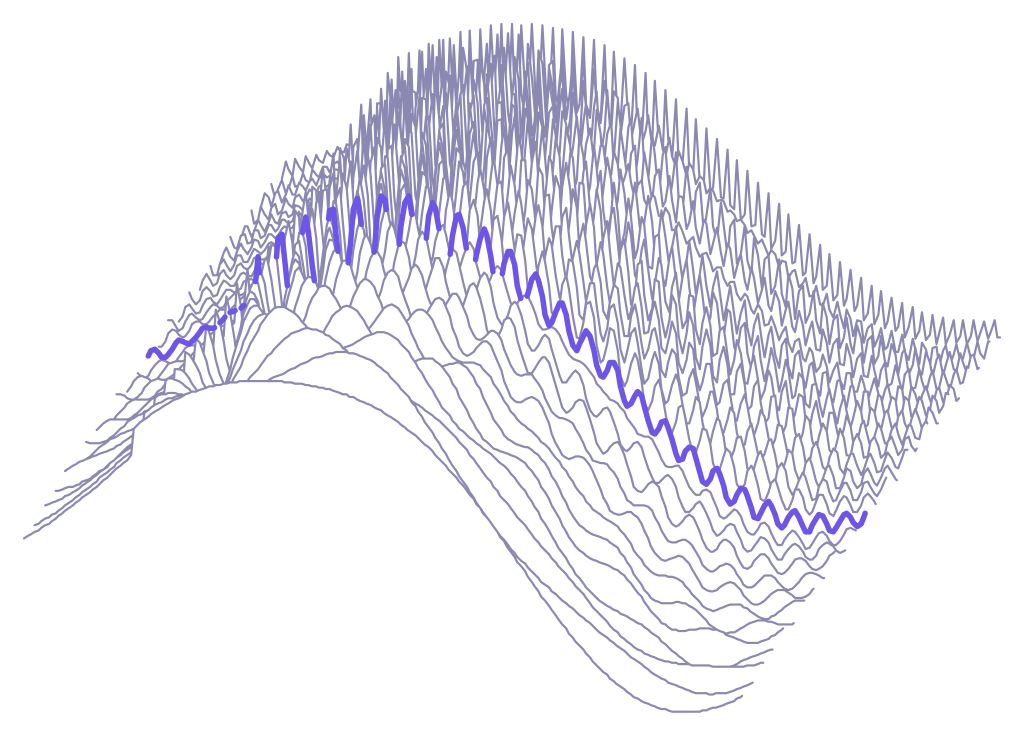
The user manual · Multi-instrument & sound design engine · Version 1.0
Contents
- 1Welcome to Terrain7
- What Terrain is7
- Terrain in numbers9
- How to read this manual10
- 2Installing, Trial, Activation and Updates11
- System requirements11
- Installing Terrain12
- The first launch13
- The 10-day free trial14
- Activating your licence15
- Your Waves Crate account16
- Updates17
- 3A Tour of the Window18
- The SYN page at a glance18
- The header19
- The four pages20
- The strip: tips and Capture22
- Knobs, pills and menus23
- Cards and popping out24
- Your first five minutes25
- 4Oscillators26
- Eight oscillators, A to H26
- Anatomy of an oscillator panel28
- Unison29
- The back panel32
- Blend modes: oscillators bending oscillators35
- The wave view and its quick menu37
- The sound browser39
- Wavetable39
- Warp modes43
- Sample48
- Granular51
- FM53
- Resynth55
- Harmonic57
- Modal59
- Organics62
- 5Noise64
- The noise strip66
- The thirteen colours68
- Browsing and loading your own noise69
- Playback and stereo width70
- Noise as a modulator71
- Routing, filters and Noise 272
- 6Filters73
- Filter 1 and Filter 273
- The front panel74
- The back panel76
- The big filter view79
- What the knobs mean per family80
- All 123 filter types82
- 7Envelopes90
- Five envelopes, one panel90
- DAHDSR: the six stages91
- Shaping an envelope92
- The envelope chip and menu94
- Envelopes on the Patcher96
- 8LFOs97
- Ten LFOs97
- The LFO panel97
- Shapes99
- Drawing your own shapes101
- The LFO card103
- Routing an LFO106
- 9Flow107
- The Flow box107
- The Randomizer map109
- What every card shares110
- Shaper113
- Arp122
- Glitch127
- Robin132
- Putting the cards together137
- 10Modulation138
- Sources, destinations, routes138
- Drag to modulate139
- The knob's right-click menu141
- Every source142
- The MOD page143
- Macros149
- 11Effects151
- The FX rack151
- Card anatomy153
- Routing and Send156
- Adding, removing and reordering157
- Modulating effects158
- Reverb159
- Delay163
- Distortion166
- Granular173
- Filter175
- Chorus177
- Flanger180
- Phaser182
- Tape185
- Equalizer188
- Widen192
- Compress195
- Multiband198
- Bode201
- Splitter204
- Utility207
- 12Patcher209
- Opening the Patcher209
- Modules211
- Ports and cables213
- Adding modules215
- Tools, menus and the map217
- Modulators on the canvas219
- Build your own world: a worked example220
- 13CHOP221
- The page at a glance221
- Loading a sample222
- Layers A–D223
- Pitch or Slice, One-Shot or Loop224
- The waveform and its chops225
- The slicer226
- The chop panel228
- The layer mixer231
- Triggers: how the layers share the keys232
- Stems233
- CHOP in the Patcher and the effects234
- 14Tape Deck & Capture235
- The Tape Deck235
- The Deck, control by control237
- Saving takes240
- Capture242
- 15Voicing244
- The voice column244
- Mono, Legato and Poly in practice247
- Portamento, Glide, Always and Scaled248
- Velocity and Key as modulation sources249
- The voice settings elsewhere250
- 16Presets & the Library251
- The preset strip in the header251
- The quick menu252
- The preset browser254
- The inspector257
- Saving your sounds259
- Organising: right-click menus and selections262
- Packs, importing and sharing264
- The library: 717 presets in 25 packs266
- 17Dice269
- The dice button269
- The Randomize sheet271
- Undoing a roll274
- The Randomizer map275
- The dice in Terrain FX277
- The random preset dice278
- 18Settings279
- Finding your way around279
- Account279
- Audio & MIDI280
- Controllers280
- Performance280
- Presets280
- Interface280
- Themes280
- About280
- 19Terrain FX302
- What Terrain FX is303
- The FX page305
- The MOD page307
- The dice309
- Presets, settings and output310
- 20Undo, Shortcuts and Tips311
- Undo and redo311
- Keyboard and mouse shortcuts312
- Tips from the people who made it314
- 21Troubleshooting and Support315
- Installing and loading315
- Trial and licence316
- Sound and performance317
- Presets, samples and files318
- Getting help319
- 22Credits320
- Preset artists320
- Sampled instruments322
- Software and fonts323
- Trademarks324
Chapter 1
Welcome to Terrain
Terrain is a multi-instrument and sound design engine by Waves Crate. Eight oscillators, eight engines, 123 filters, sixteen effects, a modular Patcher, a sampler and slicer, a tape deck and a memory that never stops listening. Build your own world.
What Terrain is#
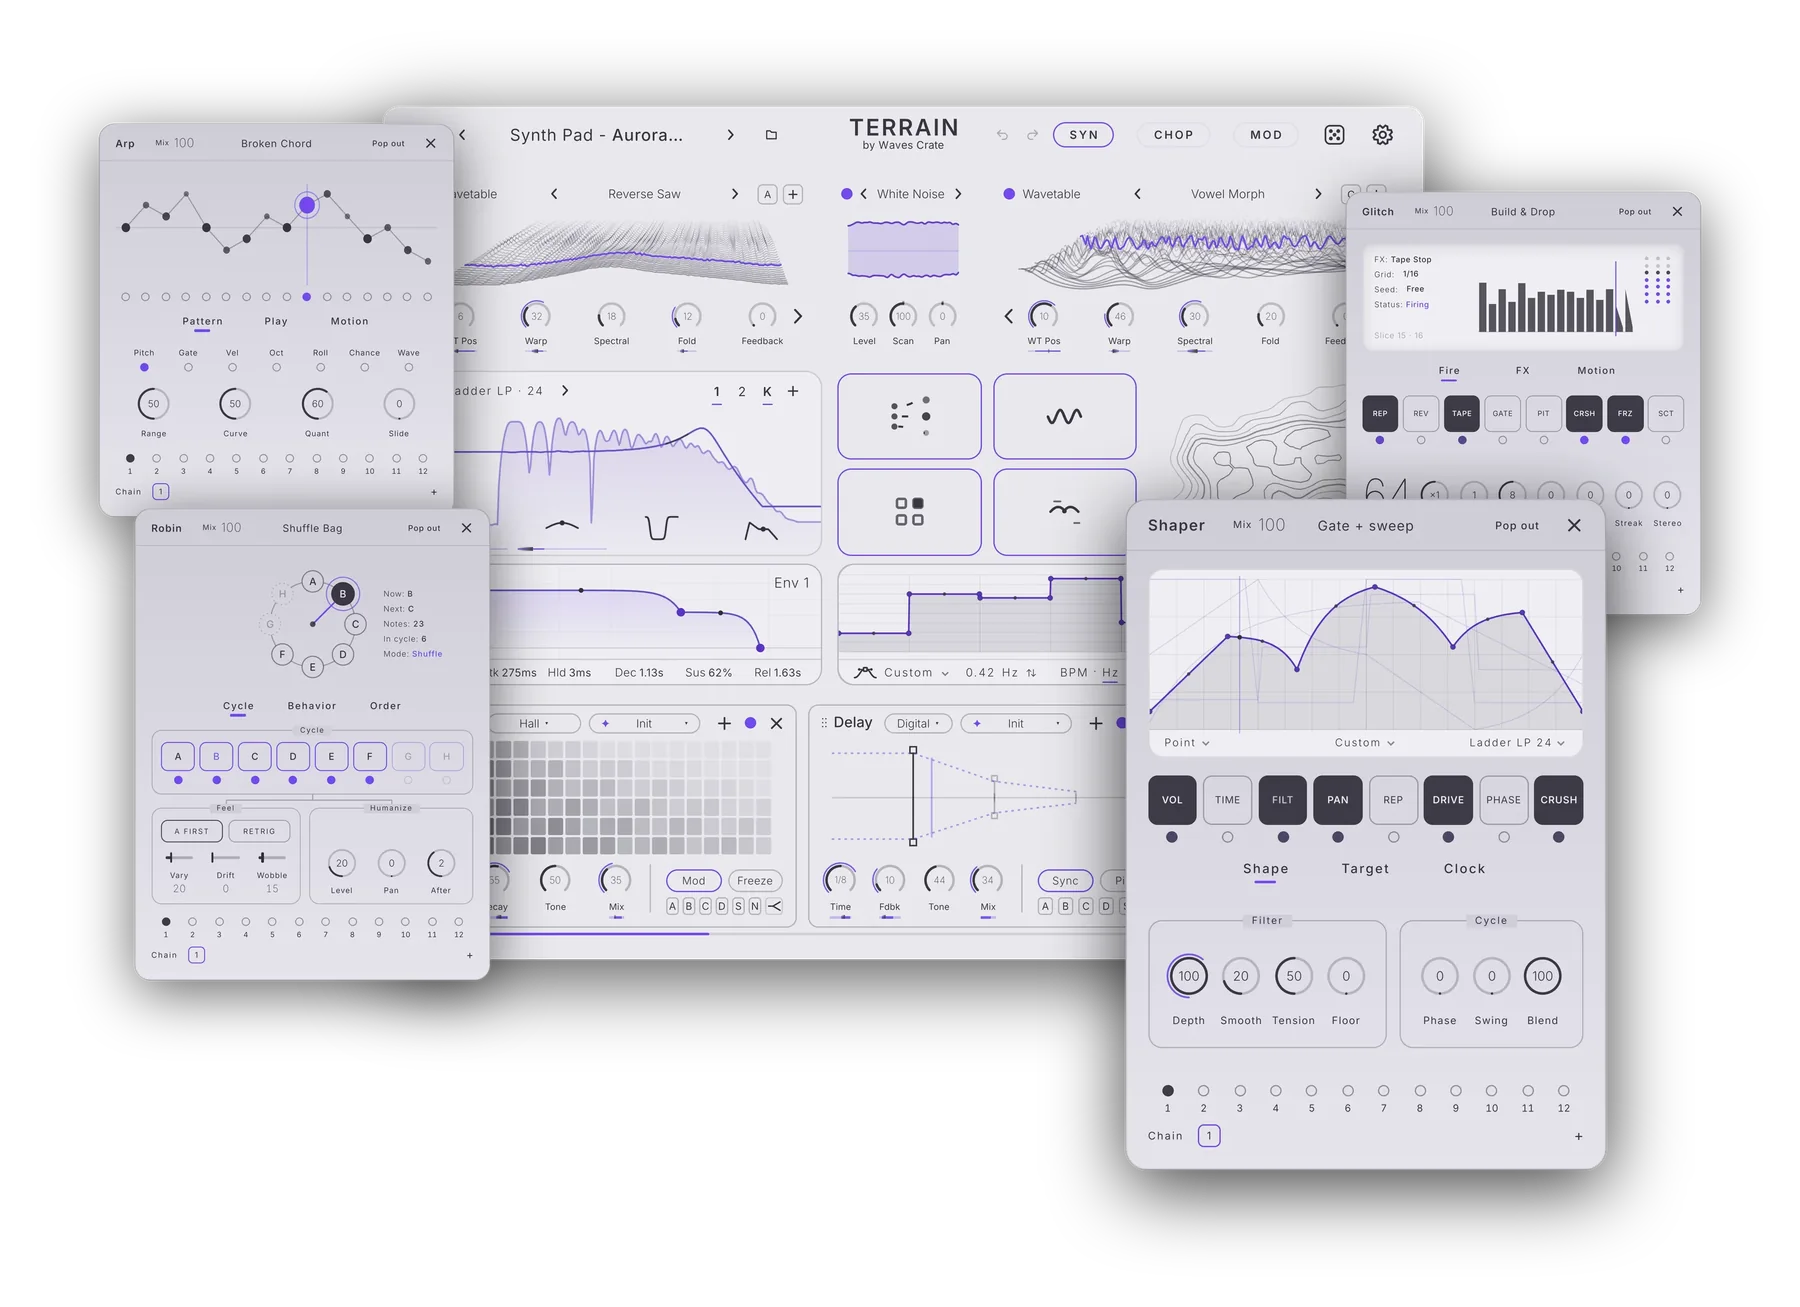
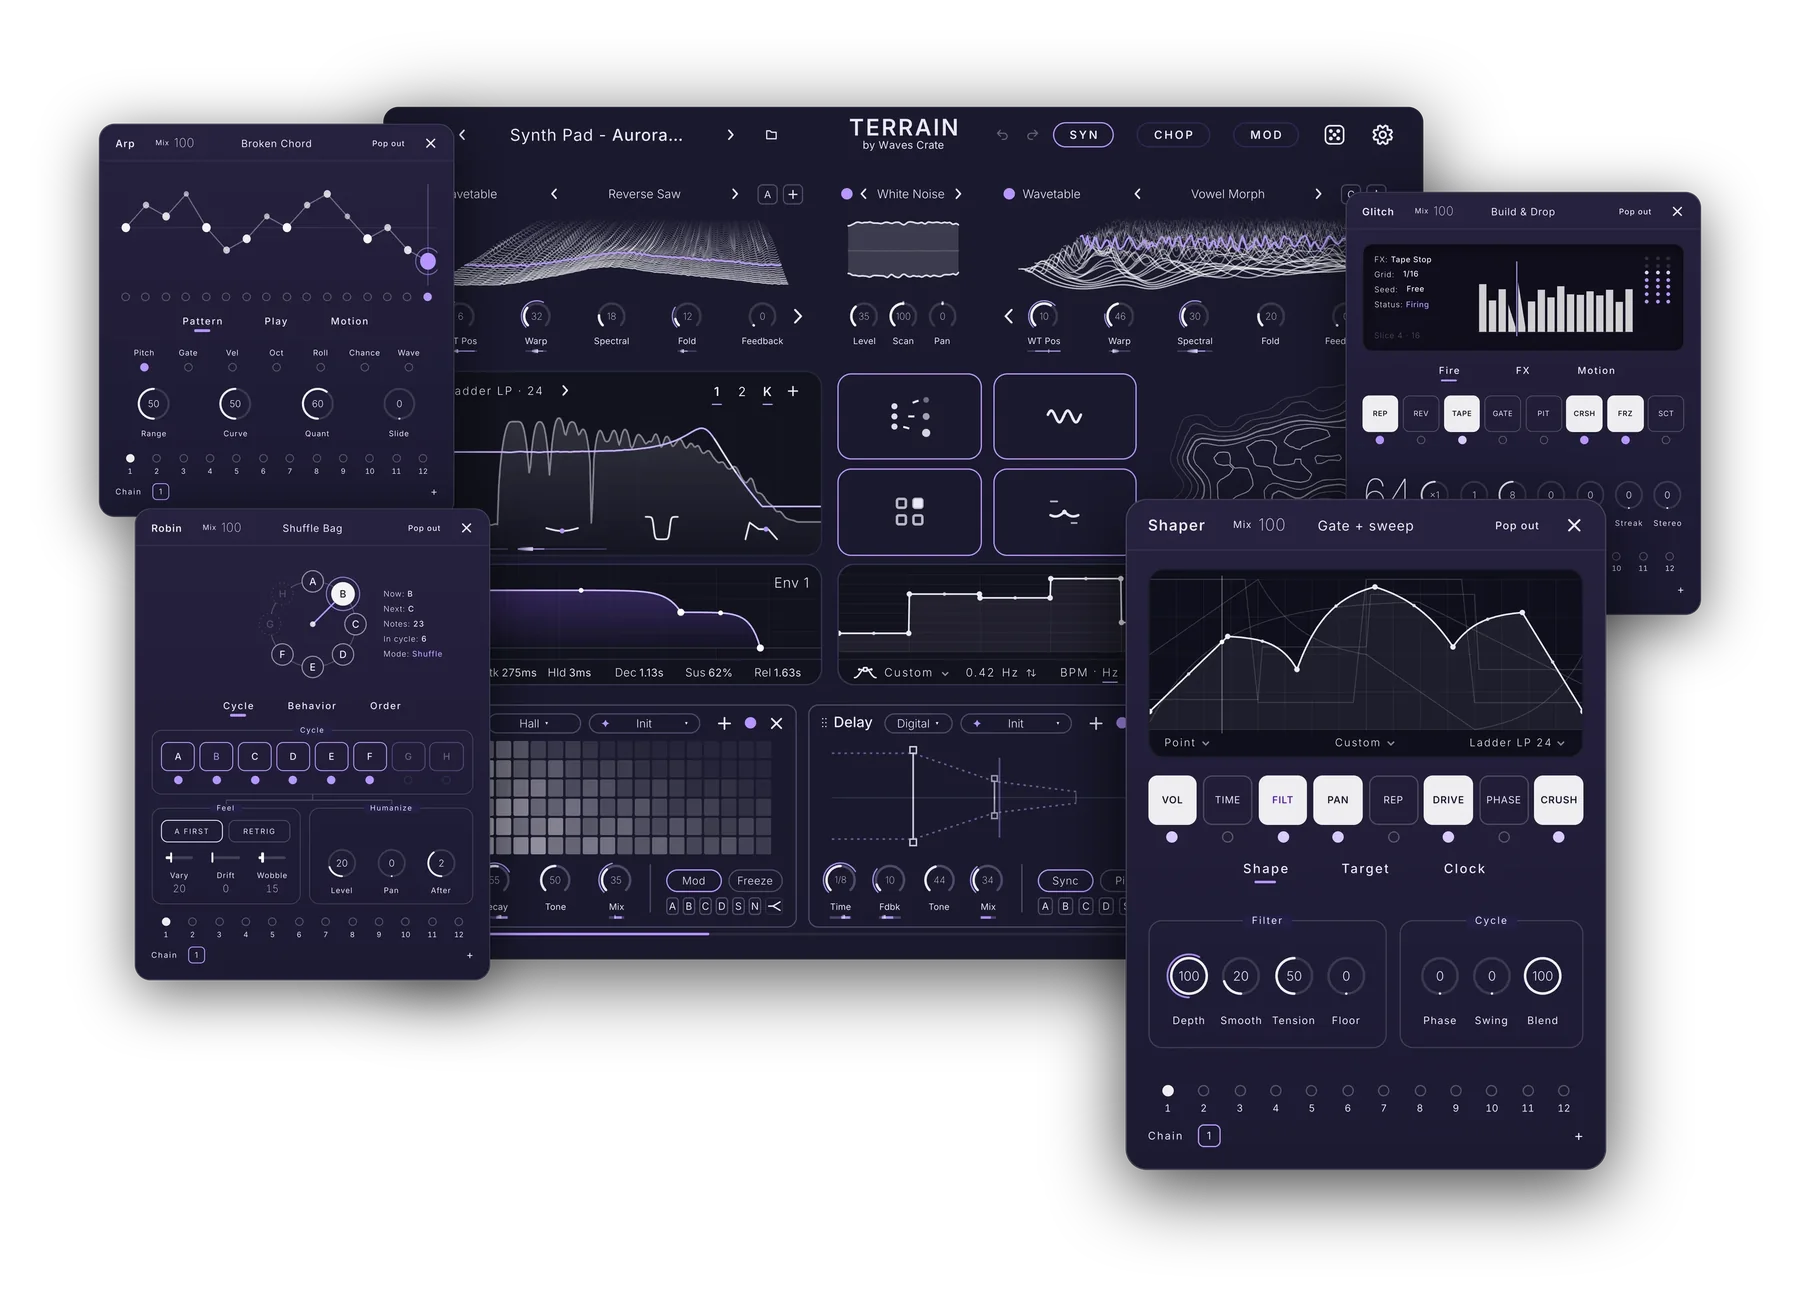
Terrain is one instrument that behaves like a whole studio rack. Every oscillator can run any of eight sound engines, from wavetables and FM to physical models and deeply sampled acoustic instruments. You shape the result with two filters drawn from 123 types, move it with ten LFOs, five envelopes and nine macros, run it through a rack of sixteen effects, and animate it in time with the song through four flow cards: the Shaper, the Arp, Glitch and Robin.
Underneath the main page sits the Patcher, a canvas where every oscillator, filter, effect and card is a module you can cable in any order. Next to it lives CHOP, a sampler and slicer for your own audio, the Tape Deck, which records what you play into a tempo-synced loop, and Capture, which keeps the last ten minutes of everything Terrain played, ready to drag into your DAW.
And when you want to work on audio that already exists, Terrain FX brings the effects, the Patcher and the modulation onto any track as an effect plug-in. It is included with Terrain.
Terrain in numbers#
| Part | What you get |
|---|---|
| Oscillators | 8 oscillators, A to H, each able to run any of the 8 engines. |
| Engines | Wavetable, Sample, Granular, FM, Resynth, Harmonic, Modal and Organics (74 sampled acoustic instruments). |
| Sound content | 500 wavetables, 2,177 one-shots, 13 noise colours, 74 Organics instruments. |
| Filters | Two filters in series or parallel, 123 filter types in eleven families. |
| Effects | 16 effects: Reverb, Delay, Distortion, Granular, Filter, Chorus, Flanger, Phaser, Tape, Equalizer, Widen, Compress, Multiband, Bode, Splitter and Utility, each with its own types and a back panel of deeper controls. |
| Modulation | 10 LFOs (including drawn shapes, Path and two chaotic attractors), 5 envelopes, 9 macros, MIDI and audio sources, a MOD page with a full matrix, and drag-to-modulate on every knob. |
| Flow cards | Shaper, Arp, Glitch and Robin, each with 12 pattern slots and a chain playlist. |
| Presets | 717 presets in 25 packs: the Waves Crate, Macshooter, and Artist Packs. The Artist Packs come from 23 producers and sound designers. |
| Looks | 30 themes, plus your own. |
| Formats | VST3, AU (Mac) and Standalone on macOS 12 or later (Apple Silicon and Intel) and Windows 10/11 64-bit. Terrain FX included. |
How to read this manual#
The manual follows the instrument. The first chapters get Terrain installed and show you around the window. Then it walks the signal: oscillators and their engines, noise, filters, envelopes and LFOs, the flow cards, modulation, effects and the Patcher. After that come the pages and tools around the sound: CHOP, the Tape Deck and Capture, voicing, presets, the dice, Settings and Terrain FX, and finally shortcuts, troubleshooting and credits.
Every panel is introduced with a picture of the real interface. A thin line runs from each labelled control to its name and a one-line definition beside the picture, and tables name every control with what it does, its range and what a double-click or right-click does to it. Boxes marked Try this give you a move worth making right away; boxes marked Good to know explain a behaviour that might surprise you.
The pictures in this manual show the Night theme, Terrain's signature look. Your Terrain may wear any of the 30 themes; every control sits in the same place in all of them. Use the Night / Daylight button at the top right of this page to read the manual in the light or the dark, and press / to search it. Inside Terrain, Settings › About › Manual opens this manual in your browser.
Chapter 2
Installing, Trial, Activation and Updates
From the download to your first note in a few minutes. This chapter covers what Terrain needs, what the installer puts on your computer, the 10-day free trial, activating your licence, your Waves Crate account and how updates reach you.
System requirements#
| Item | Requirement |
|---|---|
| macOS | macOS 12 Monterey or later, on Apple Silicon or Intel (one universal installer). |
| Windows | Windows 10 or Windows 11, 64-bit. |
| Plug-in formats | VST3 on Mac and Windows, AU on Mac. Both Terrain and Terrain FX. |
| Standalone | Terrain and Terrain FX also run as their own apps, with their own audio and MIDI settings (Settings › Audio & MIDI). |
| Internet | Needed once to start the trial or to activate, and now and then to keep the licence checked in. Terrain plays offline. |
| Display | The window opens at 820 × 672 and scales; drag the corner of the strip at the bottom, or pick a size in Settings › Interface. |
Installing Terrain#
Download the installer for your system from your Waves Crate account (or the link in your trial or order email) and run it. One installer brings everything: Terrain, Terrain FX, the sound content (one-shots, wavetables, noises and the Organics instruments) and the preset packs.
On a Mac
Open the .pkg and follow the steps. The installer places:
| What | Where |
|---|---|
| VST3 | Macintosh HD › Library › Audio › Plug-Ins › VST3 (Terrain.vst3, Terrain FX.vst3) |
| AU | Macintosh HD › Library › Audio › Plug-Ins › Components (Terrain.component, Terrain FX.component) |
| Apps | Applications (Terrain, Terrain FX) |
| Sound content | Macintosh HD › Library › Application Support › Waves Crate › Terrain |
On Windows
Run the installer. Everything (recommended) installs the lot; Choose lets you pick the parts you want. The Terrain VST3 and the sound content are always installed.
| What | Where |
|---|---|
| VST3 | C:\Program Files\Common Files\VST3 (Terrain.vst3, Terrain FX.vst3) |
| Apps | C:\Program Files\Waves Crate (Terrain, Terrain FX), with Start menu shortcuts |
| Sound content | C:\ProgramData\Waves Crate\Terrain |
Finding Terrain in your DAW
Rescan plug-ins in your DAW if it doesn't see Terrain right away. Terrain is an instrument (load it on an instrument or MIDI track); Terrain FX is an audio effect (load it on any audio track, bus or the master). Both appear under Waves Crate.
The first launch#
The first time Terrain opens, a welcome card greets you. From there it takes a minute:
- Start 10-day free trial, or Activate if you bought Terrain (see below).
- A few welcome slides show what is inside. Next steps through them, Skip jumps straight to the instrument, Start playing closes the last one.
- Your name: Terrain signs every preset you save with it. Your real name or your artist name; you can change it any time in Settings › Account.
- Capture: keep it on and Terrain holds up to 10 minutes of what you play, ready to drag from the strip at the bottom into your DAW (Capture). Keep capture on or Turn it off; change it later in Settings › Performance or by right-clicking the strip.
- Anonymous usage: OK shares anonymous counts of how Terrain gets used (like which engines are popular) with Waves Crate. Never audio, files, names or your email. No thanks sends nothing. Change it any time in Settings › Account.
The 10-day free trial#
The trial is the full instrument: every engine, every effect, every preset pack, the Patcher, CHOP, the Tape Deck and Terrain FX, for 10 days on this computer. Press Start 10-day free trial on the welcome card. Terrain needs the internet once to start the trial; after that it plays offline.
While the trial runs, the time left counts down under the TERRAIN wordmark in the header. Click it whenever you are ready: the card that opens has Activate and Buy Terrain.
When the trial ends, Terrain tells you, and makes no sound until it is activated (Terrain FX passes your audio through untouched). Your presets are safe: nothing is changed or deleted, and the card lets you export the packs you made. Activate with your licence key and you carry on exactly where you left off.
Activating your licence#
Buy Terrain at wavescrate.com. Your order email carries the three things Terrain asks for:
| Field | What to type |
|---|---|
| The address you bought Terrain with, exactly as it appears on your order email. | |
| Licence key | TRRN and twelve letters and numbers, like TRRN-XXXX-XXXX-XXXX. Paste it with or without the dashes. A licence key never contains 0, O, 1 or I, so if Terrain says it has a typo, compare those characters with your email. |
| Order no. | Your order number, like #1042. The # is optional. |
Open the sheet from the welcome card, from the trial timer under the wordmark, or from Settings › Account › Activate Terrain, fill in the three fields and press Activate. Terrain checks them with Waves Crate and unlocks on this computer. One licence covers both Terrain and Terrain FX.
Moving to another computer
To move Terrain, open Settings › Account on the old computer and choose Deactivate. That frees the activation so you can activate on the new one with the same three details. Deactivating never touches your presets.
Staying activated
Terrain checks in with Waves Crate quietly by itself whenever you are online. If a computer has been offline for a long time (60 days), Terrain asks you to connect once; it then unlocks by itself, with your presets untouched.
Your Waves Crate account#
Your purchase comes with a Waves Crate account. The email that follows your order invites you to set a password; after that, sign in at wavescrate.com and open your profile (wavescrate.com/profile). Under Your products you find:
- the Terrain download for Mac and Windows, always the newest version;
- your licence key, hidden until you reveal it, with a copy button;
- your order number, the price paid and your receipt, ready to download for your records.
Keep your order email and your account: they are all you need to reinstall or move Terrain.
Updates#
Updates are free for Terrain V1 owners. Terrain looks for a newer version once a day (switch that off in Settings › About › Check automatically, or press Check now there). When there is one, a notice appears in the strip at the bottom of the window:
- What's new opens Settings › About with the full list of changes.
- Get the update opens your Waves Crate account in your browser, where your purchase has the new download.
- The × dismisses the notice for this version; a newer version brings it back.
Nothing ever downloads or installs by itself. Run the new installer over the old one: your licence, presets, packs and settings stay as they are.
Chapter 3
A Tour of the Window
One window, four pages, one strip that explains everything. Here is where things live, so the rest of the manual has a map to hang on.
The SYN page at a glance#
Terrain opens on the SYN page, the instrument itself (Settings › Interface › Open on can change that). Everything that makes and shapes a sound sits on one screen: two oscillator slots and the noise at the top, the filter and the flow box in the middle, the envelope and LFO below them, and the effect rack with the voice column along the bottom.
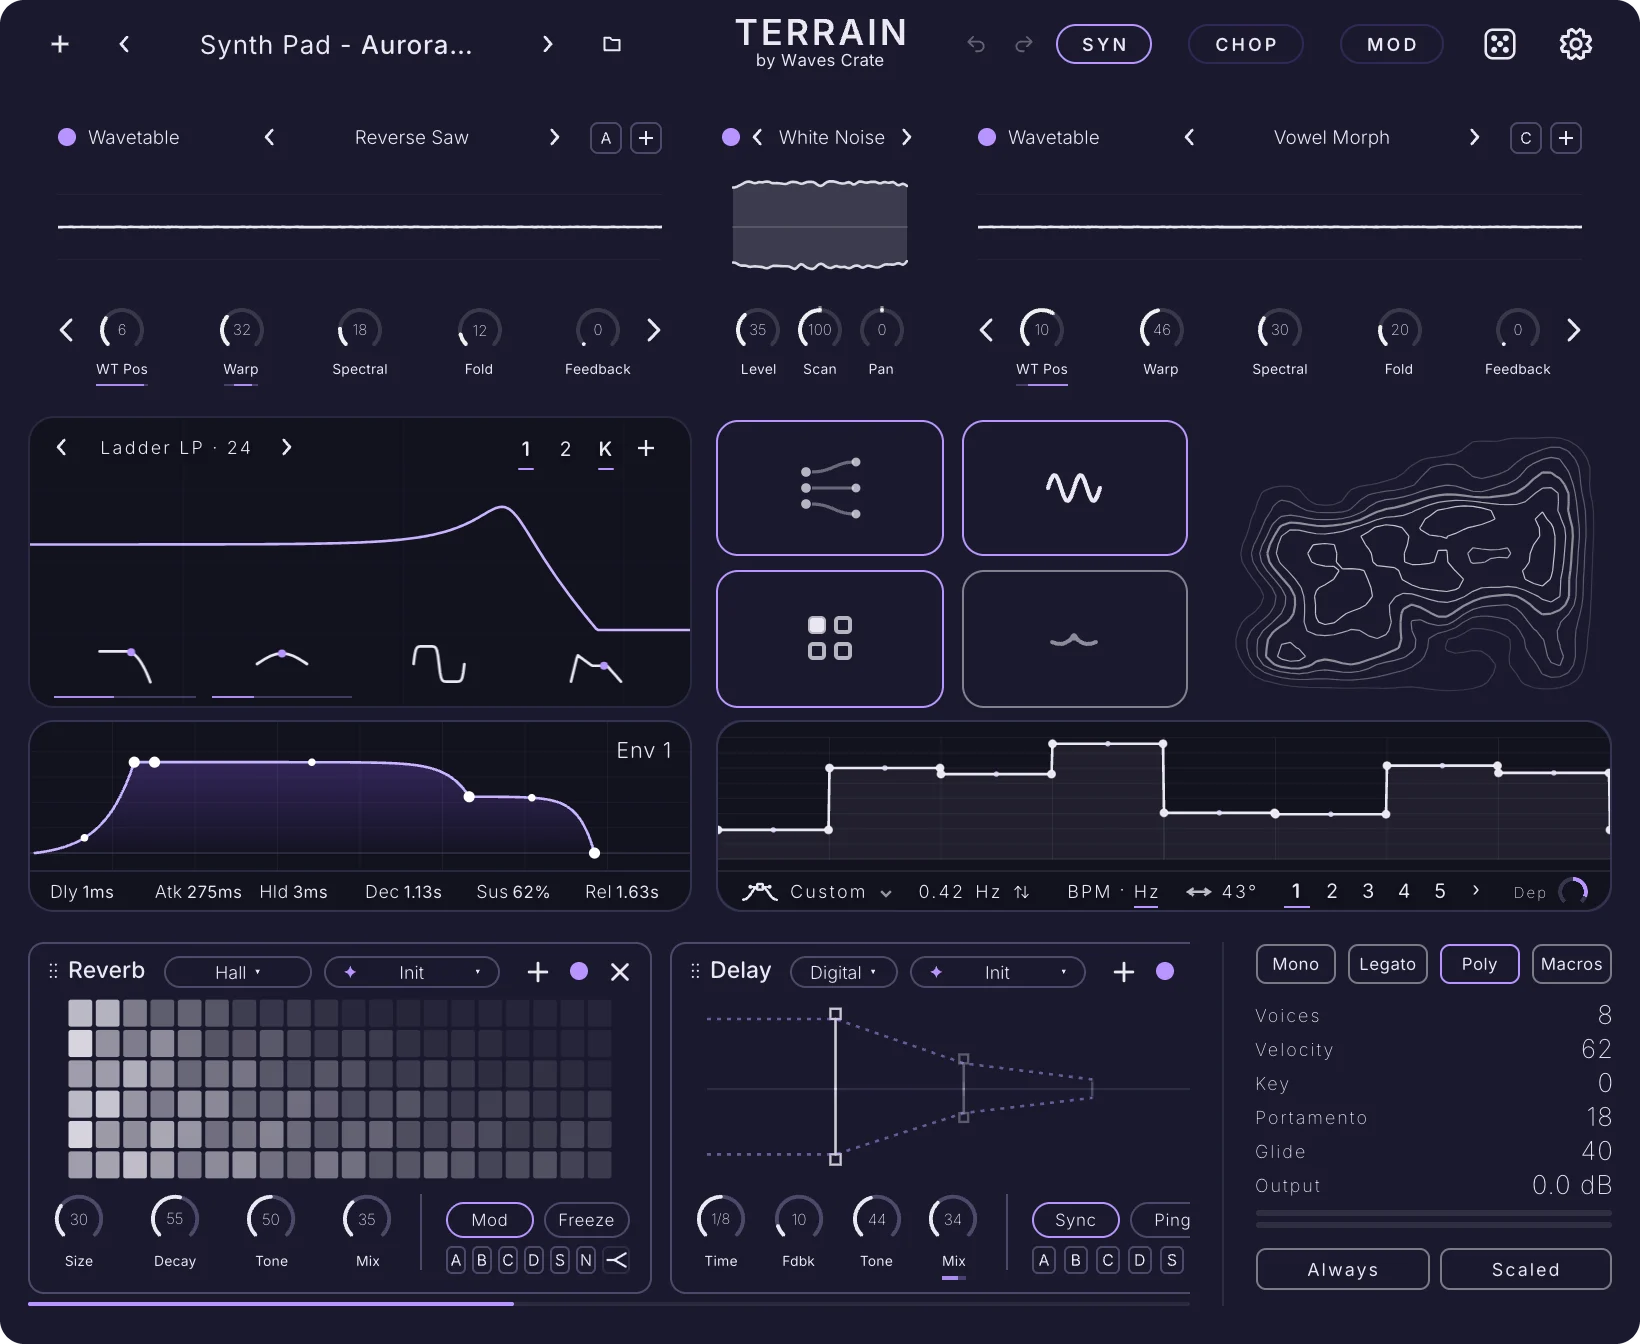
Each part has its own chapter: Oscillators, Noise, Filters, Flow cards (and the Randomizer map), Envelopes, LFOs, Effects and Voicing. The header along the top is described next.
The header#
The header runs across every page, so the preset, the pages, undo, the dice and Settings are always one click away.

| Control | What it does |
|---|---|
| + | The save menu: Save, Save as, Import, Init preset (a plain, blank sound) and Recently deleted. See Saving presets. |
| ‹ › | Previous and next preset in the current pack or folder. Keep clicking to audition sounds one by one; with the browser open they step through the rows on screen. |
| Preset name | Click for the quick menu: packs (folders of presets), Favourites, Artist Packs, categories and folders, with the presets on the right. |
| Folder | Opens the full preset browser to search, sort, tag and favourite every pack. Click again to close it. |
| TERRAIN | The wordmark. "by Waves Crate" opens wavescrate.com in your browser. While the trial runs, the time left shows here; click it for Activate and Buy. With the CPU meter on (Settings › Performance), a small number left of the wordmark shows how hard Terrain works the processor. |
| ↶ ↷ | Undo and Redo. The tooltip names the step you would undo or redo. See Undo and redo. |
| SYN | The main sound page. Click it again while you are on it and you go to the Patcher; click once more to come back. |
| CHOP | The sampler and slicer page. See CHOP. |
| MOD | The modulation page: every route from every source to every knob. See Modulation. |
| Dice | Click to roll a new sound in the style you chose; right-click to choose the style, which parts change and how far it goes. See Dice. |
| Settings | Opens Settings. Click again (or press ×) to close. See Settings. |
The four pages#
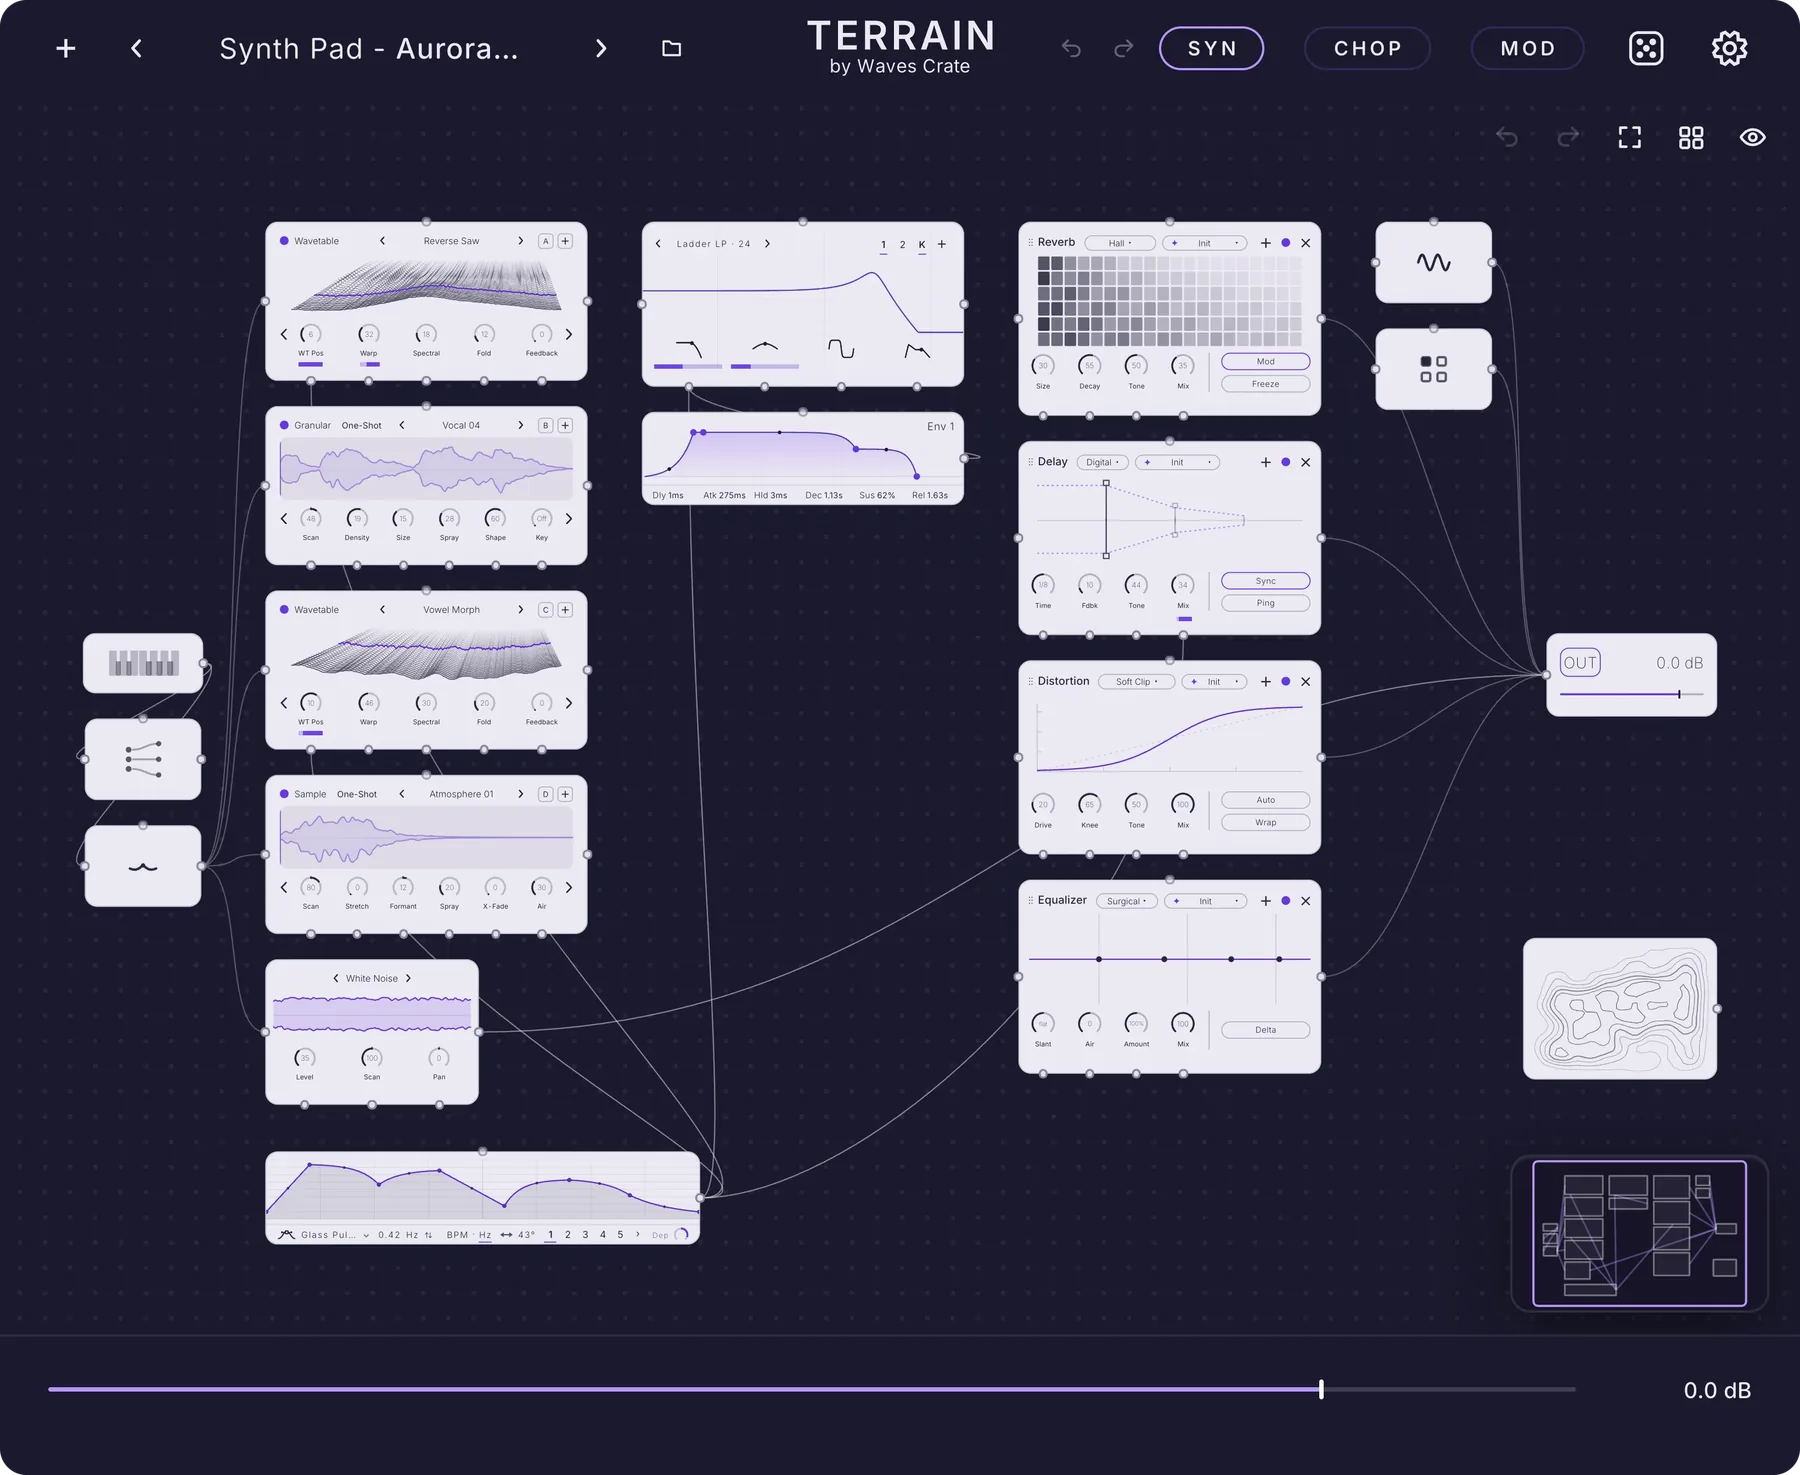
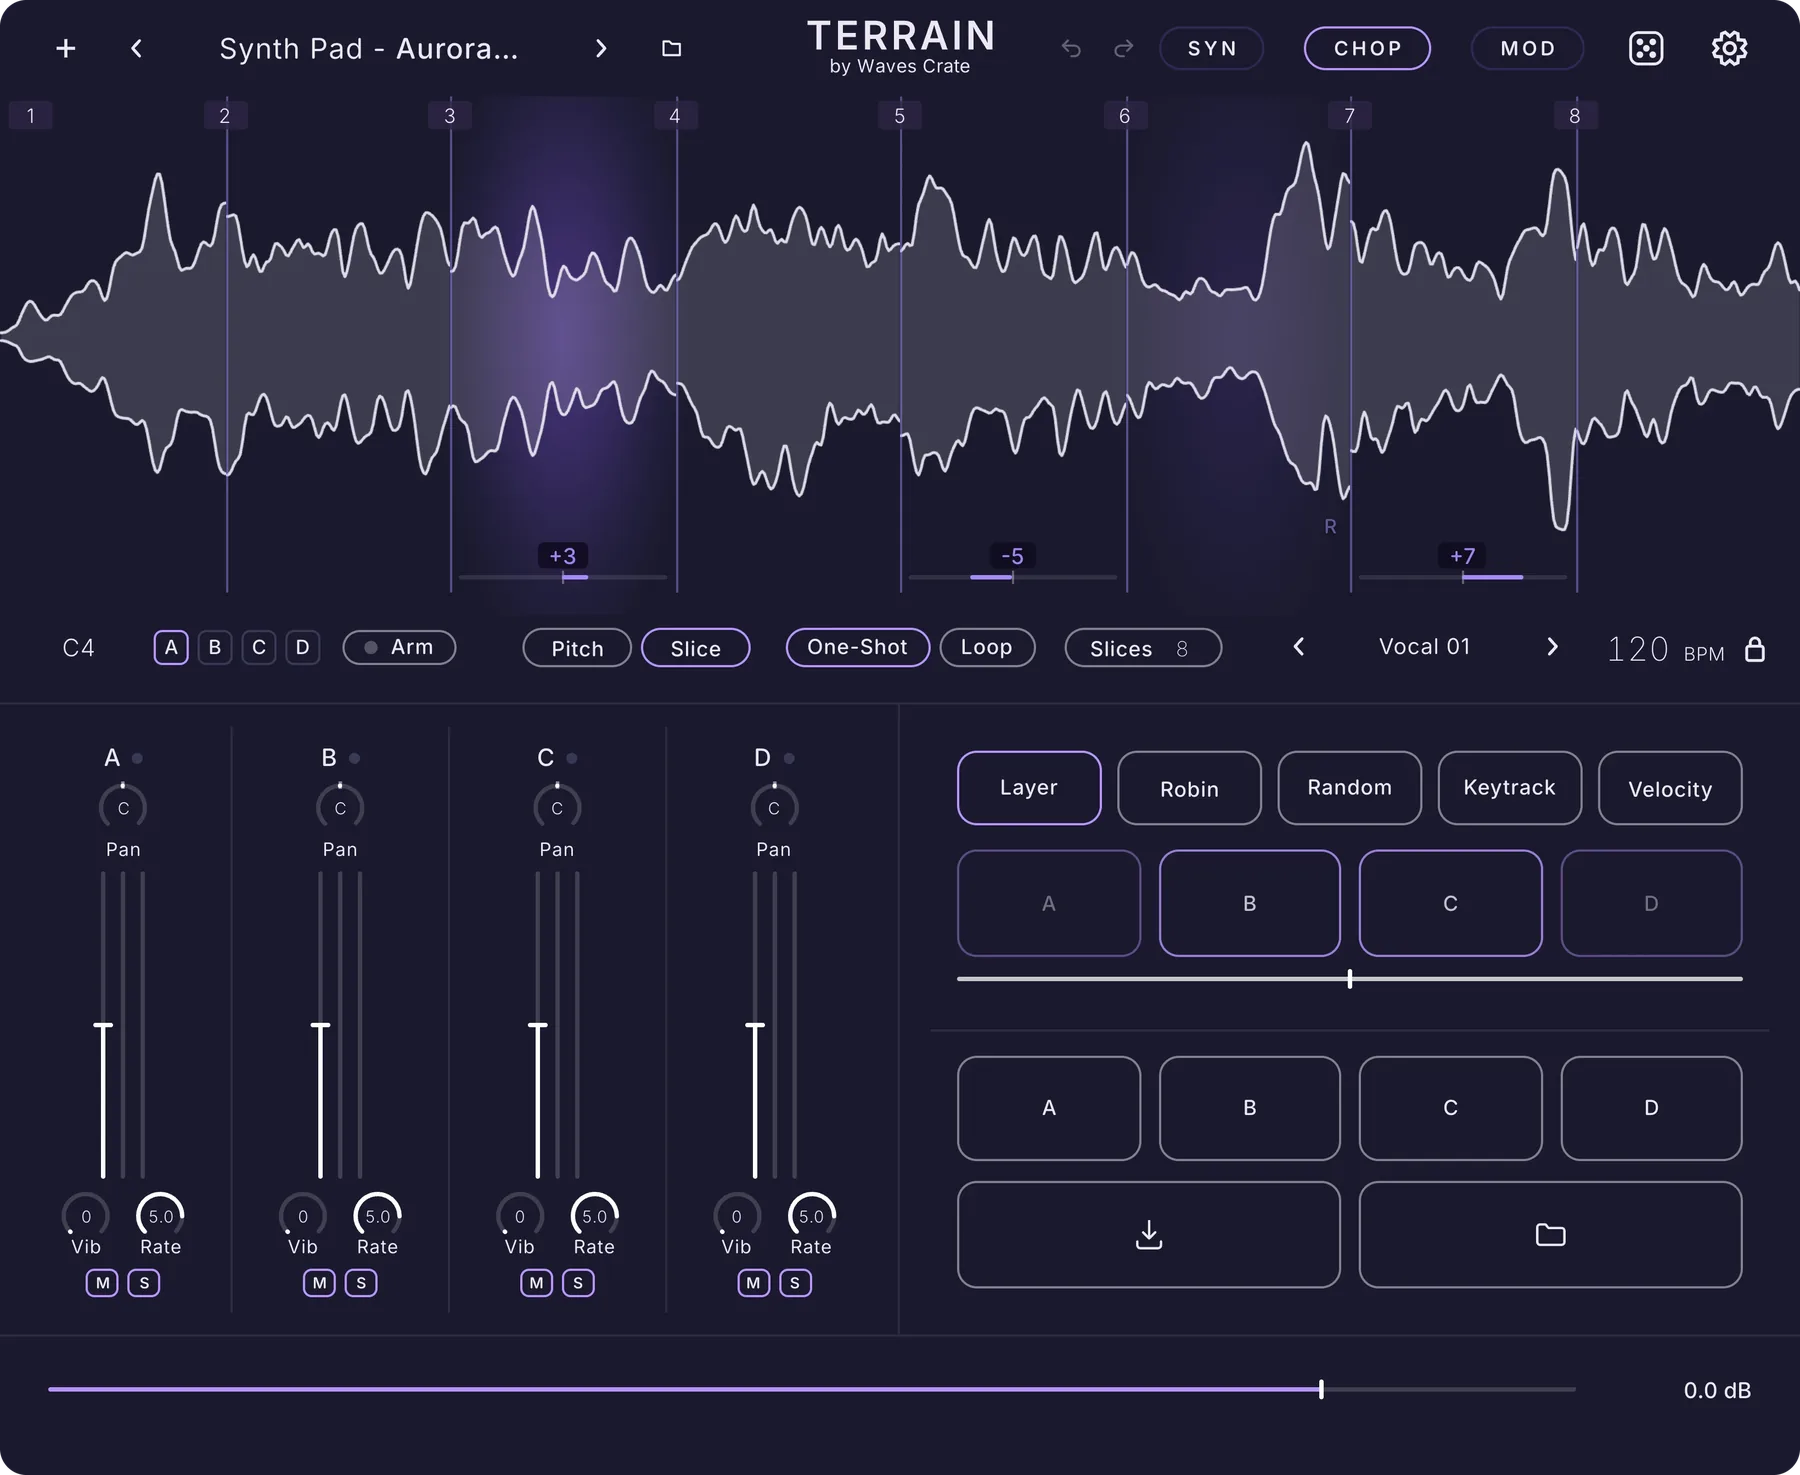
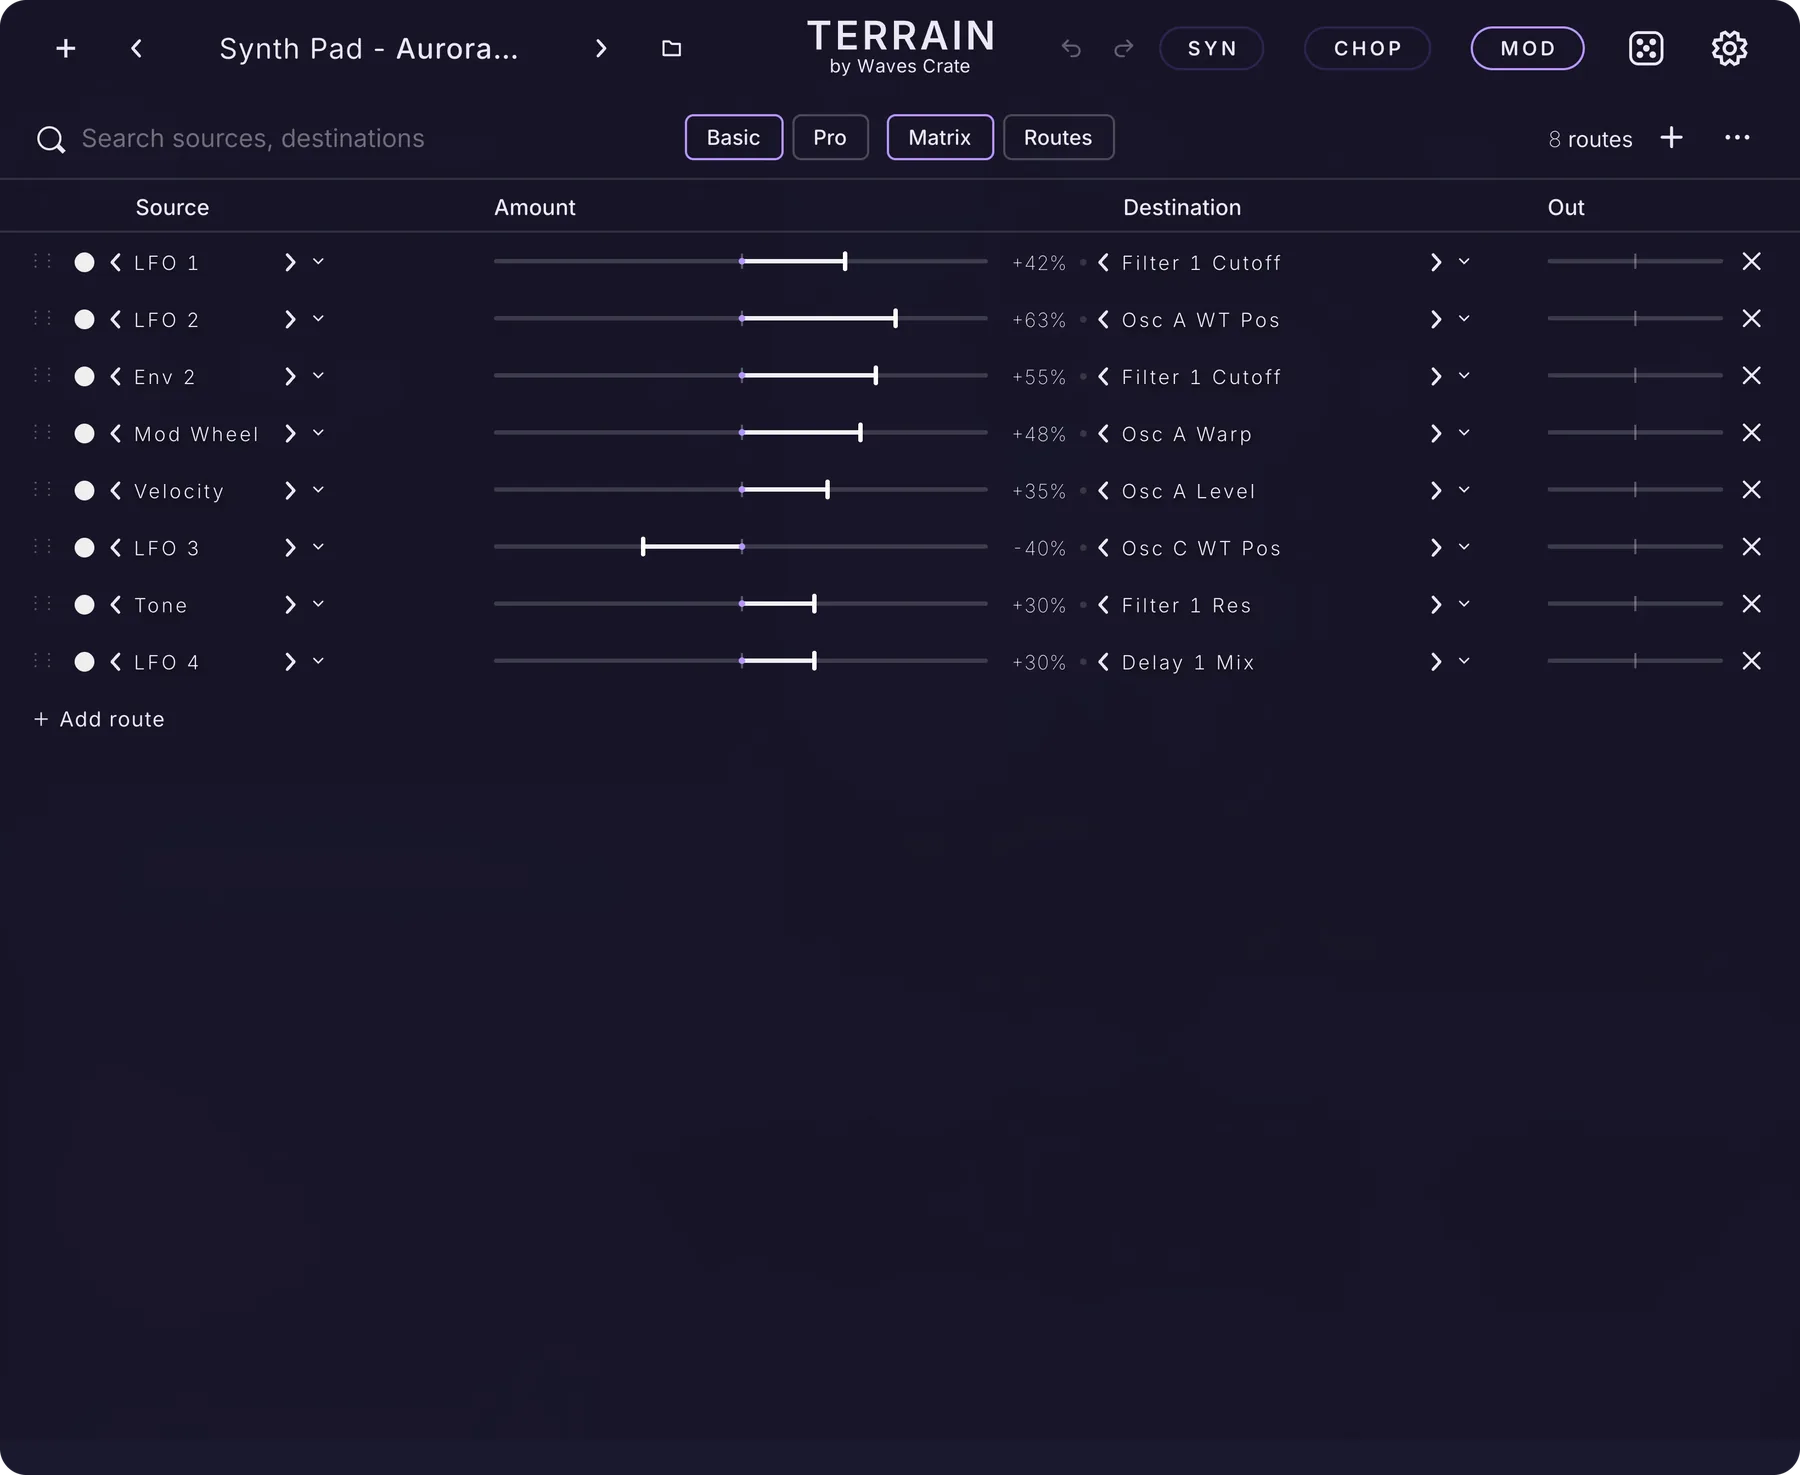
- SYN
- The instrument: oscillators, noise, filters, flow tiles, envelopes, LFOs, effects and voicing, all on one screen.
- Patcher
- The same instrument as a modular canvas. Every oscillator (all eight, A to H), filter, effect, flow card, the Tape Deck and more is a module; cable them in any order. Reach it by clicking SYN while you are on the SYN page. The Patcher.
- CHOP
- Drop in your own audio, play it pitched across the keys or sliced into chops, across four layers, with stems you can drag into your DAW. CHOP.
- MOD
- Every modulation route in one list or as cables, with curves, polarity and aux sources. The MOD page.
Settings and the preset browser open over whatever page you are on and close back to it.
The strip: tips and Capture#
The thin strip along the bottom of the window does three jobs.
A tip for every control
Point at anything (a knob, a pill, a menu row, a module on the Patcher, a setting) and the strip says what it does, in one line, at once. Move away and it gives the strip back. While you hold a knob, the tip stays with it. Popped-out cards send their tips to the strip too. Turn tips off in Settings › Interface › Tooltips.
Capture
When nothing is pointed at, the strip is Capture: Terrain keeps up to the last 10 minutes of what it played. Drag the strip into your DAW and the recording drops in as audio. Right-click it to turn Capture on or off. The whole story is in Capture.
Notices
Short messages appear here too: an Undo button for a moment after you delete something, the name of the step you just undid, where a file was saved, and the update notice with What's new and Get the update.
Resizing the window
Drag the corner at the right end of the strip to make the whole window bigger or smaller. Settings › Interface › Window size sets the size new windows open at.
Knobs, pills and menus#
| Gesture | What it does |
|---|---|
| Drag up / down | Turns a knob. The value shows inside the ring while you turn (switch that in Settings › Interface › Values while turning). Settings › Interface can make knobs turn with a vertical, circular or horizontal drag. |
| Shift + drag | Fine adjustment. |
| Mouse wheel | Nudges the knob under the pointer (Settings › Interface › Mouse wheel turns knobs). |
| Double-click | Resets the knob to its default, or opens a box to type a value, depending on Settings › Interface › Double-click a knob. |
| Right-click | The control menu: Modulate (pick a source), Copy and Paste modulators, Remove all modulators, Reset to default, MIDI Learn and, on many knobs, their modes (Warp mode, sync to tempo and so on). |
| Drag a source onto a knob | Drag an LFO number, an envelope chip, a macro name, the words Velocity or Key, the noise wave or the word Filter onto any knob to make it move that knob. Drag to modulate. |
| Pills | Outlined buttons. Lit (accent outline) means on. Some pills are also values you drag, like Sub or Warp 2 on an oscillator's back panel. |
| Back panels | Oscillators, the filter and every effect have a back with more controls. The swap arrow in their header flips them over. |
Cards and popping out#
Many parts of Terrain open a card: a floating panel with every setting of that part. The flow tiles open the Shaper, Arp, Glitch and Robin cards; the LFO panel opens the LFO card; an oscillator's Warp opens its curve card; the filter opens a big filter view (right-click › Extend).
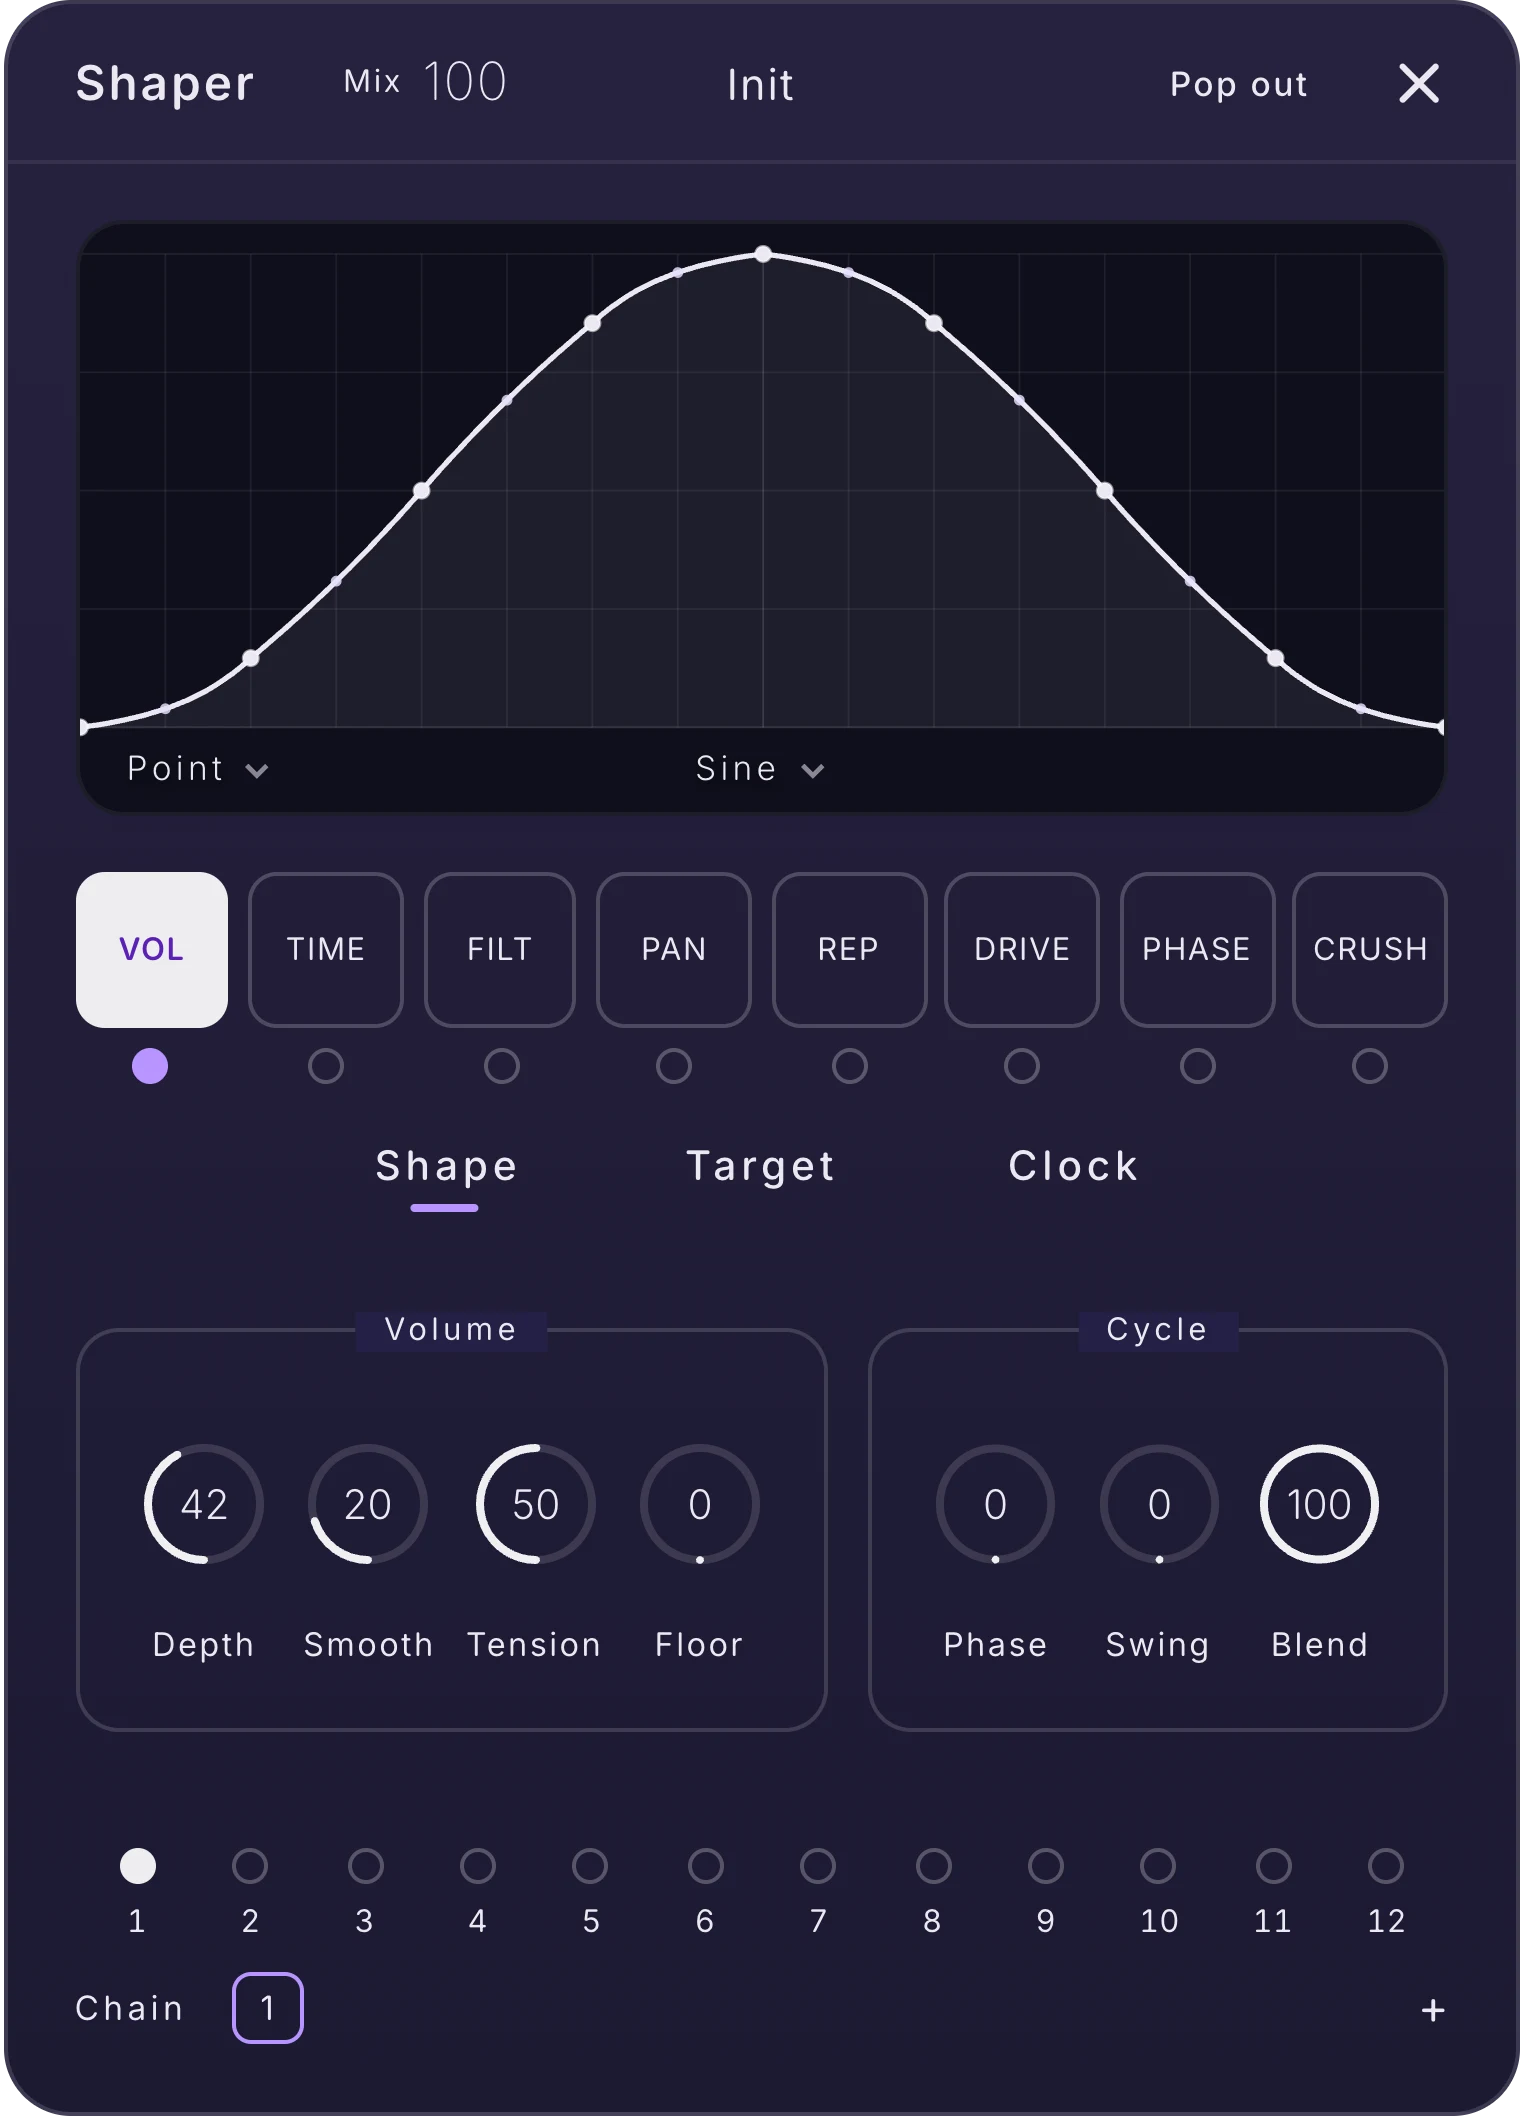
- Drag the title bar to move a card anywhere; drag its corner to resize it, double-click the corner for the default size.
- Pop out moves the card into its own floating window outside the plug-in, perfect for a second screen. Dock puts it back.
- Closing a card never stops it: its settings stay and keep playing.
Your first five minutes#
- Click the preset name and pick a pack. Play. Use the arrows to walk through the sounds.
- Turn WT Pos and Warp on oscillator A, and the filter's Cutoff. Every knob tells you what it does in the strip.
- Click the Arp tile in the flow box and hold a chord.
- Drag the 1 of the LFO panel onto any knob: it moves. Drag the line under the knob's label to set how far.
- Click SYN again to see the same sound as cables on the Patcher.
- Play for a minute, then drag the strip at the bottom into your DAW. That was Capture.
Chapter 4
Oscillators
Eight oscillators, eight engines, one panel grammar. Every oscillator can be a wavetable, a sample, a grain cloud, an FM voice, a resynthesised recording, a bank of pure partials, a struck or bowed physical model, or one of 74 sampled acoustic instruments. Pick an engine, flip the panel, bend it with its neighbours. Build your own world from here.
Eight oscillators, A to H#
Terrain has eight oscillators, lettered A to H. Each one runs any of the eight engines, has its own unison, its own tuning, its own sub, four blend slots that let another source bend it, and its own sends into the two filters. They all play at once; what you see on screen only decides which one you are editing.
The SYN page shows two oscillator slots in its top row, with the noise strip between them. The left slot holds A and B, the right slot holds C and D. Click the letter box in a slot's header to flip it: on A it shows B, on B it shows A, and the same between C and D. Flipping never mutes anything — both oscillators keep playing, the letter only picks which one you edit.
Oscillators E, F, G and H live on the Patcher as nodes, with exactly the same panels, engines and menus. See The Patcher for how to add, cable and arrange them.
Anatomy of an oscillator panel#
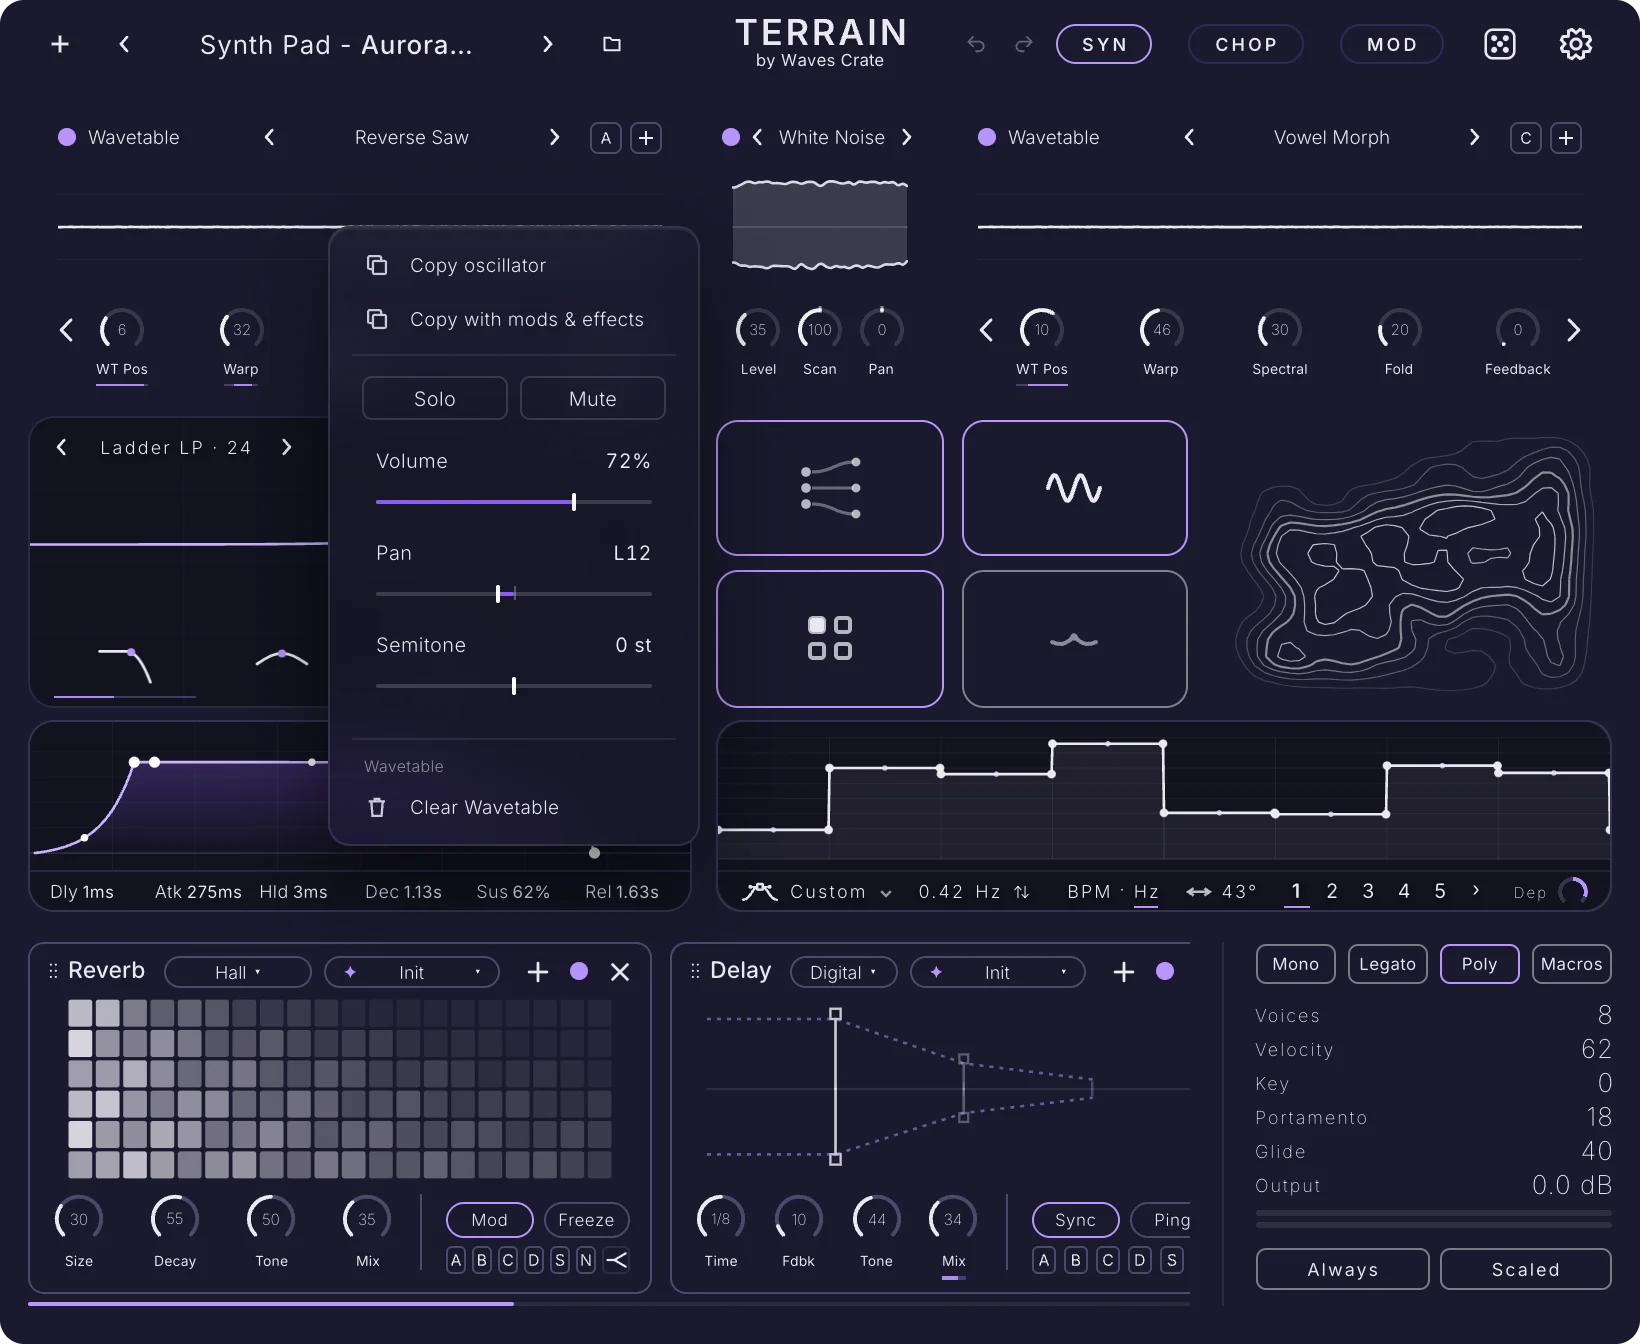
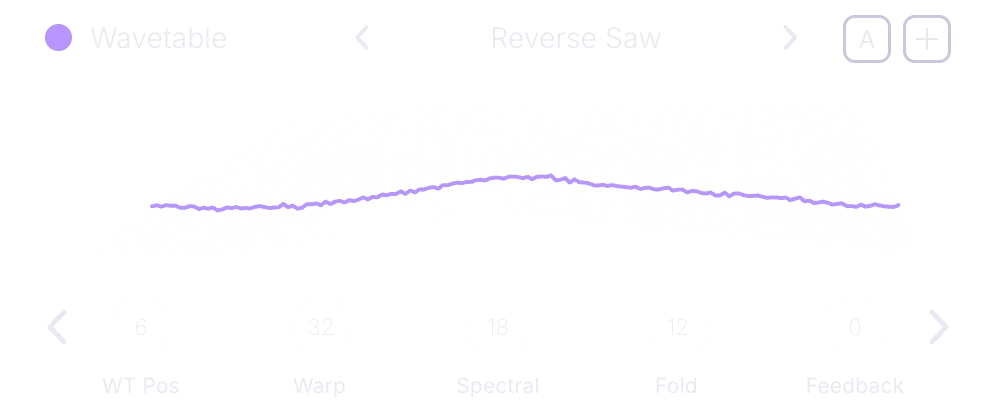
Every engine wears the same frame. The header carries the power dot, the engine picker, the engine's own source picker (a wavetable, a sample, a family, an instrument), the letter box and the swap button. Below sits the engine's display, and below that one row of knobs that you page through with the arrows.
Power and the engine picker
The purple dot at the far left of the header is the oscillator's power. Off means silent and free: an oscillator that is off costs nothing. Next to it, the engine name opens the engine picker. Changing engine keeps the oscillator's tuning, level, pan, sends, sub and blend slots; only the front of the panel changes.
| Engine | What it does |
|---|---|
| Wavetable | A row of wave shapes (frames) you sweep through with WT Pos; 500 factory tables, plus your own imports. |
| Sample | Plays a recorded sound tuned across the keys. Drop your own file on the waveform. |
| Granular | Cuts a sample into grains (tiny slices) and sprays them into clouds and textures. |
| FM | Frequency modulation: two hidden waves wobble a wavetable's pitch at audio rate for bells, keys and metal. |
| Resynth | Rebuilds a sample from the tones inside it, so you can stretch, freeze, sieve and reshape it. |
| Harmonic | Builds a tone from up to 512 partials (pure sine tones), read from a wavetable. |
| Modal | A physical model: a virtual string, pipe, bar, bell or drum, struck, plucked, bowed or blown. |
| Organics | Plays 74 deeply sampled acoustic instruments with their own articulations. |
Front and back
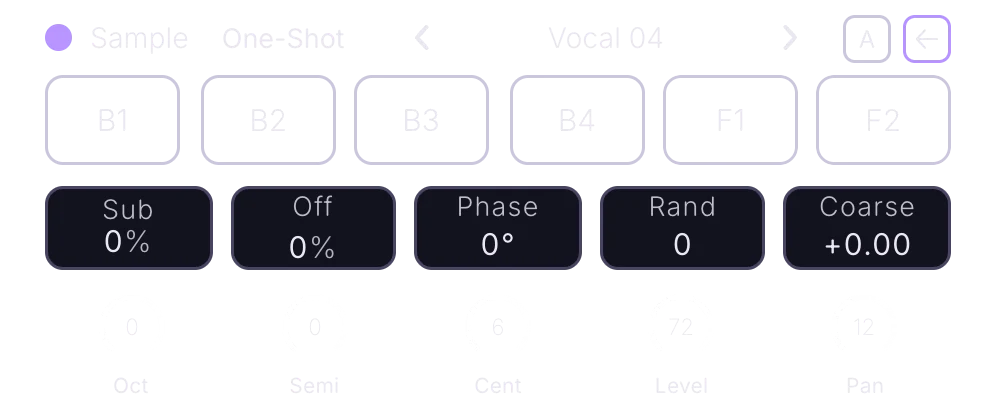
Each oscillator has two faces. The front belongs to the engine: its display and its knob sets. The back is the part every engine shares: blend slots, filter sends, sub, the second warp, phase, coarse pitch, and the tuning and mix knobs. Click the + in the header to flip to the back, and the arrow that replaces it to flip home. Both faces stay live while you look at the other one.
Knob sets and the arrows
The knob row holds five or six controls at a time. The thin arrows on either side step through the engine's sets, one set per click, always in the same order: the engine's first set, its second set if it has one, and Unison last on every engine.
| Engine | Sets, in order |
|---|---|
| Wavetable | WT Pos · Warp · Spectral · Fold · Feedback → Unison |
| Sample | Scan · Stretch · Formant · Spray · X-Fade · Air → Blend knobs (after a blend) → Unison |
| Granular | Scan · Density · Size · Spray · Shape · Key → Position · Pitch · P.Spray · Width · Dir · Skew → Unison |
| FM | Algo · Ratio 1 · FM 1 · Ratio 2 · FM 2 · Feedback → Strike · Age · Rust · Quake · Scorch · Storm → the wavetable set → Unison |
| Resynth | Scan · Stretch · Sieve · Shape · Drive → Quality · Formant · Tilt · Crush · Start · Melt → Unison |
| Harmonic | Hue · Partials · Lean · Fan · Grit · Braid → Carve · Churn · Root · Shine · Wilt · Forge → Unison |
| Modal | Hard · Pos · Decay · Material · Breath → Stretch · Bloom · Halo · Age · Body → Unison |
| Organics | Dynamics · Tone · Body · Vibrato · Human → Attack · Release · Sustain · Velocity · Image → Unison |
Every knob, every engine
All oscillator knobs share the house gestures. Drag up or down to turn. Double-click to return to the default. Right-click for the control menu: Modulate, reset, MIDI learn, and — on knobs that have them — a mode row such as Warp mode ›, Spectral mode ›, Fold shape ›, Interpolation ›, Stretch mode ›, Formant mode ›, Sieve mode ›, Drive mode ›, Shape › or Sync to tempo. Drag an LFO number, an envelope chip or the noise wave onto any knob to modulate it; Modulation covers routing depth.
Unison#
Unison stacks several copies of the oscillator on every note and spreads them in pitch and stereo. It is the last set on every engine: page right with the arrow until you see Voices. One voice is a single clean oscillator; sixteen is a wall.
| Control | What it does |
|---|---|
| Voices | How many copies play on every note, 1 to 16, shown as a number. Drag to step; double-click returns to 1. More voices = thicker, and more CPU. |
| Stack | The one unison control that changes harmony rather than thickness: it stacks the copies in octaves or fifths. Choices: Off (a plain detuned spread), 12 (1x), 12 (2x), 12 (3x) (one, two or three octaves), 12+7 (1x), 12+7 (2x), 12+7 (3x) (octaves plus fifths), Center-12 and Center-24. |
| Range | The scale of the detune fan, 5 to 4800 cents (100 cents = one semitone). Default 50. The knob is exponential, so every degree moves the same ratio. Detune works inside this range. |
| Detune | How far the copies are pulled out of tune with each other, within Range. Up = a wide, chorus-like shimmer; down = tight. Needs Voices above 1. |
| Blend | The middle copy against the outer, detuned ones. Down = focused on the centre; up = more of the wide copies. |
| Width | How far the copies spread left and right. 0 = mono; up = wider; below 0 swaps the sides. |
The back panel#
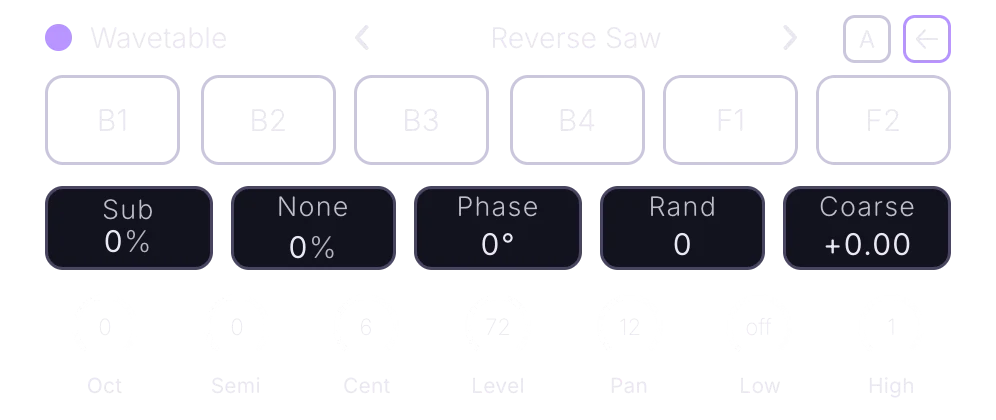
Flip any oscillator with the + and you land on the same back panel whatever the engine: blend slots and filter sends on top, five pills in the middle, the tuning and mix knobs below. Two engines change it slightly: on Sample, Granular, Resynth, Harmonic and Modal the second pill is a shaper rather than Warp 2, and Organics swaps the middle row for its own player pills (see Organics). The Low and High knobs appear on Wavetable, FM and Resynth only.
Blend slots and filter sends
| Control | What it does |
|---|---|
| B1 · B2 · B3 · B4 | Four blend slots: each lets another oscillator, the noise, an LFO's shape or the oscillator itself bend this one at audio rate. Right-click a slot for the control menu, then Blend mode › to pick a mode and a source. Drag up or down for depth, 0 to 100%. An active slot reads its mode and source, for example FM(D); hover it to see the depth. Full detail in Blend modes. |
| F1 | How much of this oscillator runs through Filter 1. It starts at 0: nothing is filtered until you fill it. Drag up or down or scroll; the purple fill shows the amount. Double-click returns to 0. |
| F2 | The same for Filter 2. The two sends are independent, so one oscillator can feed both filters at different amounts. The filter's own A–D pills toggle the same sends; see the filter's back panel. |
The pill row
| Control | What it does |
|---|---|
| Sub | A sub: an extra low tone layered under this oscillator, one per voice, always centred. It starts at 0 — drag up to hear it. Right-click to choose what the pill drags: Octave (1, 2 or 3 octaves under the note), Shape (sine, triangle, square or saw), Level (0 = off) or Drive (warms and saturates the sub so it cuts through on small speakers). Drop an LFO on it to move the sub level. |
| Warp 2 | On Wavetable and FM: a second warp slot, chained after the front Warp, with the same list of modes (see Warp modes). The pill shows the mode name on top and the amount below. Drag for the amount; right-click for the mode, and for Extend to open its curve card. |
| Shaper (Sample, Granular, Resynth, Harmonic, Modal) | On these engines the same pill drives a shaper on the engine's output: Off, Sine Shaper (bell-like overtones), Rectify (flips the lower half up for a buzzy octave), Fold (bright, buzzy wavefolding), Drive (warm saturation) or Crush (lower resolution for digital crunch). Drag for the amount, right-click for the mode. |
| Phase | Where in the wave's cycle each note starts, 0° to 360°. It is continuous: turn it while a note is held and the note moves with you. Set Rand to 0 to hear it clearly. Double-click returns to 0°. |
| Rand | How random each note's start point is, 0 to 100. At 0 every note starts exactly at Phase — punchy and identical, perfect for basses and plucks. At 100 every note starts somewhere new — loose and natural, perfect for pads. |
| Coarse | A smooth pitch offset of ±64 semitones that never snaps to the scale. Drag it, automate it, drop an LFO on it for sweeps and dives. Double-click returns to 0. Right-click to show Porta instead (this oscillator's own glide time between notes, Off up to 2 s) or Glide (the curve of that slide; 50 = even, either side bends it). |
Tuning and mix knobs
| Control | What it does |
|---|---|
| Oct | Shifts the pitch in octaves, −3 to +3. Down for bass, up for leads and bells. |
| Semi | Shifts the pitch in semitones, −12 to +12. Try 7 for a fifth or 12 for an octave. |
| Cent | Fine tune, −100 to +100 cents. A few cents against another oscillator sounds wide and alive. |
| Level | How loud this oscillator is in the mix. 0 = silent. Drag an LFO or envelope onto it to move it. |
| Pan | Places this oscillator left or right. Centre = middle. |
| Low | (Wavetable, FM, Resynth) A steep low cut that follows the note, removing the lowest harmonics. It is set in harmonic number rather than in hertz, so it rides with every note you play. Fully down = off. |
| High | (Wavetable, FM, Resynth) A steep high cut that follows the note, removing the top harmonics. Fully up = off. On Resynth these two knobs are the engine's own low and high cuts. |
Blend modes: oscillators bending oscillators#
The four blend slots (B1 to B4) are where oscillators start talking to each other. Each slot takes a mode (how it bends) and a source (who bends). Right-click a slot, choose Blend mode ›, then pick the mode at the top of the menu and the source underneath. Drag the slot up or down to set its depth. All four slots can run at once, each with its own mode and source.
Phase distortion lives here: it is the PD mode. With Self (feedback) as its source, the oscillator bends its own read position for feedback edge.
Modes
| Mode | What it does |
|---|---|
| Off | The slot does nothing. |
| FM | The source wobbles this oscillator's pitch at audio rate (frequency modulation) for bells, keys and growls. |
| FM Exp | FM measured in octaves, so small moves in the source are huge moves in pitch. It screams where plain FM growls. |
| FM Clamp | Linear FM that never runs the wave backwards: it stalls at zero instead, which splits the tone in two. |
| PD | Phase distortion: the source bends where this oscillator reads its wave, reshaping the cycle without changing its pitch. |
| AM | The source pumps this oscillator's volume at audio rate, adding side tones. |
| RM | Ring modulation: the two are multiplied for metallic, bell-like tones. |
| Warp | The source drives both of this oscillator's warp slots (Warp and Warp 2) at audio rate. Whatever the warps are set to is what gets modulated: a shaper becomes audio-rate distortion, a filter mode becomes filter FM, a drawn curve gets swept thousands of times a second. Wavetable and FM engines only. |
Sources
| Source | What it does |
|---|---|
| Osc A … Osc H | Any other oscillator, from either row of four, in a small scroll list. The source keeps modulating even with its own Level at 0, so a silent oscillator makes a perfect hidden modulator. |
| Noise | The noise layer as the modulator, for grit and air. Works with every mode. |
| Self (feedback) | The oscillator modulates itself. Offered with PD only. |
| LFO 1 … LFO 10 | Uses that LFO's drawn shape as the curve the slot bends by, swept live. Ten rows in a small scroll list. |
The wave view and its quick menu#
The display in the middle of the front panel shows what the engine plays: the current wave for Wavetable and FM, the waveform with its markers for Sample and Granular, a scrolling spectrum for Resynth, partial bars for Harmonic, the excitation picture for Modal and a drawing of the instrument for Organics. A playhead follows each held note.
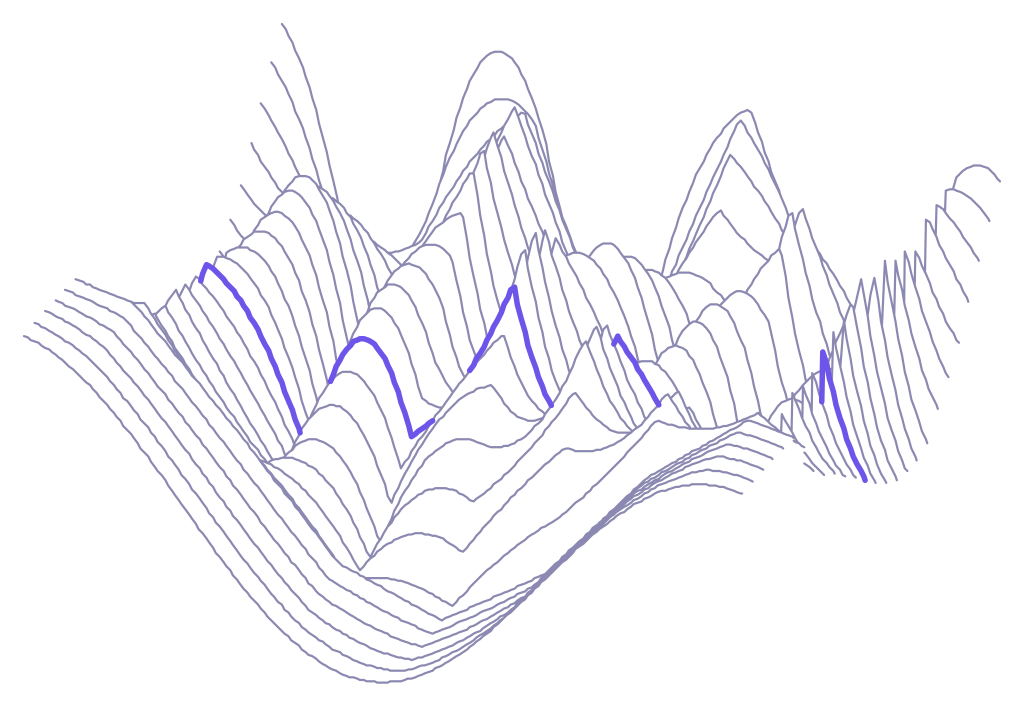
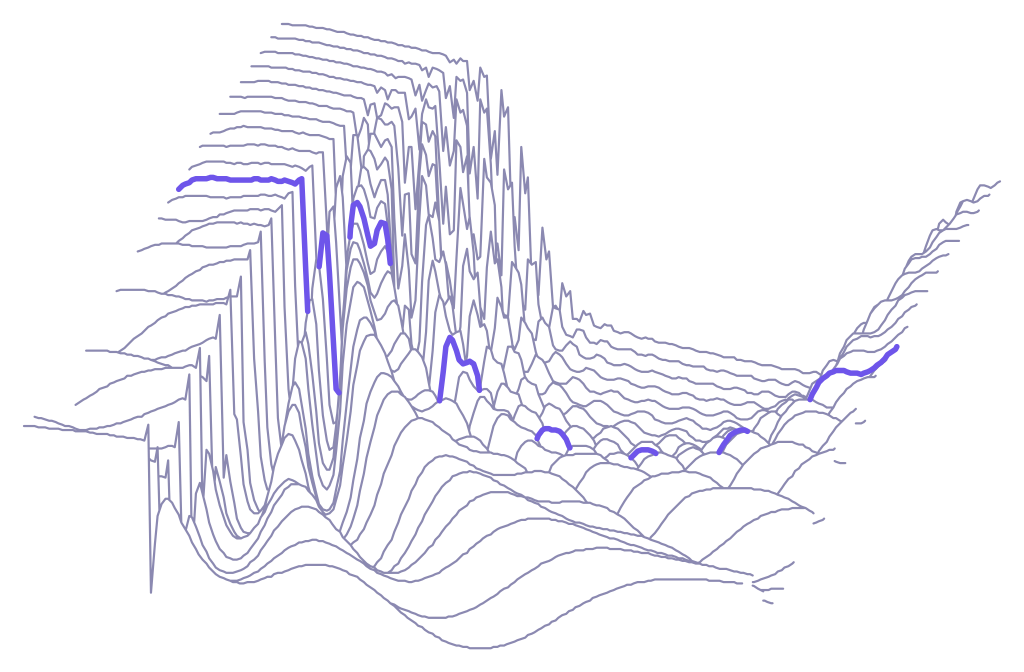
On Wavetable, FM and Harmonic, click the display to switch between the flat wave and the 3D waterfall — every frame of the table stacked in depth with the playing frame highlighted. The view you choose is remembered with the patch.
The quick menu
Right-click the display for the oscillator's quick menu. It always carries copy and paste, solo and mute, and three sliders. Wavetable and FM add a Wavetable section; the sample engines add their sample tools (see Sample).
| Row | What it does |
|---|---|
| Paste sample | Appears when you copied a sample on another oscillator: the oscillator switches to the Sample engine and plays the copied sound. |
| Copy oscillator | Copies this oscillator's engine, sound and every setting: the wavetable or sample, the drawn warp curves, the Organics instrument, a live blend. |
| Copy with mods & effects | Copies the oscillator plus every modulation connection on its knobs and its effects routing (which effects it is sent to). A toast tells you how many modulators and effects travelled. |
| Paste oscillator X | Appears on any other oscillator once something is copied. Replaces this oscillator with the copy; with mods and effects, its old connections give way to the copied ones. |
| Solo | Hear only this oscillator. Solo is exclusive: soloing one un-solos the others. Shift-click (or Cmd-click) to add to the solo set instead. |
| Mute | Silences this oscillator without turning it off. |
| Volume | The oscillator's level. Drag along the line; double-click resets. |
| Pan | Left or right. Drag the line; double-click returns to centre. |
| Semitone | The oscillator's pitch in whole semitones, ±12. Drag the line; double-click returns to 0. |
| 256 · 512 · 1024 · 2048 | (Wavetable section, imported tables only) The resolution of a table you made from your own audio, from 256 (sparse: fewer frames, smoother sweeps) to 2048 (the fullest table, every frame kept). It re-slices the original audio live. |
| Clear Wavetable | (Wavetable section) Removes an imported table and returns the oscillator to the factory Sine. |
Dropping audio
Drag any audio file from Finder or Explorer onto an oscillator's display. What happens depends on the engine:
| Dropped on | What you get |
|---|---|
| Wavetable | A menu asks where the sound should go: Sample (play it as a tuned sample), Granular (spray it as grains), Resynth (rebuild it from its frequencies) or Wavetable (turn it into a playable wavetable, named after the file). |
| Sample with a sound loaded | A menu asks Replace (the new file replaces the sample) or Blend (morphs the new file with the current sample into a new sound; the Blend knobs appear, see Sample). |
| Granular, Resynth, Modal | The file loads into the engine and the engine stays as it is; on Modal it becomes the strike that excites the resonator. If a sound is already loaded, you are asked Replace or Blend first. |
| FM, Harmonic, Organics, an empty Sample | The oscillator switches to the Sample engine and plays the file as a one-shot. |
The sound browser#
Wavetables, samples, noises and Organics instruments all open the same two-pane browser. Click a source name in an oscillator header (the table name, the sample name, the instrument name) to open it. Categories sit on the left, their contents on the right.
| Control | What it does |
|---|---|
| Search | Type part of a name to find it across every category. |
| Path | Where you are in the folders. Click a part of it to go back up. |
| ‹ › | Step to the previous or next item without closing the browser. |
| Headphone (Preview) | While it is on, clicking an item also plays it, so you can hear it before you commit. |
| + | Add folder (point Terrain at one of your folders; it is remembered, and nothing is copied — a folder is a reference) or Import file (a single file). |
| ✕ | Closes the browser. What you picked stays on the oscillator. |
| Categories | All lists everything; the factory categories follow; User is always last and holds the folders and files you added. |
| Items | Click to load onto the oscillator; double-click to load and close. |
| Folder right-click | Locate Folder shows it on disk. On a folder you added yourself, Remove Folder takes it out of the list; your files on disk are never touched. |
The factory categories depend on what you browse:
- Wavetables — 500 tables in thirteen categories: Basic Shapes, Analog, Digital, Vocal, Metallic, Spectral, Chaos, Cinematic, Harmonic, Physical, Abstract, Processed and Textures.
- Samples — the factory one-shot library (2,177 one-shots), grouped by category. Sample, Granular, Resynth and Modal all read it, and they share one User list.
- Noise — the thirteen colours in Colors, Tape, Vinyl and Space, followed by the factory noise library (see Noise).
- Instruments — the 74 Organics instruments in nine categories, plus User with Import SoundFont (see Organics).
Wavetable#
A wavetable is a row of single-cycle waves (frames). WT Pos picks which frame plays, so sweeping it morphs the tone from one shape to the next. Terrain ships 500 tables, from basic shapes to vocal, metallic, chaotic and cinematic ones, and turns any audio you drop into a new table. On top of the table sit four shapers — Warp, Spectral, Fold and Feedback — and a second warp on the back.
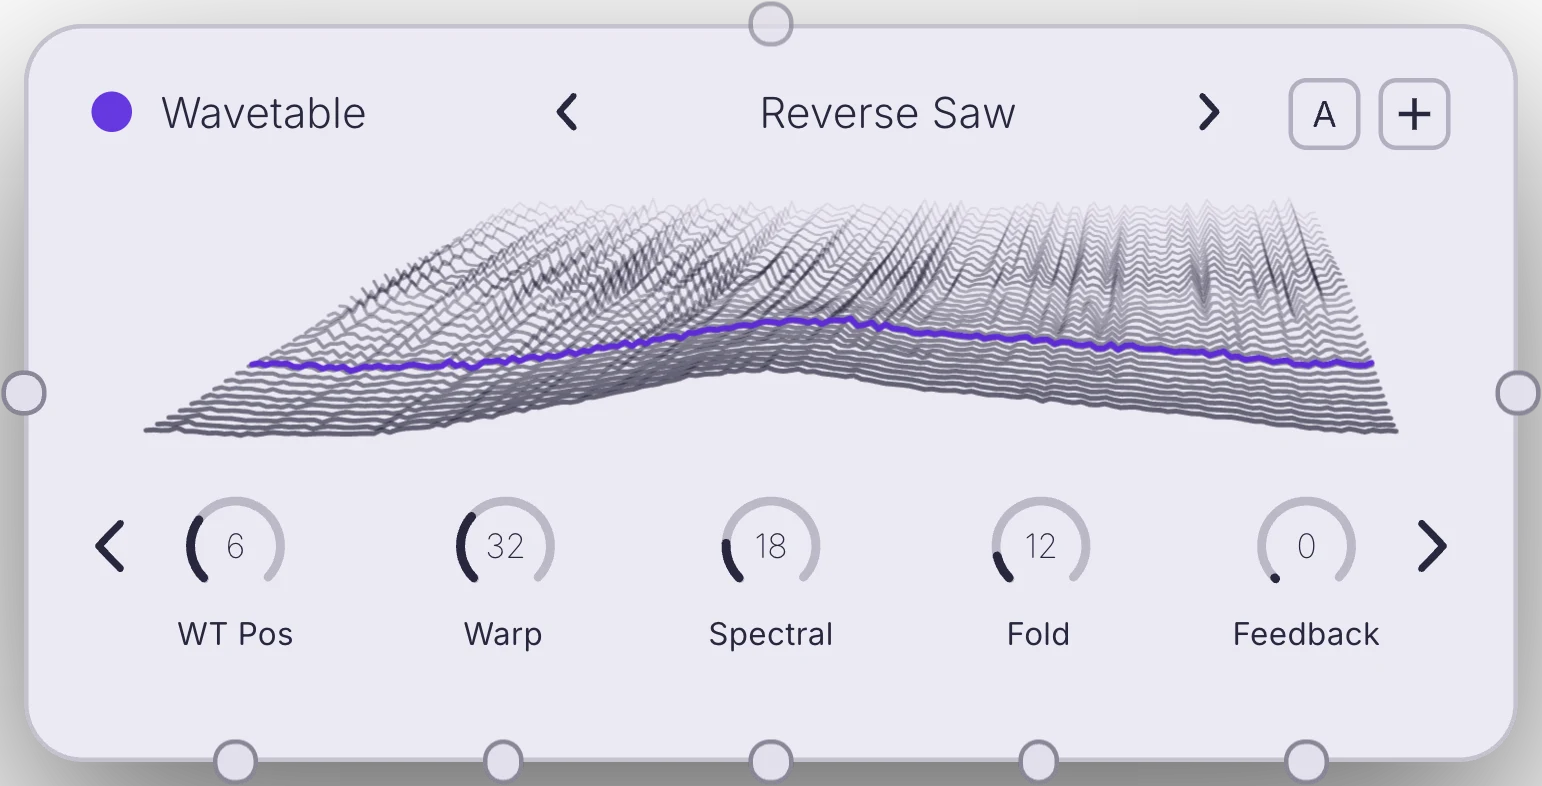
Header
The table name sits between two arrows. The arrows step one table back or forward; the name opens the browser with all 500 tables in thirteen categories, plus your own under User.
Front controls
| Control | What it does |
|---|---|
| WT Pos | Which frame of the table plays. Sweep it with a slow LFO or an envelope for evolving tones. Right-click › Interpolation: Linear glides smoothly between frames, Stepped jumps from frame to frame for a stair-stepped, digital sweep. |
| Warp | Bends the wave's shape. The knob is the amount; the mode decides what bending means. Right-click › Warp mode › opens the warp browser with 46 modes in eleven families, plus None (see Warp modes). Right-click › Extend opens the warp's curve card. |
| Spectral | Reshapes the harmonics (the overtones above the note). Off until you pick a mode: right-click › Spectral mode ›. Up = stronger. |
| Fold | Wavefolding: when the wave gets too tall it folds back down, adding bright, buzzy overtones. Up = more folds. Right-click › Fold shape: Linear (sharp corners, bright and buzzy), Sine (smooth, rounder and bell-like) or Triangle (soft corners, in between). |
| Feedback | The oscillator feeds its own output back into how it reads the wave — both the position in the cycle and the frame. Low values thicken progressively; past halfway it turns into growl and scream. |
Spectral modes
| Mode | What it does |
|---|---|
| None | Off; the knob does nothing until you pick a mode. |
| Harmonic Stretch | Spreads the overtones apart: brighter, airy, then screaming. |
| Inharmonic Stretch | Pulls the overtones out of tune: bell, metal, clang. |
| Vocode | Shapes the overtones like a mouth: vowel sweeps. |
| Smear | Blurs the overtones together: soft, washy pads. |
| Random Amps | Rerolls the overtone levels: mutant, alien tones. |
| Data Compress | Throws overtones away: lo-fi, digital, destroyed. |
| Spectral Phaser | Sweeps gaps through the overtones: hollow, phaser-like. |
| Disperse | Smears the overtones in time: chirpy, dense zaps. |
Importing your own tables
Drop any audio file on a Wavetable display and choose Wavetable: Terrain builds a band-limited table from the sound and names it after the file. You can also add a whole folder of tables through the browser's +; they appear under User. Right-click the display afterwards to set the imported table's resolution (256, 512, 1024 or 2048) or Clear Wavetable to go back to a factory table.
Warp modes#
Warp is Terrain's wave bender, on the front Warp knob and the back Warp 2 pill of every Wavetable and FM oscillator. Right-click either control and choose Warp mode › to open the warp browser: families on the left, modes on the right, search across all of them. Click a mode to use it; double-click also closes the browser. Warp 2 runs after Warp, so you can stack two different bends.
Sync
| Mode | What it does |
|---|---|
| Sync | Restarts the wave faster and faster (hard sync) for a tearing lead sweep. |
| Formant | A softened sync that slides a vowel-like peak up the tone. |
| Fractalize | Repeats the wave inside itself for buzzy, glassy layers. |
Alt Warp
| Mode | What it does |
|---|---|
| Bend + | Pushes the wave's energy toward the end of the cycle. |
| Bend - | Pulls the wave's energy toward the start of the cycle. |
| Bend +/- | Pinches both halves of the cycle for a nasal tone. |
| PWM | Squeezes the wave into a narrower pulse, like pulse width. |
| Asym + | Stretches the first half of the cycle and squeezes the second. |
| Asym - | Squeezes the first half of the cycle and stretches the second. |
| Asym +/- | Stretches and squeezes both halves in turn. |
| Flip | Flips part of the cycle upside down for a hollow, phasey tone. |
| Mirror | Mirrors the cycle back on itself for hollow, folded tones. |
| P-Quantize | Steps the read position for a crunchy, stair-stepped tone. |
| Odd/Even | Shifts the balance between odd and even overtones. |
Draw
| Mode | What it does |
|---|---|
| Draw | Your own drawn phase curve: where in the cycle to read. Draw it on the curve card. |
| Draw Amp | Your own drawn shaping curve: what to do to each sample of the wave. Draw it on the curve card. |
Geometry
| Mode | What it does |
|---|---|
| Bend | Bends the wave's timing for a brighter, vowel-like sweep. |
| Skew | Leans the wave's peak to one side for a sharper edge. |
Filter
| Mode | What it does |
|---|---|
| LP Filter | A low-pass filter (keeps the lows, darkens) that follows the note. |
| HP Filter | A high-pass filter (keeps the highs, thins) that follows the note. |
The two filter modes have their own card: an XY pad you drag across, with the two values it moves shown underneath and the filter curve drawn against the harmonics.
Saturation
| Mode | What it does |
|---|---|
| Sine Shaper | Runs the wave through a sine curve for bell-like overtones. |
| Tube | Warm tube saturation: rounder, thicker and louder. |
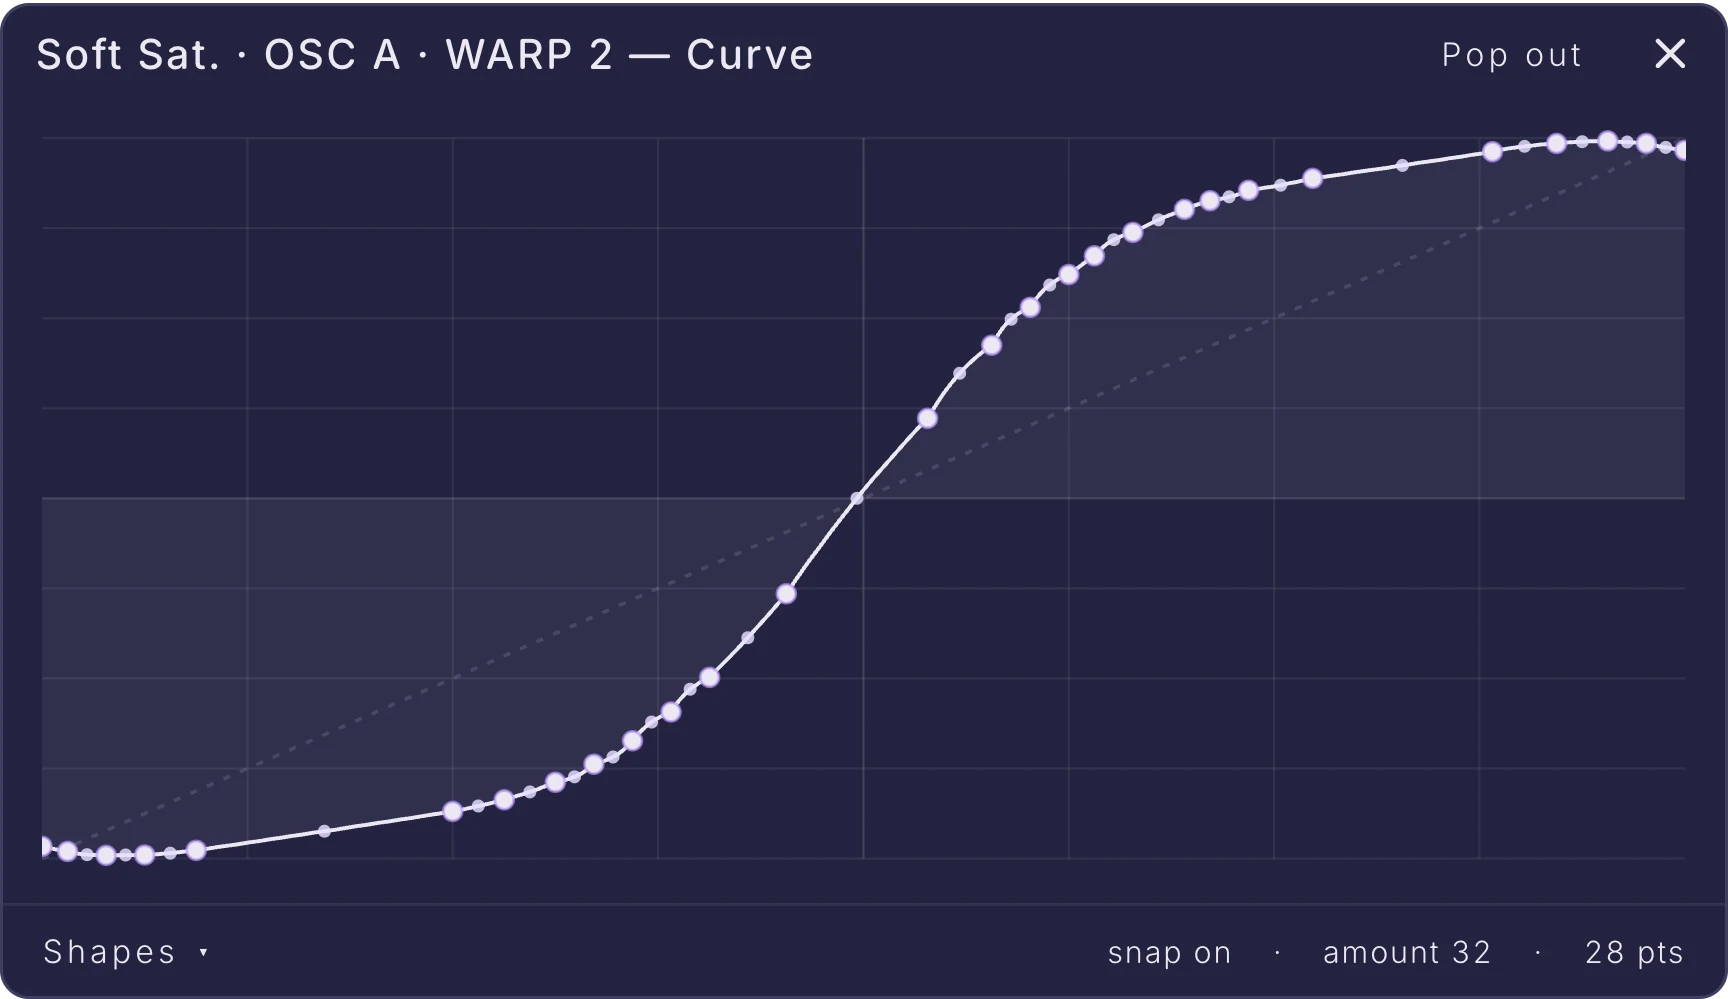
| Soft Sat. | Gentle saturation that thickens without harshness. |
| Overdrive | Pedal-style overdrive, crunchy and forward. |
| Tape Sat. | Tape-style saturation, warm and a little squashed. |
| Stomp Box | Fuzz-pedal distortion, raw and hairy. |
| Transformer | Iron-transformer saturation with thick low mids. |
Clip
| Mode | What it does |
|---|---|
| Soft Clip | Rounds the peaks off for a smooth grit. |
| Hard Clip | Cuts the wave's peaks flat for hard, buzzy grit. |
| Zero-Square | Squares the wave around zero for a hollow fuzz. |
Diode & Asym
| Mode | What it does |
|---|---|
| Diode 1 | Squashes the peaks like a diode circuit, bright and edgy. |
| Diode 2 | A harder diode-style squash with more bite. |
| Asym | Squashes the top and bottom of the wave unevenly, warm like a tube. |
Fold
| Mode | What it does |
|---|---|
| Linear Fold | Folds the peaks back in straight lines, bright and buzzy. |
| Sine Fold | Smooth wavefolding for rich, bell-like overtones. |
| West Coast | A classic wavefolder sound, rubbery and bright. |
| Overflow | Wraps the peaks around like a digital overflow, harsh. |
| Bias Fold | Offset wavefolding that adds even overtones. |
Rectify
| Mode | What it does |
|---|---|
| Rectify | Flips the lower half of the wave up for a buzzy, octave-up tone. |
| Half Rect | Cuts away the lower half of the wave for a thin buzz. |
| Doubler | Doubles the cycle for an octave-up tone. |
Digital
| Mode | What it does |
|---|---|
| Bitcrush | Lowers the sound's resolution for a stepped digital crunch. |
| Harmonics | Stacks extra overtones on top of the wave. |
| Cheby Odd | Adds odd overtones for a hollow, reedy edge. |
| Ripple | Adds a fine ripple to the wave for fizzy highs. |
| Exciter | Adds sparkling high harmonics for air. |
None sits at the top of the list on its own: it turns the warp off.
The warp curve card
Right-click Warp or Warp 2 and choose Extend to open the warp's curve card: a big view of what the current mode does to the wave, drawn as a transfer curve over a faint diagonal (the unchanged wave). Draw on the curve to make the warp your own shape; this is how the Draw and Draw Amp modes get their curves.
Sample#
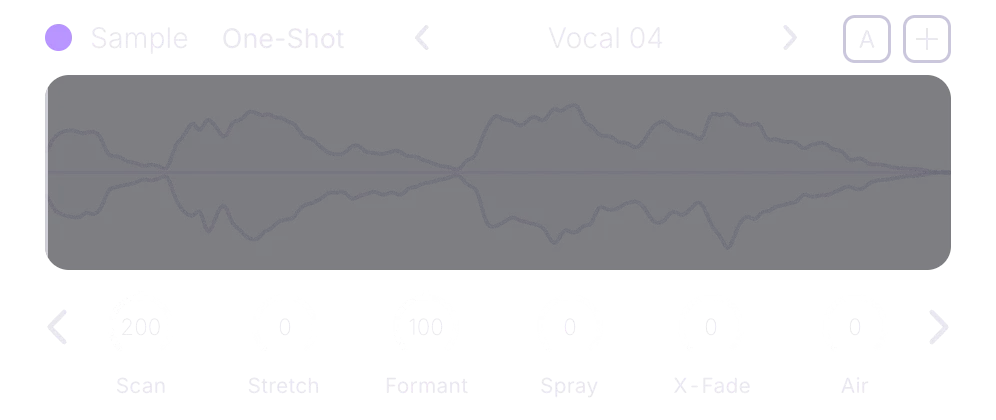
The Sample engine plays a recording tuned across the keyboard. Load one of the factory one-shots from the browser or drop your own file on the waveform. Markers set where it starts, ends and loops; the knobs time-stretch, re-voice and scatter it; and a second dropped sound can be morphed into the first with the Blend knobs.
Header
| Control | What it does |
|---|---|
| Playback | How the sample plays: One-Shot (once from Start to End), Forward (loops forward between the loop markers), Reverse (plays backwards), Ping-Pong (loops forward then backward) or Tailed (loops while you hold the key, then plays out to the end on release). |
| Sample name | Click to browse the one-shot library and your own User folders. The arrows step one sample back or forward. |
The waveform
| Control | What it does |
|---|---|
| Start marker | Drag to set where the sample starts. Shift-drag draws a fade in. |
| End marker | Drag to set where it stops. Shift-drag draws a fade out. |
| Loop start · Loop end | Drag to set the loop region used by the looping playback modes. |
| Fade in · Fade out | The small squares in the corners: drag from a corner to fade the sample in or out. Longer = softer. |
| Fade curves | Drag a fade's curve handle up or down to bend it from quick to slow. |
| Chop editor | The corner icon opens this sample on the CHOP page to slice and play it (see CHOP). |
Front controls
| Control | What it does |
|---|---|
| Scan | Playback speed and direction. Centre = frozen in place, right = forward and faster, left = backwards. A notch right of centre is normal speed. |
| Stretch | Time-stretch: slows the sample down without changing its pitch. Right-click › Stretch mode: Tones (tuned for melodic material, keeps notes clean), Beats (tuned for drums, keeps hits sharp) or Texture (tuned for pads and noise, smooth and smeared). |
| Formant | The formant is a voice's size and vowel colour. Left = bigger, right = smaller, pitch unchanged. Right-click › Formant mode: Normal, Inverted (the knob works the other way round), Cross-Formant (swaps the voice shape for a strange, talking tone) or Spectral-Tilt (the knob tilts the tone darker or brighter). |
| Spray | Each note starts at a random spot in the sample. Up = more scatter, so repeated notes never sound identical. |
| X-Fade | Crossfades the sample in at Start and out at End, so loops and edges never click. Up = longer fades. These are the same fades Shift-dragging the markers draws. |
| Air | Adds high overtones for sparkle and breath. |
Blend: morphing two sounds
Drop a second file on a loaded Sample oscillator and choose Blend. The current sound becomes the first layer, the dropped one the second, and the waveform visibly becomes the blend. A new set of knobs appears behind the Blend arrow; each one decides which layer owns one part of the sound.
| Control | What it does |
|---|---|
| Morph | Slides from the first sound into the second. The knobs after it can override each layer. |
| Attack | Whose transients (the sharp first hit of each sound) you hear, the first sound's or the second's. |
| Body | Morphs the tonal core between the two; their pitches glide into each other instead of crossfading. |
| Breath | Whose noisy, breathy layer you hear. Centre follows Morph. |
| Sculpt | Borrows the tonal shape (the formant, its vowel colour) of one sound for the guts of the other. |
| Dice | Shuffles which sound owns each harmonic. 0 = off; every position is a new mix you can come back to. |
The sample menu
Right-click the waveform for the sample tools, followed by the oscillator rows from the quick menu (copy and paste oscillator, solo, mute, volume, pan, semitone).
| Row | What it does |
|---|---|
| Trim to loop | Cuts the sample down to the loop markers. |
| Normalize | Raises the sample to full level. |
| Fade in / out | Adds short fades at the start and end so it never clicks; choose it again to remove them. |
| Reset region | Puts the Start, End and loop markers back to the whole sample. |
| Snap loop to zero · On/Off | Moves the loop markers onto silent points (zero crossings) so the loop never clicks. Click to toggle. |
| Copy sample · Paste sample | Copies this sample to paste onto another oscillator; Paste puts a copied sample here. |
| Export one-shot | Saves what this oscillator plays as an audio file, blends included. |
| Undo blend | (After a blend) Goes back to the sample from before the blend; repeat to walk back further. |
| Delete sample | Removes the sample from this oscillator. |
Granular#
Granular slices a sample into grains — tiny pieces from 2 to 500 ms — and plays many of them at once, scattered in time, pitch and stereo. Freeze a single moment into a pad, scrub through a loop like a tape head, or turn a drum hit into a shimmering cloud. It reads the same sample library as the Sample engine, and you drop files on it the same way.
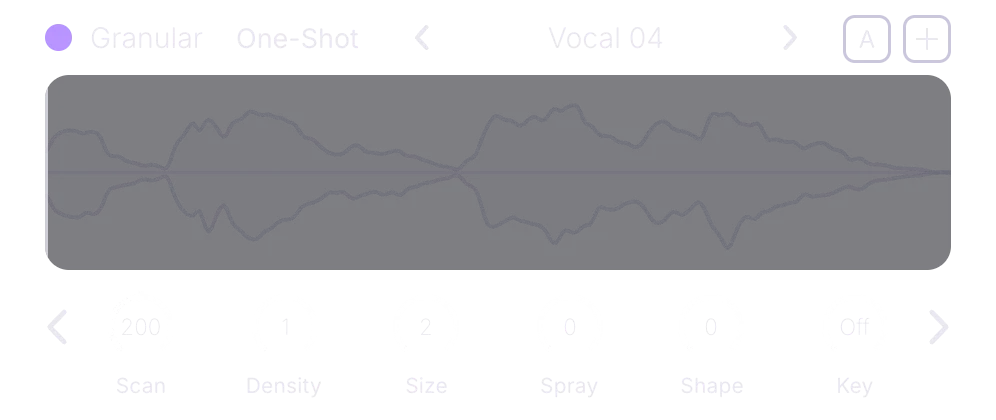
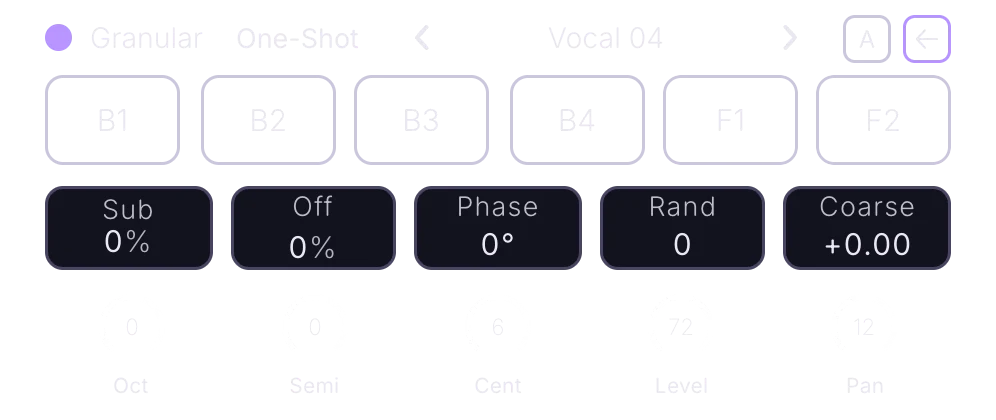
First set: the grains
| Control | What it does |
|---|---|
| Scan | How fast the grains travel through the sample. Centre = frozen, right = forward, left = backwards. |
| Density | How many grains start each second, 1 to 200. Up = a smooth cloud, down = separate pops. Right-click › Sync to tempo to step through note values (1/256 to 1 bar) that follow the song. |
| Size | How long each grain is, 2 to 500 ms. Small = buzzy, big = smooth. Right-click › Sync to tempo for note values. |
| Spray | Scatters where each grain starts around the play position. Up = a blurrier, wider cloud. |
| Shape | The fade in and out of each grain. Left = flatter and punchier, right = a soft bell shape that blends smoothly. |
| Key | Tunes the grains to an interval or a scale: Off (every grain at the note), Oct, 5th, Chord, Maj, Min or Penta. |
Second set: the spread
| Control | What it does |
|---|---|
| Position | Where in the sample the grains are taken from. Sweep it with an LFO to wander through the sound. |
| Pitch | Transposes every grain, −24 to +24 semitones. Try 12 for a shimmer an octave up. |
| P.Spray | Pitch spray: gives each grain a slightly random pitch. Up = a shimmering, out-of-tune cloud. |
| Width | Throws the grains between left and right. 0 = mono, up = wide. |
| Dir | Direction: which way grains play. Left = backwards, right = forwards, centre = a mix of both. |
| Skew | Leans each grain's fade. Left = sharp attack and slow fade (a pluck), right = slow swell and sharp end. |
Right-clicking the waveform adds three grain extras to the usual sample menu: the Tones · Beats · Texture stretch type, a Stretch slider (slows the sample down without changing pitch) and an Air slider (adds high harmonics for sparkle).
FM#
The FM engine is a wavetable carrier with two hidden modulators, Mod 1 and Mod 2, wobbling its pitch at audio rate. Whole-number ratios give musical tones — electric pianos, basses, brass — and in-between ratios give bells and metal. A second set of "weathering" controls ages, rusts and overdrives the modulators, and the full wavetable set (WT Pos, Warp, Spectral, Fold) still works on the carrier.
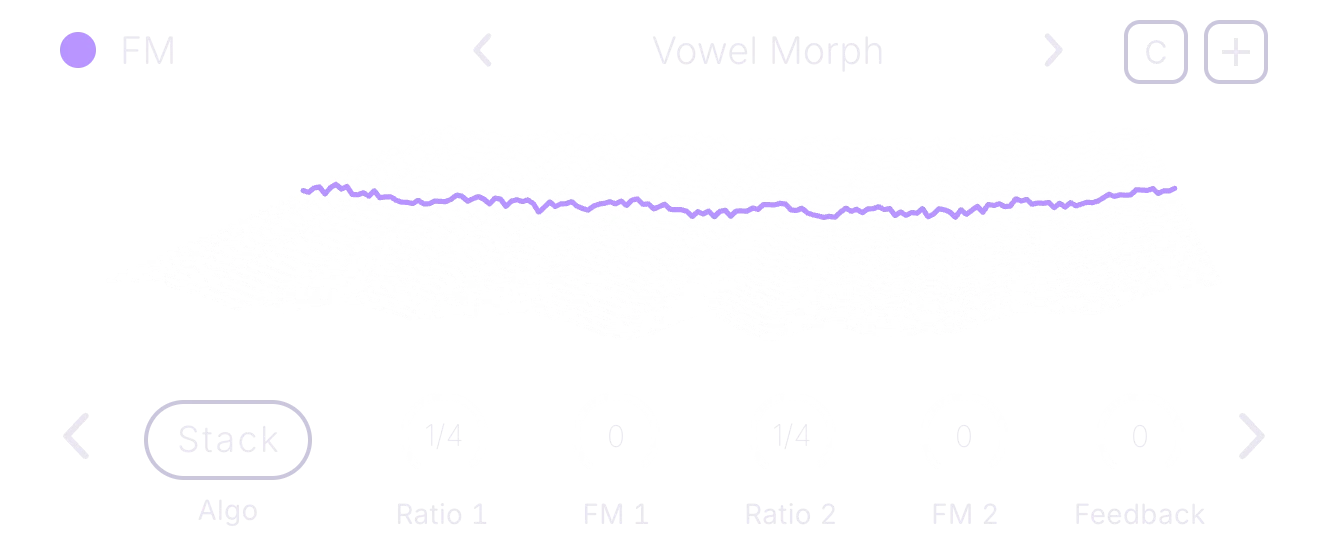
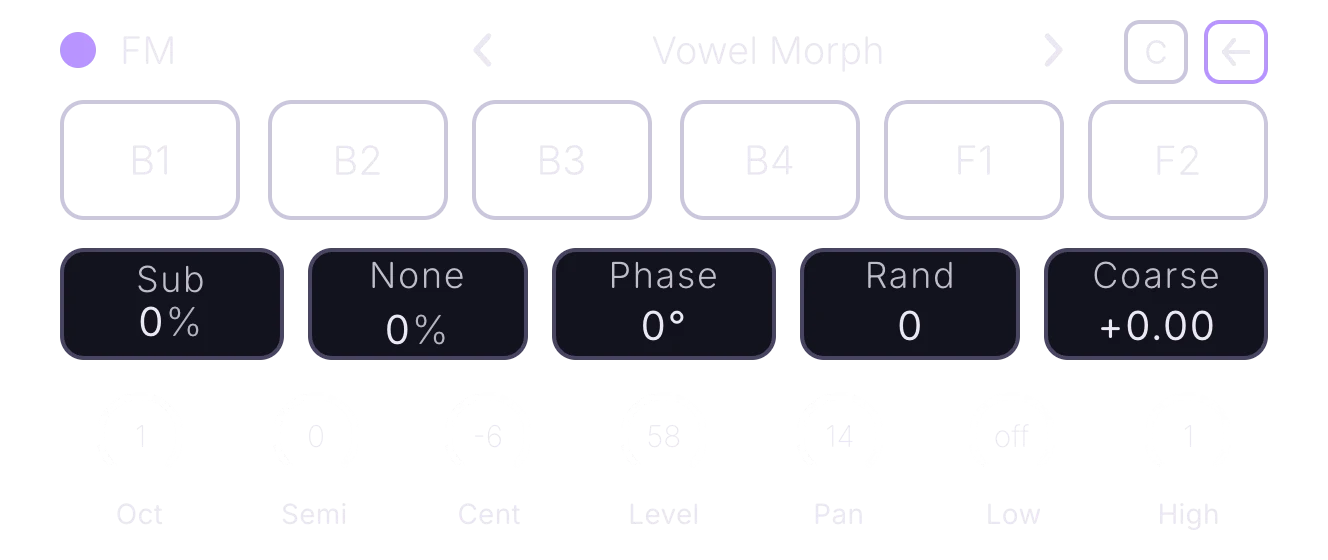
Header
The header shows the carrier's wavetable, with the same arrows and browser as the Wavetable engine. A sine carrier gives classic FM; any of the 500 tables gives FM that nobody else can make.
First set: the operators
| Control | What it does |
|---|---|
| Algo | How the modulators connect. Stack: Mod 2 feeds Mod 1, which feeds the wavetable. Split: both modulators hit the wavetable side by side. Ring: Mod 1 ring-modulates the output for metallic tones. |
| Ratio 1 | The pitch of Mod 1 as a multiple of the note, 0.25 to 16. Whole numbers = musical, in-between = bells. |
| FM 1 | How hard Mod 1 wobbles the wavetable's pitch. 0 = clean; up = brighter, metallic. Put an envelope on it. |
| Ratio 2 | The pitch of Mod 2, 0.25 to 16. Try 1, 2 or 3.5 for new colours. |
| FM 2 | How hard Mod 2 wobbles the pitch it is sent to (Algo decides where). Up = richer, harsher overtones. |
| Feedback | Mod 1 wobbles its own pitch with its own output. Low = a pure sine, up = saw-like buzz, top = growl. |
Second set: weathering
| Control | What it does |
|---|---|
| Strike | A burst of extra FM bite at the start of each note, harder when you play harder: pluck, mallet or brass blast. |
| Age | The modulators drift like old analogue gear, so no two notes beat the same. Up = more wander. |
| Rust | Pulls Mod 1 off the musical (harmonic) pitches. Low = shimmer, high = a corroded bell clang. Pair it with Storm. |
| Quake | Adds pitch wobble an octave below the note. Up = sub weight, then growl, then a crackly vocal fry. |
| Scorch | Distortion inside the FM loop. Low = warm, high = molten grit and fuzz. |
| Storm | The two modulators wobble each other too. Up = thicker, then a snarl, then controlled chaos. |
Step on with the arrow for the wavetable set — WT Pos, Warp, Spectral and Fold, exactly as on the Wavetable engine — and then Unison.
Phase distortion and cross-oscillator FM
The FM engine's operators live inside one oscillator. To modulate between oscillators, use the back panel's blend slots: FM, FM Exp and FM Clamp for frequency modulation from any other oscillator, and PD for phase distortion — including Self (feedback) for an oscillator that bends its own read. See Blend modes.
Resynth#
Resynth listens to a sample, works out the tones inside it, and plays them back as its own oscillator bank. Because the sound is rebuilt rather than replayed, you can stretch it to a standstill, throw away parts of it, morph it toward a plain waveform, crush its detail or melt its attacks into a pad. The display is a scrolling spectrum of the rebuilt sound, with a playhead for each note.
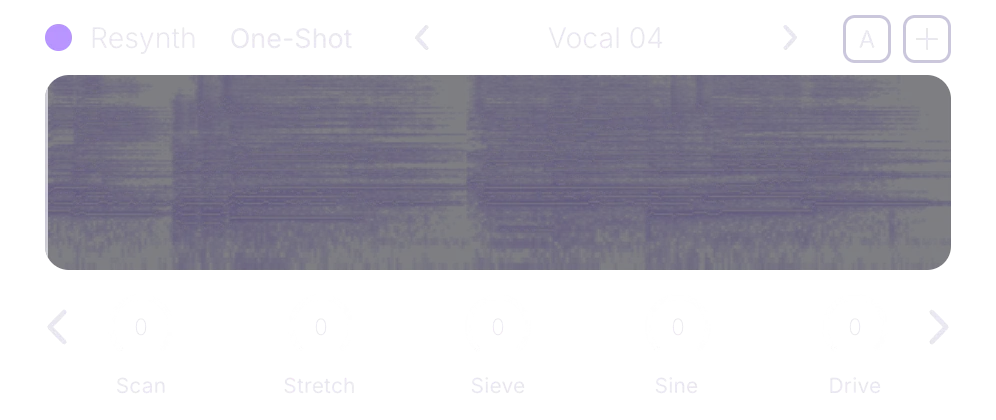
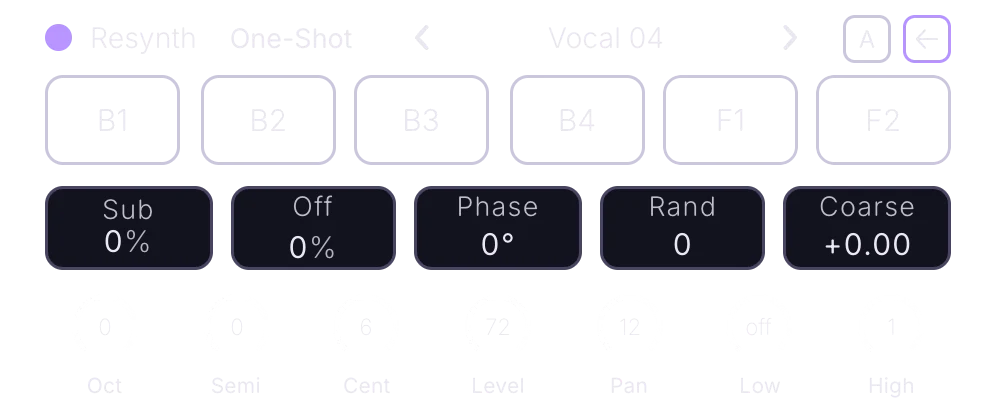
First set: play
| Control | What it does |
|---|---|
| Scan | How fast playback moves through the sample. 0 = hold still, centre = natural speed, up = faster. |
| Stretch | Slows playback down without changing pitch; all the way up freezes it into an endless pad. |
| Sieve | Throws away parts of the sound for broken, lo-fi textures. Up = more removed. Right-click › Sieve mode (see below). |
| Shape | Morphs the sample toward a plain waveform, keeping its pitch: the sample becomes the wave, missing harmonics and all. The knob's label shows the target. Right-click › Shape to choose Sine, Square, Saw, Triangle, Pulse, Organ, Half, Vowel or Metal. |
| Drive | Pushes the rebuilt sound into distortion for heat and grit. Right-click › Drive mode (see below). |
Second set: sculpt
| Control | What it does |
|---|---|
| Quality | How much detail the rebuilt sound keeps. High = clean and full, low = skeletal, lo-fi and broken. |
| Formant | The voice's size and vowel colour, from giant to chipmunk, without changing pitch. |
| Tilt | Tilts the tone like a seesaw. Left = darker, right = brighter. |
| Crush | Bitcrush and sample-rate reduction: an old-computer, lo-fi grit. Up = dirtier. |
| Start | The point in the recording where each note begins. |
| Melt | Smears the sound across time so the sharp starts dissolve into a pad. Turns any one-shot into a wash. |
The back panel's Low and High knobs are Resynth's low and high cuts.
Sieve modes
| Mode | What it does |
|---|---|
| Floor | Removes the quietest parts first. |
| Sparse | Keeps only a few strong parts. |
| Cloak | Hides the loudest parts, leaving a ghost. |
| Flicker | Parts drop in and out over time. |
| Rake | Removes evenly spaced bands, like a comb. |
| Parity | Keeps odd or even parts only. |
Drive modes
| Mode | What it does |
|---|---|
| Saturate | Warm, even saturation. |
| Bloom | Drive that opens the highs as it grows. |
| Glint | A bright, glassy edge. |
| Moire | Shimmering interference patterns. |
| Foldback | Wavefolding for buzzy overtones. |
| Ember | Dark, smouldering grit. |
Harmonic#
Harmonic is additive: it builds the sound from up to 512 partials — pure sine tones stacked above the note — and renders every one of them per voice. Its source is a wavetable: pick any table from the header, exactly as on the Wavetable engine, and Harmonic rebuilds each frame from pure sines. Then thin it, tilt it, scatter it in stereo, give each partial its own life, and sculpt the whole spectrum with the second set.
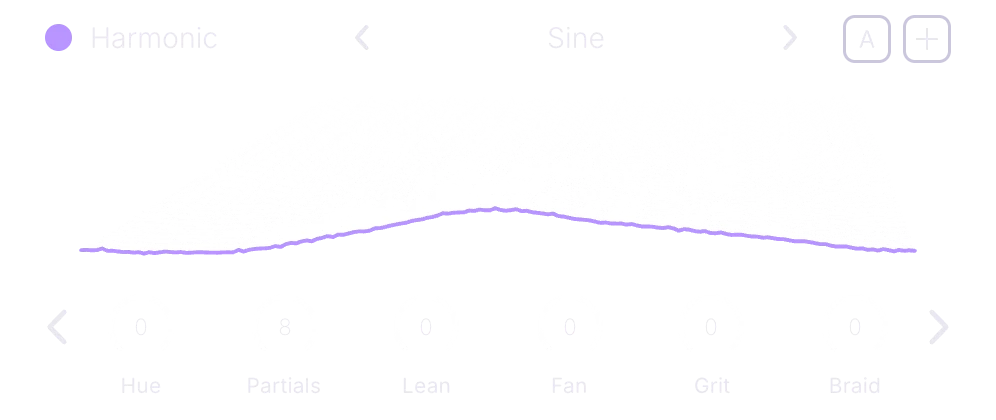
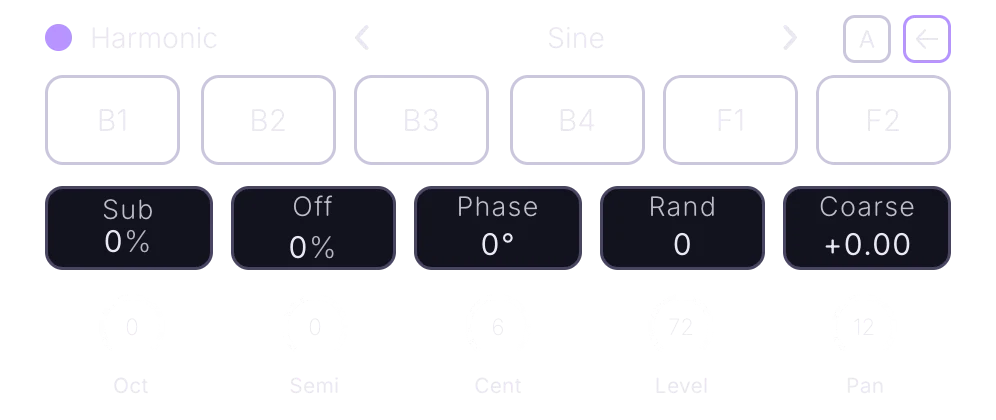
The partials display
The display draws the partials as thin lines rising from a centred line, one per partial, so you see the spectrum you are playing. Click it to switch to the 3D waterfall of the source table, with the frame Hue is reading highlighted. Right-click it for the quick menu: copy and paste the oscillator, solo, mute, volume, pan and semitone.
First set: the voice
| Control | What it does |
|---|---|
| Hue | Picks the frame of the source table that the partials are built from — the Harmonic engine's WT Pos. Fully modulatable: sweep it for a morphing, pure-sine version of the table. |
| Partials | How many partials build the sound, 8 to 512. Down = hollow and skeletal, up = full spectrum. Loudness stays level as you turn it. |
| Lean | Tilts the balance of the partials. Left = dark, soft felt; right = glassy and bright. Centre is flat. |
| Fan | Spreads the partials across left and right, then lets them slowly orbit your head. Up = wider. |
| Grit | Each partial drifts a little, like analogue gear. Low = subtle wander, high = haunted machine. |
| Braid | Adds slightly out-of-tune twins to the loudest partials, like several players at once. Up = thicker beating. |
Second set: the sculpt
| Control | What it does |
|---|---|
| Carve | Tilts the spectrum around a sliding pivot: warmth first, then the pivot slides up and the lows duck into a megaphone. Past halfway it changes the shape, not only the amount. |
| Churn | Each note drifts through the table on its own, starting from wherever Hue put it, so a chord spreads out instead of moving as one block. Up = deeper and faster drift. |
| Root | Shields the root (the note itself) from the sculpt; past halfway it adds a ghost an octave below. |
| Shine | Adds a shimmering copy of the whole tone an octave up that slowly breathes. |
| Wilt | The note's time arrow. Left = highs fade away like a pluck; right = highs swell in like a bowed pad. |
| Forge | Analogue-style drive on the whole oscillator. Low = warm, middle = overdrive, top = screaming fuzz. |
Modal#
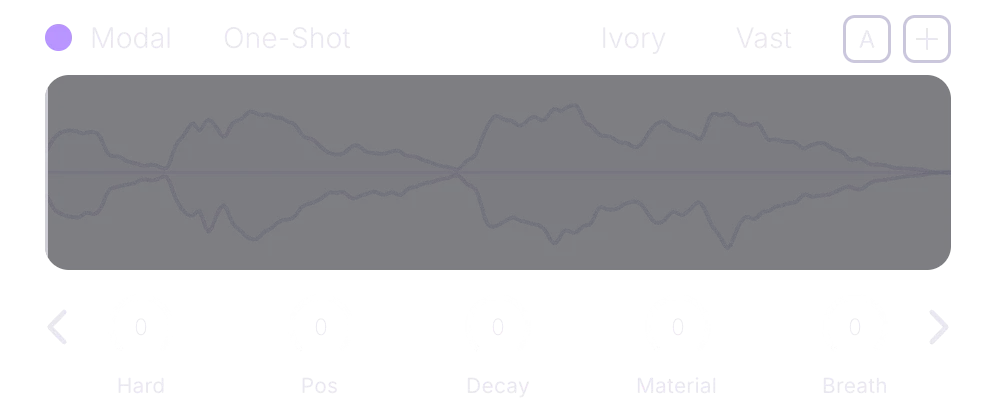
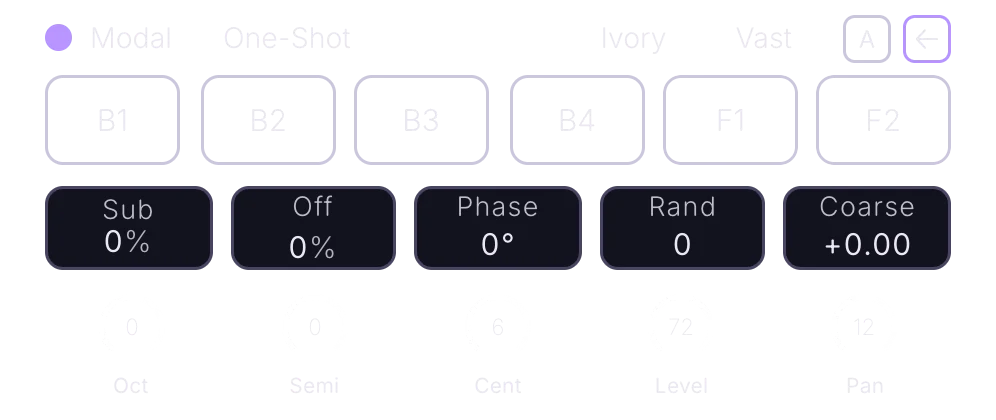
Modal is a physical model: a bank of resonances shaped like a real body — a string, a pipe, a bar, a bell, a drum skin — set ringing by a strike, a pluck, a bow or a breath. Pick a family and one of its five forms in the header, then shape how it is played and what it is made of. Drop a one-shot on the display and that sound becomes the strike.
Header
| Control | What it does |
|---|---|
| Playback | How a dropped strike sample plays (One-Shot, Forward, Reverse, Ping-Pong, Tailed), as on the Sample engine. |
| Family | The kind of body. Click to choose one of nine families, or Samples to open the sample browser and ring the resonator with a one-shot of your own. |
| Form | Which instrument of the family the model plays: five forms per family. |
The display draws what the model plays for the current settings; with a strike sample loaded, it shows that sample instead.
Families and forms
| Family | What it is · its five forms |
|---|---|
| Ivory | Piano strings struck by felt hammers · Vast, Tall, Bite, Felt, Silver |
| Wire | Plucked strings: guitar, lute, harp, sitar · Steel, Nylon, Worn, Open, Buzz |
| Silk | Bowed strings, violin to contrabass · High, Mid, Low, Deep, Gut |
| Air | Flutes and blown pipes · Pure, Warm, Hollow, Breathy, Cold |
| Rasp | Reeds: clarinet, sax, oboe, bassoon, duduk · Dark, Husky, Nasal, Deep, Mournful |
| Blaze | Brass: trumpet, horn, trombone, tuba · Bright, Round, Soft, Wide, Deep |
| Timber | Struck bars: marimba, vibes, xylophone, kalimba · Wood, Cool, Hard, Clear, Thumb |
| Glass | Bells: church, tubular, handbell, gong · Tower, Tube, Hand, Gong, Bowl |
| Skin | Drums: timpani, tom, snare, djembe, tabla · Boom, Tom, Snap, Slap, Talk |
| Samples | Your own one-shot rings the resonator. It opens the sample browser; the resonator family you had stays in place. |
First set: the essentials
| Control | What it does |
|---|---|
| Hard | How hard the body is struck. Left = soft mallet or felt, right = hard stick or pick. |
| Pos | Where it is struck, plucked or bowed, from the edge to the middle. Changes which overtones ring. |
| Decay | How long it rings. Left = tight and short, right = almost endless sustain. |
| Material | What it is made of. Left = dull wood or felt, right = ringing glass or metal. |
| Breath | Keeps driving the body like a bow or breath. Left = plucked or struck, right = a bowed or blown sustain with air. |
Second set: the sculpt
| Control | What it does |
|---|---|
| Stretch | Pulls the overtones out of tune. Left = pure, middle = a stiff piano string, right = bell or gong. |
| Bloom | Life after the strike. Left = dead, right = the sound blooms open and shimmers. |
| Halo | Sympathetic ringing, like the other strings of a piano humming along. Up = a beating, glowing halo. |
| Age | The instrument's condition. Left = pristine, right = worn, out of tune and buzzy, every note a little different. |
| Body | The resonant body around the string. Left = a raw string, right = a full body in wide stereo. |
Organics#
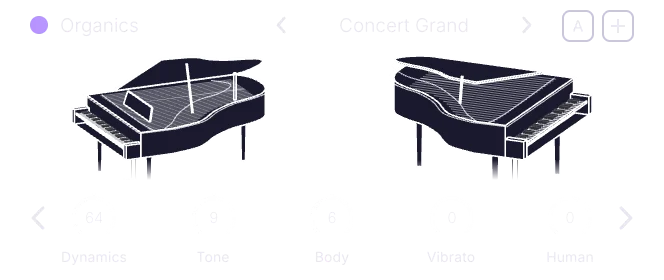
Organics plays 74 deeply sampled acoustic instruments — pianos, organs, strings, guitars, harps, winds, brass, mallets, bells, voices and percussion — with the articulations they were recorded with. The knobs do what a player does: pick a softer or harder take, brighten the tone, resize the body, add vibrato, loosen the timing, lengthen the release. And because it is an oscillator like any other, all of Terrain still applies: unison, blend slots, filters, flow and effects.
Header and display
| Control | What it does |
|---|---|
| Instrument | Click to browse the 74 instruments by category, or scroll over the name to step through them. The ‹ › arrows step to the previous or next instrument in the same category. An instrument that is not installed shows dimmed in the browser. |
| Articulation | How the player plays this instrument — sustained, short, plucked and so on, depending on what was recorded. Click to pick another. |
| Display | A drawing of the instrument that reacts as you play. Right-click it for the quick menu. |
First set: the player
| Control | What it does |
|---|---|
| Dynamics | Which recording plays: soft takes (left) or hard ones (right). Loudness still follows your playing; this changes the timbre. It crossfades live, so the mod wheel or an LFO makes it breathe. |
| Tone | Tilts the brightness, about 9 dB either way. Left = dark and felted, right = open and bright. |
| Body | The instrument's size without changing its pitch, up to six semitones of formant either way. Right = bigger and darker, left = smaller and nasal. |
| Vibrato | A player's vibrato that eases in after the note starts, up to ±50 cents. Its rate and delay are on the back. |
| Human | Each note varies a little in tuning, level, timing and tone, like a real player. 0 = every note identical. |
Second set: the mechanics
| Control | What it does |
|---|---|
| Attack | How a note begins. 0 = tight (the air before the onset trimmed, the transient lifted), centre = as recorded, top = a slow swell of about 3 s. |
| Release | How long a note rings after you let go, 20 ms up to 12 s. Centre = as recorded. |
| Sustain | 0 = the note dies away naturally; up = it crossfades into a held loop, and at the top a piano holds for ever. |
| Velocity | How much your playing strength sets loudness and brightness. 0 = every note full, 100 = the instrument's own natural curve. |
| Image | The recording's stereo width. 0 = mono, 67 = as recorded, 100 = extra wide. |
A longer attack or release on Env 1 (the amp envelope) always lengthens these further.
The back panel
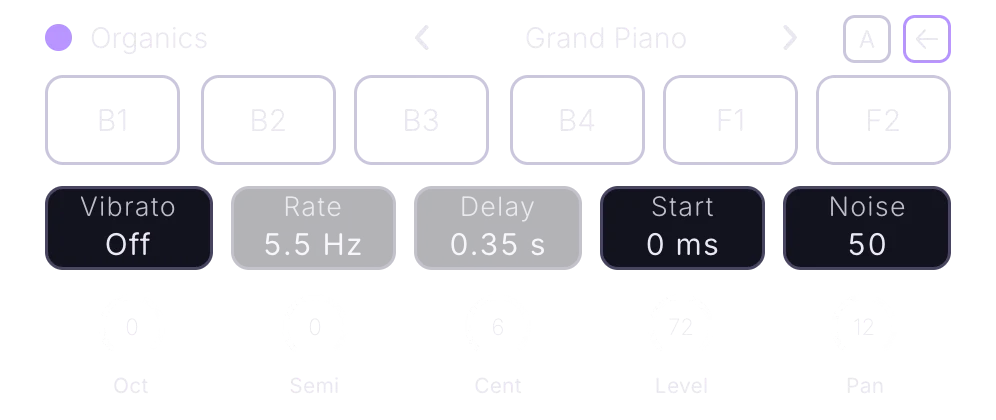
Organics keeps the blend slots, the filter sends and the tuning and mix knobs of every engine, and replaces the middle row with five player pills. Drag them up and down; double-click for the default.
| Control | What it does |
|---|---|
| Vibrato | The same vibrato depth as the front knob, 0 to ±50 cents, sitting here next to its rate and delay. Double-click = Off. |
| Rate | How fast the vibrato swings, 3 to 9 Hz. Double-click = 5.5 Hz. Dimmed while Vibrato is off. |
| Delay | How long a note holds still before the vibrato eases in, 0 to 2 s. Double-click = 0.35 s. Dimmed while Vibrato is off. |
| Start | Skips into the recording, 0 to 2 s. 0 = the whole attack; higher = the note enters in its body, with no strike. |
| Noise | The player's mechanical sounds — hammers, pedals, frets, breath, key-ups — each note deciding for itself like a real player. 0 = never, 50 = as recorded, 100 = louder and more often. Greyed when an instrument has none. Right-click to make the pill show Coarse (smooth pitch, ±64 semitones), Porta (glide time, Off to 2 s) or Glide (the glide's curve) instead. |
The 74 instruments
| Category | Instruments |
|---|---|
| Keys (14) | Bright Grand, Clav, Clavisynth, Concert Grand, Concert Grand B, FM Electric Piano, Harpsichord, Old Upright, Osiris Piano, Pad Reed EP, Reed EP, Tine EP, Upright Piano, Warm Upright |
| Organs (5) | Accordion, Chamber Organ, Drawbar Organ, Pipe Organ, Rock Organ |
| Strings (10) | Bowed Bass Pad, Cello Section, Contrabass, Erhu, Jazz Pizz Bass, Solo Cello, Solo Violin, Upright Bass, Viola Section, Violin Section |
| Plucked (11) | Archtop Guitar, Celtic Harp, Clean Electric, Concert Harp, Dan Tranh, Ganjo, Hollowbody Guitars, Hungarian Zither, Jazz Bass, Medieval Lyre, Nylon Guitar |
| Winds (14) | Alto Recorder, Alto Sax, Alto Sax (Weresax), Baritone Sax, Bassoon, Clarinet, Flute, Harmonica, Oboe, Ocarina, Soprano Sax, Tenor Sax, Tenor Sax (VCSL), Vintage Bari Sax |
| Brass (5) | Folk Tuba, French Horn, Trombone, Trumpet, Tuba |
| Mallets & Bells (8) | Glockenspiel, Hand Chimes, Kalimba, Marimba, Mbira, Tubular Bells, Vibraphone, Xylophone |
| Choir & Voice (2) | Male Aah, Synth Choir |
| Percussion (5) | Balafon, Handpan, Steel Pan, Timpani, Water Glasses |
The sample libraries behind these instruments and their licences are listed in Credits.
Importing a SoundFont
Bring your own sampled instruments into Organics. Open the instrument browser and choose Import SoundFont (the last row of the User category, or the browser's import button), then pick an .sfz, .sf2 or .sf3 file. Terrain converts it in the background and a toast reports progress. A SoundFont with several presets asks which one to import, or Import all presets; a very large file (over 500 MB) asks before it starts. Imported instruments live under User, play exactly like the factory ones, and can be removed with a right-click.
Chapter 5
Noise
Hiss, hum, crackle, wind. The noise strip sits between the oscillators and plays with every note: a breath under a pad, a click on a pluck, a vinyl bed under the whole patch. Pick a colour, load your own, and use it as a modulator too.
The noise strip#
The noise strip is the narrow panel in the middle of the SYN page's top row, between the A/B and C/D oscillator slots. It is one shared noise layer that plays under the oscillators on every note. It has thirteen built-in colours, a factory library of noise recordings, room for your own files, three knobs and a right-click menu for how it plays.
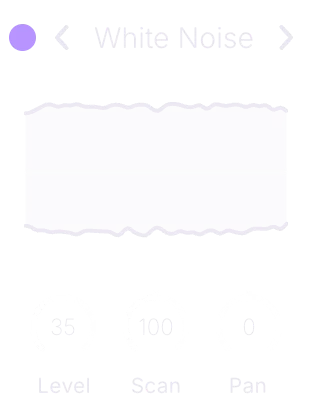
| Control | What it does |
|---|---|
| Power | Turns the noise layer on or off. When it is on, it plays with every note, under the oscillators. A fresh patch starts with the noise off. |
| ‹ › | Steps to the previous or next noise. On the built-in colours it walks all thirteen; on a factory noise recording it walks the factory library; from one of your own files it returns to the colours. |
| Name | Shows what is playing — a colour's name, or the name of the loaded recording. Click it to open the noise browser. Drag it onto a knob to modulate that knob with the noise. |
| Display | Shows the noise moving as notes play. Click it to switch between a particle cloud (calm at rest, blooming when a note plays) and a waveform view. Drag it onto any knob to use the noise's loudness as a modulator. Drop an audio file on it to import a looping noise of your own. |
| Level | How loud the noise layer is, 0 to 100%. The knob is tapered for fine control at the quiet end: 25% is about −36 dB, 50% about −18 dB, 100% full level. A little adds breath and air; pair it with a short envelope for clicks and chiffs. |
| Scan | On a colour, its tone. On a loaded recording, its playback speed, from 0.10× through 1× (centre, natural) up to 2×. |
| Pan | Places the noise left or right. Centre = middle. The number in the ring is the distance from centre; the arc shows the side. Its stereo width is in the right-click menu. |
All three knobs share the house gestures: drag to turn, double-click to reset, right-click to modulate.
The thirteen colours#
The built-in noises are generated live, so they never loop and never repeat. They come in four groups.
| Colour | What it sounds like |
|---|---|
| Colors | |
| White Noise | Bright, even hiss across every frequency. |
| Pink Noise | Softer, rain-like hiss with more low end. |
| Brown Noise | Deep, rumbling noise like distant surf. |
| Geiger | Dry random clicks and ticks, no hiss bed. |
| Tape | |
| Tape Hiss | The soft hiss of a tape machine. |
| Tape Hum | A low mains hum with faint hiss under it. |
| Tape Air | Breathy tape air that slowly swells. |
| Tape Crackle | Sparse pops and crackles over faint hiss. |
| Vinyl | |
| Clean Vinyl | A record's soft surface noise with light crackle. |
| Dirty Vinyl | A worn record: rumble, surface noise and dense crackle. |
| Space | |
| Space Open | A wide, airy wash that gently sweeps. |
| Space Helium | A thin, high, resonant whistle of air. |
| Space Wind | Gusting wind through a sweeping band. |
Browsing and loading your own noise#
Click the noise name to open the browser — the same two-pane browser the oscillators use (see The sound browser). On the left: All at the top, then the four colour groups, then the categories of the factory noise library, then User. Turn on the headphone to audition a colour or a recording before you pick it.
There are three ways to bring in your own noise:
- Drop an audio file onto the noise display. It loads and loops as the noise layer.
- In the browser, + › Add folder points Terrain at a folder of your own noises. It appears under User and is remembered; nothing is copied.
- In the browser, + › Import file adds a single file.
Whatever you pick is saved with the preset, and the name in the strip always tells you what is actually playing. A loaded recording uses Scan as its speed.
Noise as a modulator#
The noise is also a modulation source. Drag the noise display (or its name) onto any knob in Terrain: from then on, the noise's own loudness moves that knob. It keeps following even with the noise layer switched off, so you can use a silent noise purely as a source of jitter. Noise is also a source in the oscillators' blend slots (see Blend modes) and in the MOD page's Audio sources (see Modulation).
Routing, filters and Noise 2#
The noise goes to the mix on its own, past the filters. To filter it, light the N pill on a filter's back panel (see Filters); the noise then runs through that filter instead of past it. Each filter has its own N pill, so you can send the noise to Filter 1, Filter 2 or both.
A second, independent noise strip, Noise 2, lives on the Patcher alongside Oscillators E to H. It has the same colours, library, knobs, menu and import, with its own settings and its own selection. See The Patcher.
Chapter 6
Filters
Two filters, 123 types. Classic ladders and state-variables, combs that ring like strings, vowels that talk, phasers, frequency shifters, tiny reverbs and outright destruction. Route any oscillator into either filter, stack them or run them side by side, and drag the curve with your hands.
Filter 1 and Filter 2#
Terrain has two independent filters in one panel on the SYN page. The 1 and 2 pills choose which filter you are editing; each has its own type, curve, knobs, routing and back panel. Both can run at once — one after the other (Series) or side by side (Parallel).
A filter only hears what you send it. Each oscillator decides how much of itself goes to each filter with its F1 and F2 sends (on the oscillator's back, see the back panel), and the filter's own back panel has quick pills for the oscillators, the sub layers and the noise. A fresh oscillator sends nothing, so it plays dry until you route it, and both filters start on None, so pick a type before you expect to hear a change.
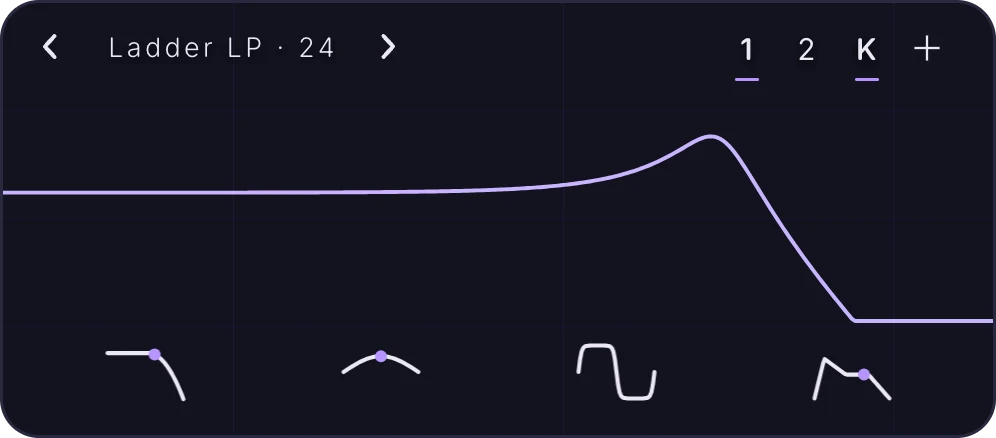
The front panel#
Type picker
The type name sits at the top left between two arrows. The arrows step through the list one type at a time. Click the name to open the filter browser: families on the left, types on the right, and a search box — type part of a name, like comb, formant or acid. All lists every type and None (bypass) switches the filter off. The arrows skip None and wrap around at either end. Hover any type for a one-line description. The full list is at the end of this chapter, see All 123 filter types.
The curve
The filter's response curve is a control in its own right. Press anywhere on it and the cutoff and resonance jump to the pointer; drag left and right to move the cutoff, up and down to change the resonance. A readout shows both values while you drag. Right-click it and choose Extend for the big view (see The big filter view).
Front controls
The four front controls are drawn as small animated emblems instead of knobs: a cutoff slope, a resonance peak, a drive wave and an envelope. Drag each one up or down; right-click to modulate it or to learn a MIDI controller.
| Control | What it does |
|---|---|
| Cut | The cutoff frequency, 20 Hz to 20 kHz; a new filter starts fully open at 20 kHz. On most types this is where the filter starts cutting; on combs, phasers, formants and the special types it means something else (see What the knobs mean per family). |
| Res | Resonance: boosts the frequencies right at the cutoff. Turn it up for a whistling, vocal edge. |
| Drive | Pushes the sound into the filter for warmth and grit. Up = louder and dirtier. (The back panel's Drive works after the filter.) |
| Env | How far the filter envelope opens (+) or closes (−) the cutoff on every note. The middle is none. Env has no sound of its own: it sets the depth of whichever envelope feeds this filter. When you drag it and no envelope (Env 2 to Env 5) feeds this filter yet, Terrain routes Env 2 to it for you, as long as Env 2 is not already routed elsewhere. If it is, a short message tells you where Env 2 goes, and Env does nothing until you route an envelope to the filter (see Envelopes). |
The pills
| Control | What it does |
|---|---|
| 1 | Edit Filter 1. Its type, curve, knobs and back panel fill the panel. |
| 2 | Edit Filter 2, with its own type and knobs. |
| K | Key Track: the cutoff follows the notes you play, so high notes stay as bright as low ones. A click switches it between off (Track 0) and full (Track 100%); fine-tune the amount with the Track knob on the back. K stays lit whenever Track is above 0. |
| + | Flips the filter to its back panel, and back again. |
The Filter word as a modulator
The word Filter at the top left of the back panel is a drag source. Drag it onto any knob and the active filter's output level moves that knob — the filtered sound itself becomes the modulator. See Modulation.
The back panel#
Flip the filter with + to see what feeds it and how it sits in the mix. Like the front, the back follows the 1/2 pills: each filter has its own routing, spread, poles and knobs. Series/Parallel is shared by both.
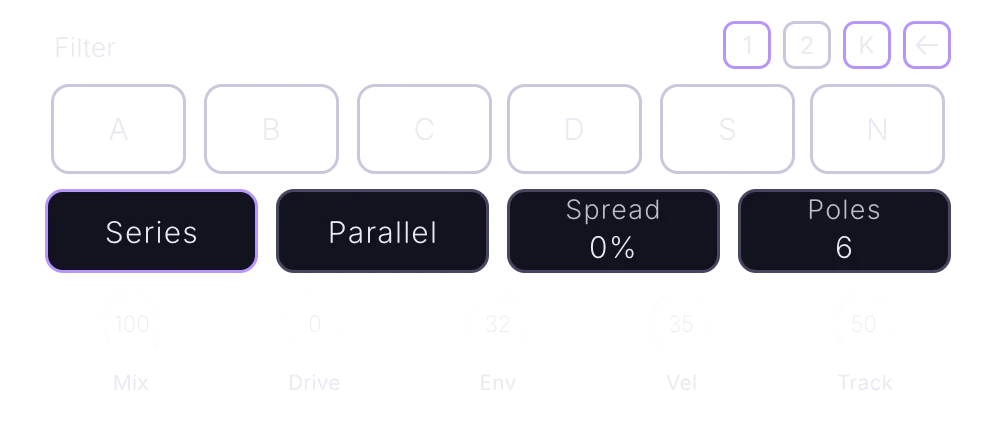
| Control | What it does |
|---|---|
| A · B · C · D | Route Oscillator A, B, C or D into this filter. Lit = it plays through the filter; unlit = it skips it. A click sets the oscillator's own F1/F2 send fully on or off; fine-tune the amount on the oscillator's back panel. A partly filled send also lights the pill. |
| S | Route the sub layers (every oscillator's Sub) into this filter. |
| N | Route the noise layer into this filter. |
| Series | Filter 1 feeds Filter 2, so the two stack. A low pass into a high pass makes a band. |
| Parallel | The two filters run side by side and mix together: two different tones at once. |
| Spread | Pulls the cutoff apart left and right for a wide stereo filter, 0 to 100%. Drag or scroll; double-click returns it to 0. Beautiful with resonance. |
| Poles | The slope — how sharply the filter cuts: 6, 12, 18 or 24 dB per octave (one to four poles; default 24). Drag up or down, or scroll. It acts on Ladder LP · 24, Ladder HP · 24 and German LP; on other types the pill dims, because their slope is fixed (for a dedicated 12 dB circuit, pick from the Two-Pole family). |
| Mix | Blends this filter with the dry sound. 100% = all filter; lower lets the original through too. Default 100%. |
| Drive | Saturation after the filter (the front Drive is before it). Right-click › Drive type for its flavour (see below). |
| Env | The same control as the front Env: how far the filter envelope opens or closes the cutoff, bipolar. |
| Vel | Harder hits open the cutoff further, so loud notes sound brighter. Great for expressive keys. |
| Track | Key tracking: how far the cutoff follows the notes you play, pivoting on middle C. 20% = one to one (play an octave higher, the cutoff moves an octave); 100% = five octaves of cutoff per octave played. While you drag, it reads as a ratio: Off, 1:1 up to 5:1. K switches between 0 and 100%. |
Drive types
| Type | What it does |
|---|---|
| Tube | Warm, rounded saturation after the filter, gentle even at high Drive. |
| Diode | A harder, buzzier clip with a bright edge. |
| Fold | Folds the wave back on itself for hollow, metallic overtones. |
| Hard | A hard clip, loud and square-edged. |
| Crush | Digital bit grit, lo-fi and crunchy. |
| Fuzz | A thick, woolly fuzz, like a guitar pedal. |
Key tracking, explained
Without key tracking, a filter's cutoff stays where you set it: a low note may sound bright and a high note dull, because the high note's harmonics sit above the cutoff. With key tracking, the cutoff moves with the note. At Track 20% it moves exactly one to one, so every note keeps the same tone; lower values follow partly, and higher values exaggerate it, so the top of the keyboard opens up dramatically. The pivot is middle C, where tracking changes nothing. On combs and Karplus types, where Cut sets a pitch, key tracking makes the ring follow the notes you play.
The big filter view#
Right-click the filter curve on the front panel and choose Extend to open a large, floating view of the active filter. Drag left and right for cutoff, up and down for resonance, over a live spectrum of what is playing. Drag the title bar to move the window anywhere; close it with ✕. The filter keeps working when the view is closed.
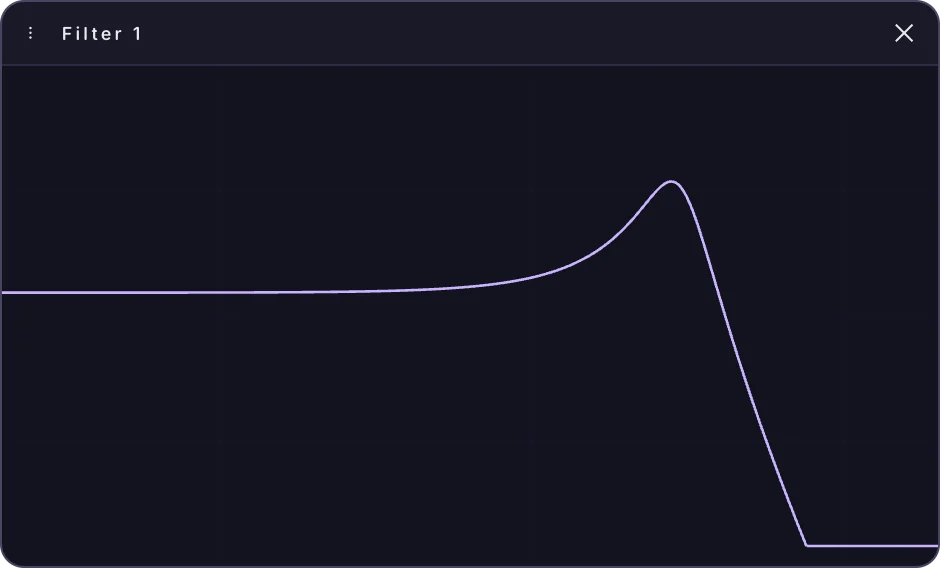
What the knobs mean per family#
On the classic types (low pass, high pass, band pass, notch) Cut, Res and Drive do what you expect. Many of Terrain's types are not simple filters, and on those the same three controls take on the job that matters. Hover a control and its tooltip always tells you what it does for the type on screen.
| Types | Cut | Res |
|---|---|---|
| Low pass | Where the highs start being cut. Up = brighter. | A whistling peak at the cutoff. |
| High pass | Where the lows start being removed. Up = thinner. | Boosts the frequencies right at the cutoff. |
| Band pass | The centre of the band that passes. Sweep it for wah-like moves. | Boosts the frequencies right at the cutoff. |
| Notch | Where the notch scoops out its slice. Sweep it slowly for a hollow, phasey movement. | Boosts the frequencies right at the cutoff. |
| Comb | The pitch of the ring. | How long it rings. |
| Flange | The flanger delay, about 0.1 to 10 ms. | Flanger feedback: a stronger, metallic jet. |
| Karplus | The pitch of the plucked string. | How long the string rings. |
| Formant A–U | The throat size: down = bigger voice, up = smaller. | How sharp the vowel is. |
| Formant Morph and voices | The vowel, sweeping a, e, i, o, u from left to right. | How sharp the vowels are. |
| Phaser | Where the notches sit. | Feedback: deeper notches. |
| Diffusor | The size of the smear: down = longer, slower. | How thick the smear is. |
| Bode | The frequency shift: centre = none, up to 2000 Hz either way. | Feedback: endless rising or falling swirls. |
| Tilt | The pivot point. | The tilt, up to ±9 dB: below half darker, above half brighter, middle flat. |
| Low / High EQ | The shelf's corner. | Shelf gain, up to ±12 dB; middle flat. |
| Band EQ | The centre of the bell. | Bell gain, up to ±12 dB; middle flat. Drive sets how narrow the bell is. |
| Air | Where the lift starts, never below 4 kHz. | How much air, 0 to 15 dB. |
| Add Bass | How deep the added bass reaches. | A little peak for a punchier low end. |
| Reverb Filter, Reverb Dark | The low pass before the little room. | The peak plus the bloom: a longer, wetter tail. |
| Reverb Filter 2, Reverb Metal | The size of the comb reverb. | Decay and wet amount. |
| Ring Mod | The frequency of the ring-mod sine: low = tremolo-like, high = clangy metal. | From a clean sine ring to a harsher diode ring. |
| Bit-Crush | The sample rate: down = harsher; fully up = clean. | The bit depth, 4 to 16 bits. |
| Waveshaper | The tone after the shaper: down = smoother, up = full and bright. | From soft clipping into wavefolding. |
| Grain Mask | The grain rate, 2 to 200 per second, and the band's centre. | Focuses the band: a more pitched, ringing texture. |
| Samp-Hold | How often the wave is held: down = coarse steps. | Feeds the steps back for a metallic ring. |
| Radio | Moves the narrow radio band, about 150 Hz to 8 kHz. | How narrow the band is: up = a tighter, more nasal radio. |
On most types Drive pushes the sound into the filter for warmth and grit. On the EQ & Tone types it saturates after the EQ instead, and on Band EQ it sets how narrow the bell is. With the type set to None, the controls do nothing until you pick a type.
All 123 filter types#
Here is every type, in the order and the families of the filter browser: None plus 122 filters in eleven families.
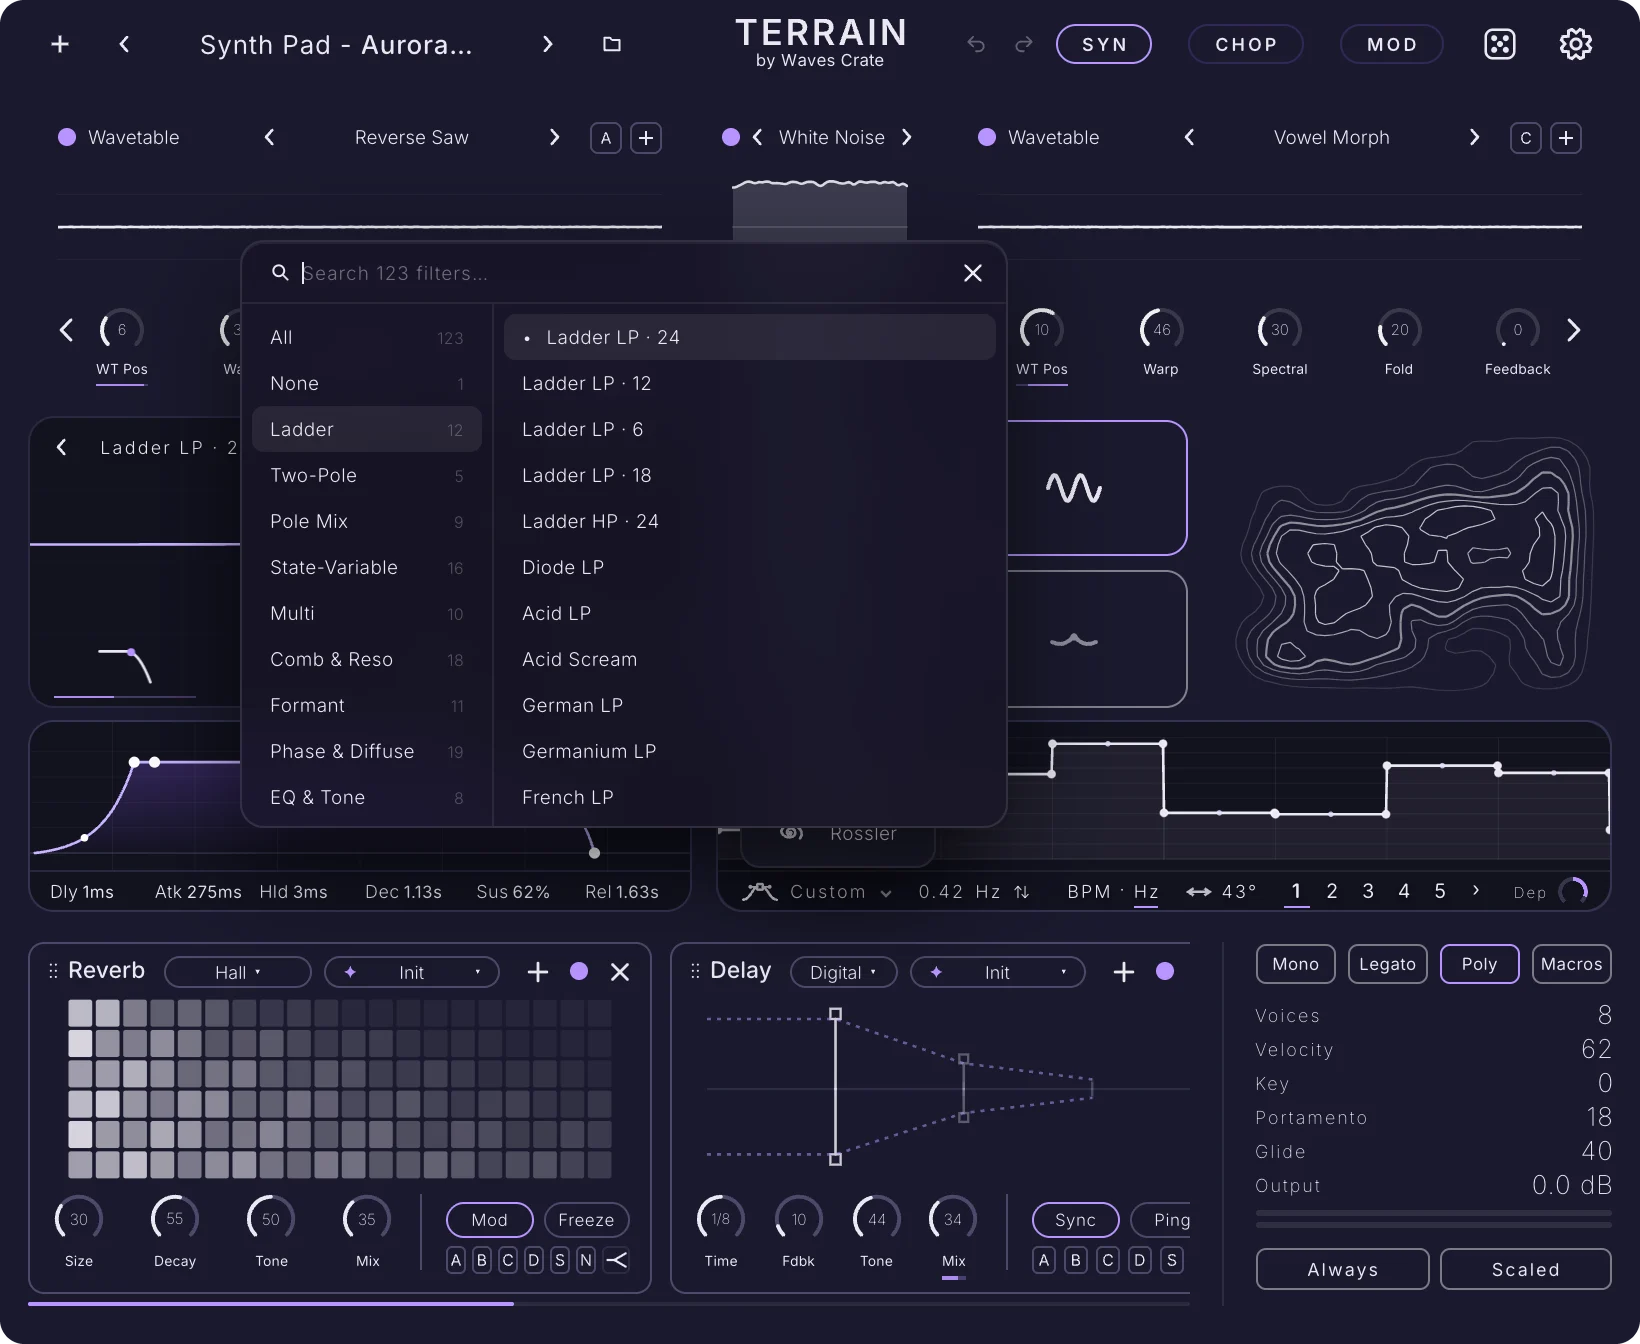
None (1)
| Type | What it does |
|---|---|
| None | No filter at all; the sound passes straight through. |
Ladder (12)
Warm, classic low pass and high pass filters with a rich, squelchy resonance.
| Type | What it does |
|---|---|
| Ladder LP · 24 | The classic warm low pass, a steep cut of the highs. Add Resonance for a juicy squelch. |
| Ladder LP · 12 | A gentler ladder low pass that keeps more top end. Smooth on pads, keys and chords. |
| Ladder LP · 6 | The softest ladder slope, a subtle darkening. Tames harsh highs without dulling. |
| Ladder LP · 18 | Between 12 and 24, a firm but smooth cut. A good all-round choice for basses. |
| Ladder HP · 24 | A high pass that removes the lows below the cutoff. Thins pads and clears room for the bass. |
| Diode LP | A buzzy, rubbery low pass with a gritty resonance. Great for squelchy acid and bass lines. |
| Acid LP | The squelchy bass-line filter. High Resonance plus Env gives the classic acid chirp on every note. |
| Acid Scream | The acid filter pushed into a screaming, overdriven resonance. Raise Drive for more bite. |
| German LP | A clean, polished ladder low pass with tamed resonance. Smooth on leads and pads. |
| Germanium LP | A fuzzy low pass with transistor grit; warmer and dirtier as you push Drive. |
| French LP | A low pass that reacts to how hard you feed it: louder input sounds brighter and edgier. |
| Raw LP | The brightest, most aggressive of the diode filters. Rude and loud, ideal for snarling basses. |
Two-Pole (5)
Smooth 12 dB filters with analogue grit, including the screaming Sallen-Key pair.
| Type | What it does |
|---|---|
| Two-Pole LP | A round, gentle low pass with analogue warmth. Musical on pads and strings. |
| Two-Pole BP | Keeps a band around the cutoff and trims lows and highs: a thin, nasal, telephone tone. |
| Two-Pole HP | A gentle high pass with analogue grit. Clears rumble smoothly. |
| Sallen-Key LP | A low pass with a clipped feedback loop; it screams as Resonance goes up. |
| Sallen-Key HP | A screaming high pass. High Resonance gives a sharp, nasal whistle. |
Pole Mix (9)
One ladder, mixed into many shapes: high pass, band pass, notch and phase.
| Type | What it does |
|---|---|
| POLE LP · 6 | A soft one-pole low pass. Gently rounds off the top end. |
| POLE HP · 6 | A soft high pass. Slightly thins the lows, very natural. |
| POLE HP · 12 | A medium high pass. Clears the lows with a resonant edge. |
| POLE HP · 18 | A steep high pass. Strongly removes the lows for thin, airy layers. |
| POLE BP · 6 | A wide, gentle band pass. Keeps the middle and softly trims both ends. |
| POLE BP · 12 | A band pass that cuts harder below than above: a focused, mid-heavy tone. |
| POLE BP · 24 | A narrow, steep band pass. Very focused and vocal; sweep it for wah moves. |
| POLE Notch | Removes a slice at the cutoff and keeps the rest. Sweep it for a hollow, phasey move. |
| POLE Phase | Shifts the timing (phase) of frequencies around the ladder peak. Subtle alone, phaser-like when swept. |
State-Variable (16)
Clean, precise filters of every shape, plus the vintage Gentle types and the gritty Wasp.
| Type | What it does |
|---|---|
| SVF LP | A clean low pass. Neutral and smooth, a safe first choice. |
| SVF LP · 24 | A clean low pass with a steeper cut. Darker and more focused than SVF LP. |
| SVF HP | A clean high pass. Use it to thin out a layer. |
| SVF HP · 24 | A clean, steep high pass. Strips the lows hard for airy, thin sounds. |
| SVF BP | A clean band pass. Sweep it for wah-like moves. |
| SVF BP · 24 | A narrower, steeper band pass: a tight, focused, nasal tone. |
| SVF Notch | Cuts a slim slice at the cutoff and keeps everything else. Sweep it for a gentle phasey sound. |
| SVF Notch · 24 | A deeper, wider notch: a stronger hollow scoop as you sweep. |
| SVF Peak | Boosts a band at the cutoff instead of cutting. Raise Resonance for a ringing, vocal peak. |
| Morph SVF | A vintage multimode filter, halfway between low pass and band pass. Hollow, smooth and classic. |
| Gentle LP | A soft, vintage low pass with a mild peak. Warm and forgiving on anything. |
| Gentle Notch | A soft vintage notch. Natural, even when swept. |
| Gentle HP | A soft, vintage high pass that never sounds harsh. |
| Gentle BP | A soft, wide vintage band pass: a warm, mid-focused tone. |
| Wasp | A gritty, buzzy filter that is dirty even with Drive at zero. Nasty and full of character. |
| Grit LP | A dirty low pass that turns aggressive toward the top of Drive. Raw, edgy basses. |
Multi (10)
Two filters at once: the first at the cutoff, the second two octaves above it.
| Type | What it does |
|---|---|
| Multi LP+HP | A low pass at the cutoff and a high pass two octaves up, side by side. |
| Multi LP+BP | A low pass at the cutoff and a band pass two octaves up. |
| Multi LP+Notch | A low pass at the cutoff and a notch two octaves up. |
| Multi HP+BP | A high pass at the cutoff and a band pass two octaves up. |
| Multi HP+Notch | A high pass at the cutoff and a notch two octaves up. |
| Multi BP+BP | A band pass at the cutoff and a second band pass two octaves up. |
| Multi BP+Notch | A band pass at the cutoff and a notch two octaves up. |
| Multi Peak+Peak | A peak at the cutoff and a second peak two octaves up. |
| Multi Notch+Notch | A notch at the cutoff and a second notch two octaves up. |
| Multi Peak+HP | A peak at the cutoff and a high pass two octaves up. |
Comb & Reso (18)
Tuned echoes that ring like strings, pipes and flangers. Cut sets the pitch.
| Type | What it does |
|---|---|
| Comb + | A tiny echo fed back on itself: a pitched metallic ring. Cut sets the pitch, Res the ring. |
| Comb - | The comb with flipped feedback: a hollow ring that sounds an octave lower. |
| Comb Raw + | A comb with nothing damping it: a bright, open pipe that rings for seconds. |
| Comb Raw - | The undamped comb with flipped feedback, for a hollower open ring. |
| Comb Bright + | A comb with a high pass inside: a thin, tinny, tin-can ring. |
| Comb Bright - | The tin-can comb with flipped feedback. |
| Comb Band + | A comb with a band pass inside: a tuned, vocal resonator. |
| Comb Band - | The vocal resonator with flipped feedback. |
| Flange + | The comb at flanger settings, mixed half and half with the dry. Sweep Cut for the jet sound. |
| Flange - | The flanger with flipped feedback, for a hollower jet. |
| Comb Wide | Two combs slightly detuned left and right: a wide, shimmering stereo ring. |
| Comb Octave | Two combs an octave apart: a richer, organ-like ring. |
| Comb Fifth | Two combs a fifth apart: a chord-like ring. Lovely on plucks and pads. |
| Comb Damp | A soft, damped comb with drive inside the loop: a warm ring that saturates. |
| Comb Shimmer | A comb blended with a shimmering echo: an airy, glassy resonance. |
| Karplus-Strong | Turns the sound into a plucked string tuned by Cut. Short bright notes in, plucks out. |
| Karplus Bright | The plucked string with more sparkle in its ring. |
| Karplus Mute | The plucked string muted: a darker, palm-muted pluck. |
Formant (11)
Vowel filters that make the sound talk, from bass to soprano voices.
| Type | What it does |
|---|---|
| Formant · A | Makes the sound say "ah"; Cut changes the throat size. Great on saws for vocal leads. |
| Formant · E | Makes the sound say "eh". |
| Formant · I | Makes the sound say "ee". |
| Formant · O | Makes the sound say "oh". |
| Formant · U | Makes the sound say "oo". |
| Formant Morph | A talking filter: Cut sweeps the vowels a, e, i, o, u. Put an LFO on Cut to make it speak. |
| Formant Wide | The talking vowel sweep with broader, softer vowels. |
| Formant Growl | The vowel sweep with sharper vowels and doubled drive: a growling voice. |
| Formant Soprano | The vowel sweep tuned to a high soprano voice instead of the default bass. |
| Formant Tenor | The vowel sweep tuned to a tenor voice, between the bass and the alto. |
| Formant Alto | The vowel sweep tuned to an alto voice, bright and clear. |
Phase & Diffuse (19)
Phasers, smearing diffusers and frequency shifters.
| Type | What it does |
|---|---|
| Phaser 4P | A sweeping phaser with 4 stages; Cut moves its notches, Res deepens them. |
| Phaser 6P | A sweeping phaser with 6 stages. |
| Phaser 8P | A sweeping phaser with 8 stages. |
| Phaser 12P | A sweeping phaser with 12 stages. |
| Phaser 16P | A sweeping phaser with 16 stages. |
| Phaser 4P N | The flipped 4-stage phaser: its notches sit where the normal one peaks. A hollower sweep. |
| Phaser 6P N | The flipped 6-stage phaser. |
| Phaser 8P N | The flipped 8-stage phaser. |
| Phaser 12P N | The flipped 12-stage phaser. |
| Phaser 16P N | The flipped 16-stage phaser. |
| Phaser 24P | So many notches it becomes a comb with a vowel-like colour. Sweep slowly. |
| Phaser 24P N | The flipped 24-stage phaser: a dense comb with the notches in between. |
| Phaser 32P | So many notches it becomes a comb with a vowel-like colour. Sweep slowly. |
| Phaser 32P N | The flipped 32-stage phaser: a dense comb with the notches in between. |
| Phaser 48P | So many notches it becomes a comb with a vowel-like colour. Sweep slowly. |
| Phaser 48P N | The flipped 48-stage phaser: a dense comb with the notches in between. |
| Diffusor | Smears the sound through a chain of echoes, softening attacks into a blur. Res = more smear. |
| Bode Shifter | Moves every frequency up or down by the same number of hertz, for clangy tones. Cut in the middle = no shift. |
| Bode Down | The frequency shifter turned the other way round: Cut shifts in the opposite direction. |
EQ & Tone (8)
Shelves, a bell, tilt and air: shaping the tone without a sweep.
| Type | What it does |
|---|---|
| Tilt | Tilts the tone around the cutoff; Res below half = darker, above half = brighter. |
| Low EQ | A shelf that lifts or lowers everything below the cutoff; Res sets how much, the middle is flat. |
| High EQ | A shelf that lifts or lowers everything above the cutoff; Res sets how much, the middle is flat. |
| Low EQ 6 | A gentle low shelf with no audible corner. |
| High EQ 6 | A gentle high shelf with no audible corner. |
| Band EQ | Lifts or dips a band around the cutoff; Res sets how much, Drive sets how narrow. |
| Air | A bright, airy lift above about 4 kHz; Res sets how much, up to 15 dB. |
| Add Bass | Folds a rounded low pass back under the sound for fuller lows. Cut sets how deep it reaches. |
Reverb (4)
Filters that bloom into a small room or a metallic plate.
| Type | What it does |
|---|---|
| Reverb Filter | A resonant low pass that blooms into a tiny room. Res = a longer, wetter bloom. |
| Reverb Filter 2 | A comb reverb with rippling teeth; Cut sets the size, Res the decay. |
| Reverb Dark | The reverb filter with a lower, softer bloom. Moody pads and distant tones. |
| Reverb Metal | A ringing, metallic comb reverb that clangs like a metal plate. |
Dirty & Weird (10)
Ring mods, crushers, waveshapers, screamers and a radio.
| Type | What it does |
|---|---|
| Ring Mod | Multiplies the sound by a sine at the Cut frequency, for bell-like, robotic tones. |
| Ring Mod X2 | Two ring modulators, the second at 1.5× the Cut frequency. Even more clangorous bells. |
| Bit-Crush | Lo-fi digital grit; Cut sets the sample rate, Res the bits (low = crunchier). |
| Waveshaper | Bends the wave for new harmonics; Drive pushes it, Res folds it, Cut tames the top. |
| Grain Mask | Chops the sound into rhythmic grains through a resonant band. Cut sets the grain rate. |
| Samp-Hold | Freezes the wave in steps at the Cut rate: a gritty, stair-stepped, lo-fi sound. |
| Samp-Hold − | Keeps only what the sample-and-hold removes: a fizzy, thin digital grit. |
| Scream LP | A low pass with a feedback loop that screams; Drive sets how hard the loop clips. |
| Scream BP | A screaming feedback band pass, nasal and wild. Ride Res and Drive together. |
| Radio | Squeezes the sound into a narrow, crushed AM-radio band. Cut moves the band. |
1 + 12 + 5 + 9 + 16 + 10 + 18 + 11 + 19 + 8 + 4 + 10 = 123 types.
Chapter 7
Envelopes
An envelope is a shape that plays once per note: how it rises, holds, falls and fades. Env 1 shapes the volume of every note; the others move whatever you drag them onto. Draw the shape with your hands, bend every curve, and loop it when you want it to cycle.
Five envelopes, one panel#
Terrain has five envelopes, Env 1 to Env 5, edited in one panel on the SYN page. The panel shows one envelope at a time; the chip in its corner says which, and opens the envelope menu.
- Env 1 is the amp envelope. It always shapes the volume of every note. (In Terrain FX, where there are no notes, Env 1 is free like the others.)
- Env 2 is the filter envelope. Drag a filter's Env control (see Filters) while no envelope feeds that filter, and Env 2 is routed to it for you, as long as Env 2 is not already routed somewhere else.
- Env 3, Env 4 and Env 5 are free. Like Env 2, they move nothing until you route them.
Routing an envelope is a drag: drag the envelope's chip onto any knob in Terrain and that knob now follows the envelope on every note. The amount and direction of each connection are set per destination — see Modulation. Need more than five? New Envelope in the envelope menu adds more.
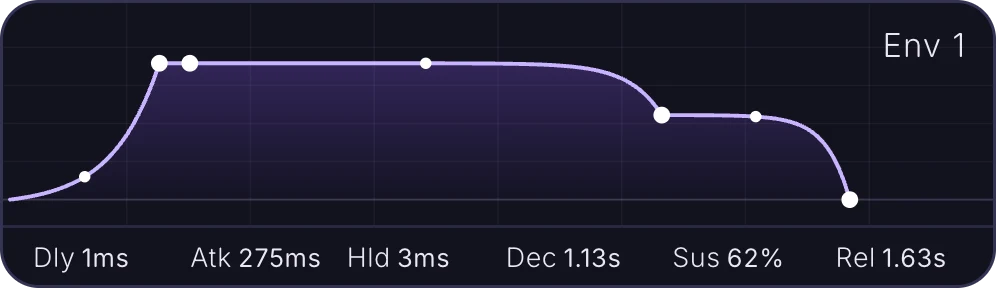
DAHDSR: the six stages#
Every envelope has six stages: Delay, Attack, Hold, Decay, Sustain and Release. A note waits through the delay, rises over the attack, stays at full for the hold, falls over the decay to the sustain level, stays there while you hold the key, and fades over the release when you let go. Letting go during any stage goes straight to release from wherever the envelope is, and a new note restarts from the current level rather than from zero, so nothing clicks.
| Stage | What it does |
|---|---|
| Delay (Dly) | Waits before the envelope starts, 0 to 10 s. For late swells and echoes of a note. |
| Attack (Atk) | Time to rise to full, 1 ms to 10 s. Short = punchy, long = a swell. |
| Hold (Hld) | Time the envelope stays at full before decaying, 0 to 10 s. |
| Decay (Dec) | Time to fall to the sustain level, up to 10 s. Short = plucky. |
| Sustain (Sus) | The level held while the key is down, 0 to 100%. On Env 1, 0 makes every note fade out like a pluck. |
| Release (Rel) | How long the envelope takes to fade after you let go, 1 ms to 10 s. Long = a gentle tail. |
A fresh or reset envelope starts at Delay 0, Attack 5 ms, Hold 0, Decay 200 ms, Sustain 70% and Release 300 ms.
Shaping an envelope#
On the graph
The graph is the editor. Drag the large points to set the times and the sustain level; drag the small dots between them to bend the curves. The Delay and Hold points only appear while those stages are on: switch them on from the right-click menu or type a value into Dly or Hld. A glowing dot follows each playing note along the shape, so you can see where the sound is.
| Handle | What it does |
|---|---|
| Delay point | Drag right to wait before the envelope starts. |
| Attack point | Drag right for a slower fade-in, left for a snappy start. |
| Hold point | Drag right to stay at full level longer before the decay begins. |
| Sustain point | Up and down = the level held while the key is down; left and right = the decay time. |
| Release point | Drag right for a longer tail after you let go, left to stop sooner. |
| Attack curve | Bends the rise, from a slow swell to a fast snap. |
| Decay curve | Bends the fall to sustain, from a quick drop to a slow slope. |
| Release curve | Bends the tail, from a quick fade to a long, gentle one. |
The readouts
Under the graph, Dly, Atk, Hld, Dec, Sus and Rel show the current values. Drag one up or down to nudge it; double-click to type an exact value and press Enter. Each readout is also a modulation target: drop an LFO or a macro on Atk, say, and the attack time itself moves.
The graph's right-click menu
| Row | What it does |
|---|---|
| Loop | Turns the envelope into a cycling modulator: when it reaches the end of the decay, it starts the attack again instead of holding the sustain, for as long as the key is down. The release still plays when you let go. |
| Delay stage | Switches the delay stage on (at 100 ms) or off. |
| Hold stage | Switches the hold stage on (at 100 ms) or off. |
| Reset shape | Puts this envelope's times, levels and curves back to the default and turns Loop off. |
The envelope chip and menu#
The chip in the corner of the panel reads Env 1, Env 2 and so on. It does two jobs.
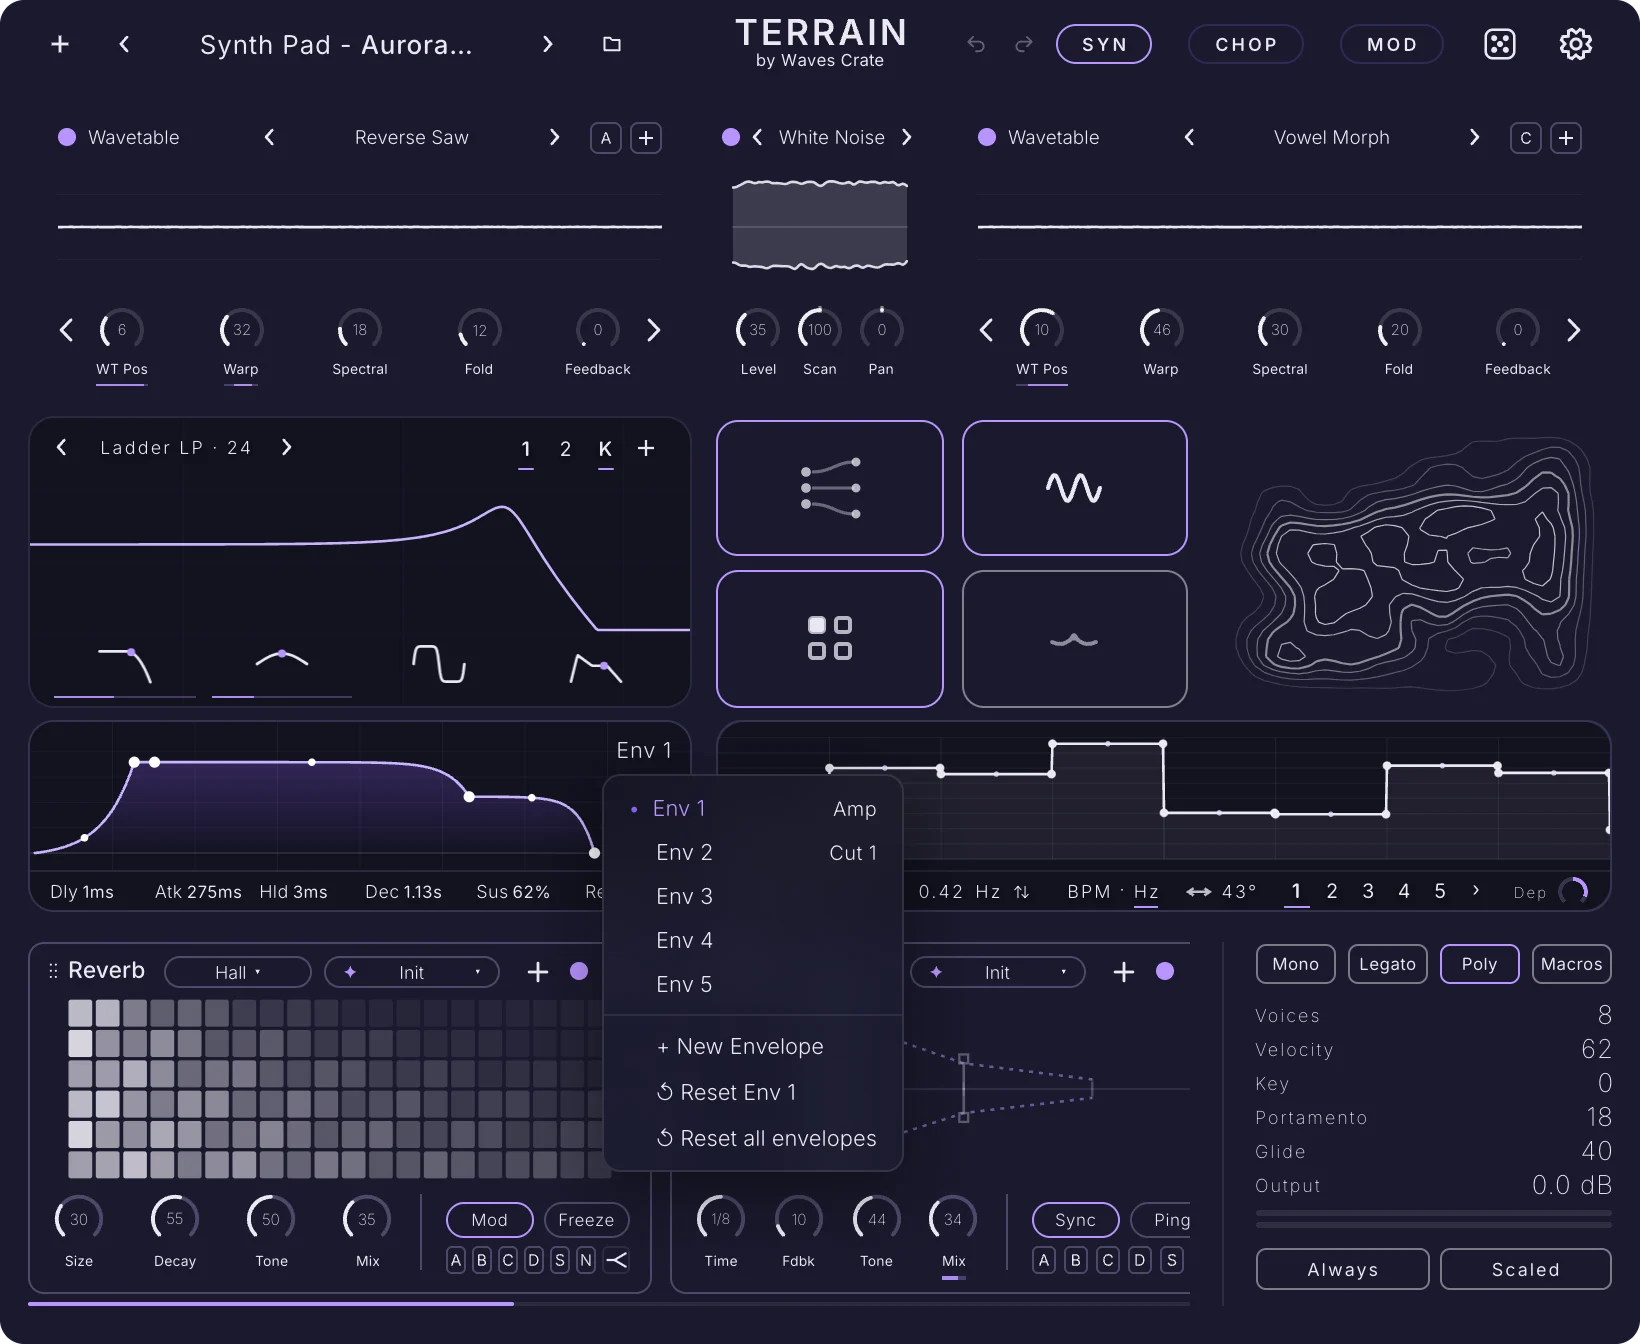
- Drag it onto any knob, slider or pill to route that envelope there.
- Click it to open the envelope menu.
| Row | What it does |
|---|---|
| Env 1 … Env 5 | Shows and edits that envelope. Each row carries a badge with what it moves: Env 1 reads Amp; a routed envelope shows its first destination (for example Level A) and how many more it drives. You can also drag a row straight onto a knob. |
| Env 6 and up | Envelopes you added with New Envelope, listed the same way. |
| − Remove Env N | Removes the last added envelope. |
| + New Envelope | Adds another envelope, up to 32 in all, and opens it. Drag its chip onto a knob to use it. |
| ↺ Reset Env N | Puts the envelope you are editing back to its default shape. On Env 2 to Env 5 it also clears the envelope's route. |
| ↺ Reset all envelopes | Puts every envelope back to its default shape and clears the routes of Env 2 to Env 5. |
Envelopes on the Patcher#
On the Patcher, the envelope panel appears as one node with the same graph, readouts and chip. Use the chip to pick the envelope you want; a cable from the node routes the envelope it is showing. See The Patcher. In Terrain FX, where there are no notes, a trigger fires the envelopes instead: choose Transient, MIDI, Beat or Bar under Trigger at the bottom of the graph's right-click menu.
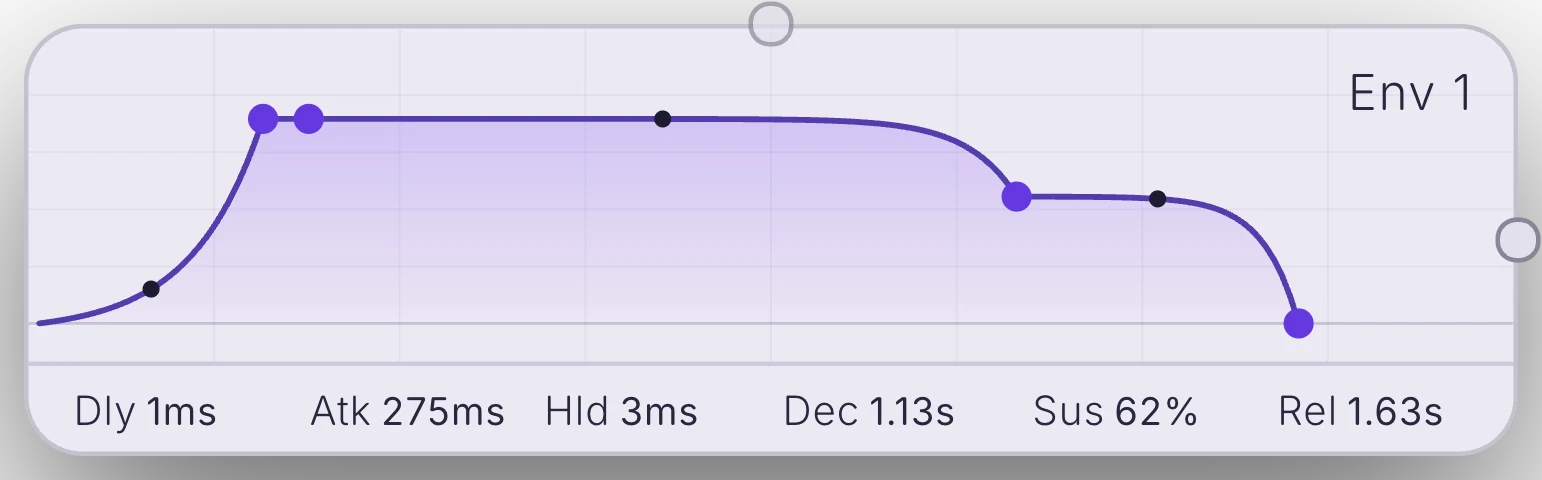
Chapter 8
LFOs
Ten LFOs — slow, repeating shapes that move knobs for you. Pick a classic wave, draw your own point by point, trace a free path, or let a chaotic attractor wander. Lock them to the song or let them run free, then drag a number onto any knob and watch it come alive.
Ten LFOs#
An LFO (low-frequency oscillator) is a wave too slow to hear that moves a control back and forth: vibrato on pitch, tremolo on level, a sweep on a filter, a rhythm on anything. Terrain has ten, LFO 1 to LFO 10. They live in the LFO panel on the SYN page, in a larger pop-out card, and in the LFO node on the Patcher. Every one of them has its own shape, rate, phase, depth and behaviour.
To use an LFO, drag its number onto a knob. That is the whole routing gesture; the amount and direction of each connection are set per destination (see Modulation), and the MOD page lists every route in one place.
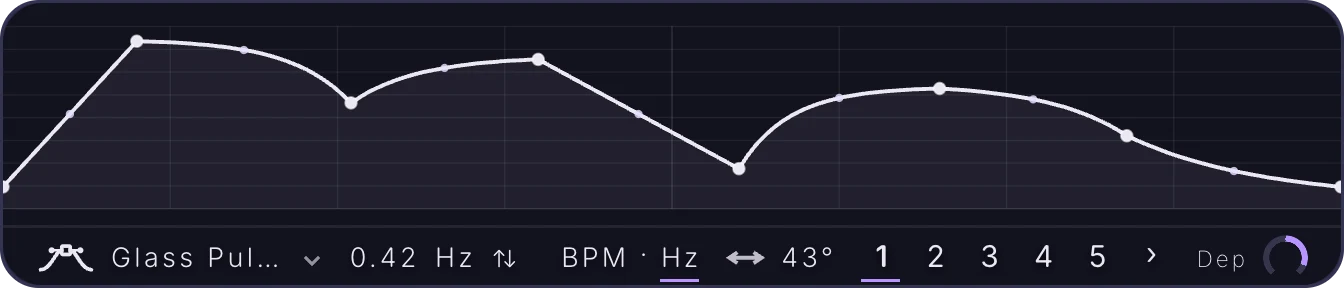
The LFO panel#
| Control | What it does |
|---|---|
| Tabs 1–5 · 6–10 | Click a number to edit that LFO; selecting it also lights up the knobs it is routed to. › shows LFOs 6 to 10, ‹ returns to 1 to 5. Drag a number onto any knob to route that LFO there. |
| Shape chip | The icon and name of the current shape. Click to choose another (see Shapes). Once you edit the points, the chip reads the name the shape has earned, or Custom. |
| Rate | How fast the LFO moves. Drag up or down. In Hz it runs from 0.01 to 40 Hz (cycles a second; default 2 Hz). In BPM it shows a note length — click it for the list. |
| BPM · Hz | Click BPM to lock the LFO to the song tempo in note lengths, or Hz to let it run free. Right-click for Global BPM or Global Hz (see below). |
| Phase | Where in its cycle the LFO starts, 0° to 360° (one full lap). Drag left or right to shift the movement in time. |
| Dep | How strongly this LFO moves all of its knobs at once. Drag up or down; 0 stills it without removing any routes. |
Note lengths
In BPM mode the rate is a note length, from very slow to very fast: 32 bar, 16 bar, 8 bar, 4 bar, 2 bar, 1 bar, 1/2, 1/4, 1/8, 1/16, 1/32, 1/64, 1/128 and 1/256, then the dotted 1/4. and 1/8. and the triplets 1/4T, 1/8T and 1/16T. The fastest values move at audio-like speeds — a buzz rather than a wobble.
Global clocks
Right-click the BPM · Hz switch for one row: Global BPM when you right-click the word BPM, Global Hz when you right-click Hz. Turn it on and every LFO follows one shared clock — their own rates are set aside — so all ten move at the same speed and you can change the tempo of the whole patch's movement from one place. The same row, marked with a bullet, turns the global clock off.
Shapes#
Click the shape chip for the shape menu. The stock shapes are starting points: touch a point and the shape becomes your own, editable drawing.
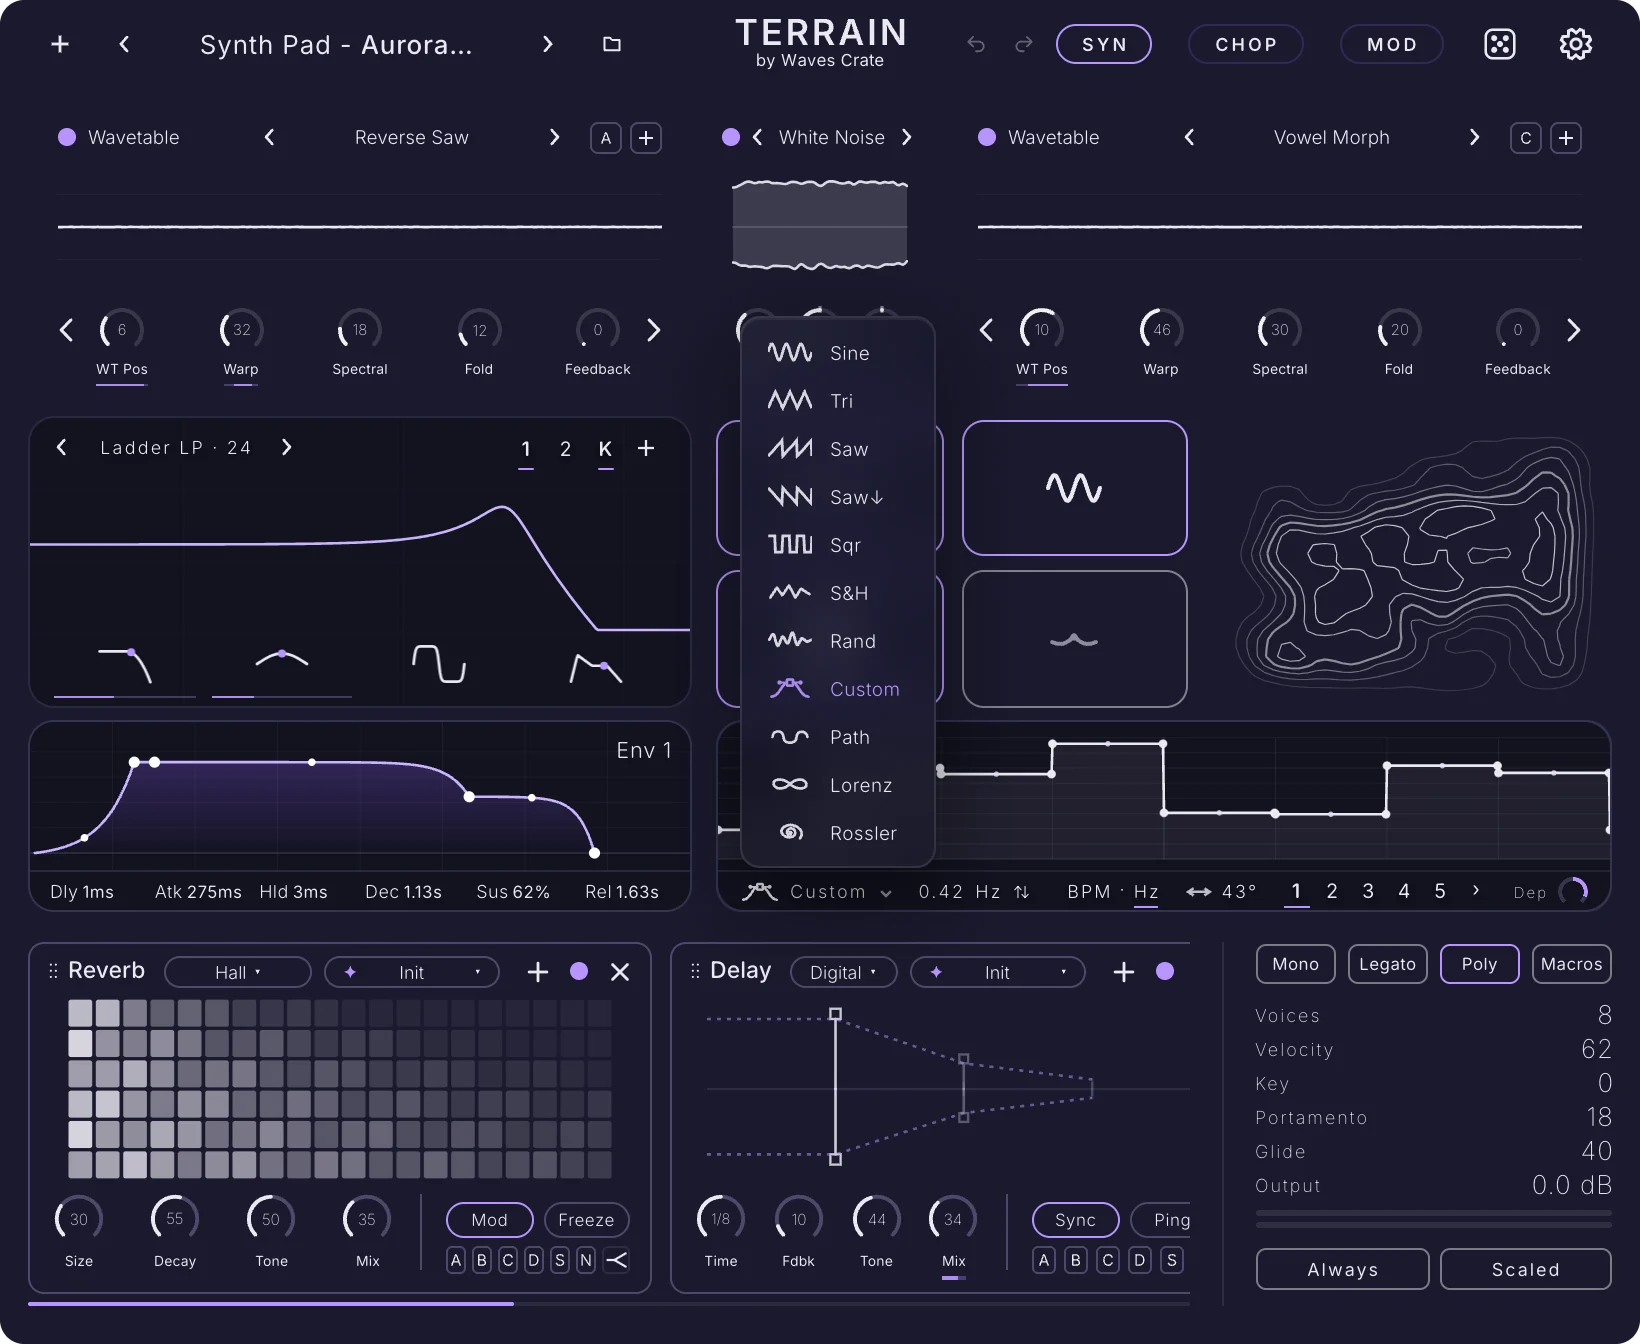
| Shape | What it does |
|---|---|
| Sine | A smooth, even rise and fall. The gentle wobble for vibrato and slow sweeps. |
| Tri | Triangle: straight ramps up and down. A slightly sharper wobble than the sine. |
| Saw | Rises steadily, then drops at once. Good for rhythmic swells and rising sweeps. |
| Saw↓ | Saw down: drops at once, then falls steadily. Great for pumping and plucky filter moves. |
| Sqr | Square: flips between high and low. For trills, gates and on-off chops. |
| S&H | Sample and hold: jumps to a new random level each cycle. The classic random, robotic step. |
| Rand | Random: wanders smoothly between random levels. Natural, unpredictable movement. |
| Your shape | Once you have edited the points, your drawing appears in the list under the name it has earned (for example Gate 1/4) or Custom. |
| Path | A free shape you draw in two dimensions; the LFO follows the line you draw, in the order you drew it. |
| Lorenz | A chaotic motion that never quite repeats: organic, restless drift for textures. |
| Rossler | A swirling chaotic motion, smoother than Lorenz: living, evolving modulation. |
The chaotic and random shapes (S&H, Rand, Lorenz, Rossler) draw their live trail in the editor while notes play. Path draws your line with a dot orbiting along it.
Drawing your own shapes#
The LFO editor is a drawing surface. A shape is a line through points; each segment between two points can be straight or curved.
| Gesture | What it does |
|---|---|
| Drag a point | Reshapes the wave. The first and last points stay at the edges. |
| Double-click empty space | Adds a point. |
| Double-click a point | Deletes it. |
| Drag a curve dot | The small dot between two points bends that segment up or down. |
| Double-click a curve dot | Straightens the segment. |
| Right-click a point | Modulate X › and Modulate Y › let another source move that point in time or level (the two end points only move in level), with an amount slider for each; Delete point removes it. A thin bar on a point shows how far it is being moved. |
| Right-click a curve dot | Straighten curve. |
| Drag empty space | Draws a box that selects several points; drag one of them to move the group. Delete or Backspace removes the selection. |
| Shift-drag | Draws steps at the grid size. |
The editor's right-click menu
| Row | What it does |
|---|---|
| Level · Time | Two sliders set the grid, 2 to 32 divisions each: Level divides the height, Time the width. Double-click resets to 8. |
| Snap | Points snap to the grid while you draw. |
| Flip vertical | Mirrors the shape in level (upside down). |
| Flip horizontal | Mirrors the shape in time (backwards). |
| Copy shape · Paste shape | Copies the shape — only the points, never rate or depth — so you can paste it onto another LFO or onto a Shaper lane (see Flow). Paste stays dim until something is copied. |
| Random flat · Random curve · Random both | Rolls a new random shape: flat steps, curves, or both. The menu stays open, so keep clicking until you like one. |
| Shape | Brushes for drawing: Point · edit (the normal editing), Straight line, Ramp up, Ramp down, Square, Triangle and Sine. Pick one and draw across the grid. |
| Wavetable → LFO | Oscillator A to D: bakes that oscillator's current wave into this LFO's shape. The oscillator must be on a wavetable. |
| Extend | Opens the LFO card (see below). |
| Set loopback point here · Remove loopback point | Only in Env mode: plants the point the shape loops back to while the key is held (see Loop below). |
With the Path shape, the right-click menu is shorter: New loop (a fresh closed path), Clear, Copy shape and Paste shape. Drag in the editor to draw, and the LFO orbits your drawing. This menu has no Extend row; switch to another shape to open the card from here.
The LFO card#
Right-click the LFO editor and choose Extend to open the LFO card: a larger editor with every behaviour switch, six knobs, a library of ready-made shapes and twelve pattern memories. Move it by its title bar, resize it from the corner, or pop it out into its own window — handy on a second screen. The card keeps working when it is closed.
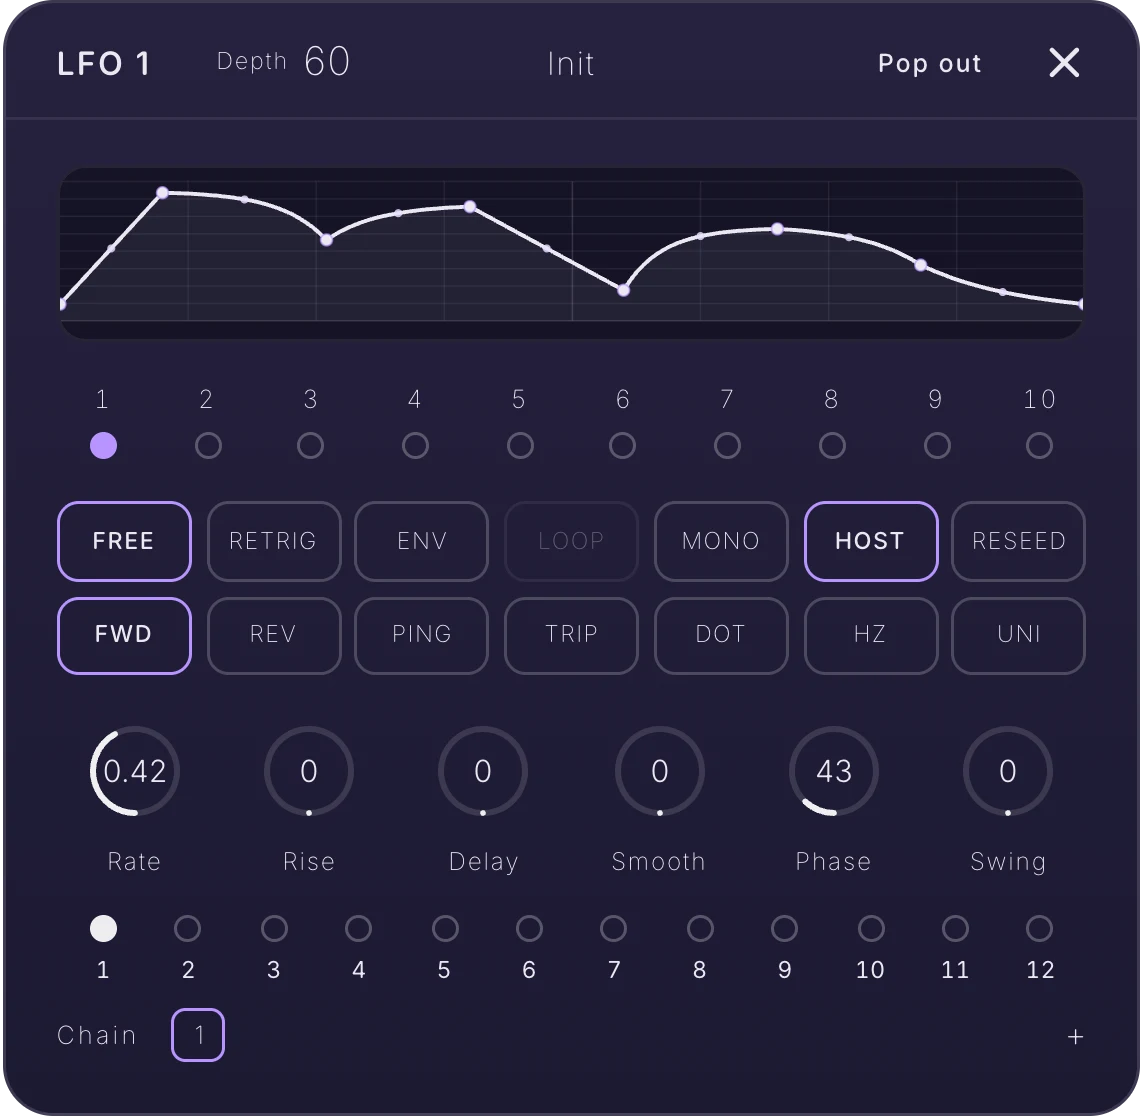
Header
| Control | What it does |
|---|---|
| Depth | The master amount of this LFO for all its routes, −100% to +100%. Drag left or right; double-click for 100. |
| Presets | Pick a ready-made shape or save your own. The factory library holds 70 shapes in five groups: Basic (Sine, Triangle, Saw up, Saw down, Square, pulses, half sine, exponential rises and falls), Rhythmic (gates at 1/4, 1/8 and 1/16, trance gates, offbeats, polyrhythms, clave), Breakbeat (chopped break patterns, shuffles, rolls and fills), IDM (bitcrush stairs, glitch scatter, tape stop, VHS warble and more) and Sidechain (pumps at 1/4, 1/2 and 1/8, soft ducks, hard slams, triplet and reverse pumps). |
| Pop out · Dock | Moves the card into its own floating window, outside the plug-in; Dock puts it back. |
| ✕ | Closes the card. Its settings stay and keep playing. |
Behaviour buttons
| Button | What it does |
|---|---|
| Free | The LFO runs on its own clock and never restarts. Notes join it wherever it is. |
| Retrig | The LFO restarts from the top on every note, so each note moves the same way. |
| Env | Plays the shape once per note and stops, like an envelope you can draw. |
| Loop | With Env: plays the start once, then keeps cycling from the loopback point while the key is held. Clicking Loop plants a loopback point at the middle; move it with a right-click on the graph › Set loopback point here. Outside Env mode the button is dimmed. |
| Mono | One shared LFO for every note, so chords move together instead of each note on its own. |
| Host | On by default. While your music app plays, a tempo-locked LFO in Free mode locks its phase to the song's bar position, so it lands the same way on every playback. With the transport stopped it keeps running at its tempo rate. |
| Reseed | Chaos and random shapes start fresh on every note, so each note gets new movement. |
| Fwd | Plays the shape left to right, the normal way. |
| Rev | Plays the shape backwards, right to left. |
| Ping | Bounces end to end, forward then backward. |
| Trip | Synced rates in triplet time: three in the space of two. |
| Dot | Synced rates one and a half times longer, for dotted, galloping rhythms. |
| BPM · Hz | Reads BPM or Hz for the current mode: click to switch between tempo-locked note lengths and free speed in hertz. Right-click it for the global clock (it then reads with a G· in front). |
| Uni | One-sided: the LFO only pushes up from the knob's setting. Off = it swings both up and down. |
Knobs
| Control | What it does |
|---|---|
| Rate | How fast the LFO moves, in hertz or note lengths (the same control as the panel's Rate). Double-click resets. |
| Rise | Fades the LFO in after each note starts, 0 to 2 s. Up = a slower fade, for vibrato that blooms. |
| Delay | Waits before the LFO starts after each note, 0 to 2 s. Pair it with Rise for late, natural vibrato. |
| Smooth | Glides the LFO output to round off hard edges, 0 to 100%. Up = softer steps and squares. |
| Phase | Where in its cycle the LFO starts, 0° to 360°. |
| Swing | Pushes every other beat late, 0 to 100%, for a shuffled, groovy movement. |
Pattern slots and Chain
The row of twelve dots holds twelve pattern memories, each a complete LFO setup: shape and behaviour. Click a slot to switch to it; whatever you edit is saved into the current slot. Underneath, Chain plays patterns one after another, moving to the next step each time the LFO completes a cycle. + adds the current pattern to the end, up to eight steps; click a step and type 1 to 12 (0 removes it), drag it up and down, or double-click it to remove it.
Routing an LFO#
Drag an LFO's number from the panel's tabs and drop it on any knob, slider or pill in Terrain. The knob shows an accent underline while it is modulated, and selecting an LFO lights the knobs it drives. Hover a modulated knob for its list of routes; right-click it for the control menu. Modulation covers depth, direction and the MOD page.
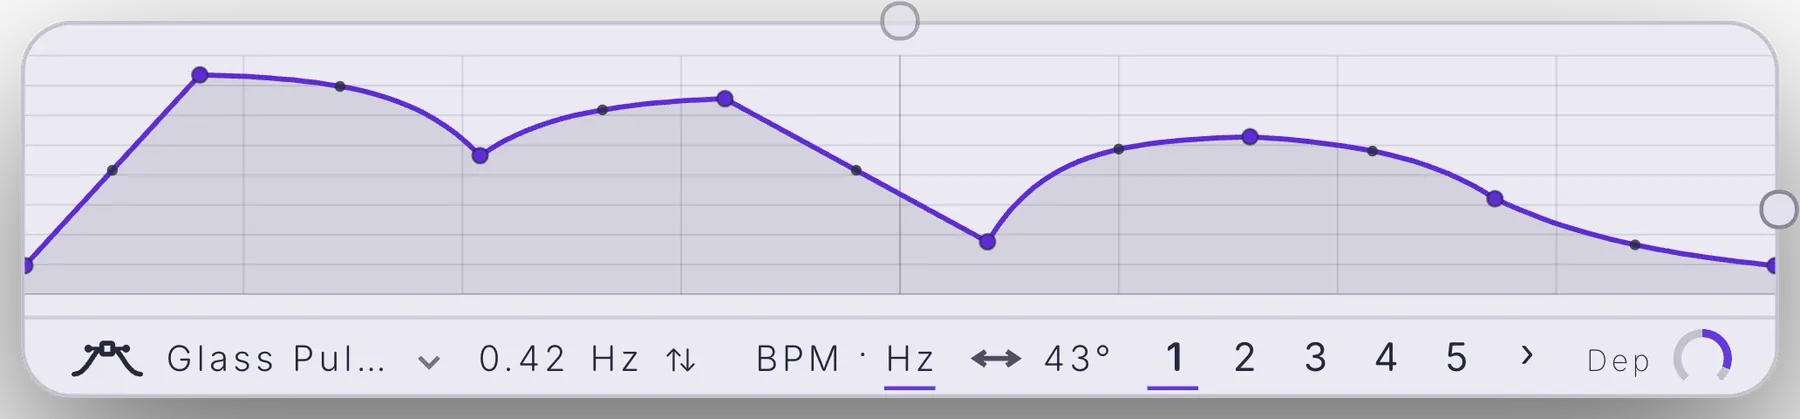
An LFO's shape can also bend an oscillator directly at audio rate: choose LFO 1 to LFO 10 as the source of a blend slot (see Blend modes).
Chapter 9
Flow
Flow is where Terrain starts to move on its own. Four cards — Shaper, Arp, Glitch and Robin — draw rhythm into the volume, turn chords into runs, chop the sound into stutters and pass your notes round the oscillators. Stack them, chain their patterns and let the groove write itself.
The Flow box#
The Flow box sits in the middle of the SYN page, under the oscillators. It holds four tiles, one per flow card, and the Randomizer map beside them. Each tile has a small animated emblem so you can tell at a glance which cards are working.
Adding cards to the chain
Click a dark tile to add that card to the flow chain; the tile lights up. Click a lit tile to take the card out again. The order you click them in is the order the sound travels: the Shaper and the Glitch process the audio one after the other in that order, while the Arp and Robin work on the notes themselves, before any sound is made, wherever they sit in the chain.
The moment you add a card, its Mix jumps to 100 so you hear it straight away. A freshly added Shaper also switches on its Volume lane if no lane of that card is lit yet, so the first thing you hear is the gate it was drawn with. A preset you load always plays exactly as it was saved.
Opening a card
Right-click any of the four tiles to open its card. The card is where every setting of that flow mode lives; the tile is only the on/off switch and the picture. A card keeps playing whether it is open or closed.
| Gesture | What it does |
|---|---|
| Click a dark tile | Adds the card to the end of the flow chain and sets its Mix to 100. |
| Click a lit tile | Removes the card from the chain. Its settings stay, ready for next time. |
| Right-click a tile | Opens that card (Shaper, Arp, Glitch or Robin). |
The Randomizer map#
The contour map to the right of the tiles is the Randomizer. It is a one-click variation machine: every click re-rolls the settings of the modules it is cabled to, and only those. You make those connections on the Patcher, by dragging from the Randomizer's output to the small dot on top of any module (an oscillator, the filter, an envelope, an LFO, a rack effect, a flow card or the tape machine). Once it is cabled, the map works from any page.
If nothing is cabled, a click does nothing at all and a short message tells you to connect it first. Nothing outside the cabled modules is ever touched.
Reach
Right-click the map for the Randomizer menu. The first line lists what it is cabled to right now (or reads Not connected); below it you pick how far a roll may go. The reach is saved with the patch.
| Reach | What a roll does |
|---|---|
| Light | Nudges its modules a little from where they are. Safe, subtle variations. |
| Medium | Changes its modules noticeably but keeps the sound recognisable. This is where a new patch starts. |
| Heavy | Moves its modules far from where they are. Big, surprising changes. |
| Wild | Can set its modules anywhere in their range. Anything can happen. |
| Crazy | The furthest reach: every roll lands somewhere new and extreme. For happy accidents. |
The Randomizer is separate from the dice in the header, which builds a whole new sound — see Dice.
What every card shares#
The four flow cards are built the same way: a header with the name, Mix, presets and window buttons; a picture of what the card is doing; three tabs of controls; and at the bottom twelve pattern slots with a chain that plays them in order. Learn it once and every card feels familiar.
The header
| Control | What it does |
|---|---|
| Title bar | Drag the bar to move the card anywhere on the screen. |
| Mix | Blends the card against the dry, untouched sound; 100 = all card. Drag sideways; double-click for 100. On Robin, Mix sets how much Robin moves the notes round the oscillators. On the Arp, Shaper and Glitch, Mix is also a modulation destination, so you can play a card in and out. |
| Presets | Click the name for the card's preset menu: the factory presets, your own presets, and saving. Loading a preset starts from the card's defaults and lays the preset over them, so nothing carries over from before; it never changes Mix. To save, pick save, type a name and press Enter; if the name already exists the row asks you to confirm the overwrite with one more click. Presets you saved can be deleted from the same menu. |
| Pop out / Dock | Pop out moves the card into its own floating window outside the plug-in, handy on a second screen. In that window the button reads Dock, which puts the card back inside Terrain where it was. |
| Close (×) | Hides the card. Its settings stay and it keeps playing; right-click its tile to bring it back. |
| Resize corner | Drag the corner to scale the card up or down; double-click it for the normal size. |
Pattern slots and the chain
Under the tabs sit twelve numbered dots. Each is a complete memory of the card — every lane, every knob. Click a slot to switch to it: whatever you were editing is stored in the slot you left, and the card loads the one you clicked. Edits always land in the current slot.
The Chain row below is a playlist of slots. It starts with one step (the current slot). Press + at the right to add the current slot to the end, up to eight steps. When the chain holds more than one step, the card plays them one after another, moving on each time the pattern comes round, and starts again from the first step when you play after a silence.
| Gesture | What it does |
|---|---|
| Click a slot dot (1–12) | Saves the card into the current slot and switches to the one you clicked. |
| + (Chain) | Appends the current slot to the chain (eight steps at most). |
| Click a chain step | Type a slot number from 1 to 12 and press Enter; type 0 (or clear it) to remove that step. Esc cancels. |
| Drag a chain step up or down | Steps through slot numbers 1 to 12. |
| Double-click a chain step | Removes it (the last remaining step always stays). |
A preset saves the slots and the chain too, so a card preset can carry a whole arrangement.
Global: Free or Sync
The Shaper's Clock tab and the Glitch's Motion tab both carry a Global switch with two settings. Sync follows your music app's song position, so everything lines up with the bar. Free runs on Terrain's own clock and plays even when the transport is stopped — perfect for jamming in the standalone app. A fresh Shaper lane and a fresh Glitch both start on Free, so they move the moment you play. Global sets every Shaper lane and every Glitch at once; each lane or card can still be set on its own afterwards, and the Shaper's switch reads Mixed when they disagree.
Shaper#
The Shaper is a drawn, tempo-locked modulator wired straight into eight effect lanes. Draw a shape on the screen and it repeats every cycle — a 1/4 note, a bar, eight bars — pushing the lane's effect up and down with it. Volume gives you gates and sidechain pumps, Time gives you half-time, tape stops and rewinds, Filter gives you rhythmic sweeps, and so on. Every lit lane runs at the same time, each with its own shape, its own rate and its own settings: build your own groove machine.
The screen and drawing
The screen shows the shape of the lane you are looking at. Left to right is one cycle; bottom to top is how far the lane's effect is pushed. The two end points are pinned to the edges. A purple head travels across as it plays.
| Gesture | What it does |
|---|---|
| Drag a point | Moves it. Drag a box around several points to select them and move them together. |
| Drag a curve dot | The small dot between two points bends the line between them, up or down. Double-click it to make the line straight again. |
| Double-click empty space | Adds a point. |
| Double-click a point | Deletes it. |
| Right-click the screen | Opens the shape menu (below). |
Brush
The Brush chip at the bottom left of the screen sets what a click or a drag draws. Point is the editing brush (drag points and curve dots); the others stamp shapes into the grid cell you drag across: Line, Ramp up, Ramp down, Square, Triangle and Sine, and Free draw paints freehand as you move.
Shape library
The Shape chip in the middle of the screen opens a library of ready-made shapes for this lane. Pick one and it replaces the lane's points; it stays fully editable.
| Group | Shapes |
|---|---|
| Basic | Sine, Triangle, Saw, Saw down, Square, Flat. |
| Gates | Gate 1/8, Gate 1/16, Gate 1/32, Trance 1, Trance 2, Trance 3, Offbeat. |
| Curves | Exp up, Exp down, Swell, Pluck, Sidechain (ducks the sound on every beat, as if a kick drum pushed it down), Bounce, Pump 1/4, Breath. |
| Steps | Stairs up, Stairs down, 4 steps, Random steps, Random curve, Random gate (the three Random shapes roll a new pattern every time you pick them). |
The Time lane has its own library, because its shapes describe playback speed rather than level:
| Group | Shapes |
|---|---|
| Basic | Unity (normal speed: the lane does nothing yet), Half time (half speed, an octave down — try it on drums for a heavy drop), Reverse (plays the cycle backwards). |
| Stutter | Stutter 1/8, Stutter 1/16, Stutter 1/32, Stutter build. |
| Tape | Tape stop (slows to a halt like pulling a plug), Tape start (starts stopped and winds up to normal), Scratch (back and forth like a turntable), Rewind (spins backwards), Half + back (half speed forward, then half speed back). |
The shape menu
Right-click the screen for these tools (they act on the lane you are looking at):
| Item | What it does |
|---|---|
| Grid | A slider for the drawing grid of this lane. |
| Snap | Points snap to the grid lines while you draw. |
| Flip vertical / Flip horizontal | Mirrors the shape upside down, or back to front in time. |
| Copy shape / Paste shape | Copies the lane's shape to a clipboard shared with the LFO editor, so you can move shapes between lanes, cards and LFOs. Paste is dimmed until something is copied. |
| Random flat / Random curve / Random both | Rolls a random stepped shape, a random curvy one, or a mix. The menu stays open, so keep clicking until one grooves. |
| Wavetable → Shape | Oscillator A, B, C or D: bakes that oscillator's current wave into the lane's shape. |
| Remove selected / Straighten selected | With points selected: deletes them, or flattens their curves. |
| Clear | Resets the lane to a flat line (Unity on the Time lane). |
Lane type
Lanes that drive a whole engine show a third chip at the right of the screen, the lane type: the flavour of effect this lane pushes. Click it to choose.
| Lane | Types |
|---|---|
| Filt | Every filter type in Terrain, sorted by family (see Filters). |
| Drive | The 23 distortion types: Tube, Tape, Transformer, Stomp Box, Overdrive, Soft Clip, Hard Clip, Zero-Square, Slew Clip, Diode 1, Diode 2, Asym, Rectify, Linear Fold, Sine Fold, West Coast, Shaper, Shaper Asym, Harmonics, Table, Downsample, Bitcrush, Overflow. |
| Phase | Phaser, Flanger, and the phase-family filter types. |
| Crush | Bits + Rate, Bits, Rate, Bit-Crush, Samp-Hold, Samp-Hold -, Radio, Downsample, Bitcrush, Overflow. |
| Reverb | Room, Plate, Hall, Shimmer. |
| Delay | Digital, Tape, BBD, Diffuse. |
| Chorus | Vintage, June, Pedal, Trio, Ensemble, Micro, Wow, Dark. |
| Widen | Throng, Twin, Steady, Twofold, Blur, Bands. |
| Tape | Studio, Cassette, Reel, Porta, Wire. |
| Grain | Cloud, Rise, Swarm, Suspend, Scatter, Rewind, Stretch, Pulverize. |
| Bode | Shift, Barberpole, Echobode, Detune, Ring, Spiral, Chorale, Freeze. |
| Noise | Opens the noise browser: White, Pink and Brown Noise, Geiger, Tape Hiss, Tape Hum, Tape Air, Tape Crackle, Clean Vinyl, Dirty Vinyl, Space Open, Space Helium, Space Wind. |
| Flange | Jet or BBD, each in eight characters (Jet: Silver, Compact, Deep Sweep, Hollow, Screamer, Drop, Thin Air, Twin Jet; BBD: Classic BBD, Deluxe, Dark Bucket, Squash, Matrix, Short Bucket, Long Bucket, Grind). |
The effects behind these lanes are the same engines you find in the FX rack, so a type sounds the same wherever you meet it.
The lanes
The row of eight tiles under the screen is the Shaper's lane bank. The tile you are looking at is white; the dot under each tile is its switch.
| Gesture | What it does |
|---|---|
| Click a tile | Turns that lane on (or off again, if it was on) and shows its shape and settings. |
| Click the dot under a tile | Turns the lane on or off without switching the screen to it. |
| Right-click a tile | Opens the list of all eighteen lane effects, A to Z. Pick one to put it at this position. If the effect you pick is already in the bank, the two swap places; if it is not, it replaces the one here. |
| Lane | What the shape does |
|---|---|
| Vol (Volume) | Turns the volume up and down with the shape, for gates, chops and pumping. |
| Time | Plays the audio faster, slower or backwards, like a turntable: half time, tape stops, rewinds. |
| Filt (Filter) | Sweeps a filter cutoff with the shape. |
| Pan | Moves the sound left and right. |
| Rep (Repeat) | Loops a grid slice while the shape is high, for stutters and rolls. |
| Drive | Pushes saturation up and down. |
| Phase (Phaser) | Sweeps a phaser. |
| Crush | Crushes the bits and sample rate. |
| Reverb | Opens a reverb with the shape. |
| Delay | Sends into a delay with the shape. |
| Chorus | Moves a chorus with the shape. |
| Widen | Widens the stereo image with the shape. |
| Multi (Multiband) | Drives a multiband squash with the shape. |
| Tape | Adds tape wobble and age with the shape. |
| Grain (Granular) | Feeds a grain cloud with the shape. |
| Bode | Shifts frequencies with the shape. |
| Noise | Adds noise in rhythm with the shape. |
| Flange (Flanger) | Sweeps a flanger with the shape. |
Shape tab
How the drawn line is read for the lane on screen. The left box is named after the lane (Volume, Time …); the right box is the Cycle.
| Control | What it does |
|---|---|
| Depth | How much of the drawn shape reaches the lane, 0 to 100. 0 = none, 100 = the full shape. Double-click resets (100; 50 on the Time lane). Depth is a modulation destination: put the mod wheel on it to play the effect in by hand. |
| Smooth | Rounds the shape's sharp edges so hard steps glide. Up = softer, click-free movement. Smooth plus Floor turns a hard gate into a pump. |
| Tension | Bends how the shape is read between points. Below half the curves sag (dip early), above half they bulge (dip late). |
| Floor | The shape never drops below this. Raise it so a volume gate never fully closes. |
| Phase | Slides the whole shape along the cycle, like moving it later in the bar. |
| Swing | Stretches the first half of each cycle and squeezes the second, for a shuffled, lazy feel. |
| Blend | This lane wet against dry. 100 = fully shaped; lower mixes the untouched sound back in. |
Target tab
How the lane's own effect sounds while the shape moves it. Every lane has exactly four knobs here; the box on the right holds its stepped settings, where it has any.
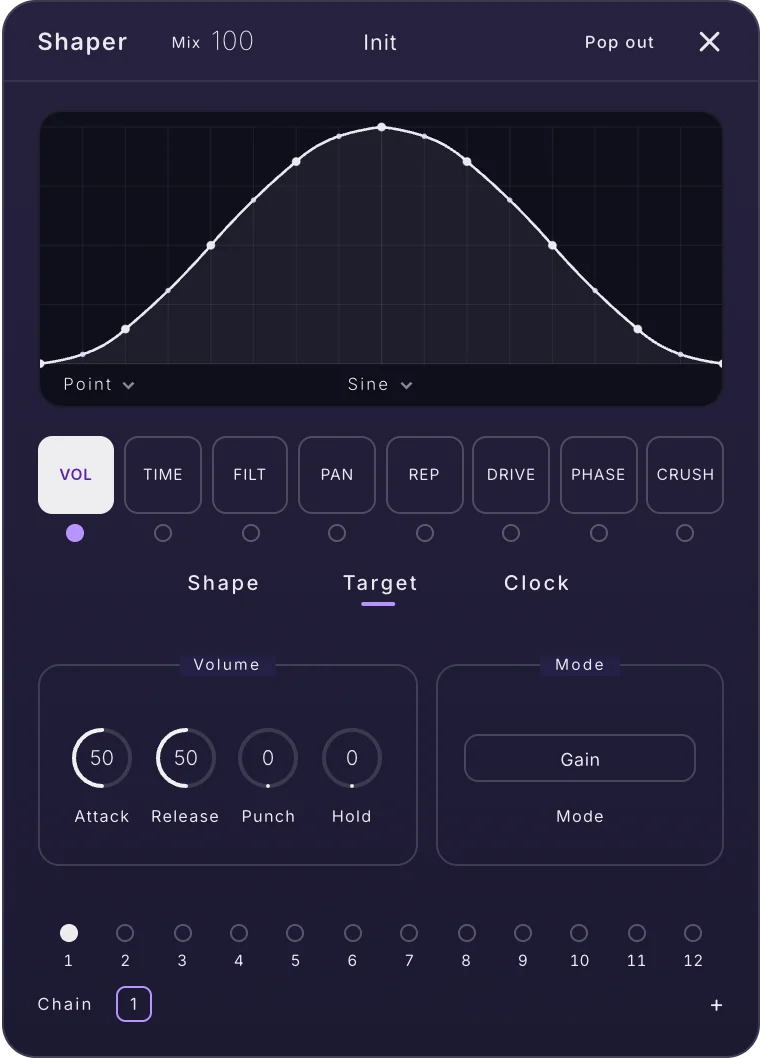
| Lane | Controls |
|---|---|
| Vol | Attack: how fast the volume opens on each rise; up = softer fade-ins. Release: how fast it closes on each fall; up = longer tails between chops. Punch: a short boost each time the gate opens; up = harder hits. Hold: keeps the volume open up to 250 ms after the shape drops. Mode: Gain follows the shape; Duck turns it upside down, so the shape pushes the volume down, like sidechain pumping. |
| Time | Fade: crossfades every time jump so stutters and reverses never click. Glide: slides to the new time instead of cutting, a turntable-like pitch bend. Range: how far the lane can speed up or slow down, from a quarter speed to four times (÷4 to ×4). Tone: darkens or brightens what the lane plays back. |
| Filt | Reso: resonance at the moving cutoff; up = a whistling, vocal sweep. Drive: pushes the lane filter into saturation. Spread: pulls the cutoff apart left and right for a stereo sweep. Punch: kicks the cutoff open on each rise, for snappy filter plucks. Poles: the slope, 6, 12, 18 or 24 dB per octave. Char: the drive flavour, Tube, Diode, Fold, Hard, Crush or Fuzz. |
| Pan | Width: narrows or widens the stereo image before the pan moves it. Bass: keeps the lows in the middle while the rest pans. Haas: delays the far side a few milliseconds as it pans, for a deeper, roomier swing. Tilt: lets the highs swing wider than the lows, or the other way round. Law: Power keeps the loudness even, Linear is plain, Width moves the stereo width instead of the position. |
| Rep | Seam: the crossfade where each repeat loops; up = smoother. Decay: every repeat quieter than the last. Pitch: every repeat steps higher or lower, up to 6 semitones, for risers. Tone: darkens or brightens the repeats. Mode: Slice repeats the grid slice, Reverse plays it backwards. |
| Drive | Tone: dark to bright after the drive. Makeup: the level after the drive, to match loudness with it on and off. Bias: pushes the wave off centre for lopsided, tube-like harmonics. Knee: how soft the clipping is; up = rounder. Char: the drive flavour, 1 to 8. |
| Phase | Feedbk: resonance of the phaser; up = sharper, more vocal swirls. Stereo: offsets left and right for a wide, spinning sweep. Drive: grit inside the phaser. Centre: where the sweep sits, about 60 Hz to 1 kHz. |
| Crush | Bits: how coarse the bit depth gets at the top of the shape; up = crunchier. Rate: how low the sample rate drops; up = more lo-fi. Tone: darkens or brightens the crushed sound. Stereo: crushes left and right on their own timing, for a wide digital fizz. |
| Reverb | Size, Decay, Tone, Diffuse. |
| Delay | Time, Feedbk, Tone, Width. |
| Chorus | Rate, Depth, Feedbk, Voice. |
| Widen | Amount, Width, Rate, Axis. |
| Multi | Speed, Lift, Char, Range. |
| Tape | Flutter, Drive, Age, Width. |
| Grain | Size, Density, Pitch, Spread. |
| Bode | Range, Feedbk, Spread, Blur. |
| Noise | Tone, Width, Scan, Drive. |
| Flange | Feedbk (bipolar: the centre is none), Centre (where the drawn sweep sits), Range, Stereo. |
The knobs on the borrowed lanes (Reverb to Flange) work like their namesakes on the full rack effects — see Effects. Every Shape and Target knob is a modulation destination too.
Clock tab
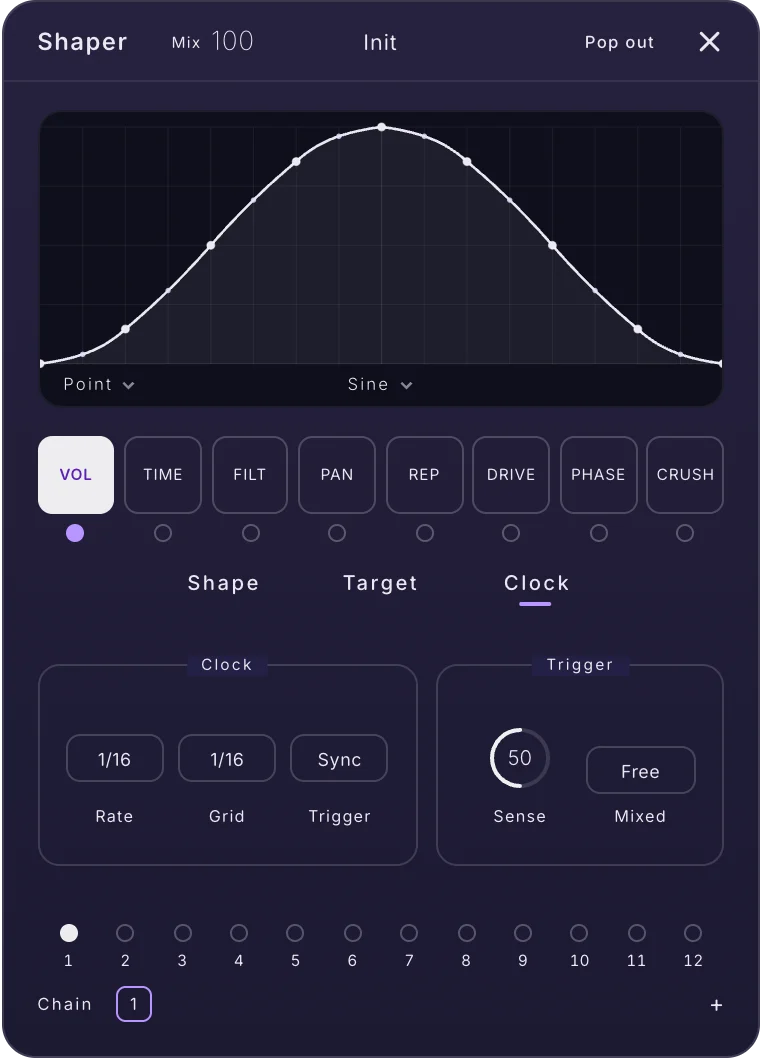
| Control | What it does |
|---|---|
| Rate | How long one cycle of the shape lasts: 1/16, 1/8, 1/4, 1/2, 1 bar, 2 bars, 4 bars or 8 bars. Short = fast chops, long = slow sweeps. Each lane has its own Rate, so a 1/8 gate can run against a four-bar filter sweep. |
| Grid | The snapping lines on the screen, and the slice size for the Repeat lane: 1/2, 1/3, 1/4, 1/6, 1/8, 1/12, 1/16, 1/24 or 1/32. |
| Trigger | What restarts the shape. Sync: the song position. Free: its own clock, also with the transport stopped. MIDI: every new note. Audio: hits in the sound itself. A new lane starts on Free. |
| Sense | How hard a hit must be to restart a lane set to the Audio trigger, 0 to 100. Up = more sensitive. |
| Global | Free or Sync for every Shaper lane and every Glitch at once (see What every card shares). Reads Mixed when lanes differ. |
Shaper presets
The factory menu gives you a starting point per lane: Init, Gate 16ths, Half time, Stutter 1/16, Reverse, Tape stop, Tape scrub, Acid sweep, Ladder pump, Pan swing, Repeats up, Tube ramp, Phaser wash, Flange 16ths, Crush stairs, Radio stairs and Gate + sweep.
Arp#
The Arp turns held notes into a stepped pattern. It is a sixteen-step, multi-lane sequencer that reads your chord: draw the melody on the Pitch lane, then shape length, accent, octave, rolls, probability and timbre per step. It works on the notes, so whatever oscillators play them — and every effect after them — follow along.
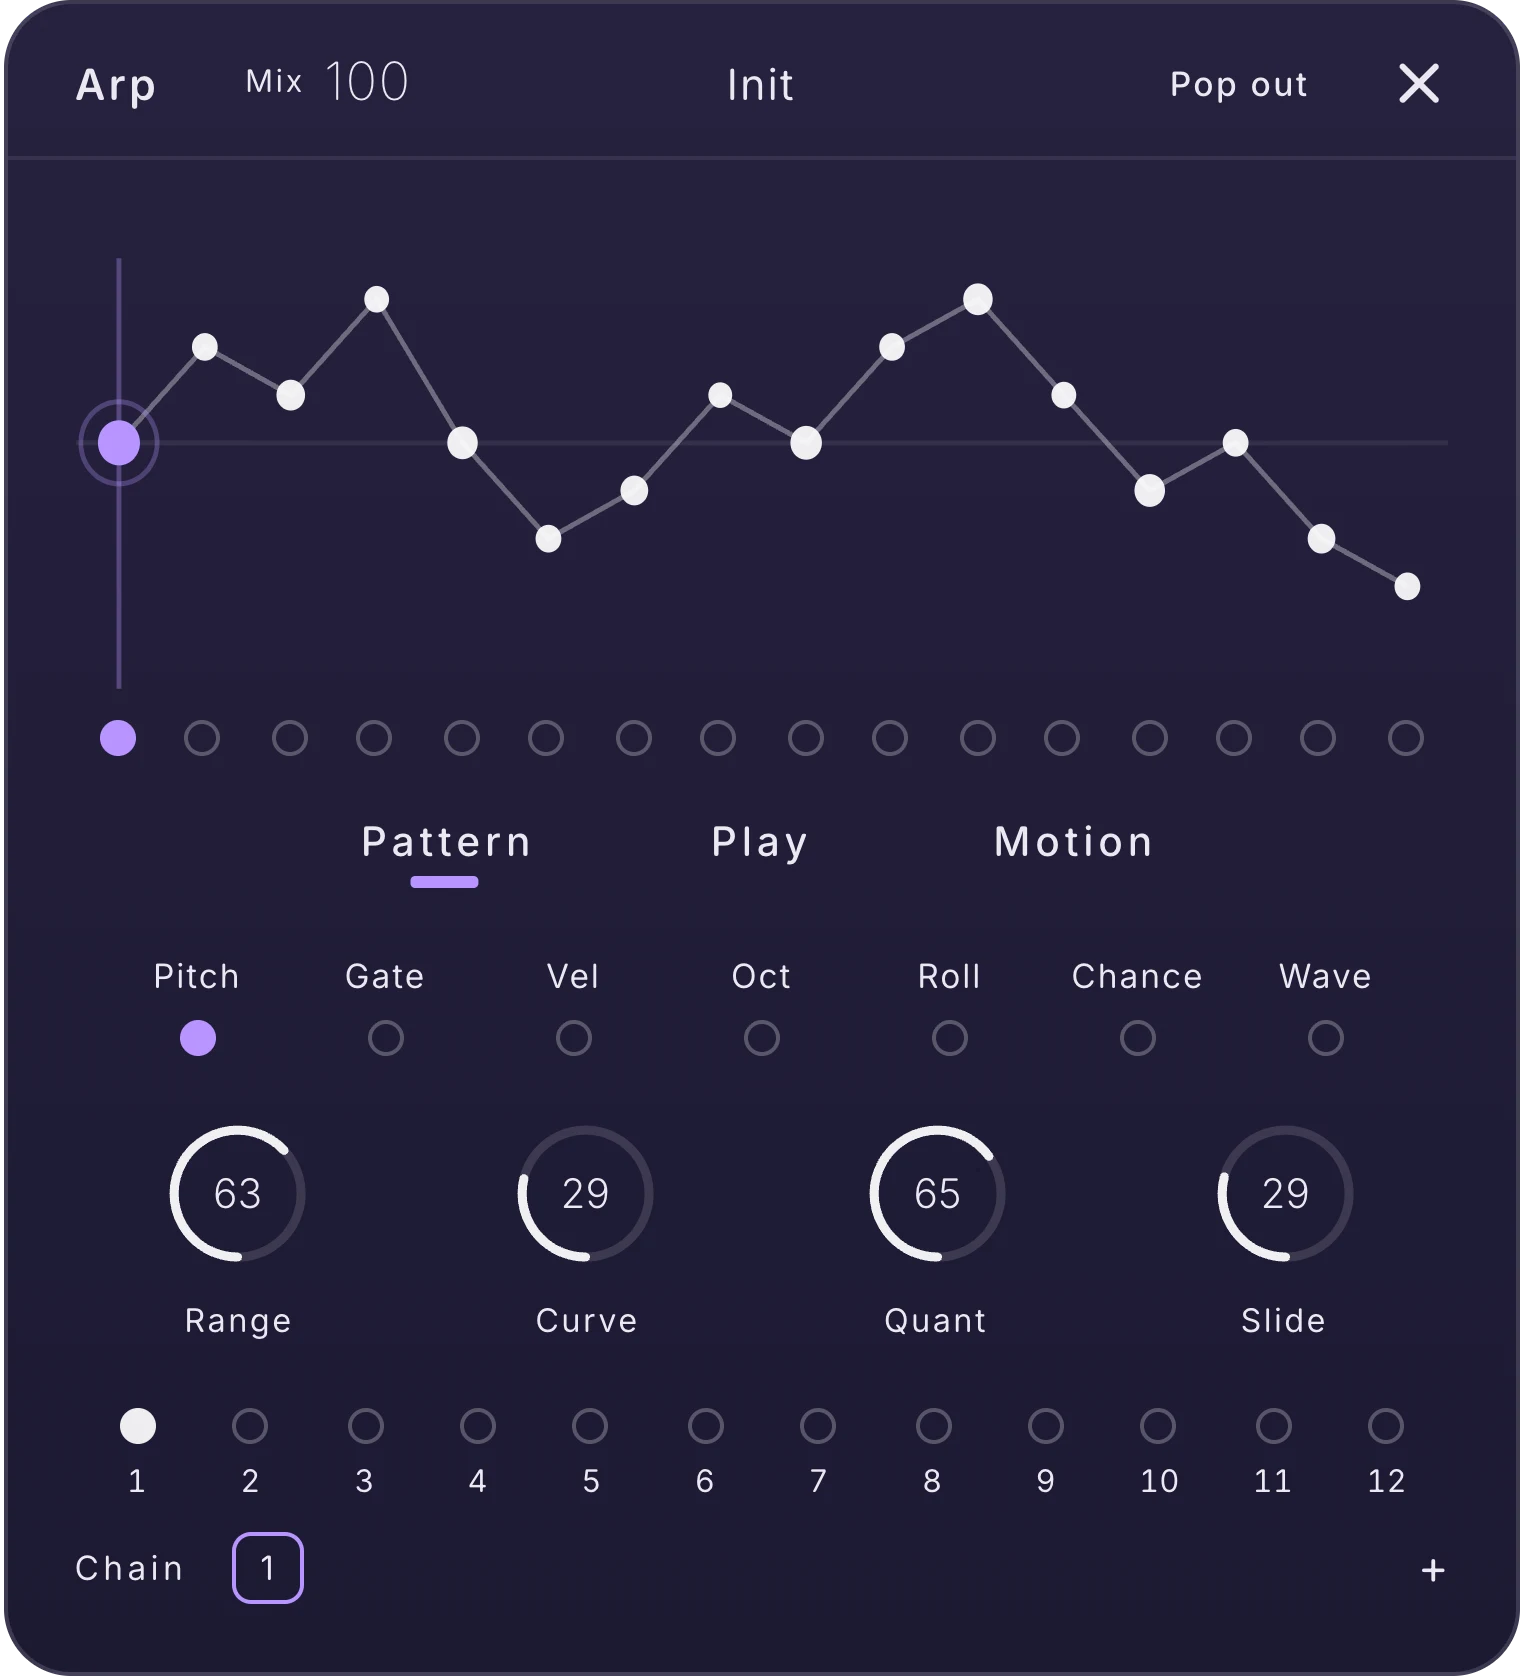
Drawing the pattern
The screen always shows the pitch path as a line of dots. The lane you select decides what dragging across the steps draws; on every lane except Pitch, the selected lane's value shows as the size and brightness of each dot.
| Gesture | What it does |
|---|---|
| Drag across the steps (Pitch) | Sets each step's pitch row (seven rows, the middle one is the centre). |
| Double-click a step (Pitch) | Turns the step into a rest, or back into a note. |
| Drag (Gate, Vel, Chance, Wave) | Paints the step values by height. |
| Click a step (Oct) | Cycles that step an octave down, none, or an octave up. |
| Click a step (Roll) | Cycles the step through 1 to 4 fast repeats. |
Pattern tab: the lanes
| Lane | Knobs |
|---|---|
| Pitch — which note each step plays | Range: how many note rows the lane can jump across; up = wider melodies. Curve: bends the pitch shape so steps lean up or down. Quant: the odds that a step snaps to a note of your chord; up = more in tune. Slide: the odds that a step slides into the next note. |
| Gate — how long each step holds | Length: how long every step holds; down = short plucks, up = long legato. Curve: bends the gate lengths across the pattern. Random: humanises the lengths a little on each step. Slide: the odds that a step ties into the next one. |
| Vel — how hard each step hits | Range: how much the drawn velocities count; up = bigger accents. Curve: bends the velocity shape. Random: humanises how hard each step hits. Floor: the quietest a step can be. |
| Oct — octave jumps per step | Range: how many octaves the lane can jump, 0 to 4. Bias: leans the jumps down or up (−4 to +4). Random: the odds of a random octave jump. Spread: zigzags alternate steps apart in octave. |
| Roll — fast repeats in a step | Count: how many repeats a rolled step splits into, 1 to 4. Decay: each roll repeat gets quieter. Curve: the spacing of the repeats, even or speeding up. Amount: the odds that a programmed roll plays. |
| Chance — how likely each step is to play | Amount: how strongly the lane skips steps; up = more gaps. Bias: leans the odds toward playing or skipping (−50 to +50). Seed: rerolls the random pattern, 0 to 16; the same seed plays the same pattern. Drift: the pattern mutates a little every loop. |
| Wave — wavetable motion per step | Depth: how far the lane moves the wavetable per step. Curve: bends the wavetable moves. Slide: glides the wavetable between steps. Random: a little random move per step. |
Play tab
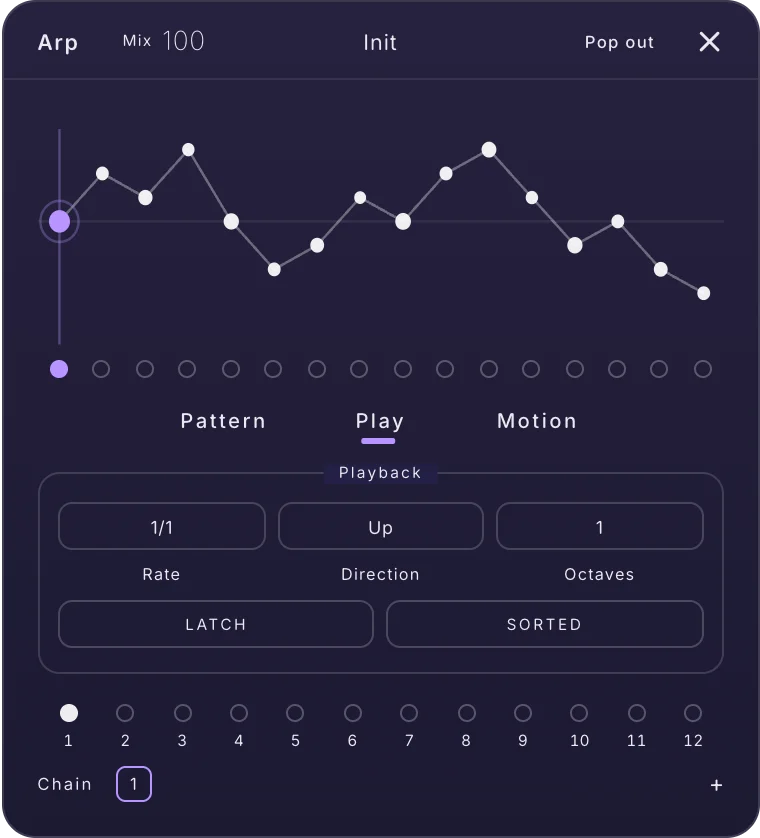
| Control | What it does |
|---|---|
| Rate | The step speed: 1/1, 1/2., 1/2, 1/4., 1/2T, 1/4, 1/8., 1/4T, 1/8, 1/16., 1/8T, 1/16, 1/32., 1/16T, 1/32, 1/32T, 1/64, 1/128 or 1/256 (a dot = dotted, T = triplet). 1/16 is the classic arp. |
| Direction | How it walks through your held notes: Up, Down, Up-Dn or Random. Direction shapes the notes, not the timeline: the step grid still runs left to right. |
| Octaves | How many octaves the pattern climbs, 1 to 4. |
| Latch | The arp keeps playing after you let go. Press new notes to change it. |
| Sorted | Plays held notes from low to high. On by default; switch it off and they play in the order you pressed them. |
Motion tab
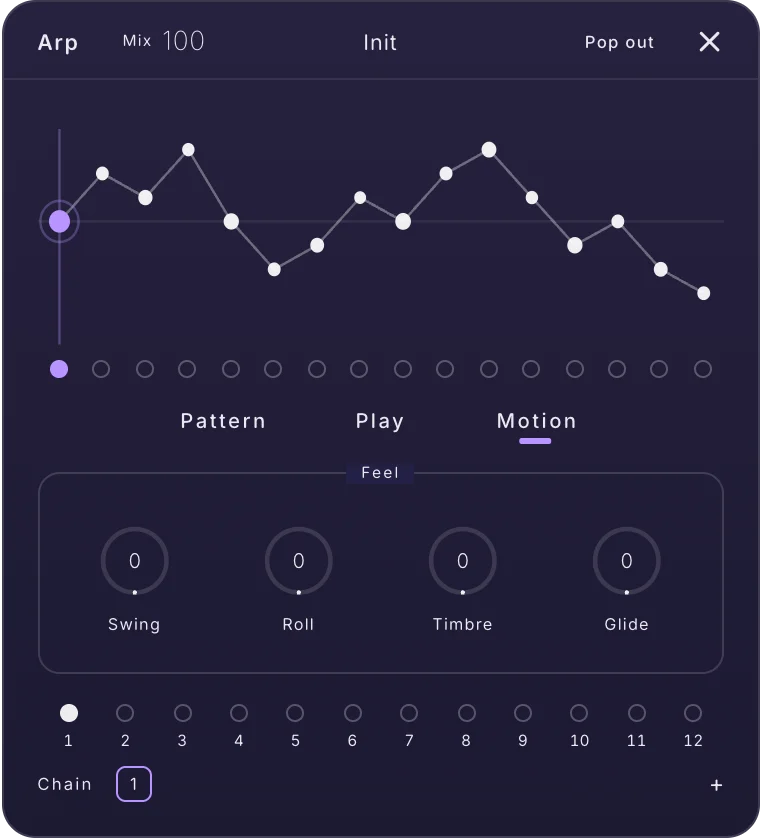
| Control | What it does |
|---|---|
| Swing | Pushes every other step late for a shuffle. A little goes a long way. |
| Roll | The overall amount of fast repeats across the pattern, 0 to 100. |
| Timbre | The master amount for the Wave lane's wavetable moves, 0 to 100. |
| Glide | Slides between notes like a classic acid bass line; up = longer slides. |
Swing, Roll, Timbre, Glide, Mix and several lane knobs (Pitch Range and Slide, Gate Length and Random, Velocity Range and Random, Octave Range and Random) are modulation destinations.
Factory presets include Init, Trance Anthem, Broken Chord, Octave Bass, Swung Pluck, Berlin School, Gated Pad, Stutter Build, Random Sparkle, Harp Gliss, As-Played Jam and Ambient Drift.
Glitch#
Glitch is a dice-driven stutter box. On every grid step it rolls to see whether a glitch fires; when one does, it grabs the sound and mangles it with one of eight effects — repeat, reverse, tape stop, gate, pitch, crush, freeze or scatter — for a number of steps, then lets go. Turn on several effects and each fire picks among them. Set a seed and the chaos becomes a repeatable pattern you can build a track on.
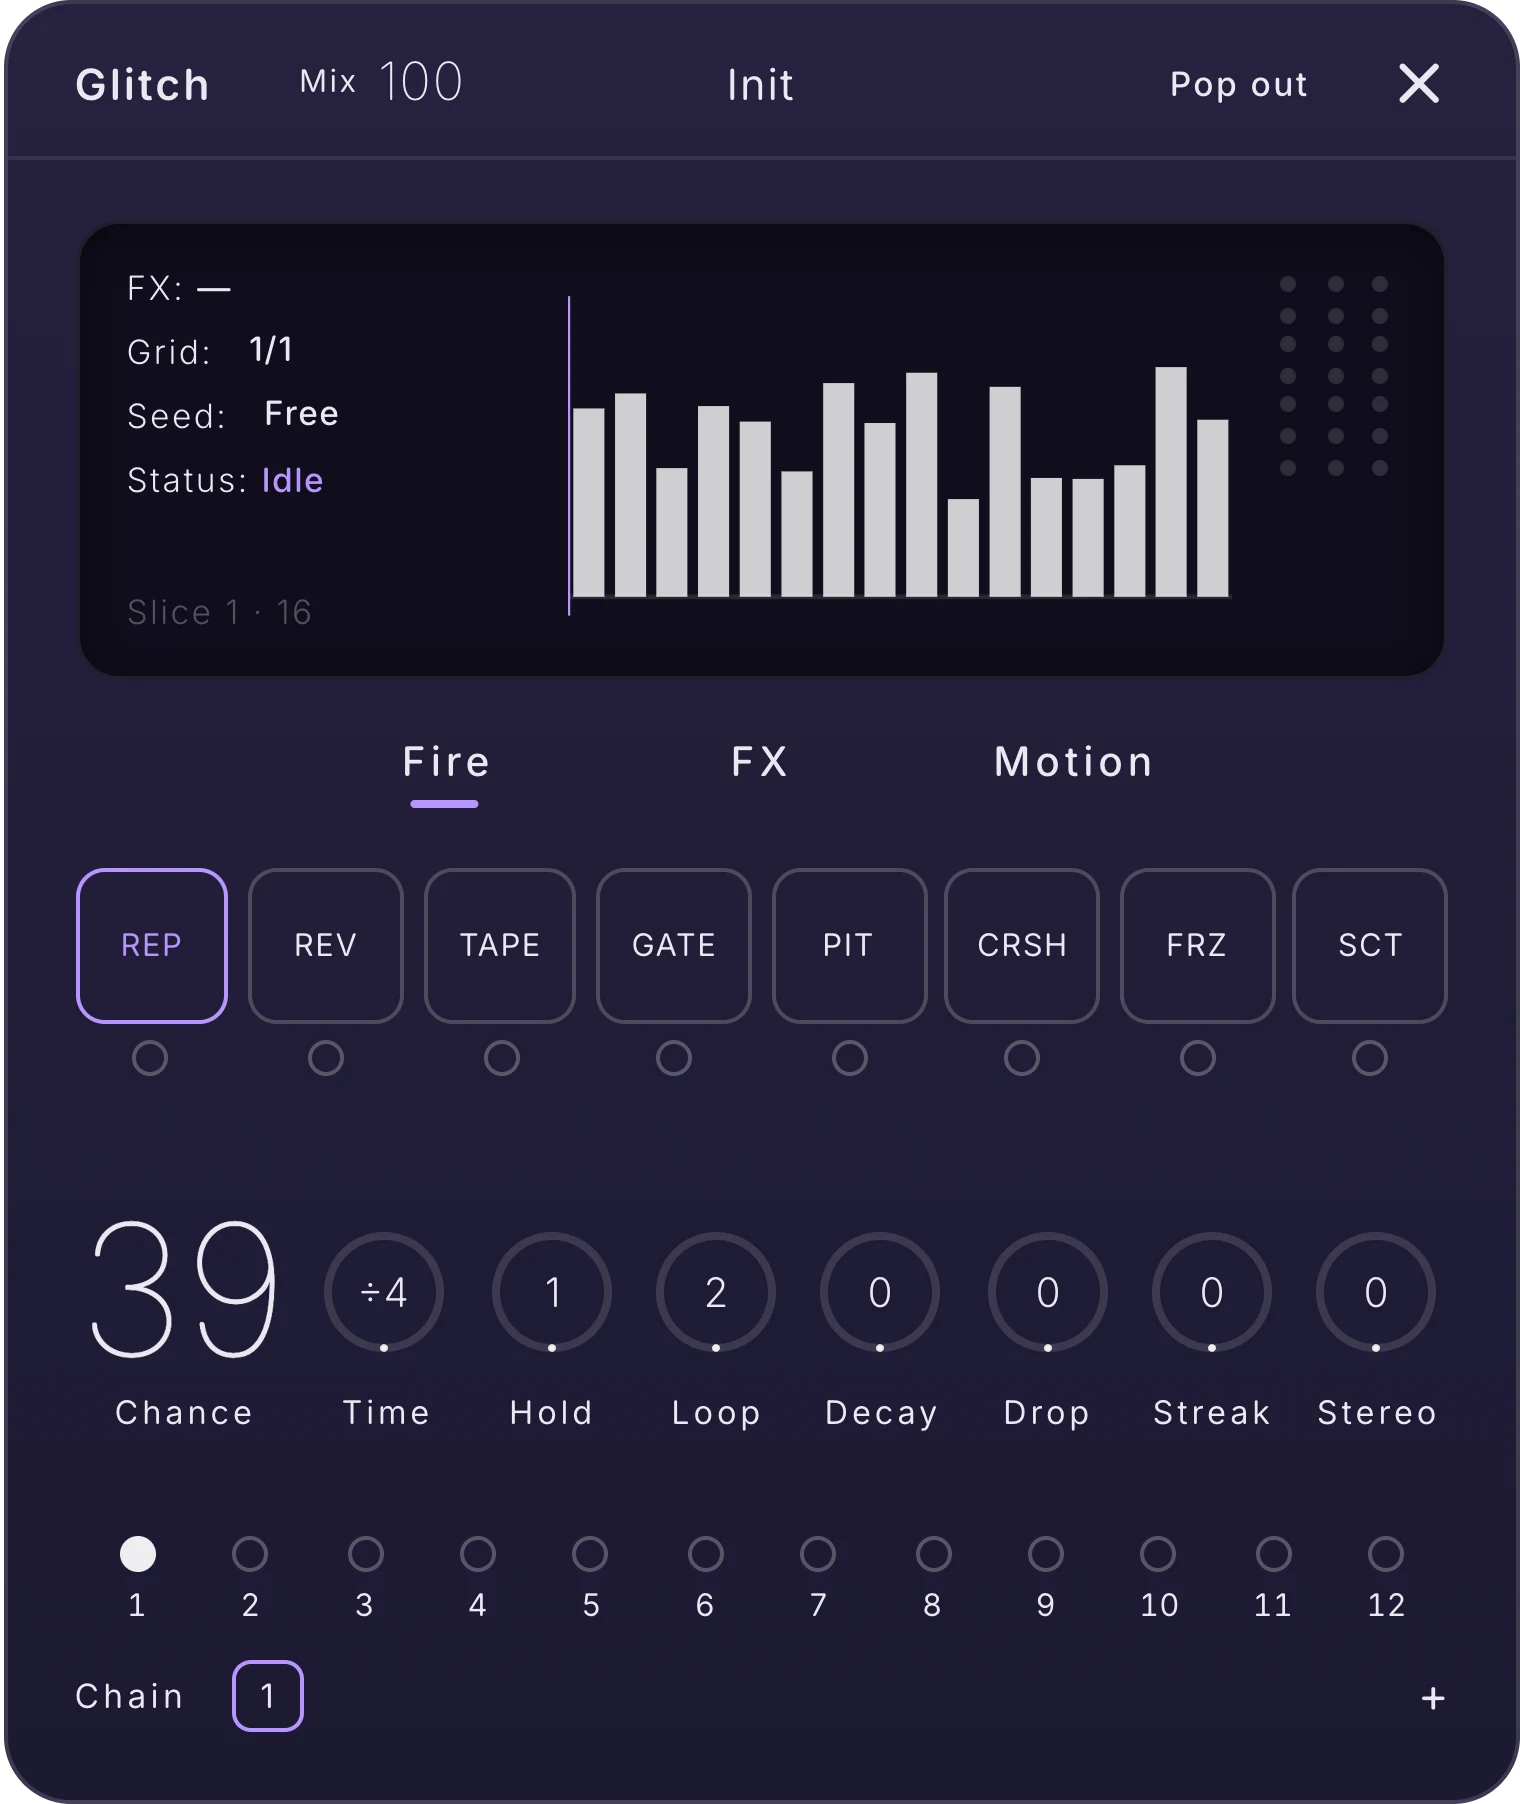
The monitor
The left of the screen reads out FX (what is firing), Grid, Seed and Status. Grid and Seed are live controls: drag either value up or down. Seed shows a number, or Free when every roll is new; the same seed always glitches the same way. Double-click Seed to go back to Free.
Fire tab
The eight tiles choose the effects. Click a tile to turn that effect on (or off again) and show its settings; its dot lights while it is on and flashes when it fires.
| Tile | What it does |
|---|---|
| Rep | Repeats a slice, the classic stutter. |
| Rev | Plays the slice backwards. |
| Tape | Slows to a stop like pulling the plug on a turntable. |
| Gate | Chops the volume into rhythmic bursts. |
| Pit | Jumps the pitch up or down. |
| Crsh | Crushes the sound to lo-fi grit. |
| Frz | Holds one frozen grain, a buzzing freeze. |
| Sct | Scatters tiny pieces around. |
| Control | What it does |
|---|---|
| Chance | How often a glitch fires, 00 to 99 percent. Start around 30 for a lively loop. |
| Time | How fast each glitch plays what it grabbed — the stutter, the reverse, the tape, the frozen grain, the scatter's grains and the gate's chops — never when it fires (Grid and Chance own that). Right-click the knob to choose Steps (the default: ÷4, ÷3, ÷2, ÷1.5, ×1, ×1.5, ×2, ×3, ×4 — ÷2 is half speed, an octave down) or Smooth (a continuous sweep from ÷4 to ×4). At ×1.5 a repeated slice lasts a triplet of itself, at ÷1.5 a dotted one. |
| Hold | How many steps one glitch lasts: 1, 2, 3, 4, 6 or 8. |
| Loop | How many steps before the glitch pattern repeats: 2, 4, 8, 12 or 16. |
| Decay | Each glitch eases back to the dry sound; up = a quicker return. |
| Drop | The odds that a fire lands as silence, a hole punched in the loop. |
| Streak | The odds that a glitch repeats on the following steps too. |
| Stereo | Each fire bounces to the other side of the stereo field. |
FX tab
Each effect has four knobs of its own and an Out box. Click a name in the row at the top to show its knobs; the dot under the name lights when that effect is on.
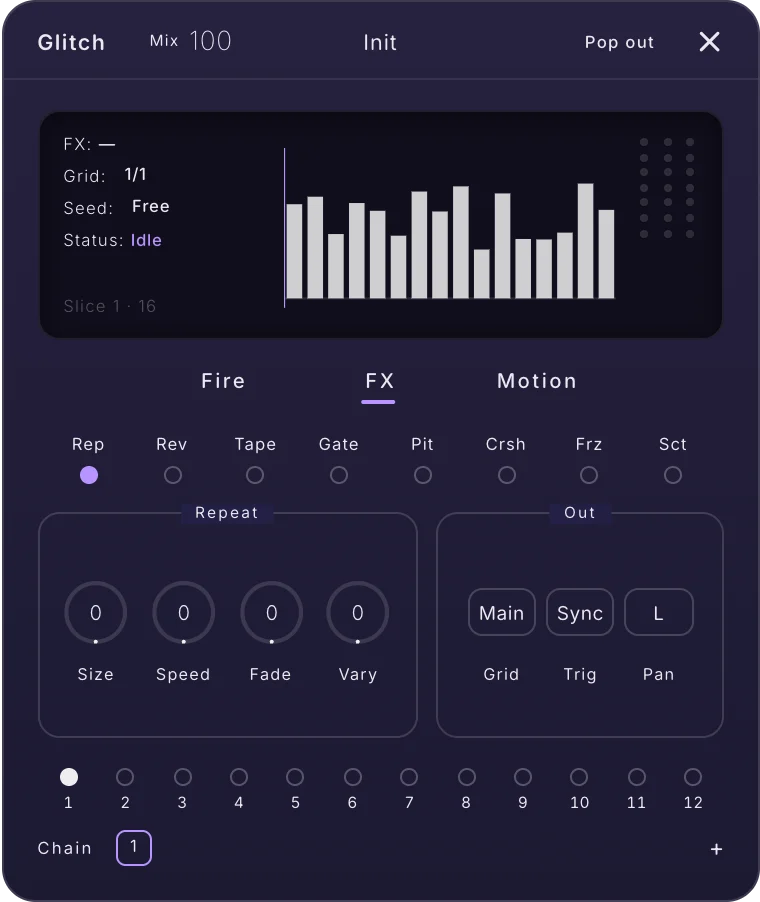
| Effect | Knobs |
|---|---|
| Rep (Repeat) | Size: how big each repeated piece is; smaller = a faster stutter. Speed: each pass shrinks the loop for an accelerating roll. Fade: the repeats die away over time. Vary: the start point drifts a little on every repeat. |
| Rev (Reverse) | Len: how long the reverse plays. Fade: the reverse dies away. Sprd: reaches farther back for what it reverses. Snap: the odds each pass re-locks to the fire point; otherwise it walks backwards. |
| Tape (Tape Stop) | Curve: the shape of the slowdown, from a straight brake to a long coast. Time: when in the step the stop lands. Depth: how far the tape slows. Spin: winds back up to speed after the stop. |
| Gate | Rate: how many chops in the step: 1, 2, 3, 4, 6, 8, 12 or 16. Shape: hard or soft chop edges. Nudge: slides the chops off the beat. Amt: how deep the chops cut. |
| Pit (Pitch) | Shift: how far the pitch jumps, up to 12 semitones either way. Jump: the odds of an extra octave leap. Glide: slides between the pitches. Walk: each repeat steps the pitch further, a riser. |
| Crsh (Crush) | Bits: crunchier as it drops, 16 down to 4 bits. Rate: lowers the sample rate for aliasing. Tone: bright to dark. Amt: how much crush is blended in. |
| Frz (Freeze) | Size: the frozen grain, 15 to 200 ms. Spray: each pass grabs an older grain. Shine: adds an octave-up sparkle. Melt: blurs the frozen grain together. |
| Sct (Scatter) | Size: each scattered piece, 12 to 120 ms. Amt: how many pieces scatter. Vary: a little different every time. Width: spreads the pieces across the stereo field. |
| Out box | What it does |
|---|---|
| Grid | This effect's own step size. Main follows the card's Grid; or pick a note length from 1/1 to 1/256. |
| Trig | Sync fires on the beat; Free on its own drifting clock. |
| Pan | Puts this effect left (L), centre (C) or right (R). |
Motion tab
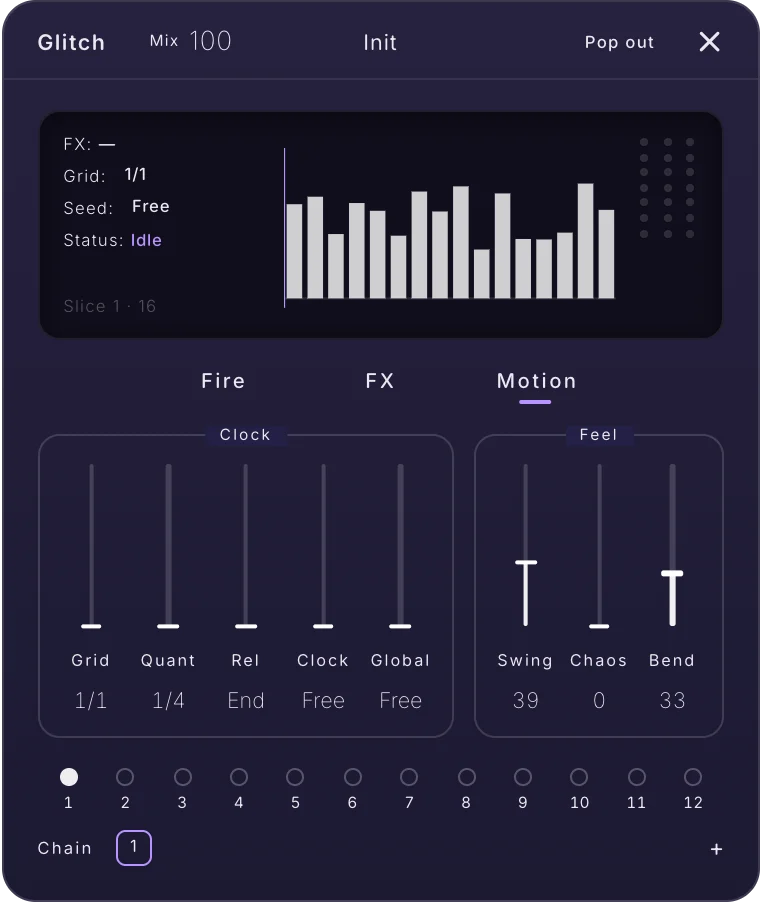
| Control | What it does |
|---|---|
| Grid | The step size every glitch fires on, from 1/1 to 1/256 (dotted and triplet values included). 1/16 is a good start. The same value as Grid on the monitor. |
| Quant | The timing grid a glitch punches in on: 1/4, 1/8, 1/16 or 1/32. |
| Rel | When a glitch lets go: End finishes the repeat, Now stops at once. |
| Clock | Free runs with the transport stopped; Sync follows the song. Double-click returns to Free. |
| Global | Free or Sync for every Glitch and every Shaper lane at once. |
| Swing | Pushes every other step late. |
| Chaos | More fires, other effects and shorter slices, at random. |
| Bend | A slow pitch warble on the glitches. |
The Seed lives on the monitor (see above). Chance, Chaos, Swing, Decay, Drop, Streak, Stereo, Bend, Time and Mix are modulation destinations, and so are key knobs of the effects, such as Repeat Size and Speed, Pitch Shift, Crush Bits and Freeze Size.
Factory presets include Init, Half-Time, Tape Stop, Triplet Roll, Trance Gate, Reverse Flip, Riser Build, Vinyl Brake, Bit Rot, Freeze Frame, Scatter Spray, Ghost in the Machine, Stereo Machine, Loop Tamer and Waltz.
Robin#
Robin is a round robin for your oscillators. Each new note plays the next oscillator in the rotation — A, then B, then C — so repeated notes never sound machine-identical. Put four slightly different sounds on Oscillators A to D, light Robin, and a single repeated key turns into a living, human performance. Robin works on the notes, before any sound is made.
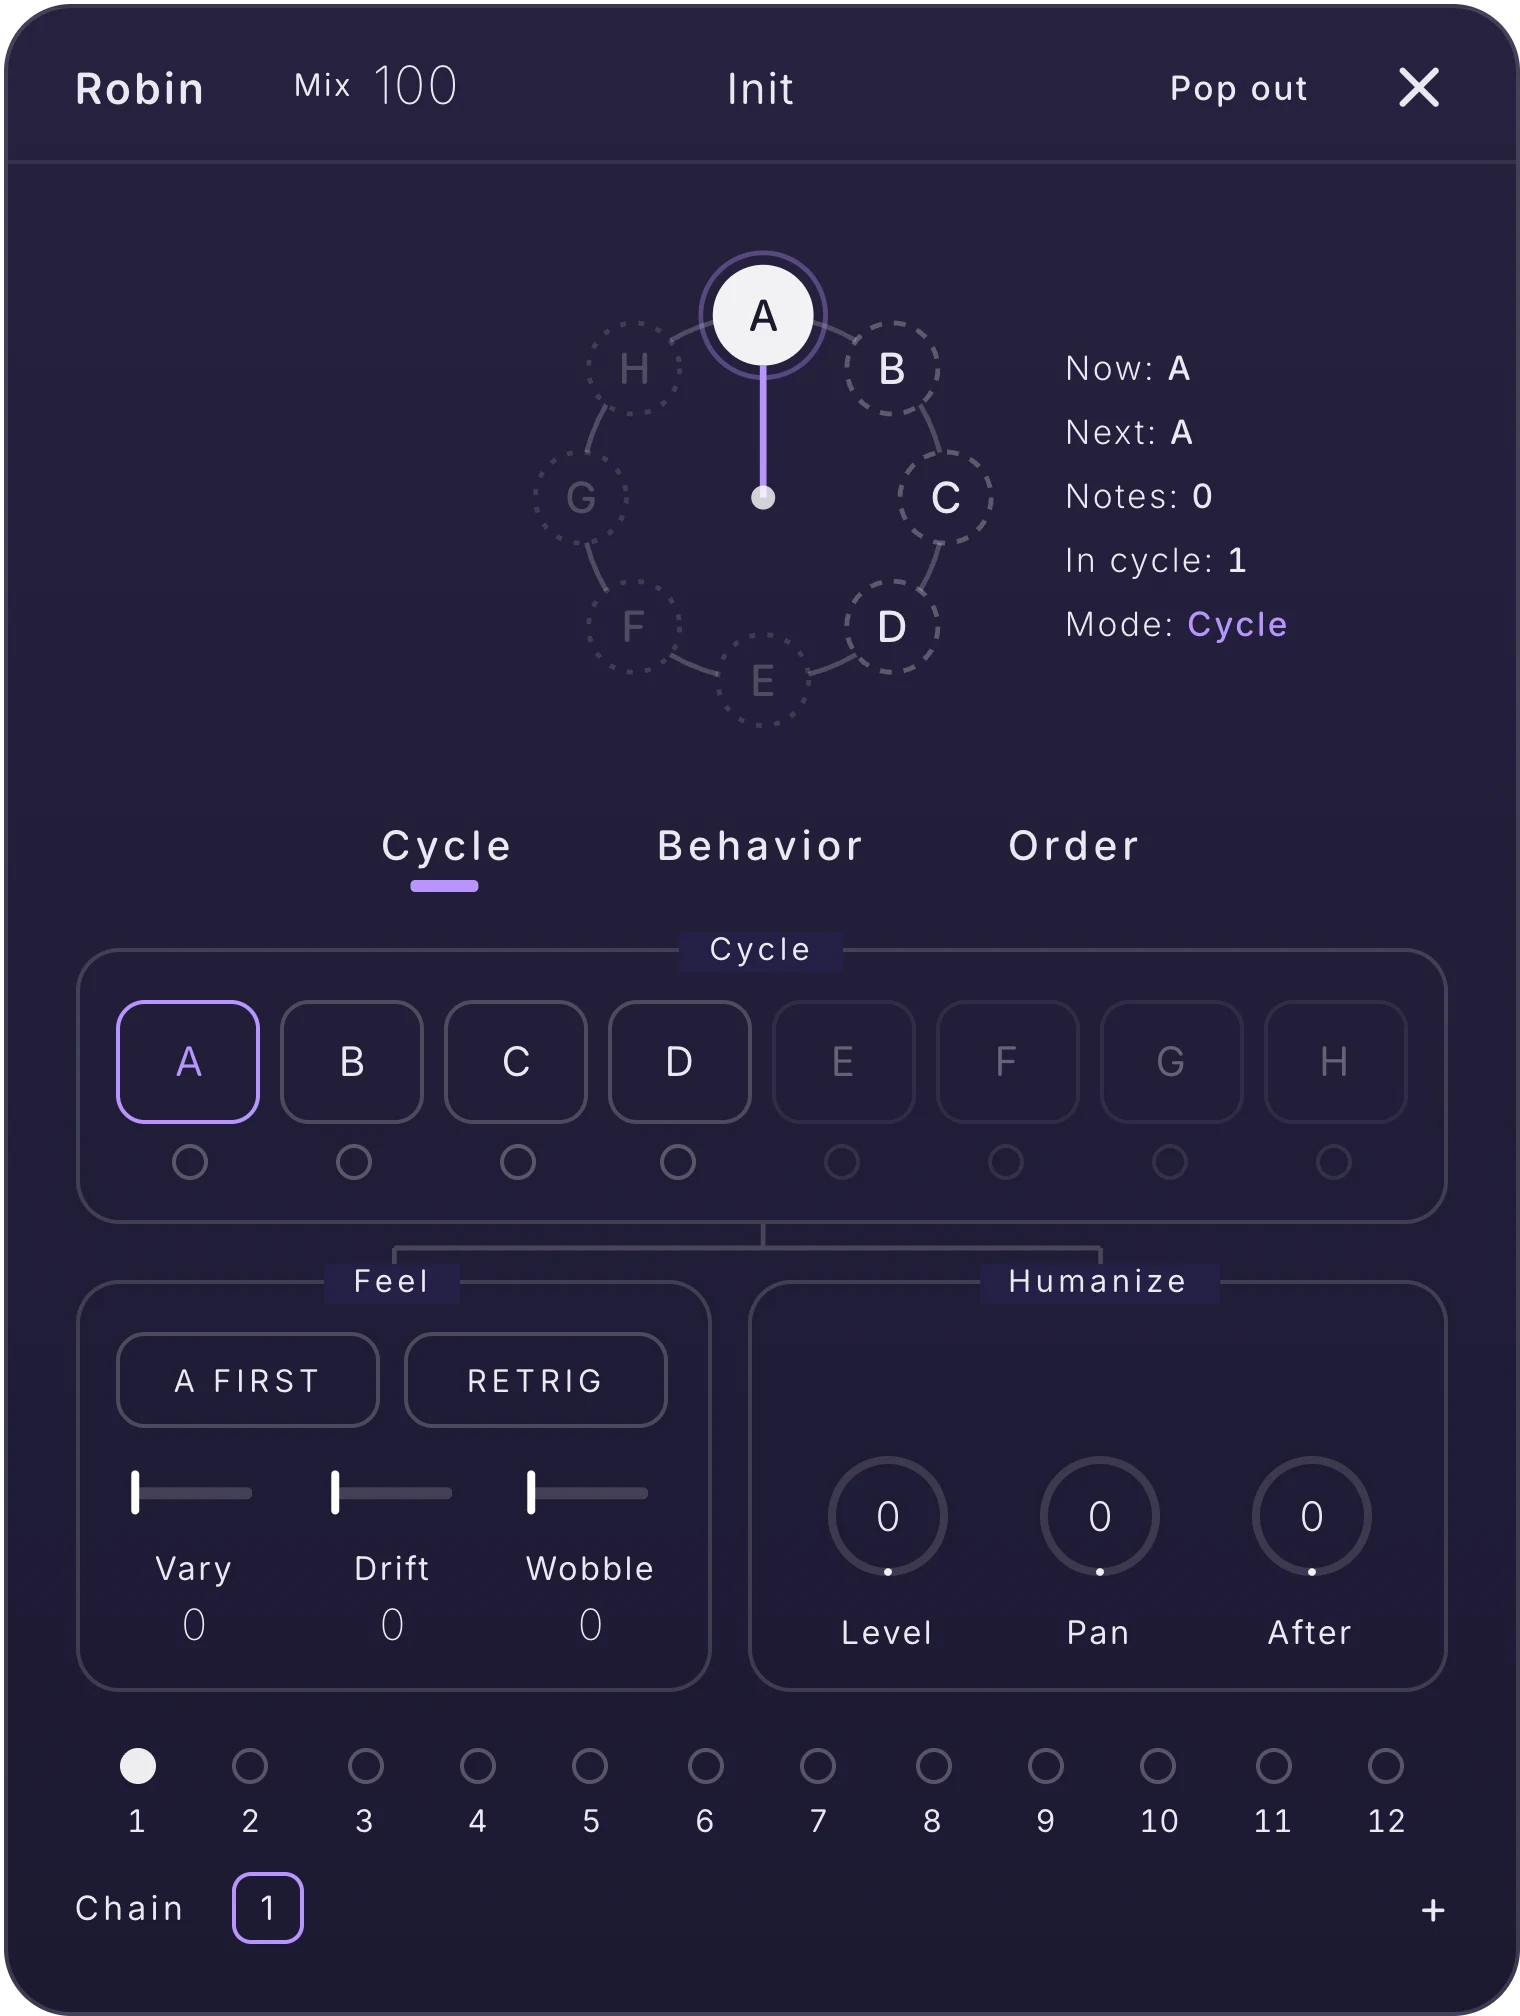
The wheel
Each station on the wheel is an oscillator, A to H. Stations in the rotation are drawn solid; the pointer jumps to the station that plays the next note. The readouts tell you which station is playing (Now), which comes Next, how many Notes have played, how many stations are In cycle, and the current Mode.
Cycle tab
| Control | What it does |
|---|---|
| Stations A–H | Click a station to put that oscillator in the rotation or take it out. The rotation can never be empty. A station whose oscillator is switched off is dimmed and skipped. |
| A First | After a silence, the rotation always starts on the first station. |
| Retrig | Tied or legato notes restart the sound too. |
| Vary | Changes level and pan a little on every hit, so no two notes sound the same. |
| Drift | A slow pitch wander per station, up to 18 cents. |
| Wobble | Random late starts, up to 20 ms, for a looser feel. |
| Level | A fixed volume lean per station. |
| Pan | A fixed left-right lean per station. |
| After | How much silence resets the rotation, 0 to 5 s. |
Behavior tab
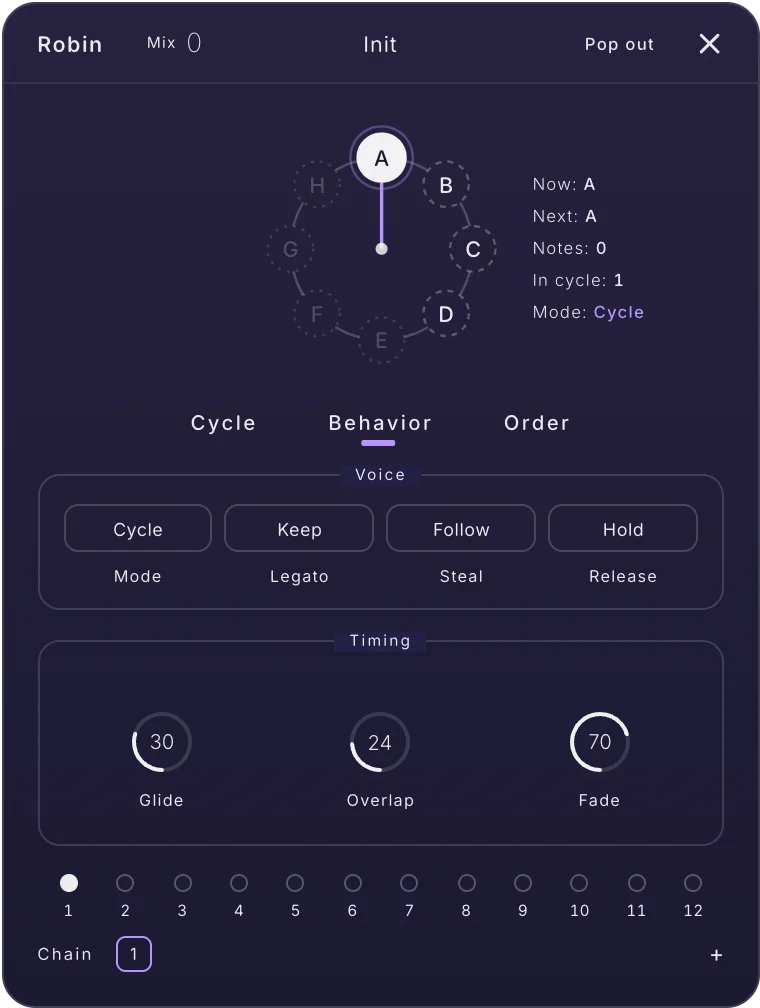
| Control | What it does |
|---|---|
| Mode | How it moves through the stations: Cycle (in order), Shuffle (shuffled), Random or Pong (back and forth). |
| Legato | Keep: tied notes stay on their station. New: they move on. |
| Steal | When voices run out: Follow moves on, Stay reuses the station. |
| Release | Hold reuses a ringing key's station; Free moves on. |
| Glide | Slides into each new station, 40 to 340 ms. |
| Overlap | The old station keeps ringing into the next. |
| Fade | How fast the old station's tail fades out. |
Order tab
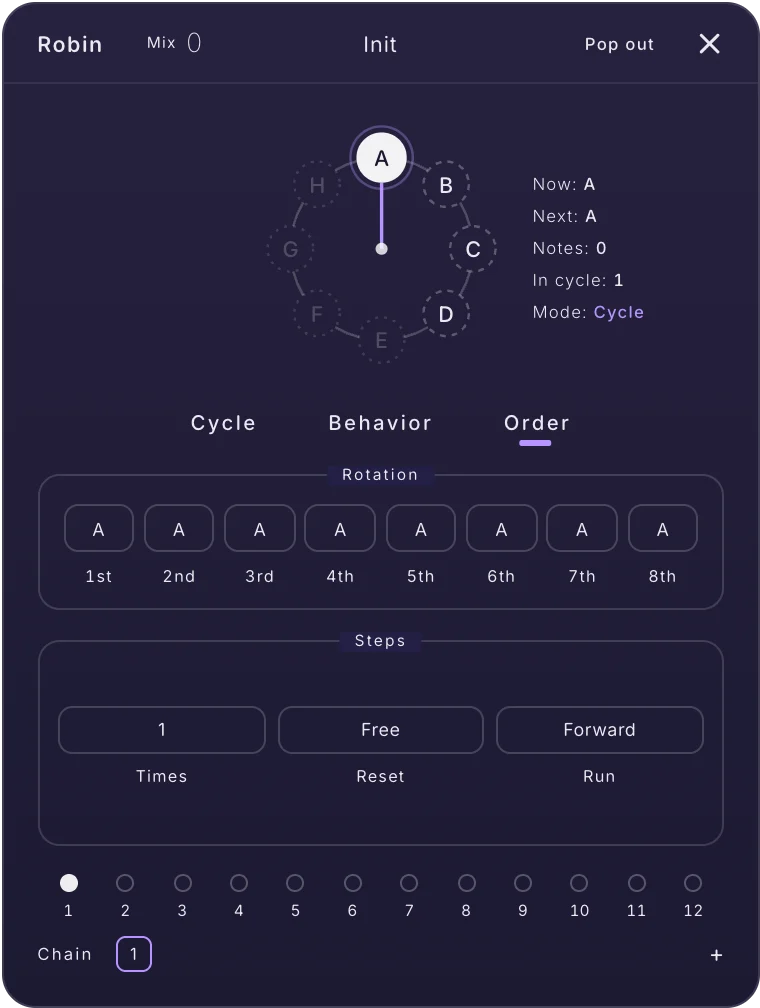
| Control | What it does |
|---|---|
| 1st … 8th | Which oscillator plays first, second and so on in the rotation. Picking a letter swaps it into place, so each station appears once. |
| Times | How many notes each station plays before moving on, 1 to 4. |
| Reset | When the rotation restarts: Free (it never forces a restart), Bar (every bar) or Phrase (after a silence). |
| Run | Plays the order Forward or Backward. |
Vary, Drift, Wobble, Level, Pan, After, Glide, Overlap and Fade are modulation destinations. Factory presets: Init, Humanized, Shuffle Bag, Ping-Pong Stereo, Tape Wobble and Call & Answer.
Putting the cards together#
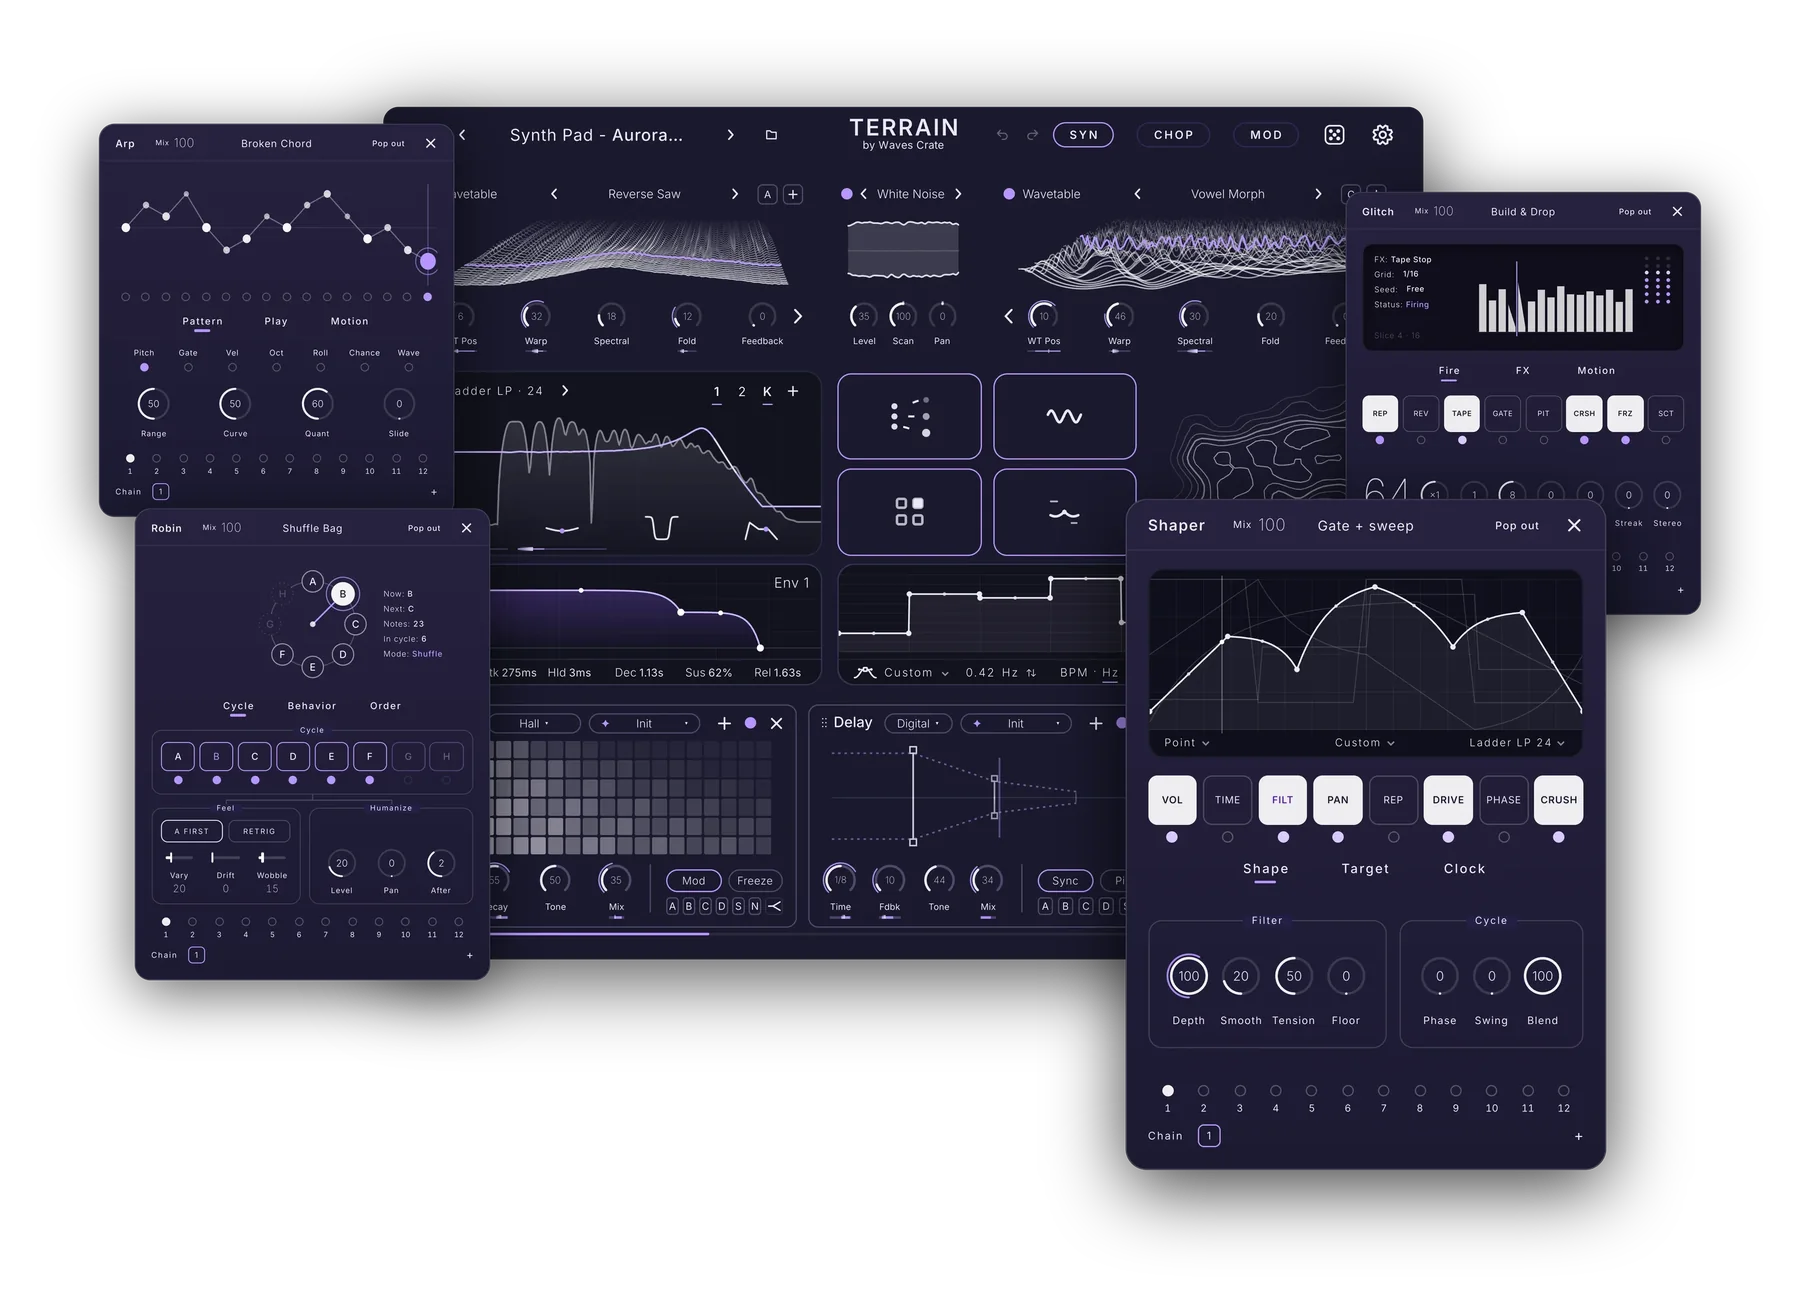
Because the Arp and Robin act on notes and the Shaper and Glitch act on audio, a full chain reads naturally: the Arp writes the notes, Robin hands each one to a different oscillator, the Shaper draws the groove into the result and the Glitch tears it up at the end. Pop the cards out and keep them open on a second screen while you play.
Chapter 10
Modulation
Modulation is how a sound comes alive: a source moves a destination so you don't have to. In Terrain almost every knob is a destination, and wiring one up takes a single drag. The MOD page then shows every connection in one place, with the deeper controls to bend, scale and trim each one.
Sources, destinations, routes#
Every modulation in Terrain is a route: one source (an LFO, an envelope, a macro, how hard you play …) moving one destination (a knob) by an amount. The knob keeps its own value; the route adds movement on top of it, up or down. One source can move many knobs, and one knob can take many sources — they add up.
Destinations are everywhere: oscillator and engine knobs, the noise, both filters, the envelopes' times, the LFOs' rate, amount and phase, the macros, every knob of every rack effect (front and back), the flow cards' knobs, the Chop page's layer strips, and the global pitch, level and pan. If a knob shows a modulation mark when you drop a source on it, it is a destination.
Drag to modulate#
The fastest way to make a route is to grab a source and drop it on a knob. Wherever you see one of these, you can drag it:
| Drag this | Source |
|---|---|
| An LFO's number tab (1, 2, 3 …) on the LFO panel | That LFO. See LFOs. |
| The envelope chip (Env 1, Env 2 …) | That envelope; rows in the envelope list drag out too. See Envelopes. |
| A macro's name in the Macros view | That macro. |
| The words Velocity and Key in the voice column | How hard you play, and which note you play (key tracking). |
| An oscillator's power dot (the dot that leads its header) | That oscillator's own loudness (Osc A–D). |
| The noise name or the noise waveform | The noise's loudness. |
| The word Filter on the filter panel | The output level of the filter slot you are looking at. |
Drop it on any knob and the route exists, at a starting amount you then adjust. Drags work across popped-out card windows too.
The modulation mark
A modulated knob shows a short accent-coloured underline below its label — the modulation mark. It shows how far its sources move the knob and moves live while you play.
| Gesture | What it does |
|---|---|
| Drag the mark up or down | Sets the amount of the route (the selected one when there are several). |
| Hover the mark | Opens the route list of this knob: one row per source, with its amount. |
| Click a source name in the list | Shows that source (opens its LFO, envelope …). |
| Drag the % in the list | Sets that route's amount; double-click it to type a number. |
| Click a row in the list | Picks that route, so dragging the mark edits it. |
| Extend icon in the list | Opens the route's curve editor (see The route curve). |
| × in the list | Removes the route. The knob goes back to its own value. |
Every source#
The source browser groups the sources in six families. Each is also a drag source somewhere on the page, as listed above.
| Family | Sources |
|---|---|
| Envelopes | Env 1 – Env 5: shapes that play once per note (delay, attack, hold, decay, sustain, release). Env 1 is the volume and Env 2 the filter by default. See Envelopes. |
| LFOs | LFO 1 – LFO 10: repeating waves for wobble, vibrato, tremolo and rhythmic movement, each with its own drawn shape. See LFOs. |
| Macros | Macro 1 – Macro 9 (or the names you gave them): one knob that moves many. See Macros. |
| Keys | Velocity: how hard you hit the key. Key: which note you play; higher notes move the destination further. Random: a new random value on every note (each route draws its own). Alt: flips between 0 and full on every other note. |
| Audio | Osc A, Osc B, Osc C, Osc D, Noise, Filter 1, Filter 2: the loudness of that part, so the audio itself becomes the modulator. An oscillator follower keeps following with its Level at 0, and the noise follower with the noise off — use a silent source as a pure control signal. |
| MIDI | Mod Wheel; Aftertouch (pressing harder into a key you already hold); Pitch Bend (both ways from the centre); Slide (on an MPE keyboard — one with per-note expression — moving your finger up and down a key). |
The MOD page#
Click MOD in the header for the modulation page: every route of the sound in one list.
The header
| Control | What it does |
|---|---|
| Search | Filters the rows by source, destination, aux or destination group as you type. |
| Basic | The simple route list: source, amount, destination, live output. |
| Pro | Adds a curve, polarity, an aux source with its own curve and invert, and an output trim to every route. |
| Matrix | Every route as an editable row. |
| Routes | Every route drawn as a cable from its source to its destination. |
| Route count | How many routes this sound has; reads Locked while Lock Matrix is on. |
| + (Add route) | Makes a new route, a free LFO on Filter 1 Cutoff (or the next LFO and destination not yet routed); retarget its source and destination from there. + Add route under the last row does the same. |
| ··· (menu) | Sorting, the matrix lock, clearing, templates and macro baking (below). |
The menu
| Item | What it does |
|---|---|
| Sort by Source | Orders the routes by their source: LFOs together, envelopes together. |
| Sort by Destination | Orders the routes by what they move. |
| Lock Matrix | Keeps these routes when you change presets, so your modulation setup carries over to the next sound. |
| Clear all routes | Deletes every route in this sound. |
| Create Vibrato | A free LFO on pitch, faded in by the mod wheel (the wheel is its aux). Push the wheel to wobble. |
| Create Velo → Amp | Velocity to level, with a gentle curve: harder playing, louder notes. |
| Create Filter Envelope | Env 2 opens Filter 1 Cutoff on every note, the classic pluck. |
| Create Wheel → Cutoff | The mod wheel opens the filter by hand. |
| Apply and Delete Macros | Bakes the current macro positions into the knobs they move and removes the macro routes. Routes that cannot be baked (pitch in semitones, for example) are kept, and the count tells you how many were baked and kept. |
The columns
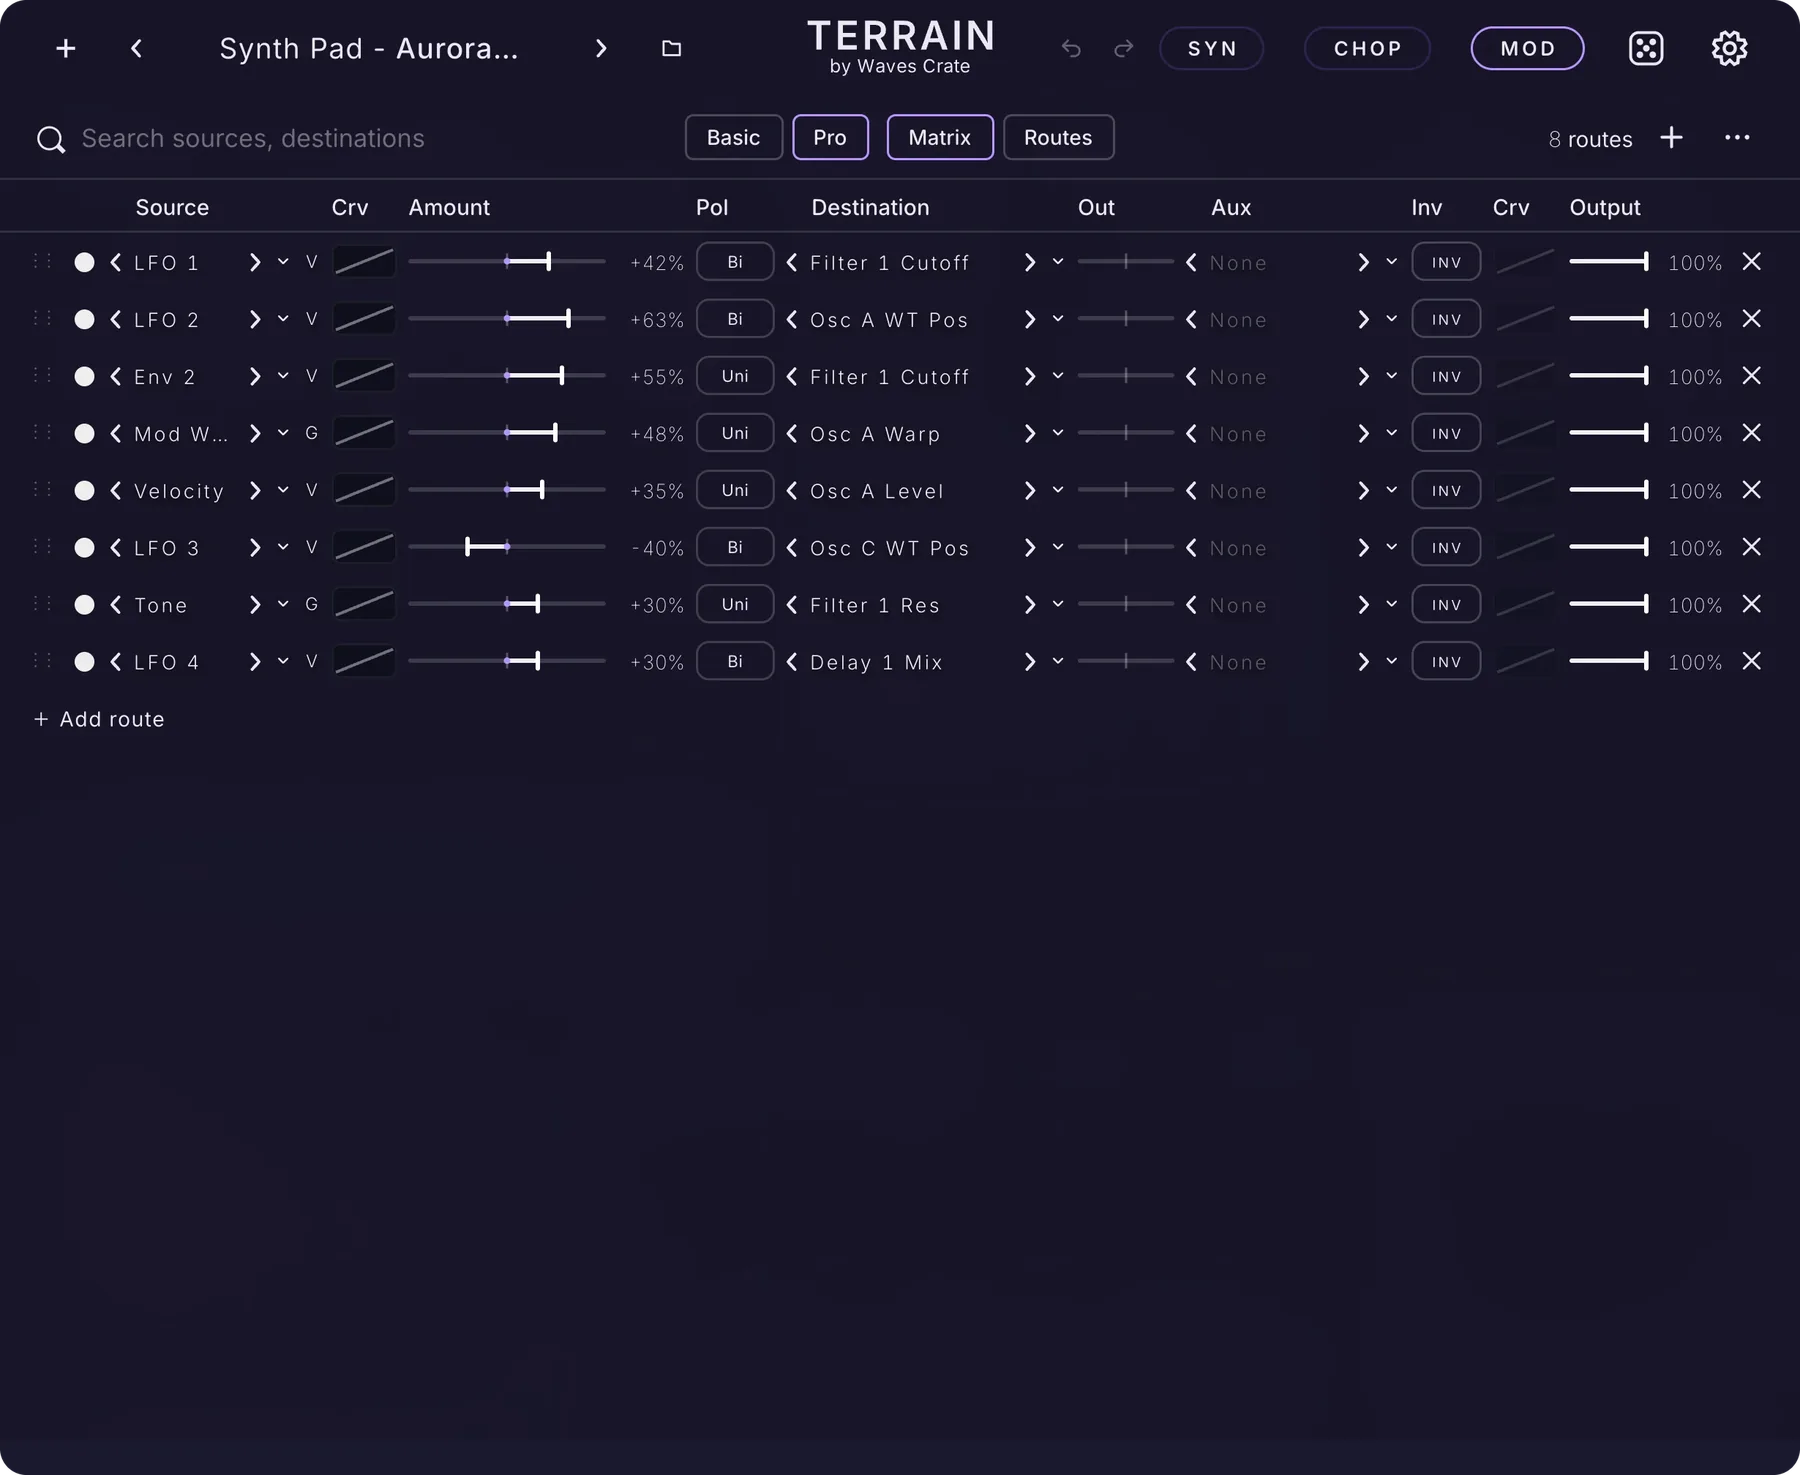
| Column | What it does |
|---|---|
| Handle (⋮⋮) | Drag up or down to move the route in the list. |
| Bypass dot | Click to bypass the route: it stays but stops moving its destination. Click again to turn it back on. |
| Source | Click the name for the source browser; the ‹ › arrows step to the previous or next source. In Pro the letter after it reads V (per voice) or G (global). Click the column title to sort by source. |
| Crv (Pro) | Bends how the source responds, gentle at first or fast at first. Drag up or down; double-click for straight. |
| Amount | How far the source moves the destination, −100% to +100%. Right of centre pushes up, left pushes down. Drag the bar sideways, or drag the percentage up or down (Shift for fine steps, or scroll); double-click the percentage to type a number. In Basic, a small dot beside the amount lights when Pro settings are shaping the route. |
| Pol (Pro) | Polarity. Uni pushes one way from the knob's value; Bi swings both up and down around it. LFOs and Pitch Bend start as Bi, everything else as Uni. |
| Destination | Click the name for the destination browser, grouped by module (Osc A–H, Noise, Filter 1 and 2, Envelopes, LFOs, Macros, FX Rack, Shaper, Arp, Glitch, Robin, Chop, Global, plus Patcher for extra effects and flow cards that live there), with a search field. The ‹ › arrows step through destinations. Click the column title to sort by destination. |
| Out | The live movement of this route right now. Play a note to see it move. |
| Aux (Pro) | A second source that scales the route ("Scale by"), like the mod wheel fading in an LFO. None = no scaling. Click to pick. |
| Inv (Pro) | Inverts the aux: more aux means less modulation, so the aux fades the route out instead of in. |
| Crv (Pro, aux) | Bends how the aux responds. Drag up or down; double-click for straight. |
| Output (Pro) | The final trim of the route after the aux and curve, 0 to 100%. Drag sideways. |
| × | Removes the route; the destination goes back to its own knob value. |
Right-click a row for its own menu: Bypass (or Enable), Scale by (pick the aux), Duplicate (a copy with every setting), Straighten curves and Remove.
The route curve
The Crv column bends a route with one drag. For full control, open the route's curve card: click the Extend icon beside a route in a knob's hover list or right-click menu. The card is the same curve editor the Distortion uses (see Distortion): left to right is what the source puts out, bottom to top is what reaches the knob. The straight diagonal is the route as it is; draw any shape to remap it — a dead zone, a step, an S-curve, an upside-down response. Double-click resets it to straight. The card can pop out into its own window like the flow cards.
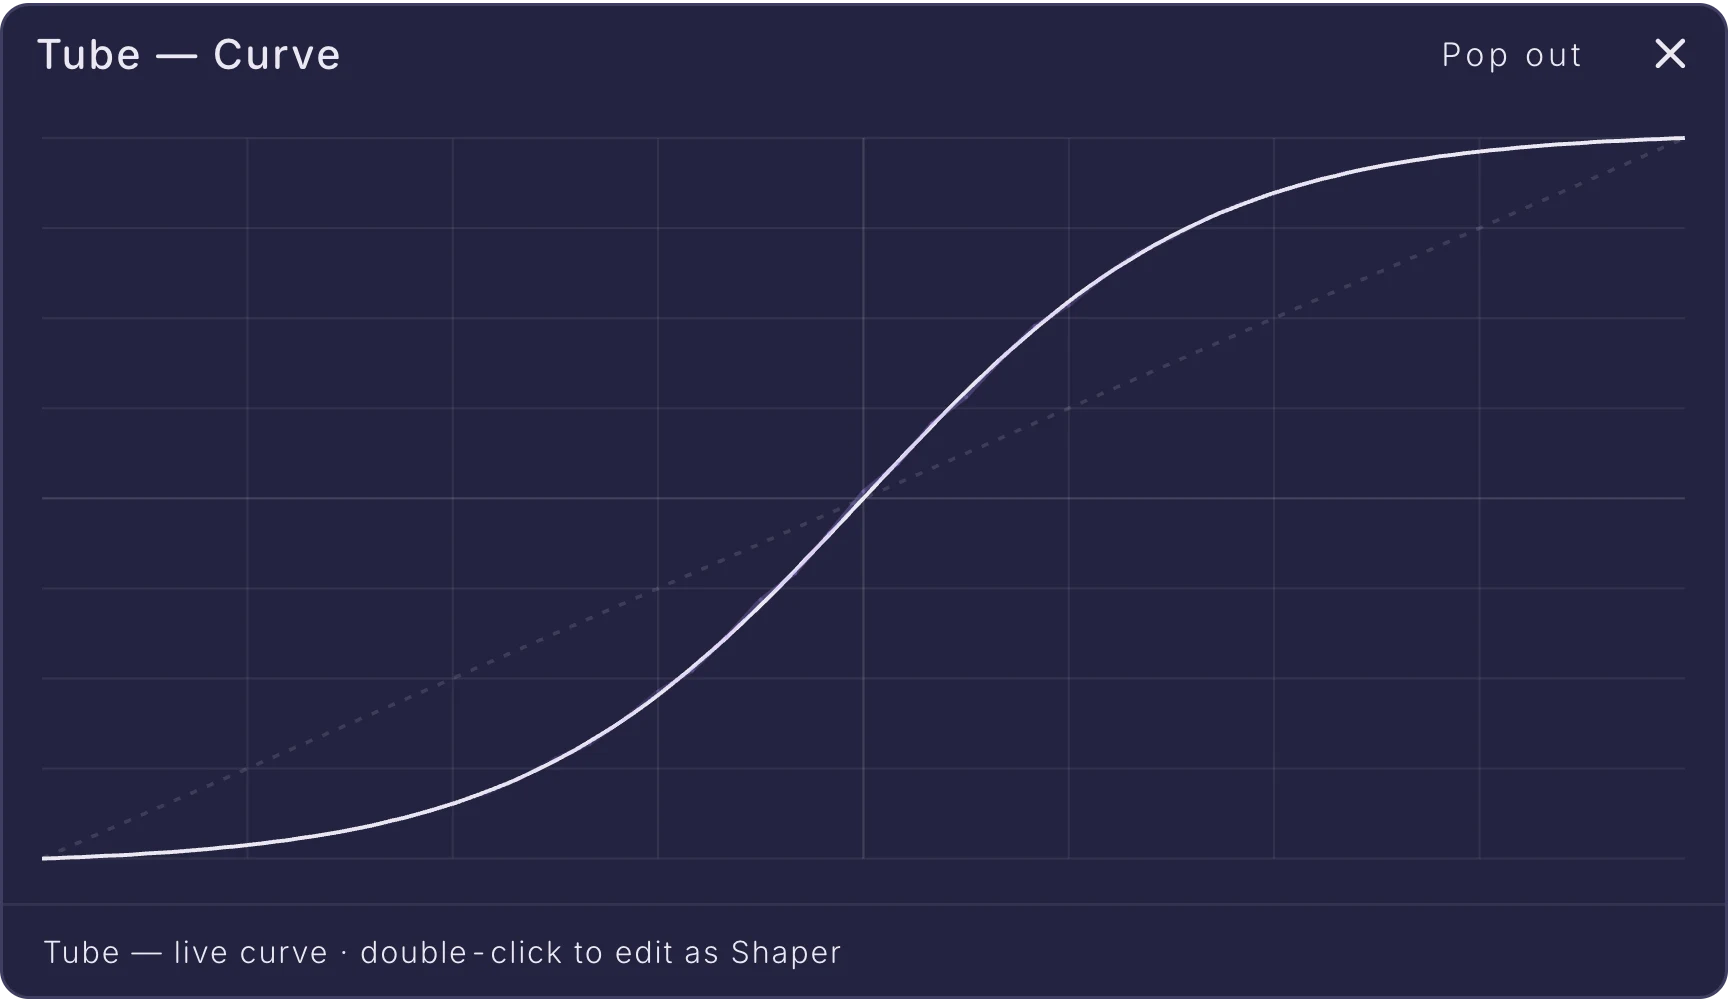
Routes view
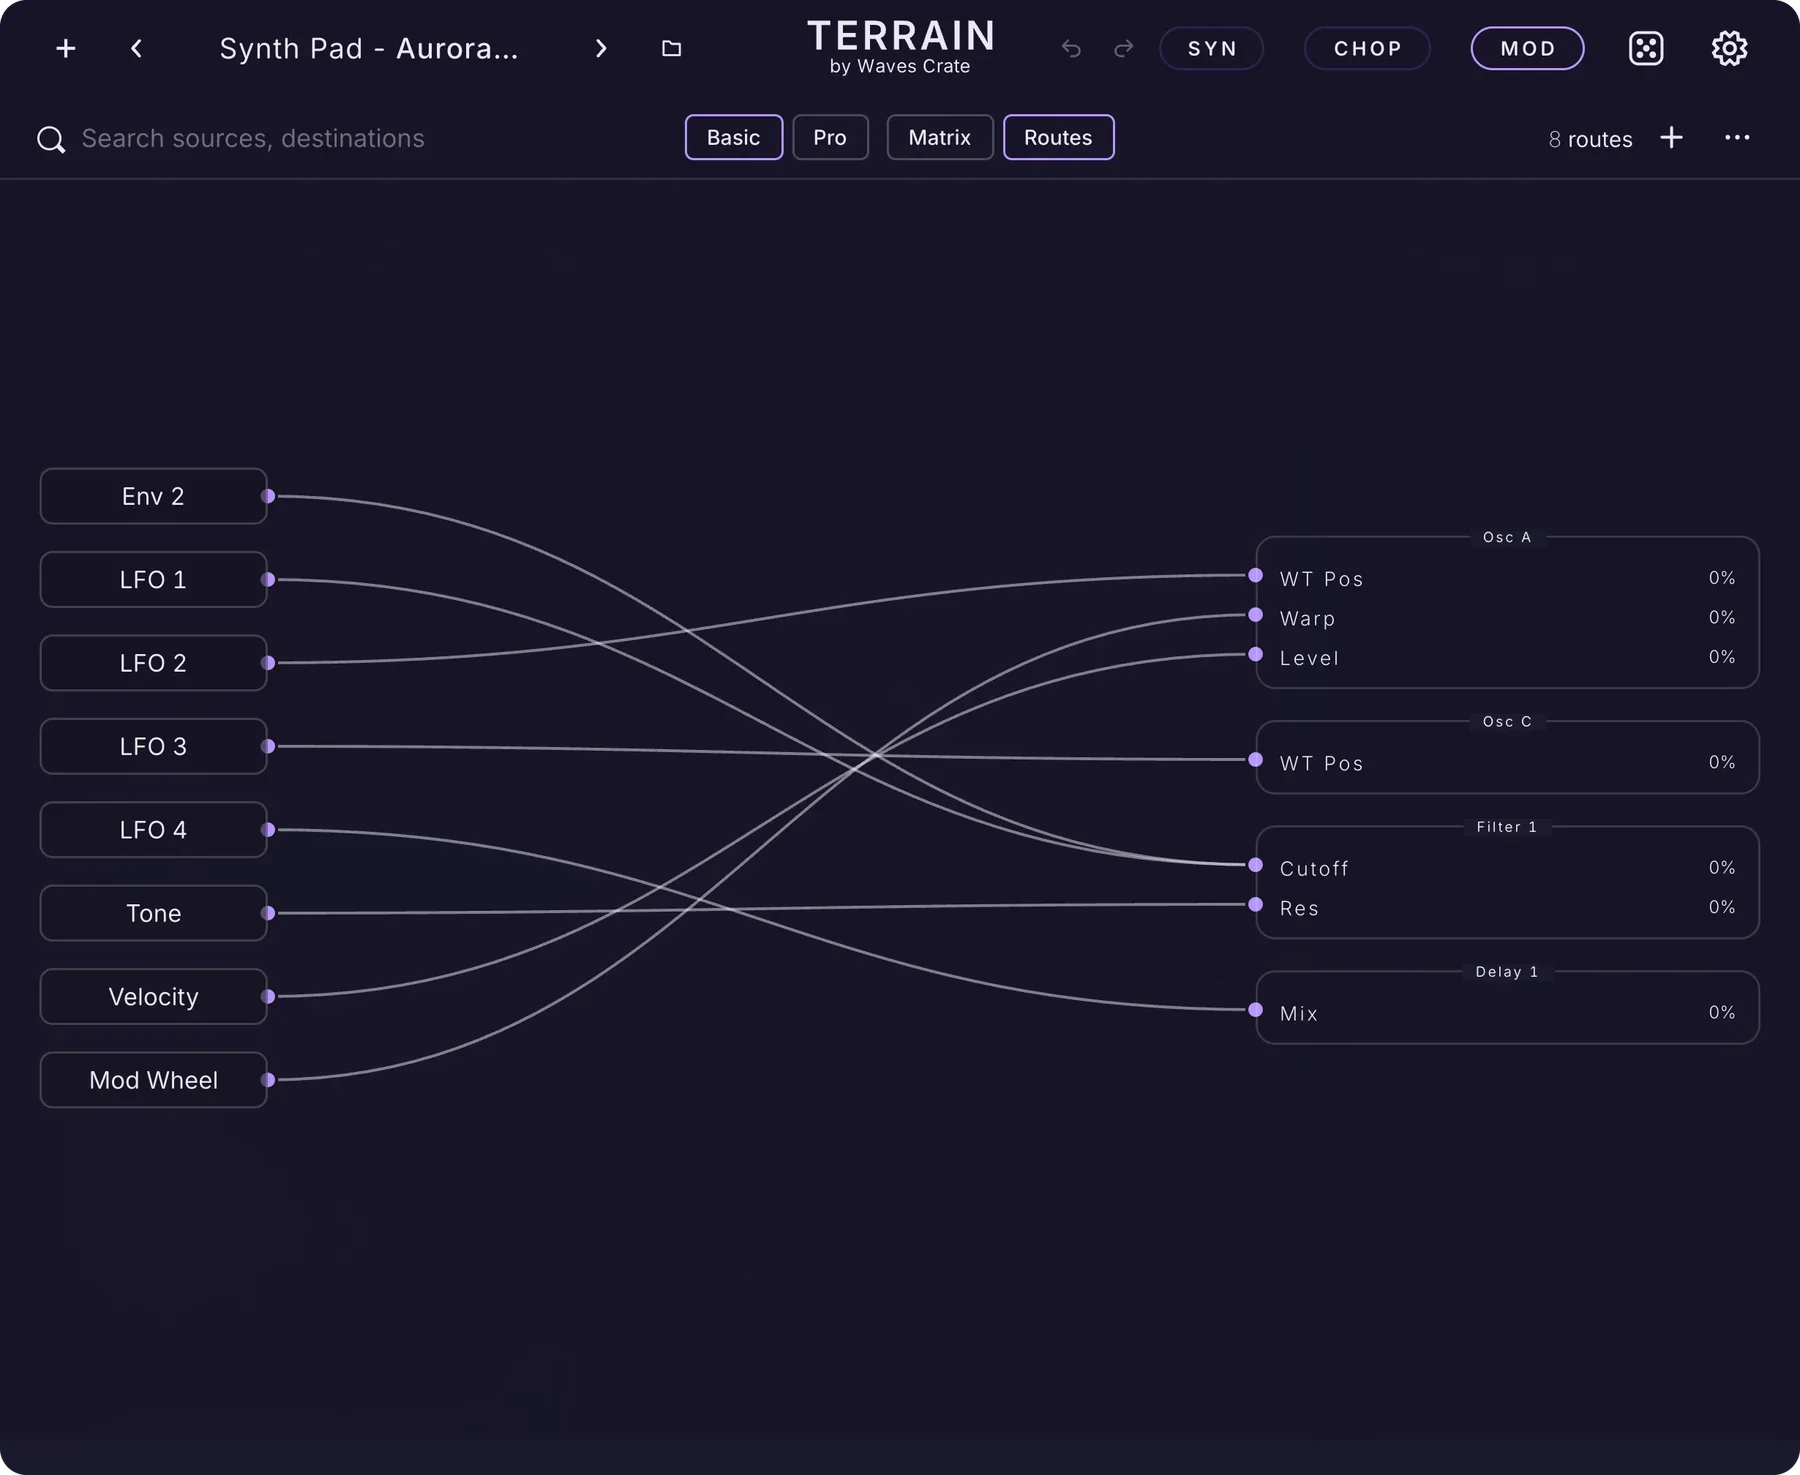
Routes view draws the same routes as cables: every source on the left, every destination on the right, grouped by module, with the live amount it is being moved by right now. Drag to scroll; click a cable to select its route. Switch back to Matrix to edit it.
Macros#
Terrain has nine macro knobs. A macro is a hand-played source: turn it and everything it is routed to moves at once — one gesture for "darker and wider", "more grit", "open the space". Build them into your presets so whoever plays the sound gets the moves you designed.
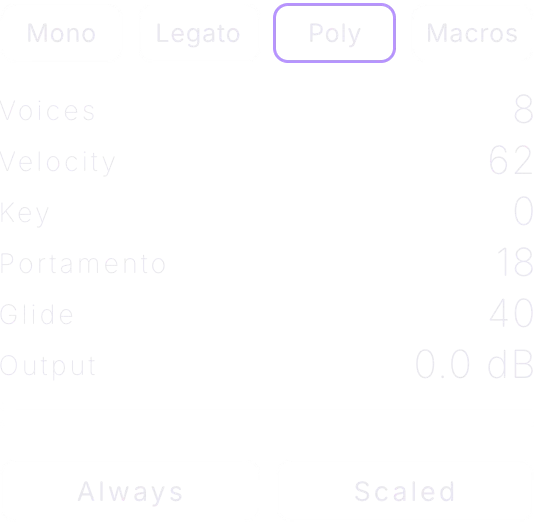
| Gesture | What it does |
|---|---|
| Click Macros in the voice column | Shows the nine macro knobs in place of the voice settings. |
| Drag a macro knob up or down | Moves the macro, and everything routed to it. |
| Drag a macro's name onto a knob | Routes that macro to the knob. Or right-click a knob › Modulate › Macros. |
| Double-click a macro's name | Renames it. The new name shows everywhere: in the source browser, the MOD page and the route lists. |
| Right-click a macro knob | Rename, Reset to default and MIDI Learn — map your hardware knobs to the macros. |
The macros are destinations too, so an LFO or envelope can turn a macro, which then turns everything under it. When a design is finished, Apply and Delete Macros on the MOD page bakes the current macro positions into the knobs.
Chapter 11
Effects
Build your own effect rack. Sixteen effects, each with its own types, voicings and a hidden back panel, chained left to right and routed per oscillator, so the pad can bloom in a hall while the bass stays bone dry. Every knob on every card is a modulation destination.
The FX rack#
The FX rack is the strip of effect cards along the bottom of the SYN page. Each card is one effect. Sound flows through the rack from left to right: the first card processes first, the next card hears the result, and so on to the end of the strip. Drag a card by its grip to change the order and you change the sound.
The rack is not one bus that everything has to pass through. Each card has a row of routing chips, one per sound source, and a source only passes through the cards where its chip is lit. That is how you send Oscillator A through a reverb and a delay while Oscillator B goes only through the distortion and the noise skips the rack entirely.
Every card has a header (grip, name, type, preset, More, power and remove; see Card anatomy), a live picture, four front knobs ending in Mix, one to three pills and the routing chips. The Delay on the right hears whatever leaves the Reverb, for the sources routed through both.
The sixteen effects
| Effect | What it does |
|---|---|
| Reverb | Puts the sound in a space, from a small room to a cave a minute long. Nine types, including Spring and Convolution. |
| Delay | Echoes in time, from clean digital to dark bucket-brigade and diffuse washes. |
| Distortion | 23 types of drive, clipping, diode, wavefolding, drawn curves and digital destruction. |
| Granular | Records the sound and replays it as tiny grains: clouds, shimmers, freezes, stutters. |
| Filter | Any of Terrain's 123 filter types as a rack effect. |
| Chorus | Moving copies for width and thickness, from 80s keyboard chorus to warped-record wobble. |
| Flanger | The jet-plane whoosh of a very short, sweeping delay. |
| Phaser | Sweeping notches that make the sound swirl. |
| Tape | Tape machines for wobble, warmth, hiss and tape echo. |
| Equalizer | Four fixed bands plus up to four free bands, seven EQ personalities. |
| Widen | Spreads the sound across the stereo field with detuned or delayed copies. |
| Compress | Eight compressor designs, from transparent to a hard ceiling. |
| Multiband | Squash-and-lift in up to three bands for dense, loud sounds. |
| Bode | A frequency shifter: metallic, bell-like, spiralling and endless sounds. |
| Splitter | Cuts the sound into bands so each band can get its own chain of effects. |
| Utility | A channel strip: gain, width, pan, polarity, mono checks and basic tone. |
You can run up to six of each effect at once: six reverbs, six delays, six distortions and so on, each with its own settings. The same cards also live in the Patcher, where you can cable them freely (see The Patcher), and in Terrain FX, where they process audio from your track (see Terrain FX).
Card anatomy#
Every effect shares the same chassis. Learn one card and you know all sixteen: a header, a picture, four front knobs with Mix last, one to three pills and the routing row. Click More and the card flips to its back: two menus and eight deeper knobs in the same footprint, so nothing around it moves.
Header controls
| Control | What it does |
|---|---|
| Grip | The six dots. Drag the card left or right. Sound flows through the rack from left to right, so a distortion before a reverb sounds very different from a distortion after it. |
| Name | Which of the sixteen effects this card is. Hover it for a one-line summary. |
| Type | Picks the effect's type (Hall, Room, Plate … on Reverb). Every type has its own sound and, on most effects, its own eight Characters on the back. Values you set on the shared knobs carry across a type change, so you can audition types without losing your settings. |
| Preset | Opens the card's preset menu (below). |
| More | Flips to the back panel with eight deeper knobs and two menus. Click the arrow to come back. Three cases differ: the Filter and the Reel, Porta and Wire tape machines have no back panel (and no More button), and the Utility's back has eight knobs but no menus. See their sections. |
| Power dot | On or bypassed. A bypassed card keeps its settings and routing. |
| Remove | Deletes the card. Any modulation routes on its knobs go with it. |
The preset menu
Click the preset pill to open the card's own preset menu. It is per type: a Plate reverb shows plate presets, a Spring reverb shows spring presets.
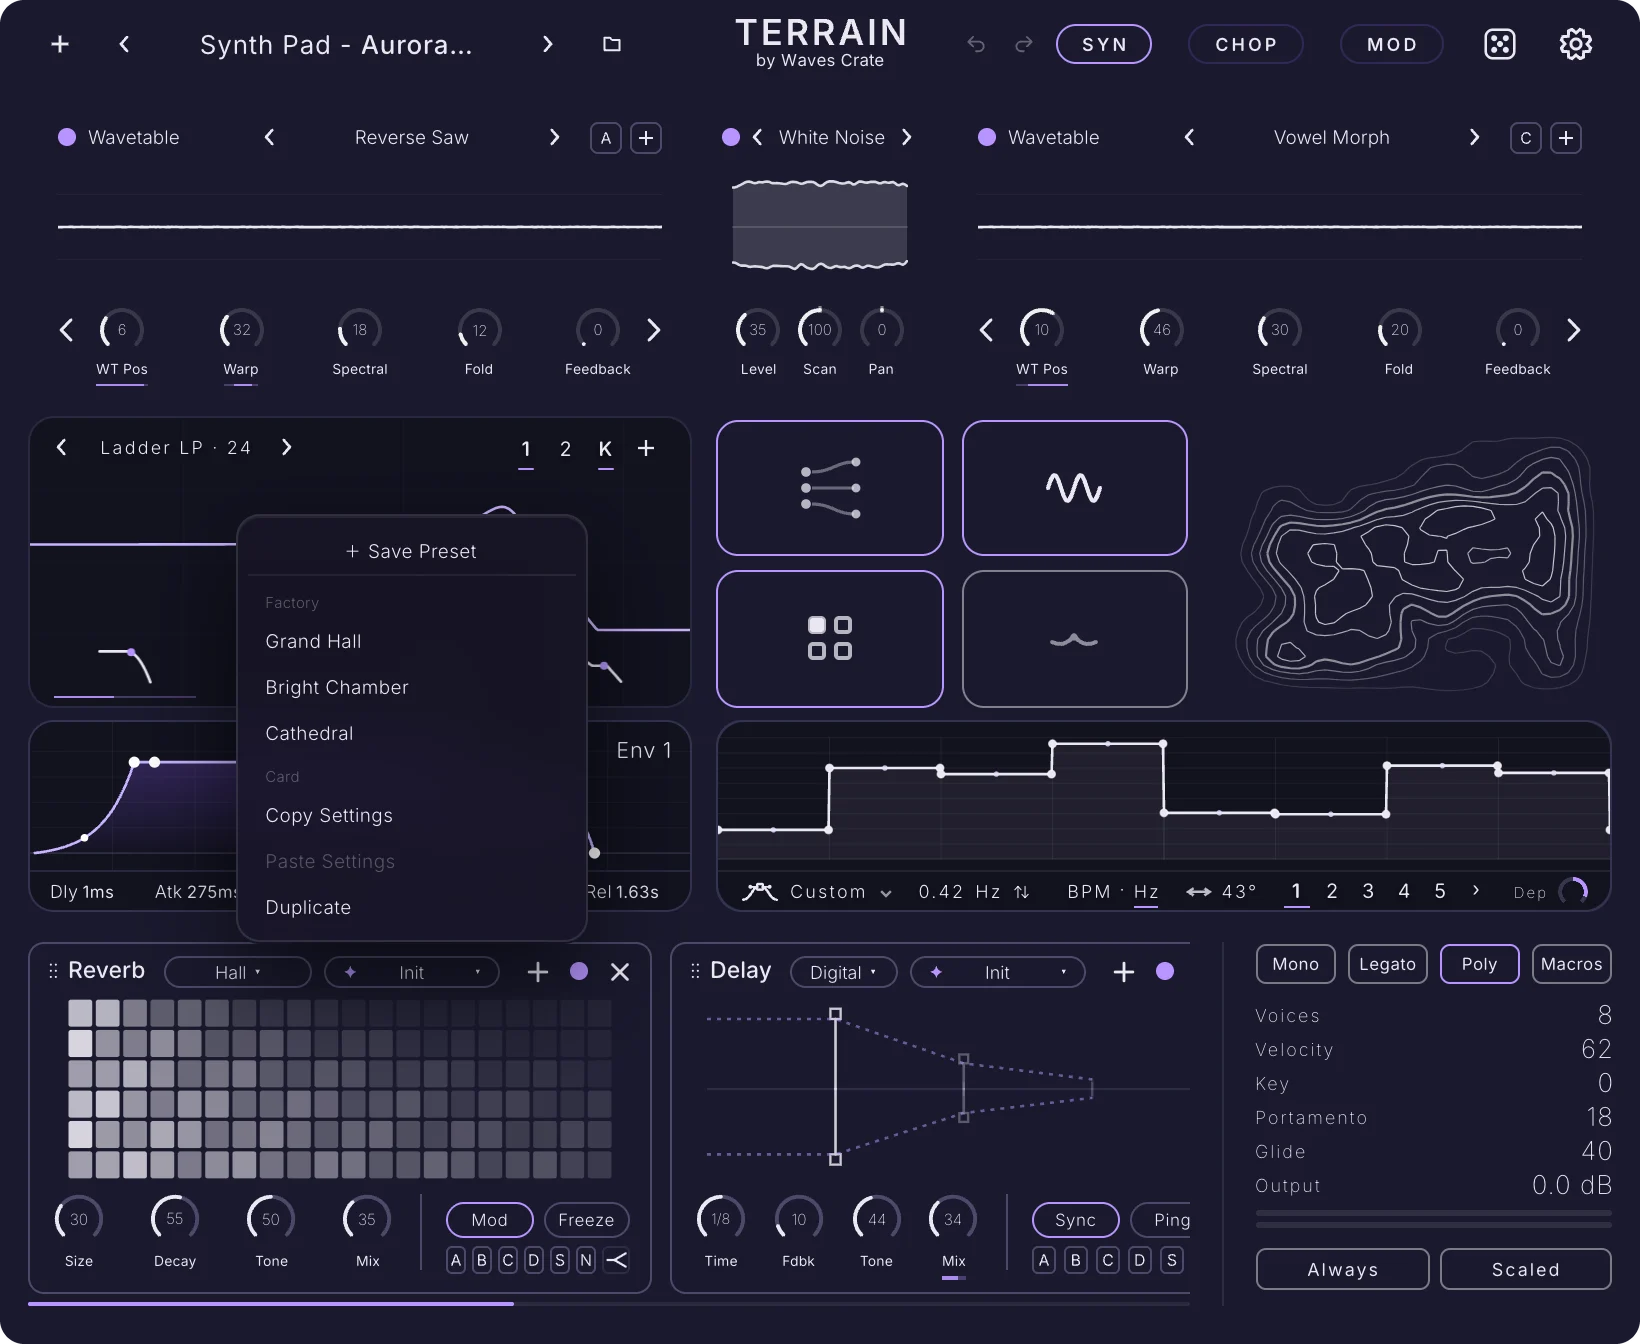
| Item | What it does |
|---|---|
| + Save Preset | At the top. Stores the current settings under a name you type, in the User list for this type. |
| Factory | Ready-made settings for the current type. Click one to load it. |
| User | Your saved presets. The cross on a row deletes it (Terrain asks first). |
| Copy Settings | Copies this card's settings so you can paste them onto another card of the same effect. |
| Paste Settings | Puts copied settings onto this card. Dimmed (and named after what you copied, e.g. "Paste Reverb Settings") when the clipboard holds a different effect. |
| Duplicate | Adds a second copy of this card with the same settings, right after it. Dimmed when six of this effect are already in the rack. |
The Convolution reverb adds an Impulse response section: + Load IR opens a file chooser for your own impulse response, followed by the built-in spaces.
Knobs
Drag a knob up or down to change it; double-click to reset it to its default. The value reads inside the ring in the unit that matters (milliseconds, note lengths, Hz, dB or a plain 0 to 100). Every front and back knob can be modulated; see Modulating effects.
Pills
Pills are on/off switches. A lit pill is on. Which pills a card has depends on the effect (most have two, Equalizer has one, Splitter three), and on Reverb and Distortion they change with the type. Each effect's section lists its pills.
Routing and Send#
The chips in the bottom-right corner of every card decide which sources play through it. Click a chip to light it; click again to unlight it.
| Chip | Source |
|---|---|
| A, B, C, D | Oscillators A to D. |
| S | The Sub oscillator. |
| N | The Noise. |
| E, F, G, H, N2 | Oscillators E to H and Noise 2. These extra chips appear on the cards in the Patcher, where the extra sources live. |
Lit means the source plays through this card and carries on along the rack to the next card where its chip is lit. Unlit means the source skips this card. A source that is lit on no card at all never enters the rack.
Send
The first card in the rack (whichever effect it is) carries one extra chip at the end of the routing row, drawn as one line splitting into two. That is Send. Off, the routed oscillators go through the rack. On, the oscillators keep playing dry in the main mix and the rack receives a copy, like an aux send on a mixing desk. Use it for reverbs and delays where you want the full dry signal plus a wet return. Send belongs to the first slot: drag another card to the front and the chip moves with the position, not with the effect.
Adding, removing and reordering#
The add button sits at the end of the rack. Click it for the list of all sixteen effects, sorted A to Z. A new card lands at the end of the rack. When the rack is empty, the whole strip shows Add Effects; click it to add your first effect.
The list shows how many of each effect are already in use (for example "Reverb ×2"). When six of one effect are in the rack, its row reads "(max)" and is greyed out: remove one to add another. Six is the limit per effect, not for the rack as a whole.
| Action | How |
|---|---|
| Add an effect | Click the add button at the end of the rack and pick from the list. |
| Add a copy of a card | Preset menu › Duplicate. The copy lands right after the original. |
| Reorder | Drag the grip left or right. |
| Bypass | Click the power dot. |
| Remove | Click the cross. Modulation routes on the card's knobs are removed with it. |
| Add an effect inside a Splitter band | Click the + under a band in the Splitter's picture (see Splitter). |
Modulating effects#
Every rack knob, front and back, is a modulation destination: up to twelve per card (four front, eight back). Drag a source onto a knob exactly as you would on an oscillator: an LFO number, an envelope chip, a macro name, the word Velocity or Key. The accent underline appears under the knob's label, and the route shows up on the MOD page with the effect's name. See Modulation for the full drag-to-modulate workflow, depth and curves.
Good targets: reverb Size on a slow LFO for a breathing space, delay Fdbk on the mod wheel for dub throws, distortion Drive on velocity so harder notes bite, Bode Shift on an envelope for a falling metallic sweep, Utility Width on a macro to open the stereo image in a drop.
Reverb#
Reverb puts the sound in a space. Nine types cover simulated halls, rooms and plates, a physical spring tank, two classic digital racks, a vast dark cave, an octave-climbing shimmer and convolution with recorded spaces (or your own impulse responses). Pair it with Delay for big ambient tails.
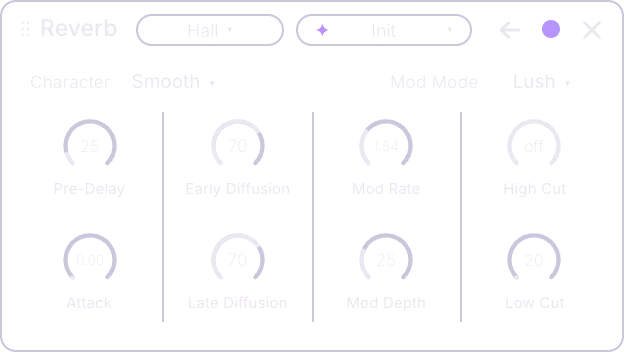
The back is laid out in lanes: when the reverb starts (Pre-Delay over Attack), how smooth it is (the two Diffusions), how it moves (Mod Rate over Mod Depth) and its tone (High Cut over Low Cut).
Types
| Type | Sound | Character options |
|---|---|---|
| Hall | A big, smooth concert-hall tail for pads, strings and leads. | Smooth, Random, Vintage, Cathedral, Chamber, Dark, Bright, Ethereal |
| Room | Distinct wall echoes and a short tail, so drums sit in a real room. | Studio, Booth, Bedroom, Live, Chamber, Tile, Garage, Warehouse |
| Plate | A bright, dense shimmer with no early echoes: the classic vocal and snare sheen. | Classic, Vintage, Modern, Vocal, Drum, Bright, Dark, Shimmer |
| Spring | The boingy, drippy chirp of a guitar-amp spring tank, for surf and dub. Has its own back panel. | Surf, Amp, Studio, Cheap, Outboard, Long Pipe, Dub, Lo-Fi |
| Digital | A lush, chorused late-70s studio rack, wide and glossy on pads. | Program: Concert B, Small A, Large B, Vocal Plate, Perc Plate, Constant, Chamber, Room A |
| Vintage | A grainy 80s digital rack with lo-fi grit, good for retro and gated sounds. | Classic, Bright, Metal, Space, Cheap, Warm, Gated, Cathedral |
| Basin | A huge, dark cave wash up to a minute long, for drones and film beds. | Basin, Cavern, Abyss, Glacier, Chasm, Fog, Void, Bloom |
| Shimmer | The tail climbs an octave and feeds back into an angelic cloud. | Shimmer, Angel, Ice, Choir, Sparkle, Deep, Ghost, Cascade |
| Convolution | A recorded real space instead of a simulated one. | Space: Hall, Room, Chamber, Cathedral, Plate, Ambience, Cave, Tunnel |
When you switch type, the Character keeps its position in the list, so the third voicing of a Hall becomes the third voicing of a Plate.
Front
| Control | What it does |
|---|---|
| Size | How big the space is. Up = a bigger hall, down = a small room. On Spring it is the spring tension: the time between boings, 12 to 120 ms, and their pitch. On Convolution it stretches the recorded space from 0.4× to 2×. Try Size up with Decay low for a big, short space. |
| Decay | How long the tail lasts. Up = a long wash, down = a quick room. On Spring it is the dwell: how long the springs keep ringing. Long decays love Low Cut on the back. |
| Tone | Dark to bright tail. 50 is neutral; darker tails sit behind the mix. |
| Mix | Dry against wet. 100 = only reverb. 20 to 35 keeps the sound in front. |
Back (every type except Spring)
All types except Spring share the same eight back knobs, laid out in lanes: one column per job, the related control underneath. Values carry across a type change.
| Control | What it does |
|---|---|
| Pre-Delay | A gap before the reverb starts, 0 to 250 ms. Up = the hit stays clear in front of the tail. |
| Attack | The tail swells in over 0 to 300 ms instead of arriving at once. 0 = off; up = a soft bloom. |
| Early Diffusion | Smears the first echoes together. Down = grainy, separate echoes; up = one smooth start. |
| Late Diffusion | Smears the tail together. Down = sparse, fluttery and metallic; up = a dense, glassy wash. |
| Mod Rate | Speed of the slow wobble in the tail, about 0.05 to 7 Hz. Needs Mod on. |
| Mod Depth | How far the tail wobbles in pitch. Up = a lush chorus, top = a clear warble. Needs Mod on. |
| High Cut | Removes treble from the tail, 1 to 20 kHz; all the way up reads "off". Down = a darker, older reverb. |
| Low Cut | Removes lows from the reverb, 20 to 1000 Hz. Up = less mud under bass and kicks. |
Back (Spring)
| Control | What it does |
|---|---|
| Pre-Delay | A gap before the springs answer, 0 to 150 ms. |
| Transition | How high the metallic zing of the spring chirp reaches. Down = a dark boing, up = brittle. |
| Shake | Rattle and turbulence, like kicking the amp. 0 = clean, up = noisy crash. |
| Dispersion | How big the spring chirp is. Down = clean, up = a huge laser boing. |
| Damping | High-end loss inside the springs. Up = darker drips. |
| Drive | Saturates the sound going into the tank. Up = dirtier, like a hot amp. |
| Low Cut | Removes lows from the reverb, 20 to 1000 Hz. |
| Width | Stereo width of the spring tail. Down = mono, up = wide. |
Back menus
| Menu | What it does |
|---|---|
| Character / Program / Space | Voices the type: decay, tone, damping and motion together (see the types table for each list). On Digital it is called Program and picks a classic studio-rack program; on Convolution it is Space and picks the recorded space. |
| Mod Mode | The style of the tail's wobble: Off, Subtle, Lush, Chorale, Random, Chaos, Drift, Ensemble. Needs Mod on. Lush is the classic. |
| Springs (Spring only) | How many springs, 1 Spring to 6 Springs. More = denser, smoother boings. |
Pills
| Pill | What it does |
|---|---|
| Mod | (Hall, Plate, Digital, Vintage, Basin, Shimmer, Convolution) Turns the slow wobble in the tail on or off. Off = a still, static tail. |
| Duck | (Room, Spring) The reverb dips while you play and blooms back in the gaps, so the notes stay clear. |
| Freeze | (every type except Convolution) Holds the current tail forever as a pad and stops new sound entering. Play dry over it. |
| Reverse | (Convolution) Plays the recorded space backwards, so the reverb swells up into each note. |
The picture
The grid of squares blooms with the live tail; a bigger Size lights more of them. On the Convolution type you can drag an audio file straight onto the picture to load it as an impulse response, or use + Load IR in the preset menu.
Delay#
Delay repeats the sound in time. Lock it to the song with Sync, bounce it with Ping, and split the left and right times on the back for wide, uneven echoes.
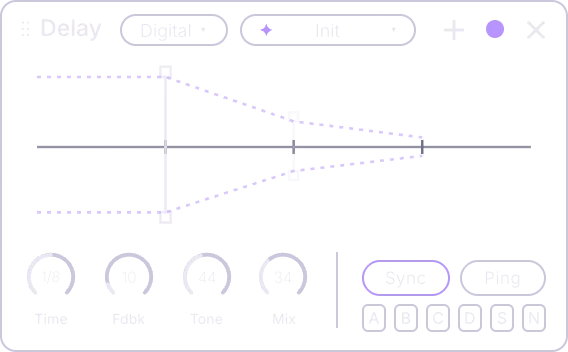
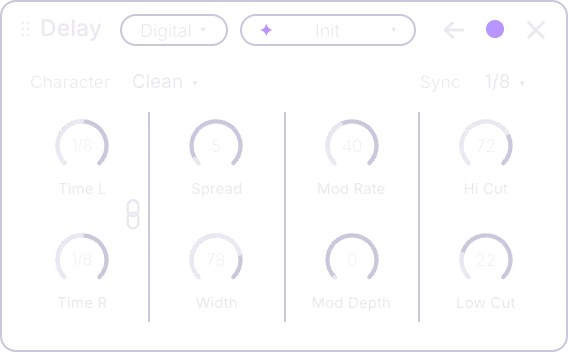
Types
| Type | Sound |
|---|---|
| Digital | Clean, exact repeats. |
| Tape | Each repeat gets warmer and dirtier, like tape echo. |
| BBD | Dark, gritty analog bucket-brigade echoes that darken as the time grows. |
| Diffuse | Echoes blur into a reverb-like wash. |
Front
| Control | What it does |
|---|---|
| Time | The gap between echoes, 1 ms to 8 s, or a note length with Sync on. Try 1/8 dotted for bounce. |
| Fdbk | Feedback: each echo is fed back in. Down = one echo, up = many; near the top it builds and howls. |
| Tone | Colours the echoes. Down = darker, up = thinner and brighter. 50 is neutral. |
| Mix | Dry against echoes. 100 = echoes only. 20 to 35 keeps leads clear. |
Back
| Control | What it does |
|---|---|
| Time L | The left echo time, the same as the front Time knob. |
| Time R | The right echo time. The link between Time L and Time R ties them together; click it to unlink and set the right side apart. |
| Spread | Delays the right side a little later than the left for a stereo bounce. Works while the times are linked. |
| Width | How far the echoes spread left and right. Down = mono, up = wide. |
| Mod Rate | Speed of the wobble on the echoes, 0.05 to 8 Hz. Needs Mod Depth up to be heard. |
| Mod Depth | How much the echoes wobble in pitch. 0 = steady; a little = tape-like chorus. |
| Hi Cut | Each repeat loses more treble, 1.2 to 18 kHz. Down = darker, dub-style echoes. |
| Low Cut | Each repeat loses more bass, 20 to 1000 Hz. Up = thin, clean echoes that stay out of the low end. |
Back menus
| Menu | Options |
|---|---|
| Character | Clean, Warm, Vintage, Modern, Lo-Fi, Bright, Dark, Wide. Adds warmth and grit; heard most on the Tape and BBD types. |
| Sync | Free, 4 bar, 2 bar, 1 bar, 1/2, 1/2D, 1/2T, 1/4, 1/4D, 1/4T, 1/8, 1/8D, 1/8T, 1/16, 1/16D, 1/16T, 1/32, 1/64, 1/128, 1/256. D = dotted, T = triplet. Free = milliseconds. |
Pills
| Pill | What it does |
|---|---|
| Sync | Echo times lock to the song tempo as note lengths (1/8, 1/4 and so on). |
| Ping | Ping-pong echoes that bounce left and right. |
The picture draws each echo as a line: their spacing is Time, their fade is Fdbk.
Distortion#
Distortion drives the sound until it bends: warm valve grit, pedal crunch, clipping, diodes, wavefolders, curves you draw yourself and broken digital noise. Its 23 types fall into six families. The family decides the label of the second front knob, the second pill and the eight back knobs; each type also has its own list of Characters, the circuit model inside it.
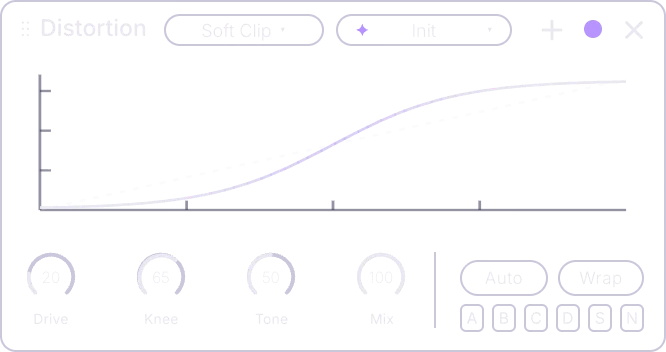
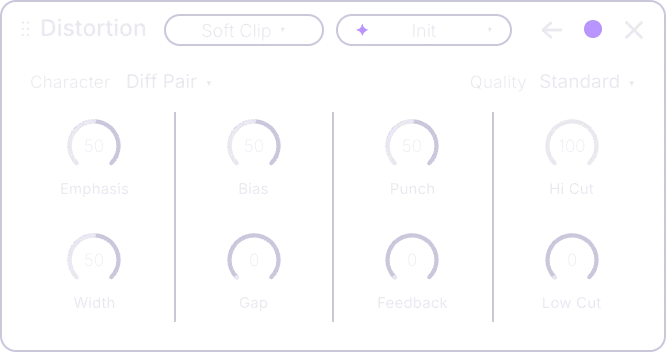
The picture is the distortion's curve: the dotted line is clean, and the more the solid curve bends away from it, the more the sound distorts. Right-click it for Extend (see The curve card). The second front knob and the second pill change with the family: on the Clip types shown here they are Knee and Wrap.
Types and families
| Type | Sound | Character options |
|---|---|---|
| Analog family (front knob Bias, pill Slam) | ||
| Tube | Warm valve drive with soft, even harmonics; great on keys and bass. | 12AX7 Tight, 12AX7 Round, 12AU7 Line, 6V6 Power, Starved, Cold Clip, Blocking, Vari-Gain |
| Tape | Soft tape saturation that smooths and glues the attack. | Reel 15, Soft Reel, Reel 30, Cassette, Chrome II, Dub Plate, Worn, Under-Bias |
| Transformer | Iron saturation where the lows thicken first. | Round Iron, Snap Iron, Clean Iron, Bloom Iron, Cheap Line, Ge Radio, DC Magnet, Toroid |
| Stomp Box | A classic green pedal: clean bass, crunchy mids. | Green Drive, Yellow Drive, Blend Ge, Open Drive, LED Clip, MOSFET, Mid Scoop, Starved 9V |
| Overdrive | Pedal gain stages that square off into fuzz. | LM308 Dist, TL071 Dist, Tight Dist, Sustain Fuzz, Plexi, High-Gain, Slew Kill, Dying 9V |
| Clip family (front knob Knee, pill Wrap) | ||
| Soft Clip | Rounded clipping for clean, warm loudness. | Diff Pair, Glue, Dense, Growl |
| Hard Clip | Flat-topped clipping, bright and aggressive. | Razor, Rails, Wrap Tip, Modulo |
| Zero-Square | Turns the wave into a square: a gated, buzzy fuzz. | Comparator, Duty, Octave, Sub Oct, PWM Env |
| Slew Clip | Limits how fast the wave can move: dull and spitty. | Fast, Slow, Asym, Charge, Stick, Ring, Bounce, Stereo |
| Diode family (front knob Asym, pill Octave) | ||
| Diode 1 | Diode-pair pedal crunch; pick the diode on the back. | Silicon, Germanium, LED, Schottky, Stacked, MOSFET, Log, Leaky |
| Diode 2 | Crossover distortion: quiet parts sputter and break up. | Class B, Class AB, Gate, Ge Bridge, Push-Pull, Sputter, Half Gate, Ratchet |
| Asym | One-sided clipping with strong even harmonics. | Ge/Si, Si/LED, 2-Up-1-Dn, Grid Bias, Amp Curve, Half Hard, Screamer, Collapse |
| Rectify | Flips the low half of the wave up, for octave-up and ring tones. | Bridge, Half Wave, Doubler, Octave Up, Ringer, Rect Fuzz, Xformer, Over-Rect |
| Fold family (front knob Symm, pill Track) | ||
| Linear Fold | Folds the peaks back, bright and buzzy. | Tri Fold, Ladder, Compressed, Expanded, Lossy, Runaway, Rounded, Brk Mirror |
| Sine Fold | Smooth sine folding, bell-like and gentler. | Shaper, Bell, Brass, Formant, Cluster, Hollow, Ripple, Chime |
| West Coast | A multi-cell folder with metallic, vocal sweeps. | Five Cell, Extended, Deep Fold, Lockhart, Metalizer, Six Cell, Timbre Swp, Cold Solder |
| Shaper family (front knob Morph, pill Sym) | ||
| Shaper | Bends the wave through a curve you draw. | Clean, Log, Razor, Glass, Twice, Growl, Sticky, Squeeze |
| Shaper Asym | A drawn curve with different top and bottom halves. | Direct, Halves, Log Both, Razor, Glass, Twice, Growl, Bias Walk |
| Harmonics | Adds chosen overtones on top of the sound: draw bars 1 to 16. | Pure, Index, Odd Only, Even Only, Ramp, Comb, Stretch, Beyond |
| Table | Shapes the wave through a wavetable frame. | Frame, Sweep, Mip, Spectral, Half, Phase, Noise, Two-Table |
| Digital family (pill Clean; front knob per type) | ||
| Downsample | Lowers the sample rate for aliasing and lo-fi steps. Front knob: Rate. | Modern, Sampler 12, Sampler 8, Telephone, Warble, Trk + Hold, Peak Hold, Shatter |
| Bitcrush | Lowers the bit depth for grit and steps. Front knob: Bits. | Linear, Zero-Sq, Sputter, Telephone, A-Law, Shaped, 12-Bit, Overs |
| Overflow | Loud peaks wrap to the other side: harsh, broken-file noise. Front knob: Wrap. | Overflow, Twos Comp, Bounce, Mirror, XOR, Rotate, Soft Wrap, Melt |
Front
| Control | What it does |
|---|---|
| Drive | How hard the sound is pushed. Up = more distortion and grit, down = clean. Pair with Tone to tame fizz. |
| Bias (Analog) | Shifts the circuit's resting point. Off-centre = one side clips first, a warmer, rounder bite. |
| Knee (Clip) | How round the clipping corner is. Down = razor-sharp edges, up = softer and rounder. |
| Asym (Diode) | Makes one side of the wave clip before the other. Centre = even. On Rectify it is the rectify amount: centre = full flip for an octave up, top = over-rectified and harsh. |
| Symm (Fold) | Shifts the wave up or down before folding. Off-centre = lopsided, warmer folds. |
| Morph (Shaper) | From a straight line (0) to your full drawn curve (100). On Harmonics it blends between the two sets of harmonic bars; on Table it scans through the wavetable frames. |
| Rate / Bits / Wrap (Digital) | Rate lowers the sample rate (metallic, lo-fi grit); Bits lowers the bit depth from 16 bits down; Wrap sets how low the wrap-around point sits (up = peaks flip over sooner). |
| Tone | Tilts the distorted sound. Down = darker and smoother, up = brighter and fizzier. Centre = flat. |
| Mix | Clean against distorted. Lower it to blend in drive but keep the attack; 100 = all distortion. |
Back, by family
Every family keeps Low Cut and Hi Cut on its back. Low Cut removes lows before the distortion (20 Hz to 1.2 kHz; up = tighter bass); Hi Cut removes harsh treble after it (350 Hz to 22 kHz; down = smoother). Most families also have Emphasis: which end distorts more (up = the highs fizz, down = the lows get fatter, centre = even). The rest change with the family.
| Family | Back knobs |
|---|---|
| Analog | Low Cut, Hi Cut, Emphasis, Sag, Recovery, Drift, Drift Rate, Snarl |
| Clip | Low Cut, Hi Cut, Emphasis, Width, Bias, Gap, Punch, Feedback |
| Diode | Low Cut, Hi Cut, Emphasis, Width, Knee, Dead Zone, Slew, Snarl |
| Fold | Low Cut, Hi Cut, Emphasis, Stages, Spacing, Rebound, Corner, Width |
| Shaper | Low Cut, Hi Cut, Emphasis, Width, Smooth, Bias, Beyond, Squash |
| Digital | Low Cut, Hi Cut, Bits (Downsample) or Rate (Bitcrush, Overflow), Smooth, Dither, Jitter, Spread, Feedback |
| Control | What it does |
|---|---|
| Sag | Loud playing pulls the power supply down. Up = bloom, squash and darker swells. |
| Recovery | How fast the sag lets go. Down = sputtering, up = quick recovery. |
| Drift | A slow random wander of the circuit plus a little wobble. Up = more alive and unstable. |
| Drift Rate | Speed of that wander, 0.02 to 30 Hz. |
| Snarl | Analog types: extra feedback and memory in the circuit, a grittier growl. On Stomp Box it adds a square sub-octave that follows the note. Diode types: feedback around the diodes, a screaming, singing edge. |
| Width | Stereo drive. 50 = even; up = left and right drive differently; down = only the centre distorts. |
| Bias | Shifts the wave off centre before clipping, for a warmer, lopsided tone. |
| Gap | A dead zone where quiet parts drop out. Up = notes tear and sputter. |
| Punch | Centre = off. Down = attacks stay clean and the tail breaks up; up = attacks get smashed. |
| Feedback | Feeds the distortion back into itself; above about 75 it screams on its own. On Digital types it is digital feedback that rings and grows, the top half darker. |
| Knee | (Diode) How gently the diodes start to clip. Up = smoother. |
| Dead Zone | A level quiet parts must pass to be heard. Up = gated, sputtering breakup. |
| Slew | Slows the wave's edges. Up = sludgier, duller tone. |
| Stages | How many times the wave folds, 1 to 32. Up = brighter and buzzier. |
| Spacing | How far apart the folds sit. Changes the fold colour. |
| Rebound | How hard each fold bounces back. |
| Corner | Rounds the fold corners. Up = smoother. |
| Smooth | Shaper types: blurs the curve so harsh corners round off. Digital types: softens the digital steps. |
| Beyond | What happens past the curve's edge. 0 = clamp, 50 = fold back, 100 = wrap around. |
| Squash | Levels the input so quiet notes travel the whole curve too. |
| Bits / Rate | (Digital) A second crush on the back: bit depth or sample rate, whichever the front knob is not. |
| Dither | A whisper of noise before the crush that smooths harsh steps into soft hiss. |
| Jitter | Makes the digital clock unsteady. Up = a wobbly, warbly crush. |
| Spread | (Digital) Runs the right clock faster than the left for stereo crush. 0 = the same. |
Back menus
| Menu | What it does |
|---|---|
| Character | The circuit model inside this type (the lists are in the types table). The selected position carries across a type change. |
| Quality | Off, Standard, High, Ultra. Runs the distortion at a higher internal rate (oversampling). Higher = a cleaner top end and more CPU; Off = raw grit and aliasing. |
Pills
| Pill | What it does |
|---|---|
| Auto | (every type) Keeps the output about as loud as the input, so more Drive does not just mean louder. |
| Slam | (Analog) A big extra push before the circuit, about +20 dB, for heavy saturation. |
| Wrap | (Clip) Anything past the clip edge jumps to the other side: a screaming sawtooth edge. |
| Octave | (Diode) Flips the wave before the diodes for an octave up. With Rectify, two octaves. |
| Track | (Fold) The fold depth follows the note: low notes fold more, high notes less. |
| Sym | (Shaper) Makes the curve match top and bottom, removing warm even overtones and DC offset (a shift off centre that eats headroom). |
| Clean | (Digital) Filters before the crush for band-limited lo-fi, like a telephone or AM radio. |
The curve card
Right-click the Distortion's picture and choose Extend to open the big curve card. On every type outside the Shaper family the card shows the type's real curve, live. Double-click it (or right-click the picture and choose Edit as Shaper curve) to turn that curve into points you own: the card switches the Distortion to Shaper Asym with the curve as its starting point, so you can edit a Tube or a West Coast fold by hand.
On Shaper and Shaper Asym you draw the curve directly: drag points, bend the lines between them, and use the footer's beyond value (the back panel's Beyond). On Harmonics the card shows bars 1 to 16; draw each bar's level, pull a bar below the line to flip its phase, and use Clear to start again. On Table, Morph sweeps the frame stack, and the footer lets you pick the source: Stock (the built-in table) or the wavetable of Oscillator A, B, C or D.
Granular#
Granular records whatever passes through it and plays it back as tiny grains. Dense, long grains melt into a cloud; short, sparse ones stutter. Pitch the grains up for shimmer, freeze them into a pad, or play them backwards for reverse swells.
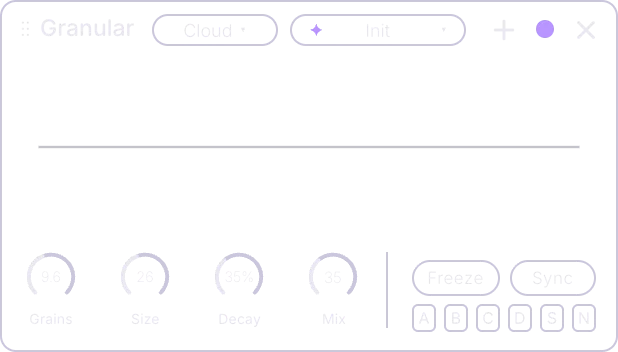
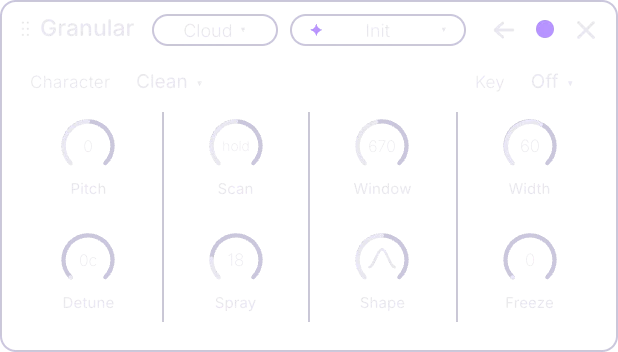
Types
| Type | Sound |
|---|---|
| Cloud | A classic random grain cloud for smooth textures. |
| Rise | Every grain is pitched up, so the cloud climbs into shimmer. |
| Swarm | Short, scattered, detuned grains: a buzzing chorus. |
| Suspend | Holds the grains into a smeared, frozen pad. |
| Scatter | Grains locked to the tempo grid: a glitchy stutter. |
| Rewind | Every grain plays backwards, for reverse swells. |
| Stretch | Slows the read head way down for a time-smear. |
| Pulverize | Crunchy 8-bit grains. |
Front
| Control | What it does |
|---|---|
| Grains | How many grains play at once. Down = sparse stutter, up = a thick wall of sound. |
| Size | How long each grain is, 2 to 900 ms. Down = buzzy and choppy, up = smooth and long. |
| Decay | Feeds the grains back into the recording so the cloud sustains. Up = it keeps building. |
| Mix | Dry against grains. 100 = only grains. |
Back
| Control | What it does |
|---|---|
| Scan | How the play point moves through the recording. Centre = hold, right = toward now, left = into the past. |
| Window | How much recent sound the grains can pick from, 50 ms to 16 s. Up = older material mixes in. Snaps to note lengths with Sync on. |
| Spray | Scatters where each grain starts. Up = more random and smeared. |
| Pitch | Transposes the grains, up to 24 semitones either way. Try +12 for shimmer. |
| Detune | A slow tape-like wobble in the grains' pitch. Up = a chorus-like shimmer. |
| Shape | Each grain's fade. Down = hard and choppy, up = soft and airy. The knob draws the grain window it is using. |
| Width | Spreads the grains across the stereo field. |
| Freeze | Blends from recording to holding. Around 75 it starts to hold; 100 holds what was played. |
Back menus and pills
| Control | What it does |
|---|---|
| Character | Colours the recording: Clean, Tape, Cassette, Radio, Worn, Drift. |
| Key | Snaps each grain to an interval: Off, Oct, 5th, Chord, Maj, Min, Penta. Off = no pitching. |
| Freeze (pill) | Stops recording and loops the grains it holds. Play over the frozen cloud. |
| Sync (pill) | The grain Window snaps to note lengths of the song tempo. |
The picture shows the recorded sound, the window the grains read from, and the live grains as dots.
Filter#
The Filter effect puts any of Terrain's 123 filter types in the rack: ladders, state-variable, multi-mode pairs, combs, formants, phasers, EQ tones, reverb filters and the dirty ones. It is the same filter engine as the main filters (see Filters), stripped to its essentials: no envelope and no key tracking, so it behaves like a plain filter box you can place anywhere in the chain and modulate from the outside.
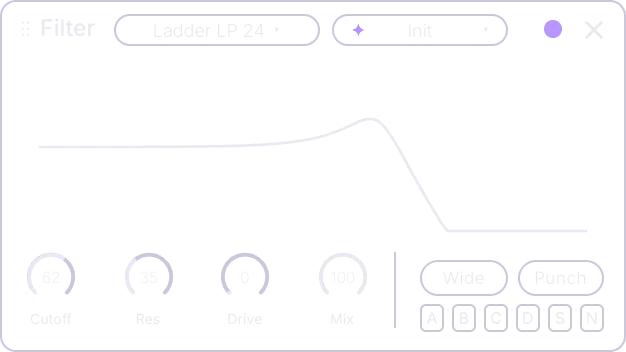
Click the type in the header for the same categorised, searchable filter browser the main filter uses. The picture draws the live response curve over the sound arriving at the filter, so you see what it is taking away.
Front
| Control | What it does |
|---|---|
| Cutoff | The frequency where the filter starts to cut, 20 Hz to 20 kHz. On a low-pass, down = darker. On combs, Karplus-Strong and ring modulation it sets the pitch. |
| Res | Resonance: boosts a narrow peak at the cutoff. Up = sharper and whistling; near the top it sings. |
| Drive | Pushes the filter into saturation. 0 = clean, up = growl. Great with Res on bass. |
| Mix | Dry against filtered. Lower it to keep some of the original. |
Pills
| Pill | What it does |
|---|---|
| Wide | Splits the cutoff a little between left and right for a stereo filter. |
| Punch | Makes the filter react to each hit's attack rather than the whole note. |
Chorus#
Chorus copies the sound with tiny moving delays so it sounds wider and thicker. Eight types span the classic pad chorus, the 80s keyboard chorus, string-machine ensembles, a clean doubler and warped-record wobble; each has its own eight Characters.
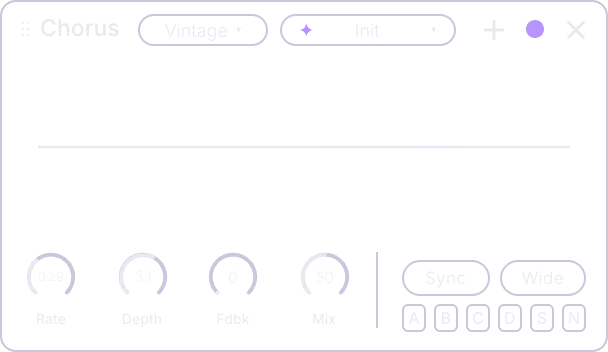
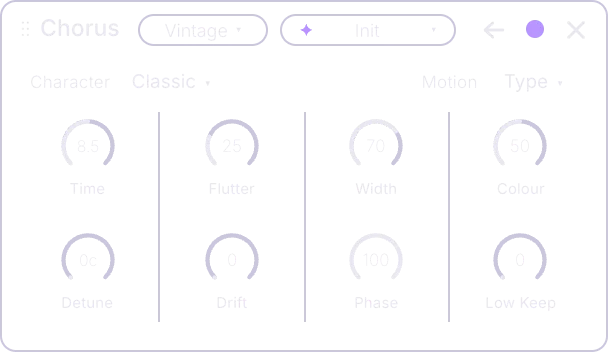
Types
| Type | Sound | Character options |
|---|---|---|
| Vintage | One sweep per side whose width slowly breathes: the classic pad chorus. | Classic, Slow, Fast, Deep, Wide 106, Locked, Thick, Hiss |
| June | The classic 80s keyboard chorus, modes I and II. | I, II, I Plus II, Manual, Aged, Clean, Wide 106, Deep |
| Pedal | A guitar stomp-box chorus. | Chorus, Vibrato, Grit, Slow Amp, Fast Amp, Wet Flip, Warm, Thin |
| Trio | Three voices left, centre and right, lush and wide. | Preset, Manual, Enhance, Sides, Centre, Syrup, Rack 86, Glassy |
| Ensemble | A string-machine ensemble, thick and shimmering. | String Ens, Synth Ens, Choir, Random, Dark Wine, Brass, Slow Tide, Phase Wide |
| Micro | A tiny pitch-shift doubler with no wobble, for vocals and leads. | Studio I, Studio II, Wander, Dual Mono, Layers, Tape Head, Chorale, Subtle |
| Wow | Warped-record wobble, lo-fi and seasick. | Cassette, Vinyl 33, Vinyl 45, Dictaphone, Pro Reel, Dying Deck, Underwater, Breeze |
| Dark | A long, murky analog-chip chorus. | Standard, Double, Murk, Pumped, Hissy, Cheap, Slap Wide, Regen Box |
Front
| Control | What it does |
|---|---|
| Rate | How fast the chorus moves, 0.02 to 20 Hz. Slow = gentle shimmer, fast = vibrato. |
| Depth | How far it moves. Up = a wider, more seasick chorus; above about 60 it gets extreme. |
| Fdbk | Feeds the chorus back into itself. Up = more resonant and metallic. |
| Mix | Dry against chorus. 50 is the classic blend. |
Back
| Control | What it does |
|---|---|
| Time | The base delay of the chorus. Short = tight and shimmery, long = slow and seasick. |
| Detune | A small pitch shift, 0 to 50 cents (hundredths of a semitone), left up and right down. Up = thicker. |
| Width | Stereo width of the chorus. Down = mono, up = very wide. |
| Flutter | A fast second wobble on top. Up = more tape-like shake. |
| Drift | A slow random wander, like old analog gear. |
| Colour | Down = darker with old analog-chip grit, up = brighter and cleaner. |
| Low Keep | Lows below this point skip the chorus, 20 Hz to 1 kHz. Up = solid, centred bass. |
| Phase | How far the right side's sweep is offset from the left. Up = wider movement. |
Back menus and pills
| Control | What it does |
|---|---|
| Character | Eight voicings of the current type, each with its own speed, depth and colour. |
| Motion | The sweep shape: Type (the type's own shape), Triangle, Sine, Soft. |
| Sync (pill) | The chorus Rate locks to the song tempo in note lengths. |
| Wide (pill) | Pushes the chorus far wider than the Width knob can, while the centre stays put. |
The picture draws two moving lines, one per side, swaying with the chorus.
Flanger#
Flanger is a very short delay that sweeps back and forth, carving a moving comb into the sound: the jet-plane whoosh. Push Fdbk above the centre for a bright, ringing jet; pull it below for a hollow, nasal one.
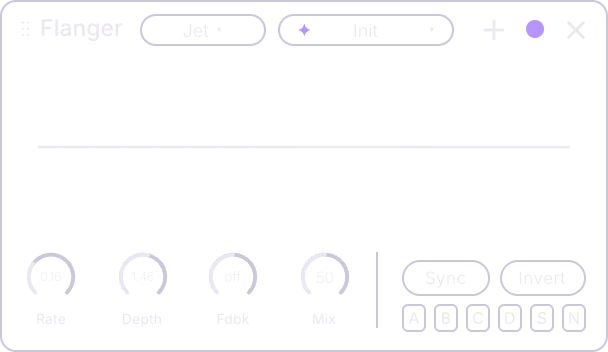
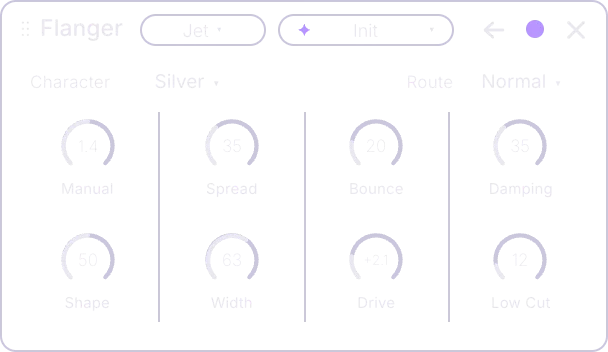
Types
| Type | Sound | Character options |
|---|---|---|
| Jet | The classic pedal flanger swoosh. | Silver, Compact, Deep Sweep, Hollow, Screamer, Drop, Thin Air, Twin Jet |
| BBD | A darker, gritty analog flanger. | Classic BBD, Deluxe, Dark Bucket, Squash, Matrix, Short Bucket, Long Bucket, Grind |
| Endless | The sweep seems to rise or fall forever. | Rise, Fall, Rise Deep, Fall Deep, Double Helix, Stacked Rise, Soft Rise, Tight Rise |
| Envelope | The sweep follows how hard you play. | Up, Down, Snap, Slow Swell, Duck Zero, Hold, Wide Touch, Deep Touch |
| Step | The comb jumps between steps in time. | Random, Stair Up, Stair Down, Pendulum, Ratchet, Drunk, Wide Steps, Glide |
Front
| Control | What it does |
|---|---|
| Rate | How fast the flanger sweeps. Slow = a jet, very fast = a growling buzz. |
| Depth | How far the sweep travels. Up = a bigger whoosh. |
| Fdbk | Feedback, centred: 50 = none. Above 50 = a bright ringing jet, below 50 = hollow and nasal. |
| Mix | Dry against flanged. 50 gives the deepest whoosh. |
Back
| Control | What it does |
|---|---|
| Manual | The delay the sweep centres on, 0.1 to 20 ms. Down = a high, thin whoosh; up = a low, chorus-like one. |
| Spread | Offsets the left and right sweeps. Up = a wider, swirling flange. |
| Width | Stereo width of the flanged sound. 62.5 = normal. |
| Damping | Darkens the delay and each pass. Up = softer, warmer. |
| Shape | The sweep's waveform, from triangle through sine to ramp. |
| Bounce | Analog wobble and drift in the sweep. |
| Drive | Saturation inside the feedback. Up = high Fdbk growls instead of only ringing. |
| Low Cut | Keeps lows out of the flanger, 20 Hz to 1 kHz. |
Back menus and pills
| Control | What it does |
|---|---|
| Character | Eight voicings of the current type, each sweeping and colouring differently. |
| Route | How the feedback is wired: Normal, Cross (left and right swapped), Mono Sum, Wide. |
| Sync (pill) | The flanger Rate locks to the song tempo in note lengths. |
| Invert (pill) | Flips the feedback so peaks land where the notches were. No change when Fdbk is 50. |
The picture shows the moving comb; the pinches are the notches sweeping.
Phaser#
Phaser sweeps a set of notches (narrow dips in the sound) up and down the spectrum, so the sound swirls. Nine types cover pedal classics, a deep 12-stage, throbbing lamp vibes, endless barber-pole sweeps and an envelope-driven auto-wah.
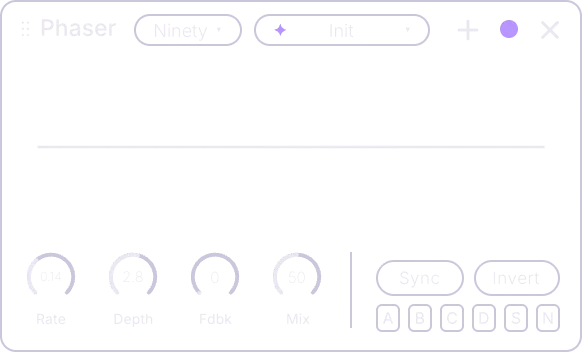
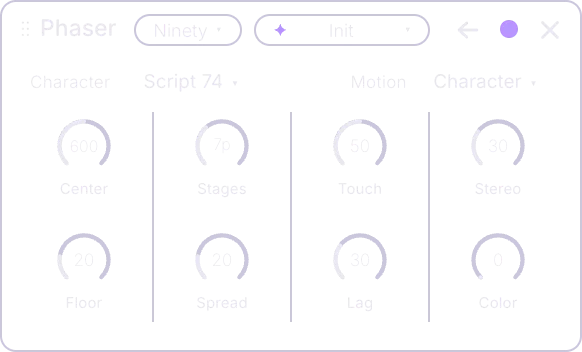
Types
| Type | Sound | Character options |
|---|---|---|
| Ninety | A four-stage pedal swoosh. | Script 74, Block 78, Two Stage, Eight Stage, Slow Lamp, Sine Sweep, Wide Stagger, Negative |
| Stone | A vocal, resonant phaser from a classic pedal. | Color Off, Color On, Deep Sweep, Two Loop Stages, Hot OTA, Cold OTA, Six Stage, Inverted |
| Duo | Two phasers on two related sweeps. | Series 1:1.33, Series 3:4, Parallel 1:1.33, Parallel Golden, Counter, Wide Duo, Slow B, Cross Feed |
| Twelve | A deep 12-stage phaser with many notches. | Full Range, Hi Range, Six Pole, Sixteen Pole, Resonant, Hollow, Aux Out, Fast Hollow |
| Kraut | A lopsided, psychedelic lamp phaser. | Slow Bulbs, Fast Bulbs, Hard Skew, Reverse Skew, Twelve Bulb, Four Bulb, Hot Loop, Cold Loop |
| Vibe | The throbbing lamp vibe of 70s guitar. | Chorus Lamp, Vibrato Lamp, Cold Bulb, Hot Bulb, Eight Cap, Even Caps, Wide Caps, Vibrato Deep |
| Barber | Notches that rise or fall forever. | Rise 8, Rise 12, Fall 8, Fall 12, Rise Wide, Fall Narrow, Sharp Notch, Deep Rise |
| Envy | Notches jump with your playing, like an auto-wah. | Fast Grab, Slow Swell, Transient, Smooth Follow, Four Stage, Ten Stage, Quack, Sink |
| Steps | The notches step between random positions. | Random 8, Random Wide, Ladder Up, Ladder Down, Pendulum, Register, Drunk, Trance Gate |
Front
| Control | What it does |
|---|---|
| Rate | How fast the notches sweep. Slow = a gentle swirl, fast = a wobble. |
| Depth | How far the notches travel, up to 4.5 octaves. |
| Fdbk | Feeds the phaser back into itself. Up = a sharper, more vocal sweep. |
| Mix | Dry against phased. Higher = deeper notches. |
Back
| Control | What it does |
|---|---|
| Center | Where the sweep sits, 40 Hz to 9 kHz. Down = a deep swoosh, up = a thin swirl. |
| Stages | How many filter steps the phaser stacks, so how many notches. Up = denser, more intense. |
| Spread | How far apart the notches sit. 0 = bunched together. |
| Stereo | Offsets the left and right sweeps for a wide, moving phaser. |
| Touch | 50 = off. Up = louder playing pushes the notches up; down = it pushes them down. |
| Lag | How lazily the notches follow, 4 to 200 ms. Up = slower, smoother motion. |
| Floor | The lowest a notch can go, 20 Hz to 1 kHz. Up = the bass stays untouched. |
| Color | Darkens and saturates the feedback. Most audible with Fdbk up. |
Back menus and pills
| Control | What it does |
|---|---|
| Character | Eight voicings of the current type, each sweeping and colouring differently. |
| Motion | The sweep shape: Character (the voicing's own shape), Triangle, Sine, Soft Tri, Lamp Skew, Ramp, Sample-Hold. |
| Sync (pill) | The phaser Rate locks to the song tempo in note lengths. |
| Invert (pill) | Flips the feedback so the resonance moves onto the notches: a hollow honk. |
The picture shows the notches as dips; the purple tick rides the lowest one.
Tape#
Tape runs the sound through an old tape machine for wobble, warmth and hiss, and adds tape echo when you want it. Studio and Cassette are full cards with a back panel of echo and machine controls. Reel, Porta and Wire are three dedicated machines with three knobs and Mix, and no back panel.
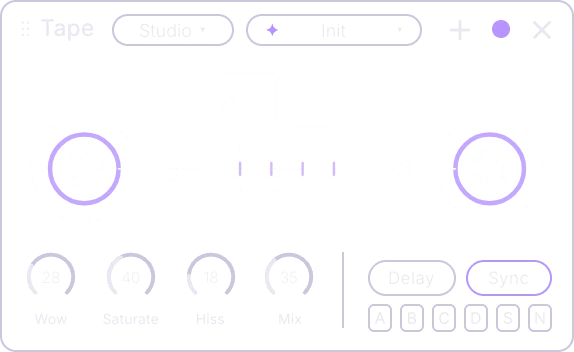
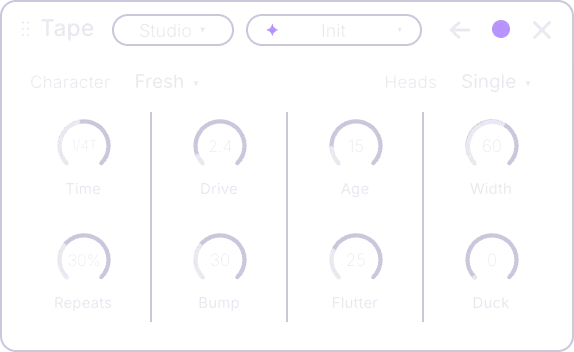
Types
| Type | Sound | Front knobs |
|---|---|---|
| Studio | A thin, broken vintage deck with honk and dropouts. | Wow, Saturate, Hiss, Mix |
| Cassette | Bright cassette warmth with bass thump and pumping. | Wow, Saturate, Hiss, Mix |
| Reel | A clean studio reel for saturation colour. No back panel. | Sculpt, Drive, Timbre, Mix |
| Porta | A hissy 4-track demo tape that breathes. No back panel. | Wow, Saturate, Hiss, Mix |
| Wire | A 1940s wire recorder: old-radio honk and deep wobble. No back panel. | Wow, Saturate, Hiss, Mix |
Front
| Control | What it does |
|---|---|
| Wow | Slow pitch wobble from the tape speed. Up = more seasick. A little on keys sounds vintage. |
| Saturate | Tape saturation. Up = warmer and more compressed. |
| Hiss | Tape noise under the sound, only while it plays. Up = more lo-fi air. |
| Sculpt (Reel) | Saturates the bass. Up = warm, thick lows. |
| Drive (Reel) | Fuzz on the mids and highs. Up = more edge and fold. |
| Timbre (Reel) | Centre = flat. Left = darker folds, right = a metallic, talking resonance. |
| Mix | Dry against tape. 100 = only the tape sound. |
Switching between types keeps the values the new type shares with the old one, so Cassette to Porta keeps your Wow, Saturate and Hiss.
Back (Studio, Cassette)
| Control | What it does |
|---|---|
| Time | The tape echo time, 10 ms to 8 s (note lengths with Sync on). Heard only with the Delay pill on. |
| Repeats | How many tape echoes return. Near the top it sings on its own. Needs Delay on. |
| Drive | How hot the sound hits the tape, up to +18 dB. Up = more saturation on the echoes too. |
| Age | Worn tape. Up = duller highs, dropouts and level drift. |
| Flutter | Fast pitch jitter. Up = a shakier, older machine. |
| Bump | The bass lift a real tape head adds, up to about +12 dB. Up = fatter, rounder lows. |
| Width | Stereo width of the tape sound. Down = mono, up = wide. |
| Duck | The tape sound dips while you play and comes back in the gaps. |
Back menus and pills
| Control | What it does |
|---|---|
| Character | The tape stock: Fresh, Ferric, Chrome, Vintage, Worn, Chewed, Hot, Cold. |
| Heads | Which tape heads play and where they pan, for echo patterns: Single, Dual, Triple, Quad, Spread, Swell, Ping, Cascade. Changes the sound even with Delay off. |
| Delay (pill) | Turns on tape echo, set on the back with Time and Repeats. |
| Sync (pill) | The tape echo time follows the song tempo in note lengths. |
The picture shows the machine running; its reels and meters follow the sound.
Equalizer#
Equalizer turns frequencies up or down. It has four fixed bands with musical names (Low, Body, Bite and Air) plus up to four free bands you add on the picture, eight in all. Seven types give it seven personalities, from a clean scalpel to console curves, a vintage passive EQ and a dynamic EQ that moves with the music.
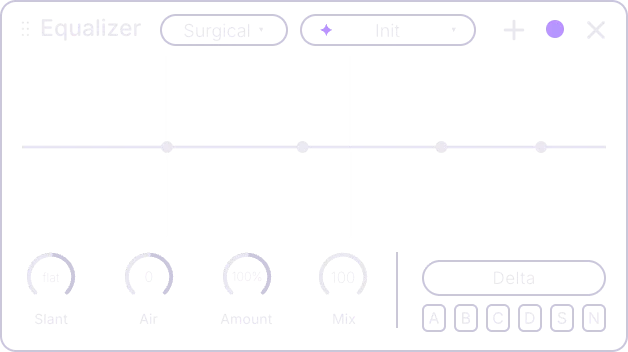
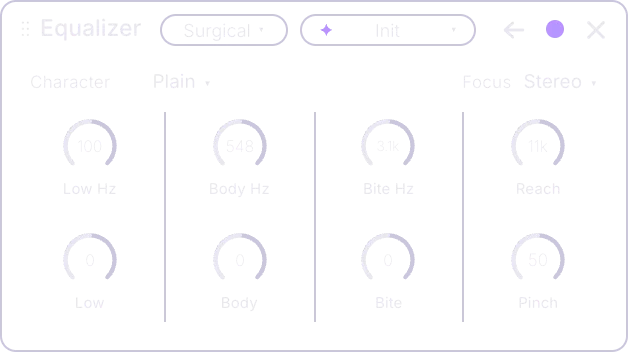
Types
| Type | Sound | Eighth back knob | Character options |
|---|---|---|---|
| Surgical | Clean and exact. | Pinch | Plain, Tight, Broad, Steep, Scoop, Deep Pivot, Bright Pivot, Four Bells |
| British | Console-style curves that ease off when pushed. | Slope | Desk, Big Knob, Ahead, Iron Top, Sub Iron, Steep Iron, Full Swing, Mid Rise |
| American | Bands get narrower the harder you push them. | Taper | Proportional, Lasers, Mellow, Floor Lift, Boost Only, Cut Only, Shelf Ride, Bolt |
| Passive | A vintage passive EQ: boosting Low also dips just above it. | Dip | Baseline, Close Cut, Far Cut, Both Ends, Bell Top, Slow Top, Deep Atten, Revival |
| Open | Wide, smooth curves with a soft top end. | Silk | Gloss, Very Wide, Two Shelves, Twin Shelf, Deep Reach, Soft Knee, Hard Knee, Bell Air |
| Dynamic | Bands move with the music, cutting when loud and lifting when quiet. | Pivot | Program Ride, Quick, Lazy, Wideband, Upward, Hard Window, Soft Window, Peak Keep |
| Chisel | Narrow, ringing bands that can turn into true notches. | Sting | Resonator, Scalpel, Triple Notch, Gain Peak, Shallow, Handset, Sub Kill, Tin |
Front
| Control | What it does |
|---|---|
| Slant | Tilts the whole sound. Up = brighter (more treble, less bass), down = darker. Centre reads "flat". |
| Air | Turns the very top end up or down, up to 30 dB. Up = sparkle, down = soft. |
| Amount | Scales every boost and cut, 0 to 200 percent. Centre (100%) = as set, 0 = flat. |
| Mix | Dry against the EQ'd sound. |
Back
| Control | What it does |
|---|---|
| Low Hz | Where the Low band (the bass slice) sits, 20 to 500 Hz. |
| Low | Turns the Low band up or down, up to 30 dB. Up = more weight. |
| Body Hz | Where the Body band (the warm middle slice) sits, 100 Hz to 3 kHz. |
| Body | Turns the Body band up or down. Down = less boxiness. |
| Bite Hz | Where the Bite band (the presence slice) sits, 700 Hz to 14 kHz. |
| Bite | Turns the Bite band up or down. Up = more presence. |
| Reach | Where the Air band (the top sparkle) starts, 6 to 20 kHz. |
| Pinch (Surgical) | How narrow every band is (Q). Up = needle-thin, for removing one ring; down = wide and gentle. |
| Slope (British) | Adds a bump and dip where the Low and Air shelves begin. Up = a bigger bump. |
| Taper (American) | How fast bands narrow when pushed. Up = they stay wide longer. |
| Dip (Passive) | How much it cuts just above a Low boost. Works while Low is boosted. |
| Silk (Open) | Adds a second sheen above Air. Works while Air is not zero. |
| Pivot (Dynamic) | The level where bands start to react. Up = only loud parts get cut. |
| Sting (Chisel) | Band sharpness and ring. Up = sharper, more ringing bands. |
Back menus and pill
| Control | What it does |
|---|---|
| Character | How this EQ type behaves: band width, shelf steepness, cut depth. |
| Focus | Which part the EQ works on: Stereo (both sides), Mid (the centre), Side (the edges), Left, Right. |
| Delta (pill) | Hear only the difference the EQ makes. Handy for finding a harsh spot; switch it off afterwards. |
The curve and its dots
The white line is what the EQ does. Each band is a dot on it.
| Gesture | What it does |
|---|---|
| Drag a dot | Left or right for frequency, up or down for boost or cut. |
| Scroll over a dot | Changes the band's width (Q). Scroll up = narrower. On a cut it sets the corner resonance. |
| Double-click empty space | Adds a free band there, at 0 dB (so adding never changes the sound), up to 8 bands in all. |
| Double-click a dot | Resets that band. |
| Right-click a dot | The band menu. Its header shows the band's name, shape, frequency and Q. Free bands offer a shape (Bell, Low Cut, High Cut, Low Shelf, High Shelf) and Delete band; the Low and Air dots offer Add a Low Cut here / Add a High Cut here. Every band has Reset band. The four fixed bands cannot be deleted. |
Low Cut and High Cut on a free band are steep 24 dB-per-octave cuts.
Widen#
Widen spreads the sound across the stereo field with detuned or delayed copies, smeared sides or frequency bands sent left and right. The first front knob changes its name and job with the type.
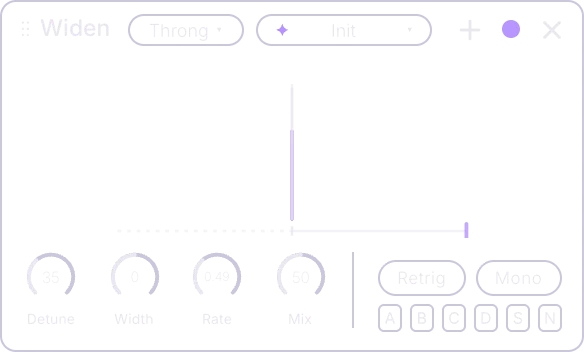
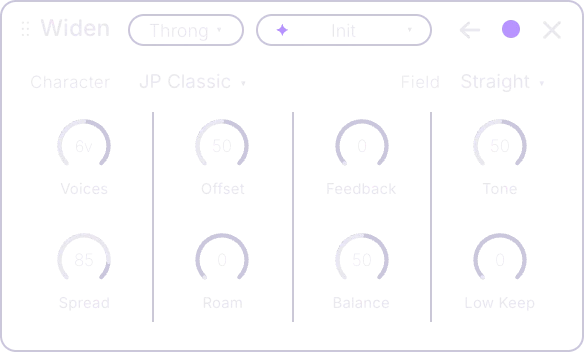
Types
| Type | Sound | First knob | Character options |
|---|---|---|---|
| Throng | A supersaw crowd of detuned copies. | Detune | JP Classic, Even Fan, Analog Drift, Tight Fan, Wide Fan, Octave Bloom, Sub Anchor, Three Phase |
| Twin | A smooth stereo pair with no obvious wobble. | Depth | Two Line, Four Line, Mode Two, Mode Three, No Compander, Dark BBD, Tremble, Hex |
| Steady | Static detuned copies with no movement. | Cents | Satin, Jab, Quaver, Fifth Up, Octave Down, Wide Slap, Gritty, Octave Pair |
| Twofold | Double-tracking with drifting late copies. | Sway | Lilt, Wide Room, Tape ADT, Tight Inst, Loose Crowd, Static Pair, Slapback, Seasick |
| Blur | Smears left and right apart with no pitch change. | Wash | Smooth Six, Deep Twelve, Plush, Low Anchor, Top Only, Seed B, Seed C, Opposed |
| Bands | Sends alternate frequency bands left and right. | Cleave | Coarse, Fine, Tilted, Rotor Slow, Rotor Fast, Guard, Deep Grid, Hard Split |
Front
| Control | What it does |
|---|---|
| Detune (Throng) | How far the copies are pulled out of tune, up to 190 cents. Up = a bigger, thicker crowd. |
| Depth (Twin) | How far the pair moves and cross-mixes. Up = wider and lusher. |
| Cents (Steady) | A fixed detune for the copies, up to 190 cents. No wobble. |
| Sway (Twofold) | How far the doubled copies drift in pitch. Up = looser double-tracking. |
| Wash (Blur) | How differently left and right are smeared. Up = wider, no pitch change. |
| Cleave (Bands) | How strongly the bands are split left and right. Mono-safe. |
| Width | 50 = normal. Down = mono, up = wider; the top is so wide it vanishes in mono. |
| Rate | How fast the copies move, 0.08 to 14 Hz. |
| Mix | Dry against the widened copies. |
Back
| Control | What it does |
|---|---|
| Voices | How many copies, 3 to 8. Up = thicker. |
| Spread | How far the copies are panned. The top goes past hard pan on purpose. |
| Offset | Scales the copies' delay times. Down = tight, up = a slapback double. |
| Roam | Random wander of the copies, for life. |
| Low Keep | Lows below this stay mono and centred, 40 to 800 Hz. |
| Tone | Tilts the widened sound. Up = darker, down = brighter. 50 = flat. |
| Feedback | Feeds the copies back into a tail that darkens on each pass. |
| Balance | Centre copy against detuned copies. 100 = copies only. |
Back menus and pills
| Control | What it does |
|---|---|
| Character | Eight voicings of the current type, each spreading the copies differently. |
| Field | The stereo layout of the widened sound: Straight, Alternate, Orbit, Swap, Side Only, Gather. |
| Retrig (pill) | Restarts every copy's motion when switched on. |
| Mono (pill) | Folds the whole output to mono to check how it sounds on one speaker. |
The picture fans each copy across the stereo field as a beam; the rail shows mono safety.
Compress#
Compress evens out loud and quiet parts so the sound feels tighter and punchier. Eight compressor designs, from transparent to glue, aggressive FET, smooth opto, warm tube and a hard ceiling, each with eight Characters.
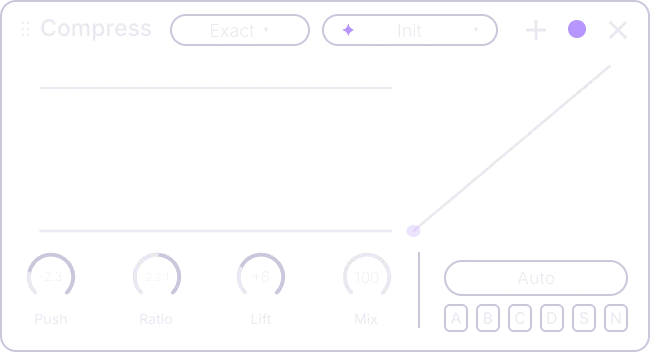
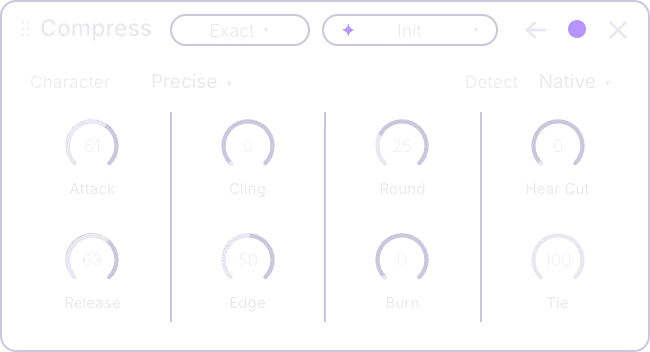
Types
| Type | Sound | Character options |
|---|---|---|
| Exact | Clean and transparent. | Precise, Soft Touch, Loose Grip, Blunt, Deep Release, Line Attack, Poise, Judder |
| Bus | Mix-bus glue. | Quad Bus, Hand Set, Two Easy, Ten Punchy, Fast City, Big Desk, Pump Bus, No Diode |
| FET 76 | Very fast and aggressive, with grit. | Blackface, Blue Stripe, All Buttons, Twenty Lock, Loose Four, Broken Bias, Waiting Fet, Two Pass |
| Opto | Smooth, slow, musical levelling. | Cell Classic, Fresh Cell, Tired Cell, Quick Cell, Even Pools, Crystal, Tube Stage, Bright Ears |
| Vari-Mu | Gentle tube compression that firms up when pushed. | Studio 670, Time One, Time Four, Auto Peaks, Long Haul, Push Pull, Lateral, Triode Soft |
| Wide Knee | A very soft knee that can go past squashing. | Gentle Knee, Hard 160, Infinity, Infinity Plus, Slow Window, Crush RMS, Decilinear, Anti |
| Ride | A leveller that lifts quiet parts and pulls loud ones down. | Level Rider, Deep Floor, Only Up, Only Down, Fast Clamp, Slow Iron, Bright Bias, Vocal Sit |
| Limit | A ceiling the sound cannot pass. | Clean Wall, Soft Ceiling, Hard Stop, Pump Limit, Loud War, Clip Guard, Springy, Porous |
Front
| Control | What it does |
|---|---|
| Push | Lowers the threshold, the level where squashing starts. Up = more squeeze, 0 = none. |
| Ratio | How strongly loud parts are held back, from 1:1 to a hard wall. |
| Lift | Makeup gain: turns the squashed sound back up, 0 to +24 dB, so it is not quieter. |
| Mix | Dry against compressed. Around 50 keeps the punch and adds body (parallel compression). |
Back
| Control | What it does |
|---|---|
| Attack | How fast it clamps down. Slow = punchy hits pass, fast = tames every peak. |
| Release | How fast it lets go. Fast = pumping, slow = smooth. |
| Round | The knee: how gently squashing begins near the threshold. Up = gentler, more transparent. |
| Hear Cut | Stops the compressor reacting to lows, 20 to 500 Hz, so bass does not pump everything. |
| Edge | Centre = neutral. Up = hits punch through, down = notes swell in. |
| Cling | Holds the squeeze up to 250 ms before letting go. |
| Tie | Stereo link. 100 = both sides squash together so the image holds; 0 = each side on its own. |
| Burn | Saturation that grows with the squeeze. 0 = clean. |
Back menus and pill
| Control | What it does |
|---|---|
| Character | How this compressor moves and colours. |
| Detect | What the compressor listens to: Native (the type's own choice), Peak, Average, Patient, Spike. |
| Auto (pill) | Turns the result back up by itself after squashing, so the level stays about the same. |
The picture shows two lines; the gap between them is how much is squashed right now.
Multiband#
Multiband squashes loud parts and lifts quiet parts separately in three bands (two on the Two Band type), for that dense, loud, everything-in-your-face sound. Turn it up for drama; blend it back with Mix to keep some punch.
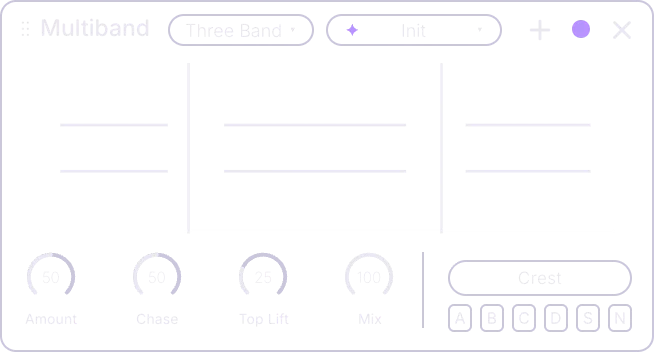
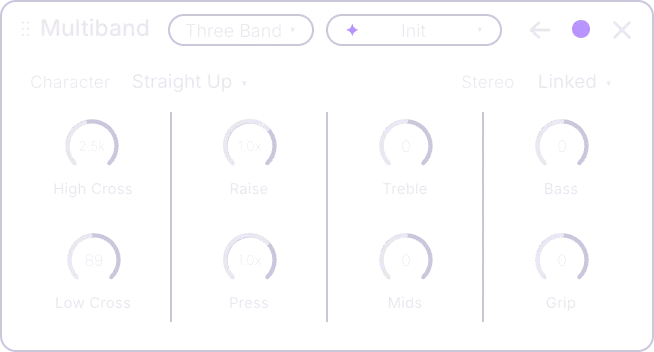
Types
| Type | Sound | Character options |
|---|---|---|
| Three Band | The classic squash-and-lift. | Straight Up, Sharp Ears, Long Ears, Wide Corner, One Detector, Slow Low, Twice Deep, Full Crest |
| Gentle | Slower and softer. | Round Corner, Slow Hands, Long Window, Half Slopes, Long Tail, Soft Top, Even Bands, Barely There |
| Heavy | Maximum squash with clipping. | Welded Shut, Band Clip, No Clip, Deeper Jaws, Fast Grind, Peak Grab, Wall Ears, Total Squeeze |
| Sheen | A shimmering top end. | Top Sheet, Higher Split, Lower Split, Glass Ceiling, Slow Shimmer, Fast Shimmer, Dark Source, Sheen Wall |
| Bass Safe | The low end is never lifted. | Anchor Low, Mono Low, Slower Low, Low Ceiling, Reese Guard, Free Low, Wide Corner Low, Tight Low |
| Surge | Lift only: brings quiet detail up. | Tail Riser, Deep Riser, Tied Rise, Fast Riser, Capped Riser, Top Riser, Mean Ears, Riser Wall |
| Two Band | One split; the halves duck each other. | Body Sparkle, Low Split, High Split, Hard Body, Soft Body, Sparkle Wall, Slow Pair, Fast Pair |
| Stagger | Bands react at different speeds. | Time Spread, Wider Spread, Narrow Spread, Reverse Spread, Slow Anchor, Fast Top, Deep Spread, Spread Wall |
Front
| Control | What it does |
|---|---|
| Amount | How strong the squash and lift are. 50 = the classic setting, 100 = everything flattened. |
| Chase | How fast it reacts. Down = breathing, up = grinding. 50 = the type's own speed. |
| Top Lift | Extra lift on the high band. Up = more sparkle. |
| Mix | Dry against squashed. Lower it to keep some punch. |
Back
| Control | What it does |
|---|---|
| Low Cross | Where the low band ends and the middle begins, 30 to 300 Hz. |
| High Cross | Where the high band begins, 1 to 8 kHz. |
| Raise | How strongly quiet parts are lifted. |
| Press | How strongly loud parts are pushed down. |
| Grip | Moves the levels where squashing and lifting start. Up = more squash, less lift. |
| Bass | Low band level, up to 12 dB either way. |
| Mids | Middle band level, up to 12 dB either way. |
| Treble | High band level, up to 12 dB either way. |
Back menus and pill
| Control | What it does |
|---|---|
| Character | Eight voicings of the current type, each squashing and lifting differently. |
| Stereo | Linked (one detector for both sides), Free Pair (each side on its own), Mid-Side (centre and edges apart). |
| Crest (pill) | Keeps the snap of each attack (transient) by pausing the lift for a moment on each hit. |
The picture
The picture shows each band's level and how far it is being pushed down or lifted up. The two vertical lines are the crossovers: drag a line left or right to move where one band ends and the next begins (the same as Low Cross and High Cross).
Bode#
Bode is a frequency shifter. Unlike a pitch shifter, it moves every frequency by the same number of Hz, so harmonics stop lining up: a small shift gives slow beating and phasing, a larger one turns anything into metal, bells and alien speech. Feed it back on itself and the shifts spiral into endless staircases.
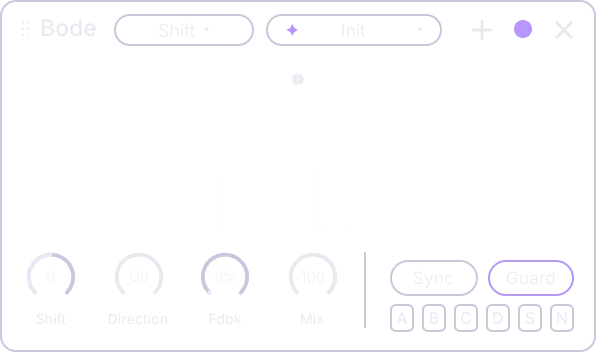
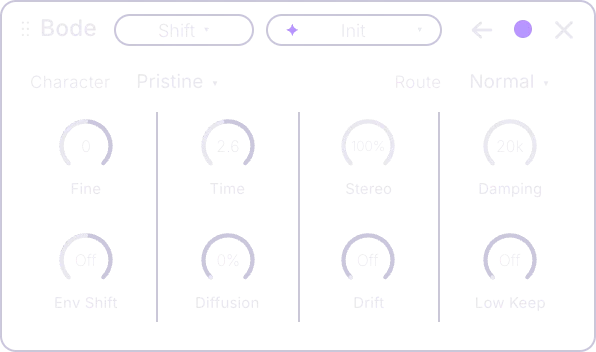
Types
| Type | Sound |
|---|---|
| Shift | A clean frequency shift. |
| Barberpole | Each loop shifts again: an endless staircase. |
| Echobode | Echoes that shift further on every repeat. |
| Detune | Tiny shifts for slow beating and phasing. |
| Ring | Ring modulation, from tremolo to clang. |
| Spiral | Climbs and falls at once, like a helix. |
| Chorale | Three shifters spread into an inharmonic choir. |
| Freeze | Grabs a moment and holds it as a drone. |
Front
| Control | What it does |
|---|---|
| Shift | How many Hz every frequency moves. Centre = none; fine near the middle, huge at the ends. On Ring it is the carrier frequency: low = tremolo, high = clang. |
| Direction | 100 = shift up, 0 = shift down, 50 = both ways at once (ring modulation, a bell-like clang). |
| Fdbk | Feeds the shifted sound back so each repeat shifts again. Up = spiralling. |
| Mix | Dry against shifted. |
Back
| Control | What it does |
|---|---|
| Fine | A small shift trim, a couple of Hz. |
| Stereo | 100 = the right side shifts the opposite way. 0 = both the same. |
| Time | The loop or echo time. Longer = slower spirals and echoes. Note lengths with Sync on. |
| Diffusion | Smears the repeats inside the loop. On the Ring type this knob is Carrier: 0 = classic ring mod, 100 = tremolo with the carrier heard. |
| Low Keep | Lows below this skip the shifter, up to 2 kHz. |
| Damping | Darkens the repeats. Down = darker. |
| Env Shift | 50 = off. Louder input pushes the shift up (above 50) or down (below). |
| Drift | A random wander of the shift, up to 40 Hz. |
Back menus and pills
| Control | What it does |
|---|---|
| Character | Drive and grit inside the shifter loop: Pristine, Dome '64, Tube 735, Leaky, Tape Loop, Crush, Iron, Ash. |
| Route | How the shifter loop is wired: Normal, Cross, Mono Sum, Wide, Shift First, Shift Last. |
| Sync (pill) | The loop Time follows the song tempo in note lengths. |
| Guard (pill) | On by default: a limiter stops the shifter getting too loud. Off = louder and uglier. |
The picture
The white ghost is where the sound was; the purple is where it moved to. Drag the shift dot left or right to shift every frequency down or up. Double-click returns to no shift. Right-click for a menu with Up, Ring, Down (the Direction) and Reset shift.
Splitter#
Splitter cuts the sound into bands (lows and highs, three or four frequency bands, mid and side, or left and right) so each band can get its own effects. Add a reverb only to the highs, distort only the mids, widen only the sides. Effects you add inside a band only hear that band; the bands are summed back together at the end.
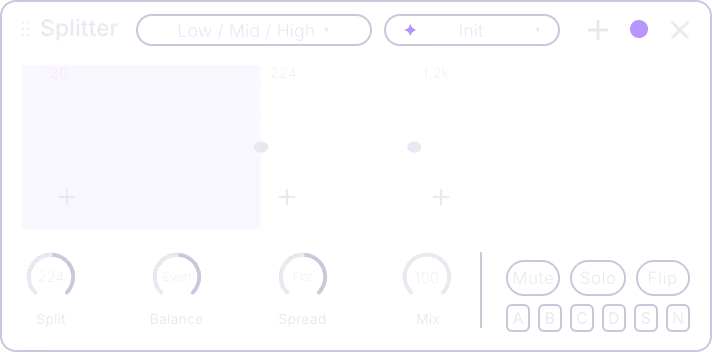
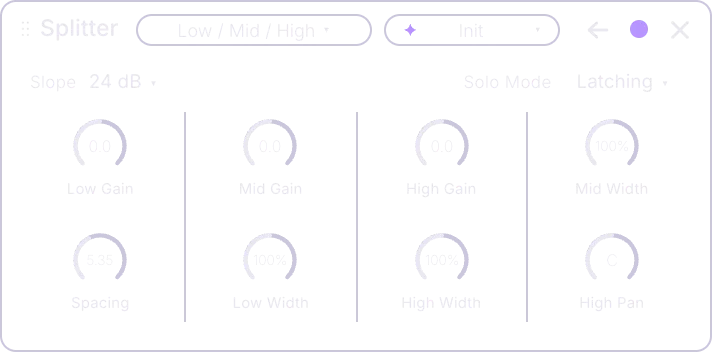
Types
| Type | Bands |
|---|---|
| Low / High | Two frequency bands. |
| Low / Mid / High | Three frequency bands. |
| Sub / Low / Mid / High | Four frequency bands. |
| Mid / Side | The centre and the edges. |
| Left / Right | The left and right channels. |
Front
| Control | What it does |
|---|---|
| Split | The lowest crossover point. Up = the low band reaches higher. |
| Balance | Tilts level across the bands. Up = top band louder, down = bottom band louder. |
| Spread | Stereo width across the bands. Up = lows mono, highs wide. |
| Mix | Dry against the split and processed sound. |
Back, by type
The back knobs wear the names of the type's bands. A Gain knob sets a band's level, −60 to +12 dB (all the way down = off); a Width knob sets its stereo width, 0 to 200 percent; a Pan knob moves it left or right. Spacing sets how far apart the other crossovers sit. A knob marked "—" has no job in that type.
| Type | Back knobs |
|---|---|
| Low / High | Low Gain, High Gain, Low Pan, —, —, Low Width, High Width, High Pan |
| Low / Mid / High | Low Gain, Mid Gain, High Gain, Mid Width, Spacing, Low Width, High Width, High Pan |
| Sub / Low / Mid / High | Sub Gain, Low Gain, Mid Gain, High Gain, Spacing, Sub Width, High Width, High Pan |
| Mid / Side | Mid Gain, Side Gain, Mid Pan, —, —, —, Side Width, Side Pan |
| Left / Right | Left Gain, Right Gain, Left Pan, —, —, Left Width, Right Width, Right Pan |
Back menus and pills
| Control | What it does |
|---|---|
| Slope | How steep the band edges are: 6 dB, 12 dB, 24 dB, 48 dB per octave. 6 dB = gentle overlap, 48 dB = sharp separation. |
| Solo Mode | How soloing behaves: Latching (Solo toggles), Exclusive (one band soloed at a time), Momentary (solos only while held). |
| Mute (pill) | Silences the selected band. Click a band in the picture first. |
| Solo (pill) | Hear only the selected band. |
| Flip (pill) | Turns the selected band's wave upside down (polarity), to fix cancelling between bands. |
The picture: bands and their effects
| Gesture | What it does |
|---|---|
| Click a band | Selects it, so Mute, Solo and Flip act on it and its band cards show in the rack. |
| Drag a crossover dot | Moves a band edge. The first dot is Split, the others Spacing. Double-click resets. |
| Click the + under a band | Opens the add list and puts the new effect inside that band, at the end of the band's own chain. |
| Right-click a band | Mute, Solo or Flip that band, Add a device in that band, and Reset crossovers. |
An effect that lives inside a band shows a band tag next to its name. Click the tag to move the card to the next band; clicking past the last band takes it out of the Splitter and back into the main rack.
Utility#
Utility is a channel strip: gain, width, pan, polarity flips, mono and dim checks, and simple tone shaping. Its five types are five ways of handling stereo width. It is the card you drop at the end of a chain to tidy up, or in front of a Distortion to drive it harder.
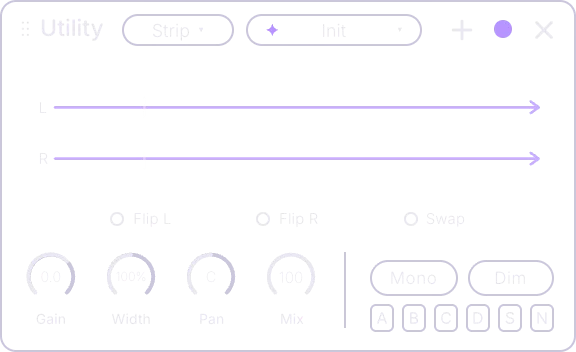
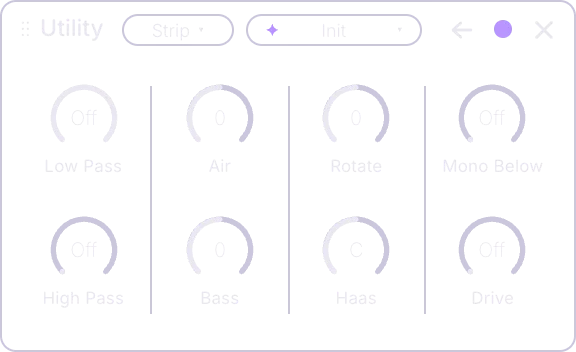
Types
| Type | How Width works |
|---|---|
| Strip | Plain width: the centre (mid) against the edges (side). |
| Turn | Rotation width that can widen a mono sound. |
| Outer | Only the edges change; mono-safe. |
| Canopy | Width only above 350 Hz; the bass stays centred. |
| Cellar | Width only below 350 Hz. |
Front
| Control | What it does |
|---|---|
| Gain | Volume, −60 to +30 dB. The default is 0 dB; all the way down = silence. |
| Width | Stereo width. Centre = normal, down = mono, up = up to 300 percent. |
| Pan | Moves the sound left or right. |
| Mix | Dry against processed. |
Back
The back has eight knobs and no menus, in signal order.
| Control | What it does |
|---|---|
| High Pass | Removes lows, 40 Hz to 4 kHz; 0 = off. |
| Low Pass | Removes highs, 300 Hz to 16 kHz; top = off. |
| Bass | A low shelf at 100 Hz, up to 12 dB either way. |
| Air | A high shelf at 8 kHz, up to 12 dB either way. |
| Mono Below | Everything under this point becomes mono, 50 Hz to 1.5 kHz; 0 = off. |
| Rotate | Turns the stereo image, up to 40 degrees either way. |
| Haas | Delays one side up to 20 ms; the ear hears the earlier side as the direction, so the image leans. Centre = off. |
| Drive | Warm saturation. Up = denser and a little louder; 0 = off. |
Switches
Three switches sit in the picture itself and act at the output; two more sit in the pill row.
| Switch | What it does |
|---|---|
| Flip L | Turns the left wave upside down (polarity). Fixes a hollow sound when two sides cancel. |
| Flip R | Turns the right wave upside down (polarity). |
| Swap | Swaps left and right at the output. |
| Mono | Plays left and right as one centred signal, to check the sound on a single speaker. |
| Dim | Drops the level by 20 dB for a quick quiet check. |
The picture draws the left and right wiring: crossing lines = Swap, merging lines = Mono, dashed = flipped.
Chapter 12
Patcher
The Patcher is the same instrument with its wiring on show. Every oscillator, filter, effect, flow card and modulator becomes a module on an open canvas, and cables decide where the sound and the notes go. Run three oscillators into three different reverbs, put a Glitch in the middle of the rack, feed the Deck from one sound only: build your own world.
Opening the Patcher#
Terrain opens on the SYN page. Click the SYN pill in the header while you are on the SYN page and you switch to the Patcher; click it again to come back. Both views show the same sound: a knob you turn on one is turned on the other, and a module you add on the canvas appears on the SYN page wherever it has a home there. In Terrain FX the same pill reads FX and always shows the Patcher, with Audio In and Audio Out at the ends.
Under MIDI In on the left sit the flow modules on the note path. The effect modules on the right are the rack's cards, living on the canvas.
Moving around
| Gesture | What it does |
|---|---|
| Scroll or swipe (empty canvas) | Pans the view. Shift + scroll pans sideways. |
| Drag empty canvas | Also pans the view. A click on empty canvas clears the selection. |
| Cmd / Ctrl + scroll, or pinch | Zooms in and out around the pointer, from 22 to 200 percent. |
| Scroll over a knob | Turns the knob, as on the SYN page. |
| Drag a module | Moves it. |
| Shift-click modules | Selects several at once. |
| Delete / Backspace | Removes the selected module (or the whole selection, in one undo step), or cuts the selected cable. |
| Cmd/Ctrl + C, then V | Copies the selected oscillators — settings, modulators, effect routes and flow cables — and pastes them as the next free oscillators. |
Modules#
Everything on the SYN page is a module here, and the canvas holds more than the page has room for.
| Module | What it is |
|---|---|
| Oscillators A–H | The eight sound sources, each with its engine (see Oscillators). Cable notes into the left side, sound out of the right. |
| Noise (and Noise 2) | The noise source; add it a second time for Noise 2. See Noise. |
| Samplers A–D | The CHOP page's four sample layers as modules, so a chopped loop can run through its own effects. |
| Filter | The main filter, plus up to six extra Filter modules (the rack's Filter effect), each with the full list of filter types. See Filters. |
| Envelope | The envelope panel; its output dot drags onto knob dots. See Envelopes. |
| LFO | The LFO panel; its output dot drags onto knob dots. See LFOs. |
| Effects | The rack effects, up to six of each type (add the Filter effect from the Filters shelf). Every effect module is a full rack card with front and back. See Effects. |
| Flow cards | Arp, Shaper and Glitch (up to four of each) and Robin (one). Arp and Robin carry notes; Shaper and Glitch carry sound. See Flow. |
| Deck | The tape looper: records whatever is cabled in and plays it back into the chain. See Tape Deck. |
| Voices | The voice settings (Mono, Legato, Poly, Voices, Glide …) on the canvas, with Velocity and Key ready to drag onto knobs. |
| Randomizer | The contour map from the Flow box. Cable it to modules and a click re-rolls them. See The Randomizer map. |
| MIDI In | The notes you play. Cable it to oscillators, the Arp or Robin. |
| Out | The main output with its level. Only what is cabled into it is heard. |
The filter, the envelope, the LFO, the Randomizer, MIDI In and Out are part of the instrument and always stay on the canvas. The last oscillator stays too: you cannot delete every sound source.
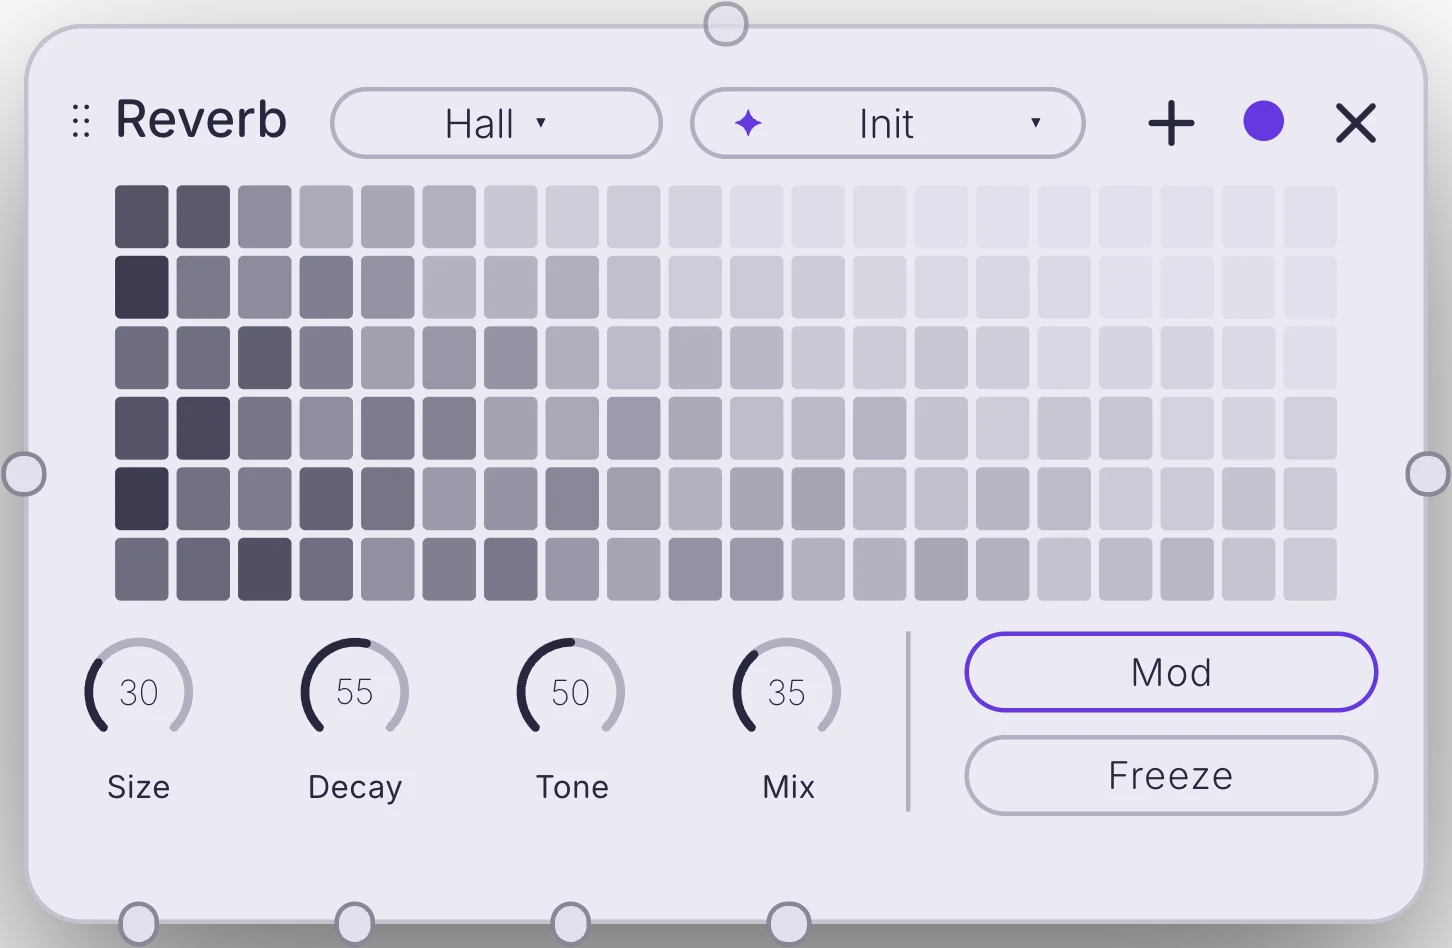
The left port takes notes on an oscillator and sound on effects, filters, Shaper and Glitch. Every knob has its own dot underneath, and the dot on top is where the Randomizer plugs in.
Ports and cables#
Modules connect through ports, the small circles on their edges. Drag from an output to an input to make a cable. There are four kinds, each with its own job:
| Port | What it does |
|---|---|
| Audio in | Feeds the module sound. Drag a cable from another module's audio out to here. |
| Audio out | Sends this module's sound on, to an effect's input or to Out. |
| Notes in | Cable MIDI In, the Arp or Robin here and the module plays those notes. |
| Notes out | On MIDI In, the Arp and Robin: drag to an oscillator's notes input. |
| Modulation out | On LFOs and envelopes: drag onto a knob's dot to make it move that knob. The route appears on the MOD page like any other. |
| Knob dot | The dots under a module's knobs: drop a modulation cable here. |
| Randomizer out | On the Randomizer: drag onto a module's top dot. |
| Dice dot | The dot on top of a module: cable the Randomizer here. |
| Cable | What it carries |
|---|---|
| Audio | Sound from one module to the next. |
| Notes | The notes you play. |
| Modulation | An LFO or envelope moving a knob. |
| Randomizer | Lets the dice map reshuffle a module. |
| Gesture | What it does |
|---|---|
| Drag from an output to an input | Makes a cable. |
| Click a cable | Selects it (Delete then cuts it). |
| Right-click a cable | Opens a one-item menu: Cut. |
| Right-click a port | Unplugs everything on that port. |
| Click a port, then Delete | Also unplugs that port. |
| Drop a cable on empty canvas | Opens the quick route menu (below). |
| Shift-drag a module onto a cable | Works on audio cables you can cut. The cable lights up; let go and the module is inserted into it (for example Oscillator A → Delay → Out). A cable the module cannot sit in never lights up, and nothing changes. It works on one module at a time, not on a selection. |
A few cables show connections the engine makes on its own; those cannot be cut, and Terrain tells you so when you try.
Adding modules#
The module browser
Right-click empty canvas to open the module browser at that spot. Pick a shelf on the left, then a module on the right, and it lands where you clicked. Type in Search to find a module by name. Entries you cannot add any more are greyed out: an oscillator or Sampler already on the canvas, the Deck, the Voices, Noise once Noise 2 is on too, and a flow card once all its instances are in use. Effects are never greyed out; when six of one effect are on the canvas, a message tells you so.
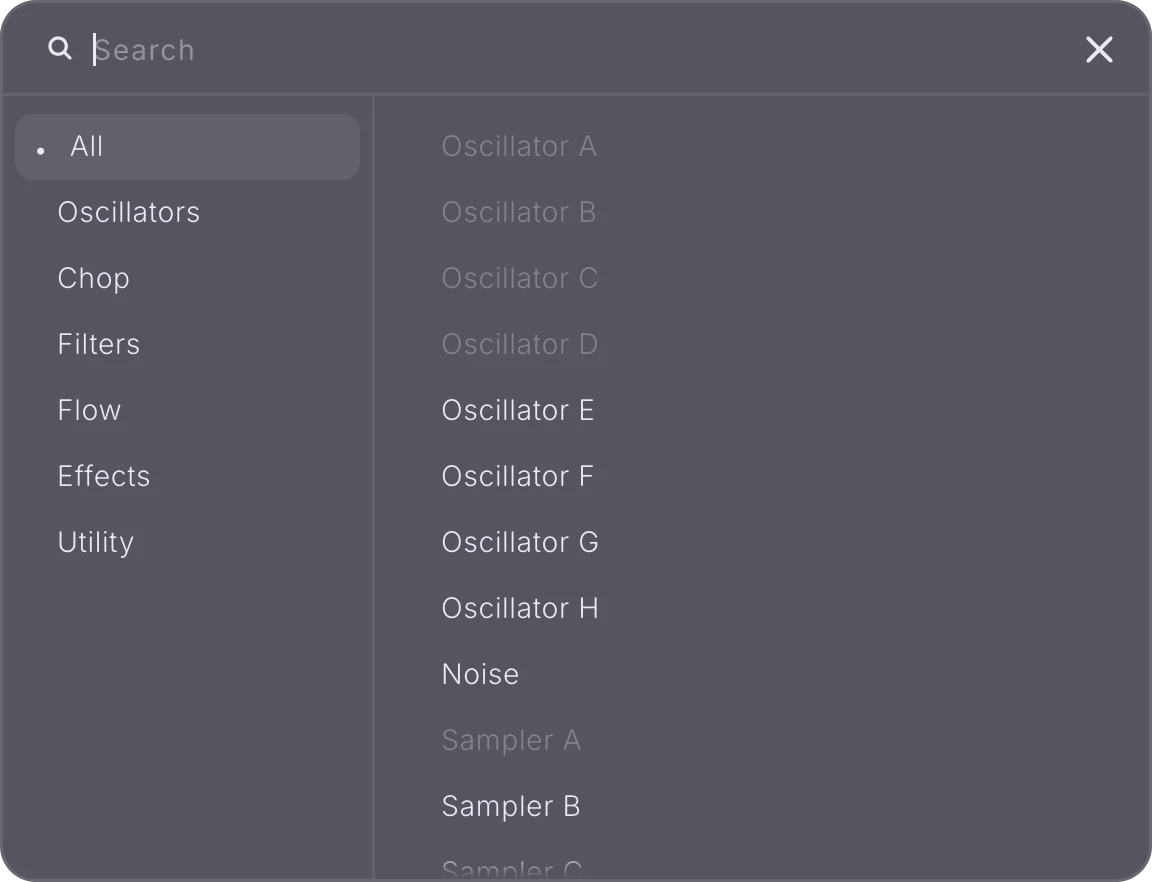
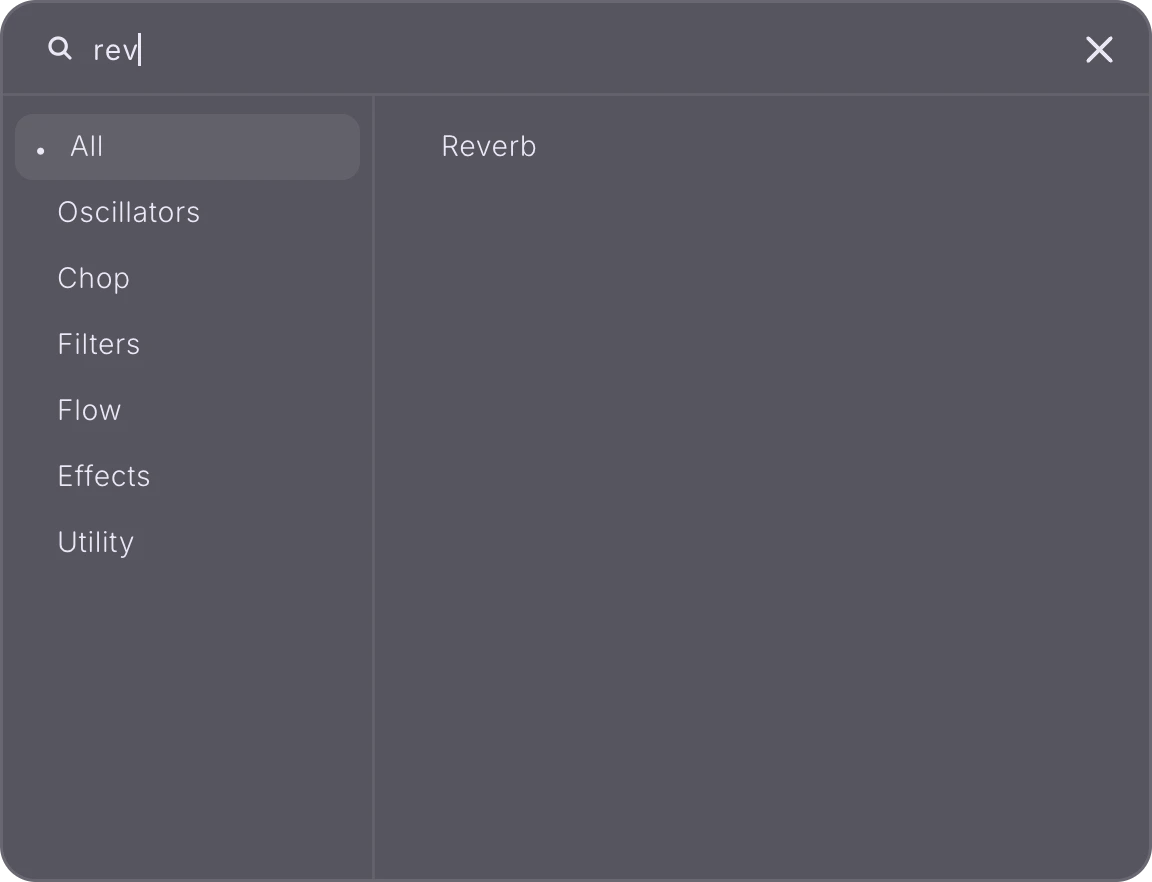
| Shelf | Modules |
|---|---|
| All | Everything you can add here. |
| Oscillators | Oscillator A to H and Noise (a second Noise adds Noise 2). A new oscillator arrives cabled to Out and nowhere else. |
| Chop | Sampler A to D, the CHOP page's layers. |
| Filters | Filter: another filter module with every filter type (the rack's Filter effect, up to six). |
| Flow | Arp, Shaper, Glitch and Robin. The list offers the next free instance; when all are on the canvas the entry says so. |
| Effects | Fifteen rack effects, from Reverb to Splitter. The Filter effect lives on the Filters shelf. |
| Utility | The Deck and the Voices panel. |
The quick route menu
Drag a cable out of a port and let go over empty canvas. A small menu opens with a Search or add field and two lists: In this patch (the existing ports that can take this cable — pick one to connect to it) and Add new (modules that can take it — pick one and it is added at the drop point, already cabled). Type to narrow both lists; the arrow keys move through them, Enter picks and Esc closes. A module that cannot take the cable shows dimmed with the reason (for example "Takes audio, not notes"). It works the same when you drag out of an input. So: drag from Oscillator B's output, let go, type "reverb", pick it, and a new Reverb sits there with Oscillator B already running into it.
Dropping audio files
Drop an audio file on an oscillator module and that oscillator loads it on the Sample engine. Drop it on empty canvas and the first oscillator not yet on the canvas comes on at the drop point, switches to the Sample engine, loads the file and is cabled to Out. If every oscillator is in use, a message asks you to drop onto one. WAV, AIFF, FLAC and MP3 files work. In Terrain FX, file drops are off.
Tools, menus and the map#
The tool row
| Tool | What it does |
|---|---|
| Undo | Steps back one change. |
| Redo | Brings back the change you undid. |
| Fit | Zooms and pans so every module is in view. |
| Tidy | Lines the modules up neatly by how the sound flows. |
| Eye | Hides the knob dots, the modulation cables and the remove and minimise buttons, for a clean look while you play. Audio and note cables stay in view. Click again to edit. |
Module menus
A module's controls behave exactly as on the SYN page: an effect's power dot bypasses it, its × removes it, its knobs right-click for the control menu. On the canvas you also get:
| Gesture | What it does |
|---|---|
| Right-click a flow module | A flow card on the canvas shows as its picture; right-click it to extend the full card in place. Its minimise button folds it back to the picture. |
| Right-click a selection | With several modules selected: a menu headed with the count, offering Tidy (lines up only those modules) and Cut all cables (unplugs every cable on them). |
| Right-click the Randomizer | Sets its reach: Light, Medium, Heavy, Wild or Crazy. |
Shaper and Glitch inside the rack
A Shaper or Glitch normally processes the sound after the effect rack. Cable its output into an effect and it moves inside the rack, just before that effect — a Glitch into the reverb, so the stutters get the tail. Cut that cable and it goes back to running after the rack.
The mini map
The map in the corner shows the whole canvas in small, with a frame for what you are looking at. Click or drag in it to jump the view there; the view keeps following while you hold the button, even outside the map.
Main volume
The long slider along the bottom is the main volume: the final level of everything Terrain plays, up to +12 dB. Drag left or right; all the way left is silence; double-click for 0 dB. The Out module carries the same level.
Modulators on the canvas#
The LFO and envelope modules are the same panels as on the SYN page, with an output dot. Drag from that dot onto the dot under any knob on any module and the LFO or envelope moves that knob — the quickest way to see modulation as wiring. Each cable is an ordinary route, so its amount, curve and aux live on the MOD page; cutting the cable removes the route.
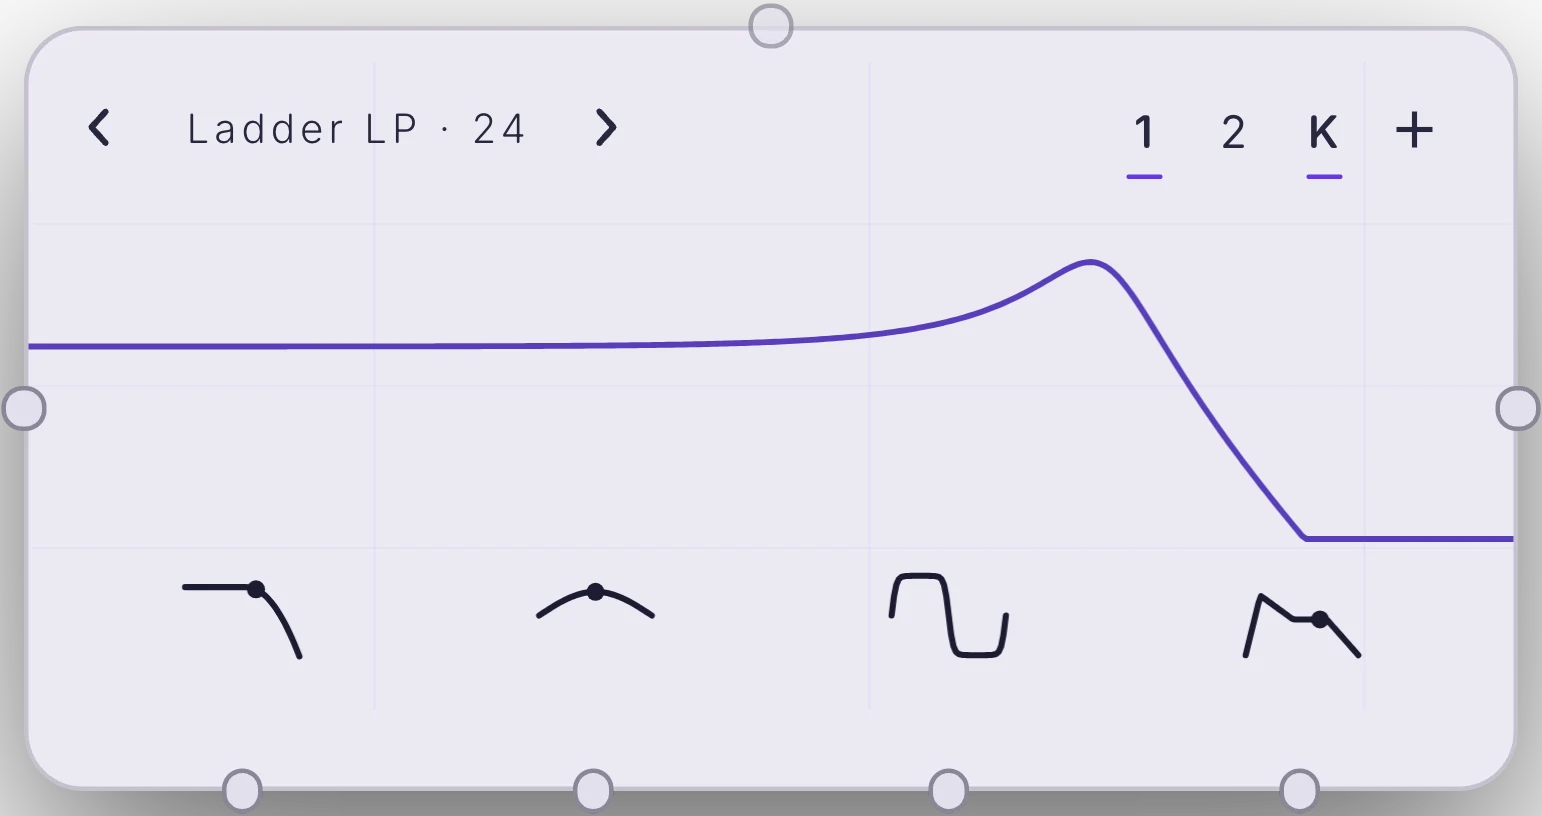
Build your own world: a worked example#
Here is a patch the SYN page alone cannot make: two oscillators with completely separate effect chains, a stutter on one of them only, and a looper catching the result.
- Open the Patcher (click SYN on the SYN page). Press Fit so you see everything.
- Right-click empty canvas › Oscillators › Oscillator E. It arrives cabled to Out and nowhere else. Give it a sound that contrasts with Oscillator A — a long pad against A's pluck.
- Drag a cable from Oscillator A's audio out, let go on empty canvas, type "chorus" and pick Chorus. Oscillator A now runs into a Chorus of its own, and the Chorus already reaches Out.
- Do the same from Oscillator E with "reverb": E gets a private Reverb. Set its type to Shimmer.
- Right-click canvas › Flow › Glitch and Shift-drag it onto the cable between Oscillator A and the Chorus. Light Rep and Rev on its card. Only A stutters, and the Chorus thickens the stutters; E's shimmer stays untouched.
- Drag the LFO's output dot onto the dot under the Reverb's Size knob. The space breathes.
- Right-click canvas › Utility › Deck, cable the Chorus's output into it. Press Record on the Deck and loop what you play (see Tape Deck).
- Cable the Randomizer to the Glitch and the Chorus, set its reach to Medium, and click the map in the Flow box whenever you want a fresh variation.
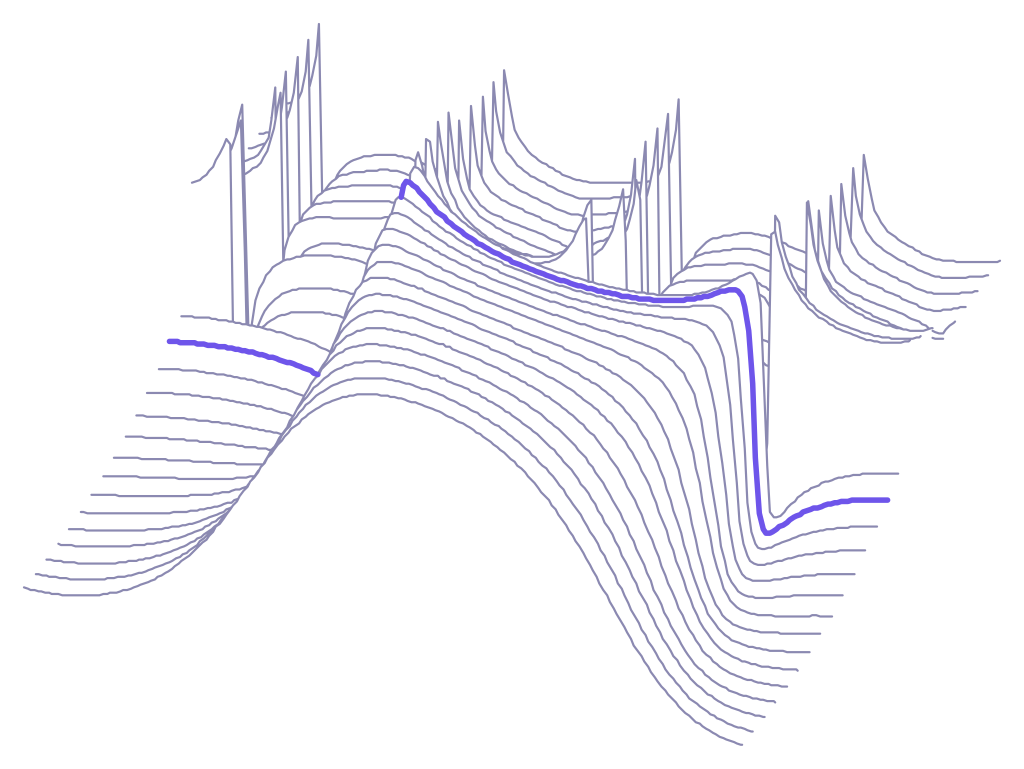
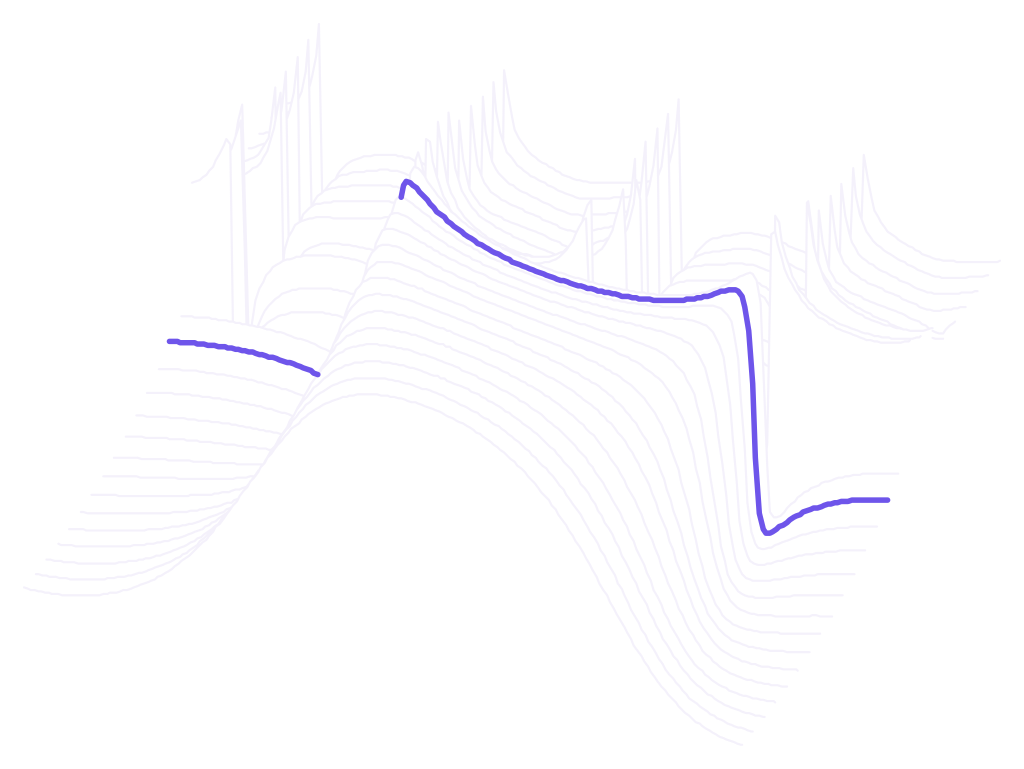
Chapter 13
CHOP
Manipulate your own audio. Drop a vocal, a loop or a field recording onto CHOP, cut it into pieces, play the pieces from your keyboard and stack up to four samples on top of each other. Every chop has its own pitch, envelope and stretch, and every layer can leave Terrain as its own stem.
The page at a glance#
Click CHOP in the header to open the page. The top half is the sample itself: a large waveform with its cut markers, and a control bar underneath that sets how the sample plays. The bottom half is the layer mixer on the left and the trigger and stem controls on the right. The Main volume slider runs along the very bottom, the same one you see on every page: it sets the final level of everything Terrain plays, up to +12 dB (all the way left is silence; double-click returns it to 0 dB).
CHOP holds four sample layers, A to D. Each layer is a complete sampler with its own sample, chops, settings, volume and pan. You edit one layer at a time on the waveform and hear all of them together, in turns, at random, or split across the keyboard, depending on the trigger mode you pick.
Loading a sample#
Drag an audio file from Finder or Explorer straight onto the waveform. CHOP takes WAV and AIFF files, and FLAC and MP3 load as well. The file lands in the layer that is selected on the layer pads, and dropping another file replaces it. An empty layer shows Drop a sample here on the waveform until something arrives.
You can also start from Terrain's own sample library, the same collection of one-shots the oscillators' Sample engine uses (see Oscillators). Click the sample name in the control bar (it reads Sample Library while the layer is empty) to open the library browser. It is sorted into categories such as Pad, Keys, Bell, Pluck, Lead, Bass, 808, Chord, Vocal, Guitar, Strings, Brass, Drums, FX and Textures, with your own imports listed alongside. Click a sound to load it into the current layer.
| Control | What it does |
|---|---|
| Sample name | Shows the sound in the current layer. Click to browse the library; the browser opens on the category of the sample you have loaded. |
| ‹ (Previous sample) | Loads the sample before this one in the library into the layer. |
| › (Next sample) | Loads the next sample in the library into the layer. Step through the arrows while a loop plays to audition sounds in context. |
| Waveform (drop zone) | Drop a WAV or AIFF file here to load it into the current layer, or to replace what is there. |
Layers A–D#
The four letter pads next to the root note choose which layer you are editing. Click B and the waveform, the chops, the mode pills, the slicer and the library name all switch to layer B. Each layer keeps its own settings, so A can be a sliced drum break in Slice mode while B holds a pad sample in Pitch mode.
Up to four layers can play together or take turns. How they share the keyboard is set by the trigger modes in the bottom right (see Triggers), and how loud each one is by the mixer (see The layer mixer).
| Control | What it does |
|---|---|
| A, B, C, D | Edit sample layer A, B, C or D. The selected pad is outlined. |
| Root note | The key that plays the sample at its own pitch (C4 by default). Click to go up a semitone, Shift-click to go down. Set it to the note the sample was recorded in and it plays in tune across the keyboard. |
| Arm | While Arm is lit, the keys play the chops and the instrument's oscillators stop, so you hear only the samples. Turn it off and every note plays the oscillators and the chops together, which is how you layer a vocal chop over a pad. |
Pitch or Slice, One-Shot or Loop#
Two pairs of pills decide what kind of instrument the layer is.
- Pitch
- The whole sample plays up and down the keyboard, like an instrument. Drag the IN and OUT marks on the waveform to set which part of the file plays. Pitch mode is right for a sustained note, a chord stab or a texture you want to play melodically.
- Slice
- The sample is cut into chops, one per key, like an MPC. This is the mode for breaks, vocal phrases and anything you want to rearrange. The Slices button appears in Slice mode and opens the slicer.
- One-Shot
- The sample (or chop) plays once to the end each time you press a key, however short the note.
- Loop
- The sample repeats for as long as the key is held. Combine it with the tempo lock to keep loops on the grid.
Tempo lock and loop tempo
The right end of the control bar shows the song's tempo in BPM. The padlock beside it is the Tempo lock: click it and every loop is stretched to the song tempo, so it stays in time when the project tempo changes. While the lock is on, the display shows the tempo Terrain read from the sample, an arrow, and the song tempo.
| Control | What it does |
|---|---|
| BPM | The song's tempo, read from your DAW. |
| Tempo lock (padlock) | Stretches every layer's loop to the song tempo. Its tooltip says how many of the four layers have a readable tempo and are being stretched. |
| Loop tempo | Visible while the lock is on: the BPM Terrain found in this layer's sample. A question mark means it could not read one, so that layer is not stretched. Click and type the right tempo, then press Enter; leave the field empty for automatic detection. A tempo you typed is shown in a brighter colour. |
The waveform and its chops#
In Slice mode the waveform is cut by thin vertical cut markers, and each chop is numbered along the top. The chop under your mouse lights up, a retuned chop shows its offset in semitones under it, and a reversed chop is marked with an R. Everything here is done with the mouse, directly on the sound.
| Gesture | What it does |
|---|---|
| Click a chop | Plays it so you can hear it. In the Chromatic play mode a click instead picks the chop the keyboard plays. |
| Drag a chop up or down | Retunes it in semitones, -12 to +12. Press Shift once the drag is moving for slower, finer travel. |
| Scroll over a chop | Retunes it one semitone per step. |
| Shift-drag a chop sideways | Stretches it in time: right = longer, left = shorter. A chop whose stretch mode is Off switches to Tone as you drag. Once a chop has a stretch mode, a plain sideways drag stretches it too. |
| Double-click | Adds a cut at that point, splitting the chop in two. |
| Drag a cut marker | Moves where one chop ends and the next begins. The marker snaps to a quiet point in the audio, so cuts land between hits instead of through them. |
| Right-click a chop | Opens the chop panel for that chop (see The chop panel). |
| Drop a file | Replaces the sample in this layer. |
| IN / OUT marks (Pitch mode) | Drag them to set the part of the sample that plays. |
The slicer#
Click Slices in the control bar to open the slicer drawer. The number on the button is how many chops the layer has now. The drawer sets the grid, how the keys play the chops, random pitch moves and the anti-click fades. Click Slices again to close it.
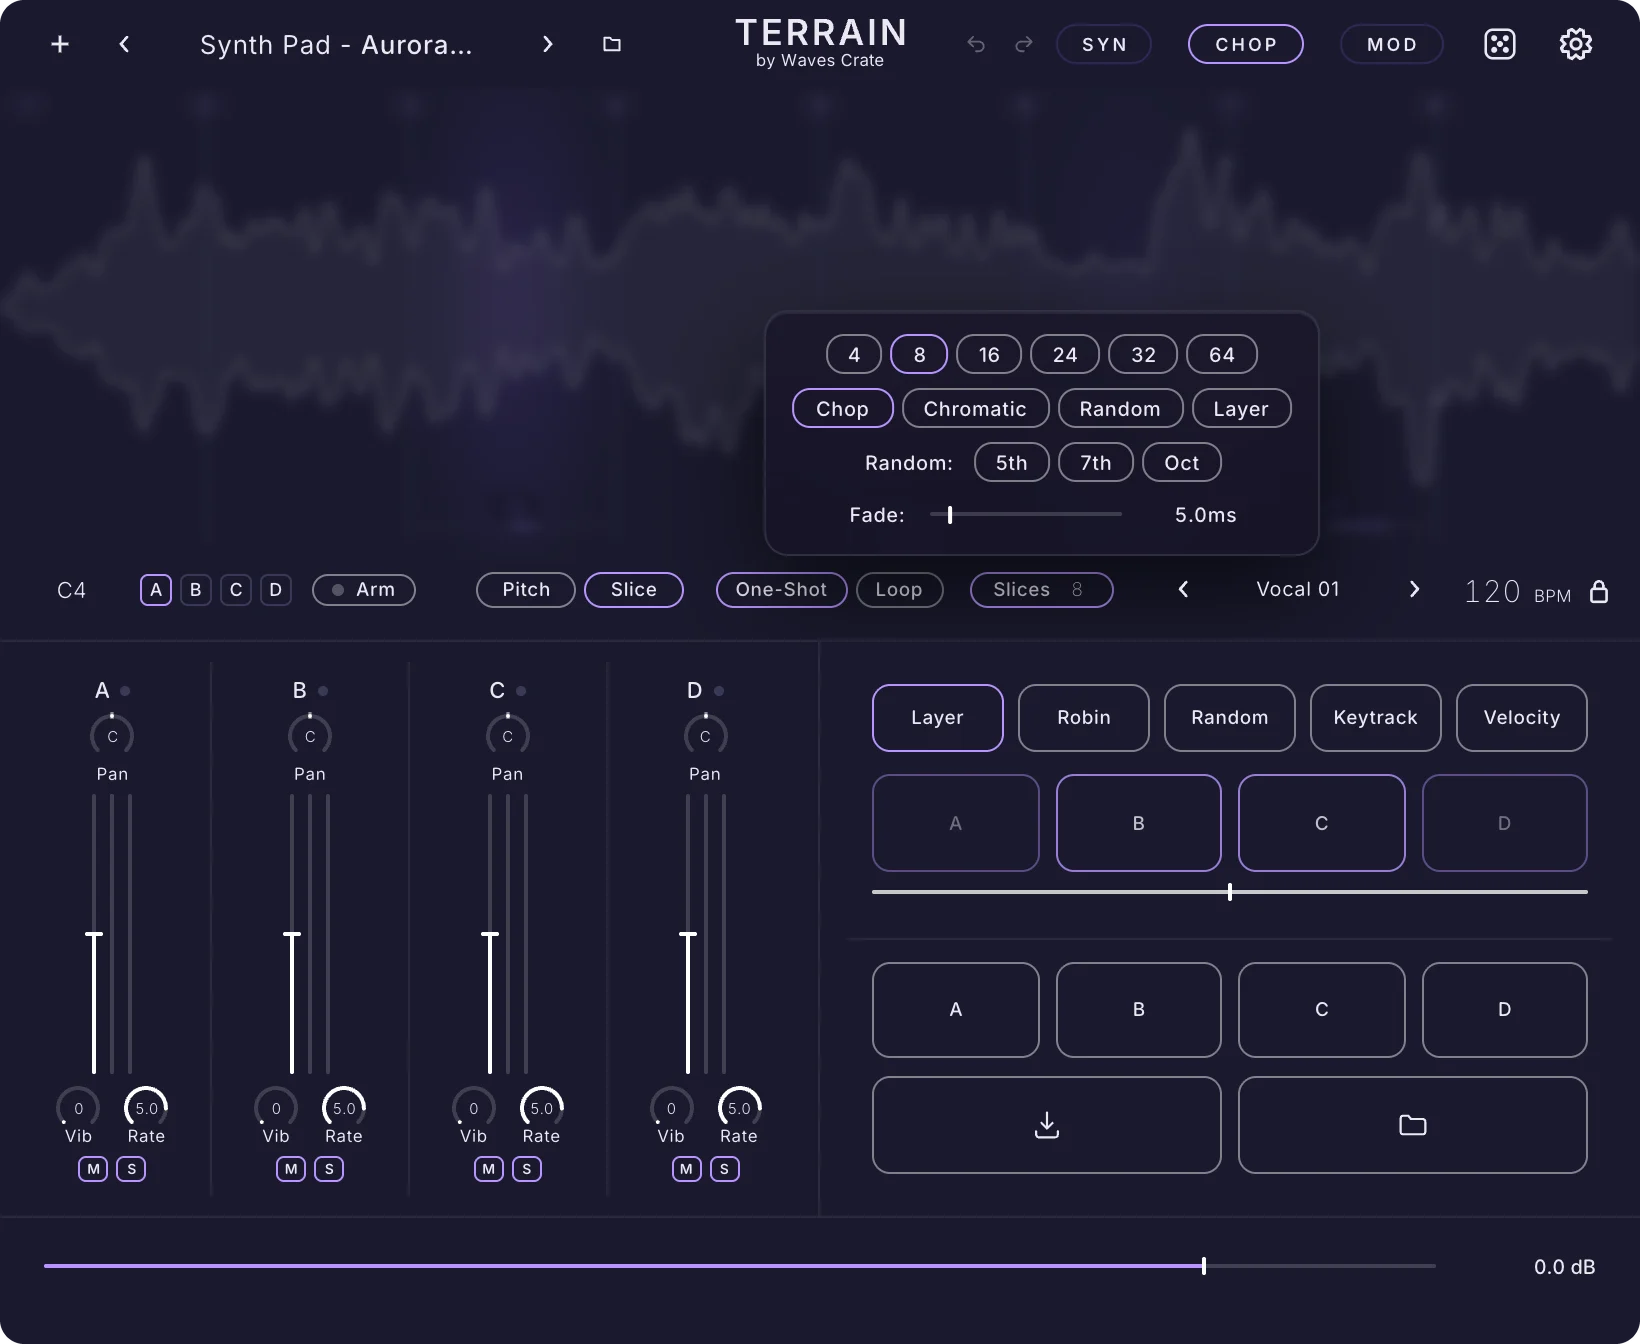
Count
The top row cuts the whole sample into equal chops, one per key: 4, 8, 16, 24, 32 or 64. The pill that matches the current number of chops is lit. After an even split, add or move cuts by hand on the waveform.
How the keys play the chops
| Sub-mode | What it does |
|---|---|
| Chop | Every key plays its own chop, all at the same pitch, like an MPC. Click the pill again to switch it to Track. |
| Track | Every key plays its own chop, pitched to the key you press. Click again to return to Chop. |
| Chromatic | One chop played up and down the keyboard, like a sampler instrument built from a single slice. Click a chop on the waveform to pick which one. |
| Random | Each note plays a random chop, pitched to the key you press, and never the same chop twice in a row. |
| Layer | Each note plays every chop at once, stacked into one sound and pitched to the key you press. Eight syllables of a vocal become one chord-like smear. |
Random pitch
Three buttons hand every chop a random interval in one click. Press one again for a new roll.
| Control | What it does |
|---|---|
| 5th | Each chop gets a random pitch of a fifth down, none, or a fifth up (-7, 0 or +7 semitones). |
| 7th | Each chop jumps randomly by a flat seventh down, none or up (-10, 0 or +10 semitones). |
| Oct | Each chop jumps randomly an octave down, none, or an octave up (-12, 0 or +12 semitones). |
| Fade | A tiny fade at each chop's edges, 0 to 50 ms (5 ms by default), so cuts never click. Raise it for softer, smeared edges on pads and vocals; keep it low for punchy drums. |
The chop panel#
Right-click a chop to open its panel. The heading shows Chop and the chop's number. Everything in the panel belongs to that chop alone, so one slice can be long and reversed while its neighbour is short and pitched up. In Pitch mode the panel edits the whole sample.
The small number at the left of the heading is the All chops mark: it shows how many chops the layer has. Click it (or press Cmd+A on Mac, Ctrl+A on Windows) to select every chop; the heading then reads All Chops, and one change edits them all. The × closes the panel.
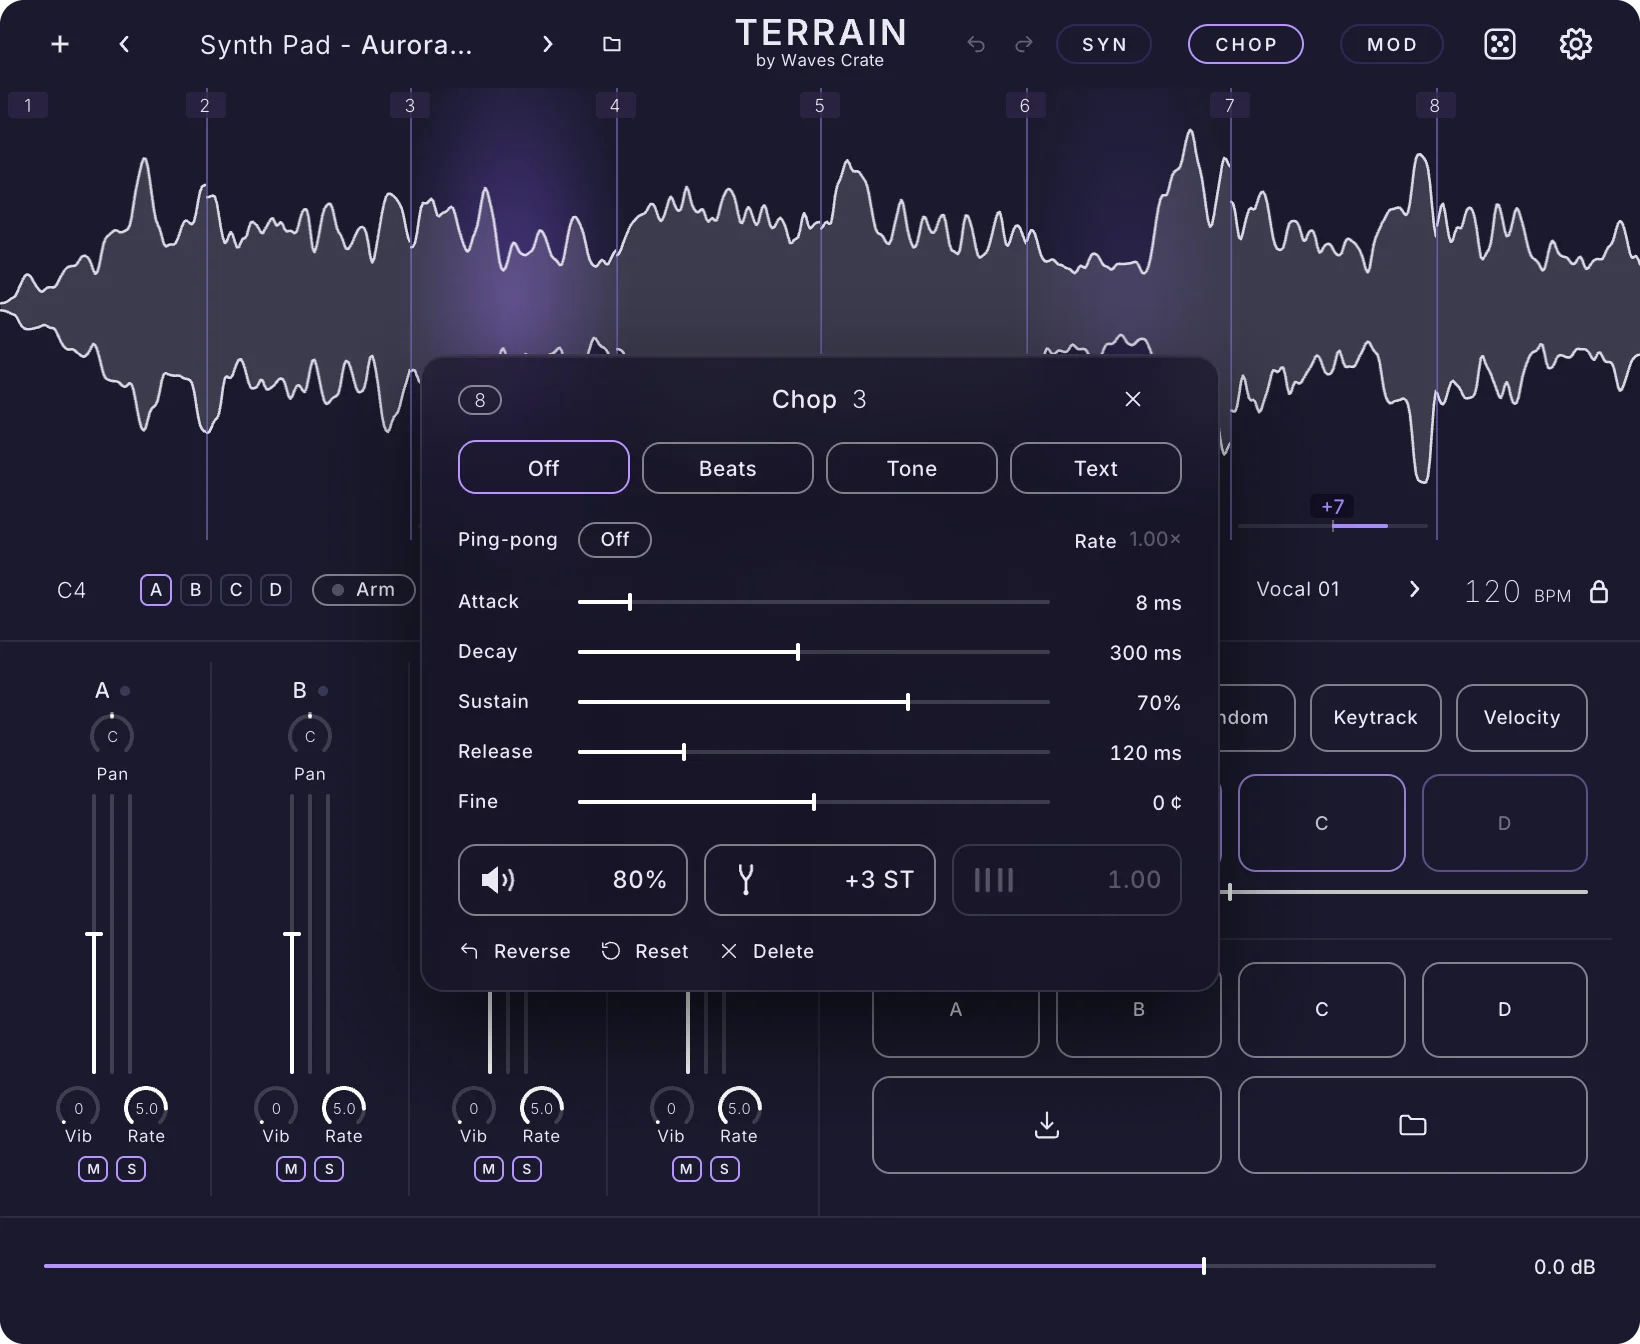
Stretch mode
Four pills decide what happens when a chop is stretched in time.
| Mode | What it does |
|---|---|
| Off | No time stretching: the chop changes speed and pitch together, like a record. |
| Beats | Keeps drums tight when the chop is stretched to tempo. It follows the hits, so transients stay sharp. |
| Tone | Keeps the pitch steady when stretched, for chords, melodies and sustained sounds. |
| Text (Texture) | Stretches into a smeared, grainy wash. Push Stretch far up for ambient beds made from a single syllable. |
Ping-pong
| Control | What it does |
|---|---|
| Ping-pong | Click the pill to make the chop play forwards, then backwards, back and forth. It reads Off when it is off. |
| Rate | The playback speed of the ping-pong, 0.1× to 8×, 1.00× by default. Drag up or down. Below 1.0 it plays slower and lower, like varispeed. For a slow scan that keeps its pitch, use the Tone stretch mode and set Stretch to the inverse of the rate (Rate 0.5 with Stretch 2.0). |
Envelope and tuning
Five sliders shape the chop's own volume envelope and fine tuning. Drag along a slider to set it.
| Control | What it does |
|---|---|
| Attack | How slowly this chop fades in, 0 to 2000 ms. Right = a softer start. Double-click to use the page's own attack. |
| Decay | How fast the chop drops to the Sustain level after it starts, 0 to 2000 ms. Double-click = 0. |
| Sustain | The level the chop holds while the key is down, 0 to 100 %. Double-click = 100 %. |
| Release | How long the chop rings after you let go, 1 to 5000 ms. Double-click to use the page's own release. |
| Fine | Tunes this chop in cents (hundredths of a semitone), -50 to +50. Double-click = dead on. |
Volume, Pitch and Stretch
| Control | What it does |
|---|---|
| Volume | This chop's loudness, 0 to 200 % (100 % by default). Drag up or down. Balance a loud hit against quieter ones without touching the layer fader. |
| Pitch | Tunes this chop in semitones, -12 to +12. Drag up or down. It is the same value you set by dragging the chop on the waveform. |
| Stretch | How far this chop is stretched in time, 0.1 to 15 (1.00 = its own length). Drag up or down. It is greyed out while the stretch mode is Off. You can also Shift-drag the chop sideways on the waveform. |
Actions
| Control | What it does |
|---|---|
| Reverse | Plays this chop backwards. A reversed chop shows an R on the waveform. |
| Reset | Puts this chop back to its starting pitch and settings. |
| Delete (sample) | Pitch mode only: removes the whole sample from this layer. |
| Delete (chop) | Removes this cut, so the chop joins the one before it. |
The layer mixer#
The bottom left holds four channel strips, one per layer. The dot beside each letter lights while that layer is playing. Every fader and knob here returns to its default on a double-click, and a right-click offers the same as Reset to default. Pan, Vib and Rate accept modulation: drop a modulator on them to animate them (see Modulation).
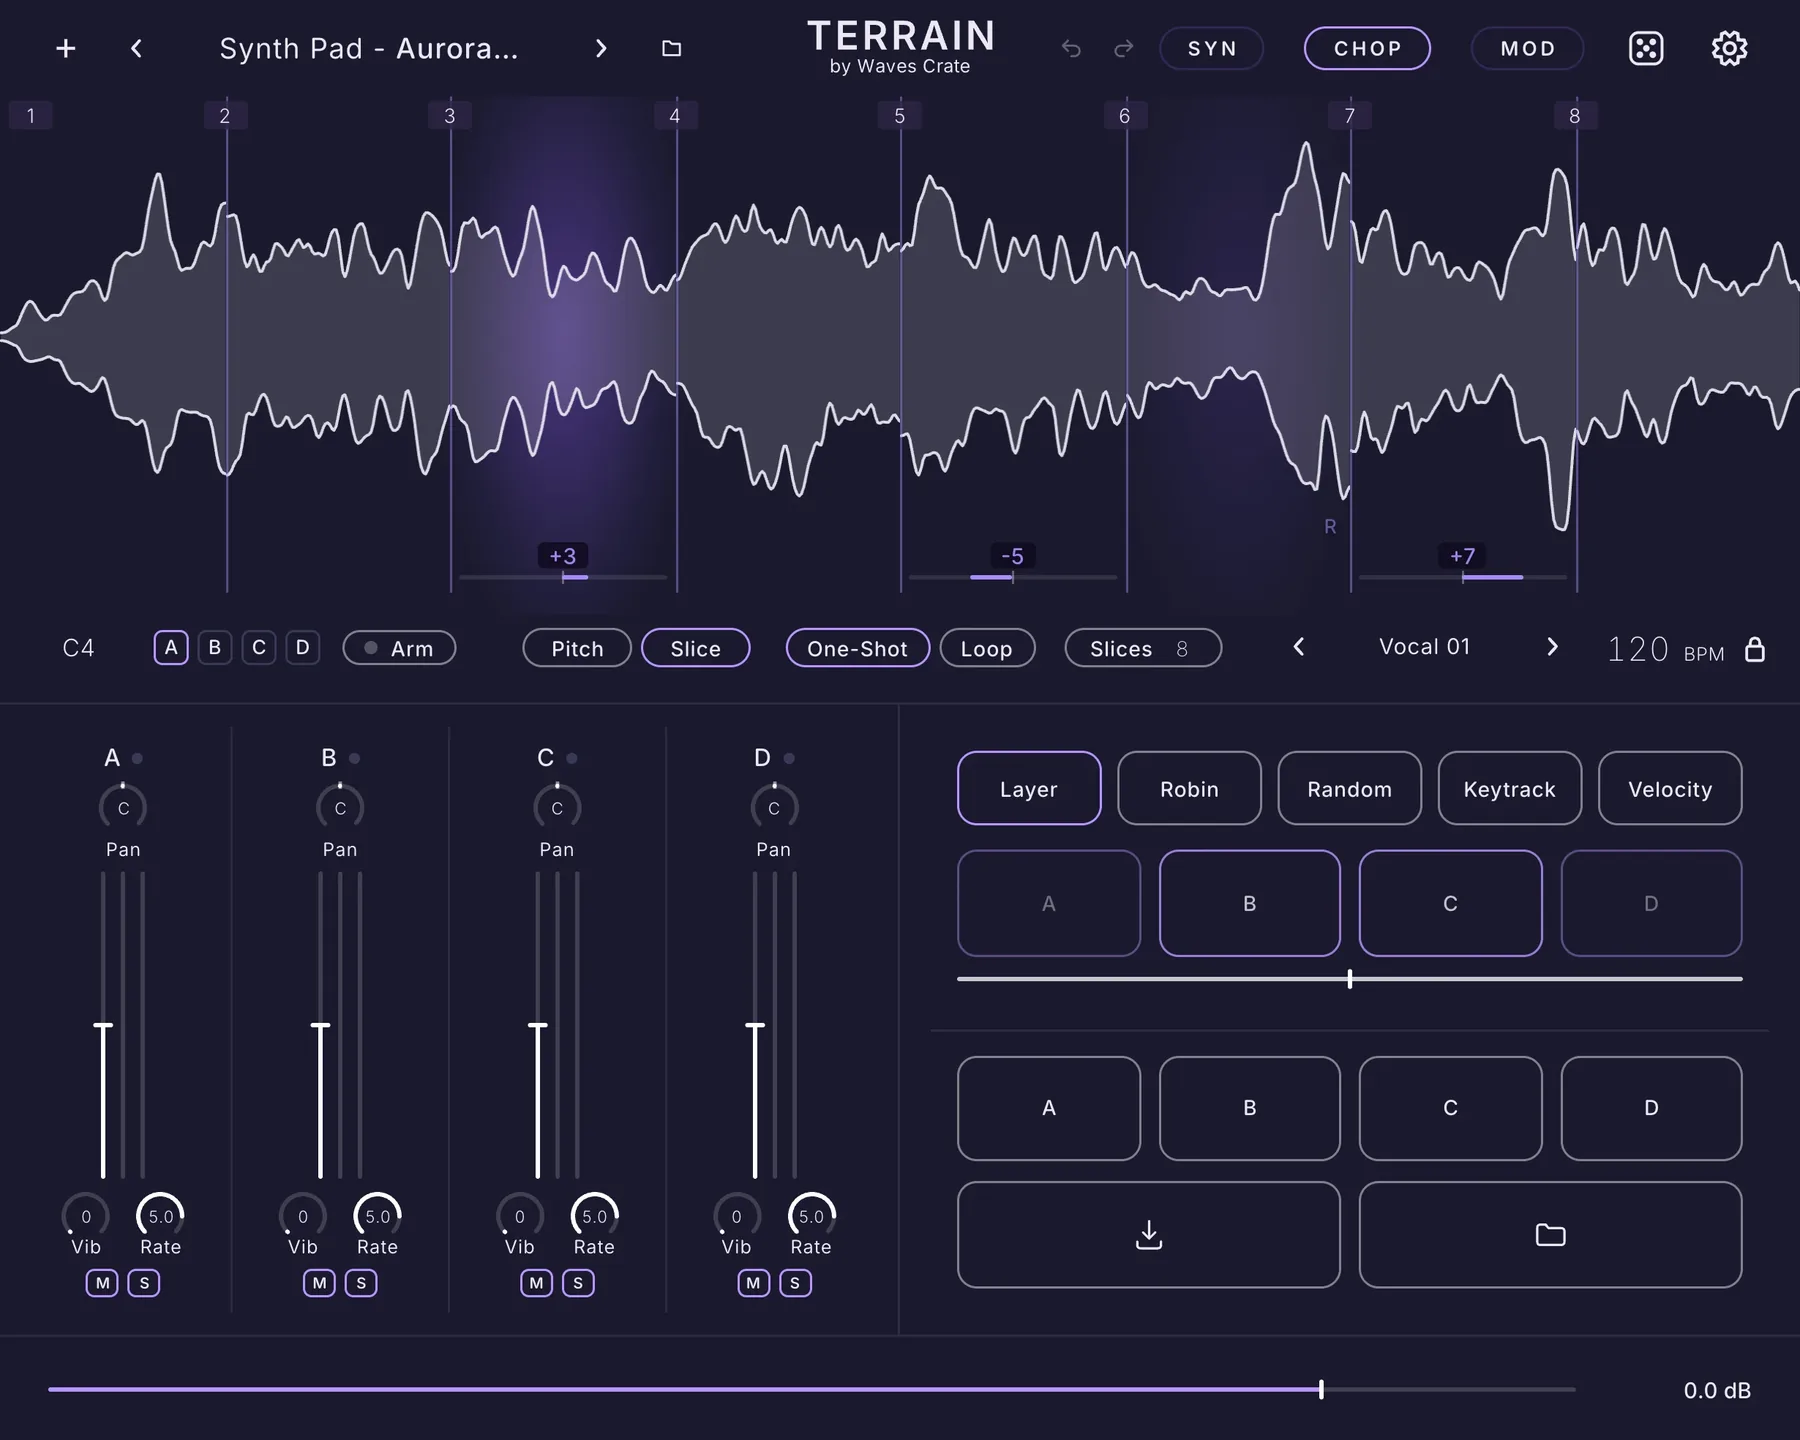
| Control | What it does |
|---|---|
| Pan | Moves the layer left or right. Double-click = centre. |
| Volume | The layer's level, 0 to 200 %. Double-click = 100 %. The two bars beside the fader are its meters. |
| Vib | How much the layer wobbles in pitch. Up = more vibrato; double-click = 0. |
| Rate | How fast the vibrato wobbles, 0.05 to 12 Hz. Double-click = 5 Hz. |
| M (Mute) | Silences the layer. |
| S (Solo) | Hear only this layer, together with any other soloed layers. |
Triggers: how the layers share the keys#
The five pills at the top right choose how a note decides which layers sound. The panel under the pills changes with the mode.
| Mode | What it does |
|---|---|
| Layer | Every loaded layer plays at once. The A–D boxes show which layers hold a sample (lit) and which are empty. Each lit box glows as bright as its layer sounds at the current Morph position. The Morph slider under them blends across the loaded layers: left = only the first (A when all four are loaded), middle = all of them, right = only the last. Double-click, or right-click › Reset to default, returns it to the middle. Put Morph on a macro and you sweep from one sample to another while you play. |
| Robin | Each note plays the next layer, A, B, C, D, skipping empty ones, like round-robin samples in a sampled drum kit. Reset to A makes the next note start the rotation again from layer A. Shuffle makes the layers take turns in a random order instead. |
| Random | Each note picks a layer at random, weighted by the odds you set. Four Odds sliders, one per layer (25 % each by default), set how likely each layer is to play. Drag sideways; double-click resets. |
| Keytrack | Each layer plays only in its own range of keys. Drag the edges between the zones on the Key ranges bar, for example low keys for A and high keys for D. Each zone shows its note range. Double-click resets. |
| Velocity | Each layer plays only in its own range of how hard you hit. Drag the edges on the Velocity ranges bar so soft hits play one layer and hard hits another. Double-click resets. |
Stems#
CHOP keeps listening to each of its layers. The four Stem buttons save the last 10 minutes of a layer as a WAV file, the layer's own sound before the effects, so you can take a performance into your arrangement without bouncing anything.
| Control | What it does |
|---|---|
| Stem A, B, C, D (click) | Saves the last 10 minutes of that layer as a WAV in the stems folder. The capture strip at the bottom of the window confirms the file name, or says the layer has no audio yet. |
| Stem A, B, C, D (drag) | Drag the button into your DAW to drop the file straight onto a track. |
| Export all (download arrow) | Saves all four layers as stems at once. Drag it into your DAW to drop every layer that holds a sample. |
| Show folder (folder) | Opens the folder the stems are saved in. |
Stems are saved in your Music folder, under Waves Crate/Terrain/Stems. Each file carries the date and time it was saved, so a new export never overwrites an older one.
CHOP in the Patcher and the effects#
Each CHOP layer is also a sound source in the Patcher. Open the Patcher's add menu and go to the Chop shelf: Sampler A, Sampler B, Sampler C and Sampler D put that layer on the canvas as a module, with a level meter, so you can cable it through its own effect chain instead of the shared one. Sampler A into a Glitch into a Delay is one signal path, separate from what the oscillators do. See The Patcher.
There is no tape section on the CHOP page. To colour a layer with tape, cable its Sampler module into a Tape effect. The Tape effect's machines include the three classic models below, each with three knobs and no back panel (the full Tape effect is described in Effects).
| Machine | Its three knobs |
|---|---|
| Reel — a clean studio reel that saturates in three bands | Sculpt drives the sound into three warm saturators (low, presence, silk); 5 to 15 adds presence, higher gets aggressive. Drive is a fuzz layer on top of Sculpt: 0 = off, 30 to 50 adds bite, 100 = gnarly fuzz. Timbre: centre = balanced, left = warmer, fatter overtones, right = a brighter, glassy edge. |
| Porta — a hissy four-track cassette that wobbles and breathes | Wow: slow pitch wobble from the tape speed; 10 to 20 adds warmth, higher gets seasick. Saturation: tape drive; 20 to 40 thickens, higher is crushed and compressed. Hiss: tape noise under the sound; 5 to 10 adds analogue air, higher is lo-fi. |
| Wire — an old wire recorder with deep wobble and honk | Wow: the wire's slow, swimming speed wobble. Saturation drives the wire into clipping; click the word to swap it to Tube, a valve stage with warmer, rounder grit. Hiss is the wire's noise floor; click the word to swap it to Space, noise that follows the sound and smears into a roomy, reverb-like tail. |
Chapter 14
Tape Deck & Capture
Two ways to keep what you play. The Tape Deck is a looper you cable into the Patcher: record a phrase, overdub on top of it, let the tape wear it down and play it back at any speed. Capture is always listening at the bottom of the window, so the take you didn't mean to record is already there, ready to drag into your DAW.
The Tape Deck#
The Deck records whatever is cabled into it into a loop locked to your song's tempo, then plays that loop back on top of the incoming sound. Overdub more layers, set how much of the old loop survives each pass, dull it like worn tape, and play it slower, faster or backwards. Every pass is kept as its own take, and you can save any of them as a WAV.
To add it, open the Patcher, open the add menu (right-click the canvas or drop a cable on empty space) and pick Deck from the Utility shelf. One Deck fits on the canvas; while it is there, the menu shows it as already on the canvas. Then cable a sound into its left side and cable its right side on to an effect or to Audio Out (see The Patcher).
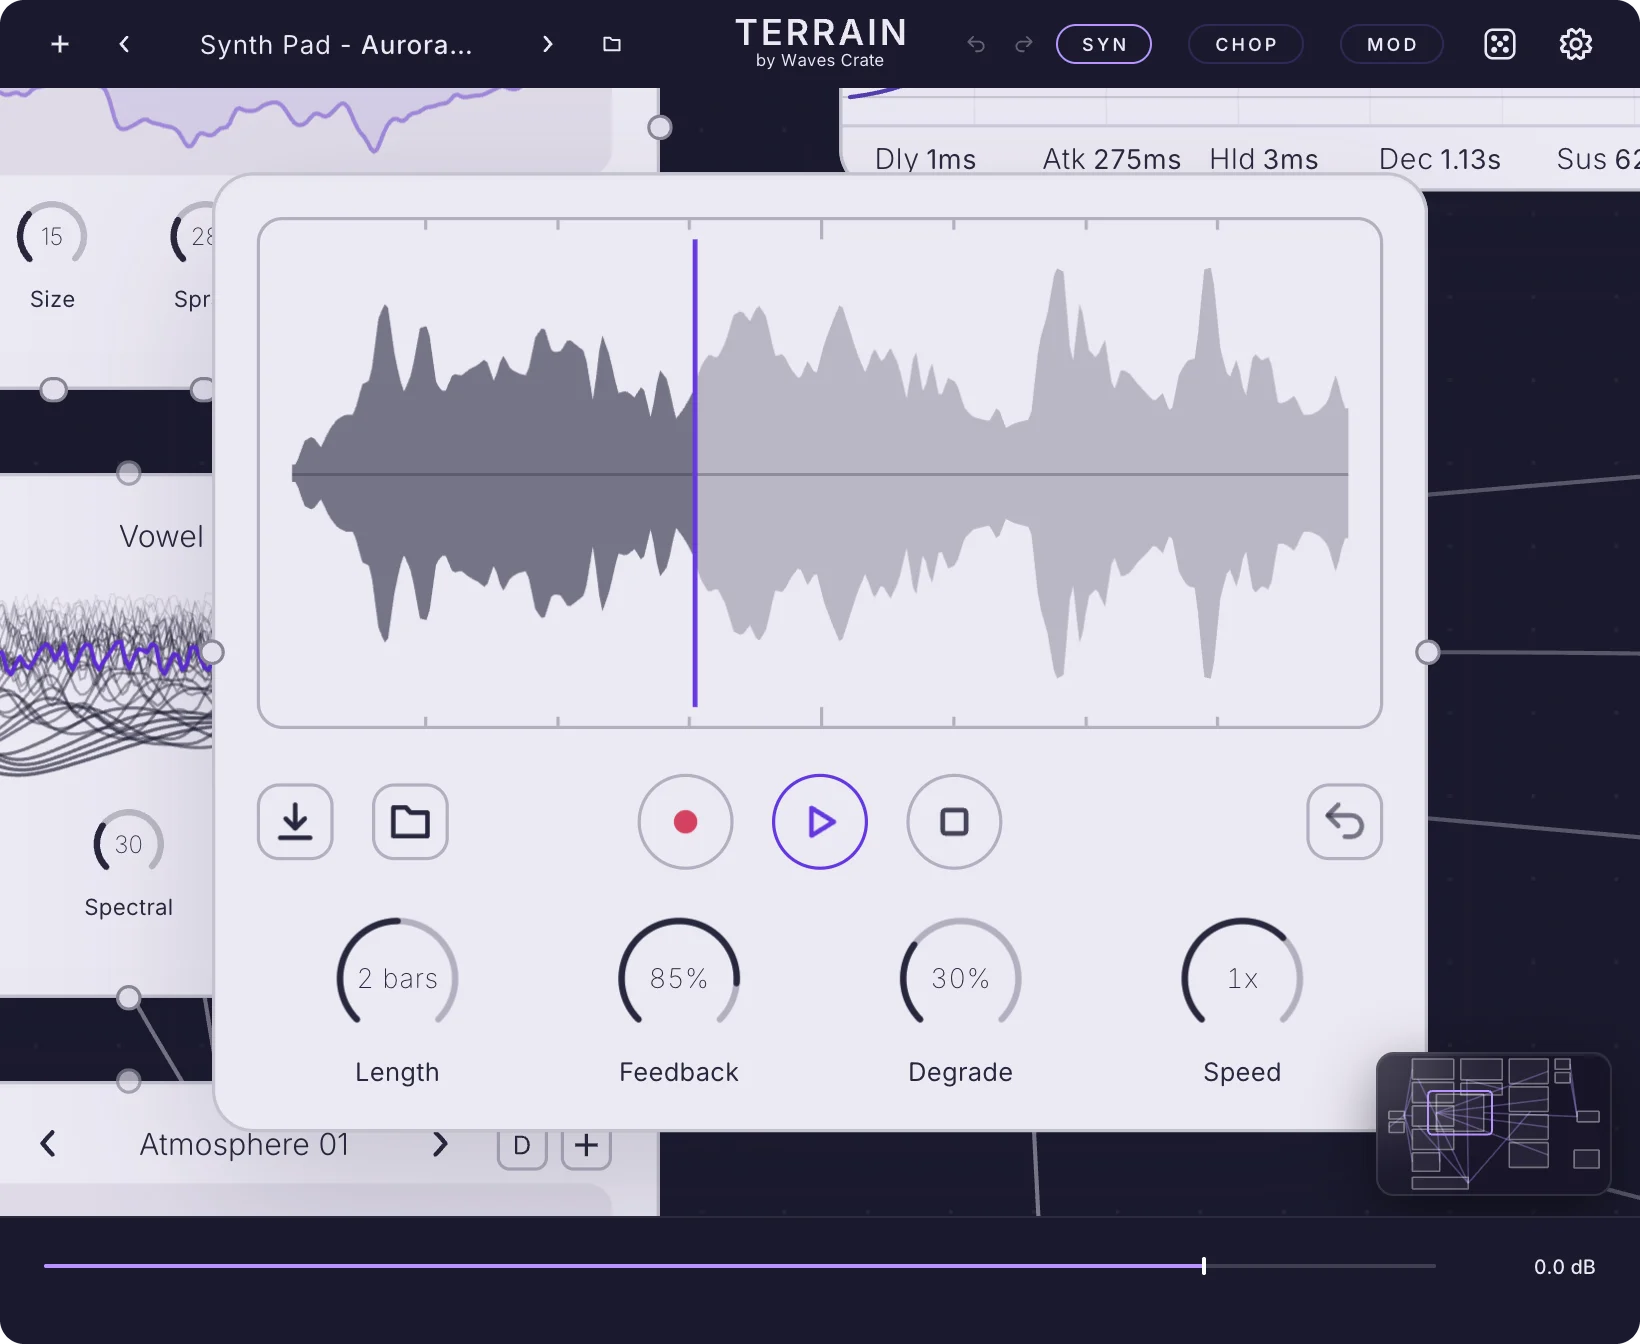
The Deck, control by control#
The module has three rows: the loop picture at the top, the transport row in the middle, and four knobs at the bottom. Its ports sit on the left and right edges.
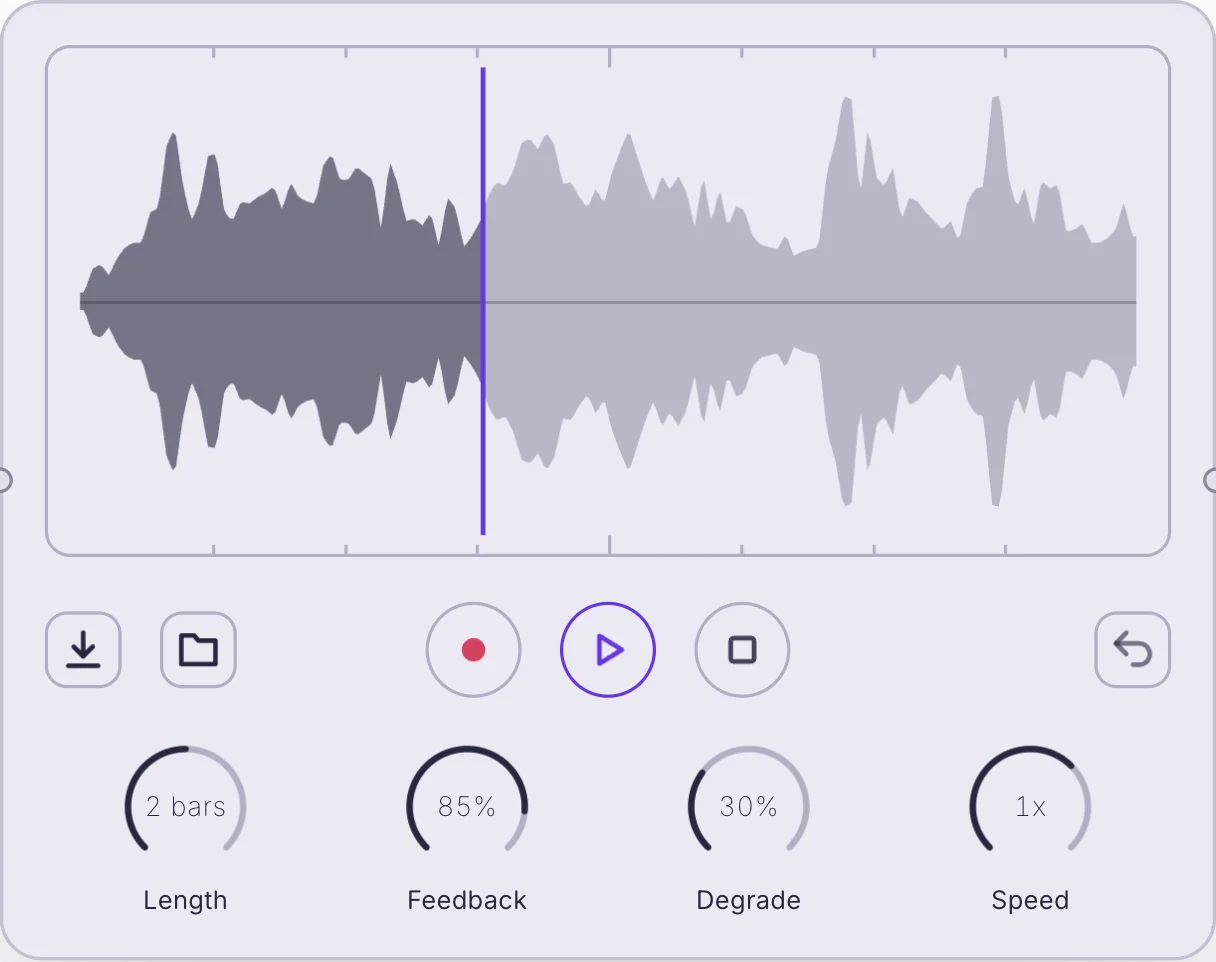
The loop picture
The picture is drawn from the audio itself. The loop's waveform is a mirrored envelope on a centre line: the part the playhead has passed is drawn darker, the rest lighter. Small ticks along the top and bottom edges mark the beats, with longer ticks on each bar. While you record, a tint fills in what the pass has written so far, and a red bar on the playhead shows your input level. During the count-in and the last four beats of a recording, a large 4 3 2 1 counts down in the middle with four dots under it. Right-click the picture, or any part of the Deck that has no menu of its own, for the Metronome.
Transport
| Control | What it does |
|---|---|
| Record | A 4-3-2-1 count-in in the song's tempo, then the Deck records what is cabled in. With a beat or bar Length it stops by itself when the loop is full, and the last four beats count down on the picture. Press Record over a recorded loop and it overdubs one more layer on top. |
| Play | Plays the loop on top of what comes in. Press again to pause it where it is. |
| Stop | Stops the loop with a short tape slow-down. Double-click to wipe the loop and start fresh; that also clears the undo history. |
| Undo | Brings back the loop as it was before your last recording. Press again to step further back, up to ten times. |
Knobs
| Control | What it does |
|---|---|
| Length | How long the loop is, in beats and bars of the song's tempo: 1 beat, 2 beats, 1 bar, 2 bars (default), 4 bars, 8 bars, or Free, which records until you press Stop. Right-click › Milliseconds switches it to free time, 10 ms to 60 s (1 s by default): short lengths buzz like a grain, long ones drift. In milliseconds, drag up or down, hold Shift for fine moves, double-click for 1 s. Right-click › Bars switches back. You can change Length while a loop plays; the loop grows or shrinks with it. |
| Feedback | How much of the old loop stays under each overdub, 0 to 100 % (85 % by default). 100 % keeps every layer; 0 % replaces the loop on every pass. |
| Degrade | Dulls the loop a little more on every pass, like tape wearing out, 0 to 100 % (30 % by default). Up = darker, softer layers; 0 % keeps it clean. |
| Speed | Plays the loop slower, faster or backwards. In Steps (the default) it clicks between -3x, -2x, -1.5x, -1x, -0.5x, 0.5x, 1x, 1.5x, 2x and 3x; below 0 plays backwards, and 0.5x is an octave down. Right-click › Free lets it glide anywhere from -3x to 3x for tape-stop sweeps and odd pitches; right-click › Steps returns. The loop keeps its speed when you switch. |
Right-click menus
| Where | Menu |
|---|---|
| Length | Bars · Milliseconds · Edit value · Reset to default (2 bars, or 1 second in milliseconds). |
| Speed | Steps · Free · Edit value · Reset to default (1x, the loop as you recorded it). |
| Feedback, Degrade | Edit value · Reset to default (85 % and 30 %). When the knob is a modulation target, its usual control menu appears instead, with Edit value added to it. |
| Download | Download last take · Download all takes. |
| Folder | Choose folder · Open folder. |
| Anywhere else on the Deck | Metronome (on or off; on by default): a soft tick on the count-in and on the last four beats of a recording. The Deck never records it. |
Edit value opens a small field over the knob's read-out. Type a number and press Enter to set exactly that; Esc or a click elsewhere leaves the knob as it was. Values outside the knob's range are clamped. Speed takes values such as 2, -0.5 or 2.1 (in Steps it lands on the nearest step). Length takes bars (1, 2, 4, 8, or 0.25 and 0.5 for one and two beats), free, or a time such as 750 ms or 1.5 s, which switches it to Milliseconds. Feedback and Degrade take a percentage, such as 85 or 85.5.
Ports
| Port | What it does |
|---|---|
| Input (left edge) | Cable a sound in here. While Record is lit, the Deck records whatever arrives. |
| Output (right edge) | What comes in passes straight through, with the loop playing on top. Cable it on to an effect or to Audio Out. |
Saving takes#
Every record or overdub pass is a take: the audio that pass recorded, its own layer of the loop. The Deck keeps the last 16 takes. Save them as WAV files and you can rebuild the loop layer by layer in your DAW, or keep only the pass you liked.
| Control | What it does |
|---|---|
| Download (click) | Saves the last take, the last record or overdub pass, as a WAV. |
| Download (right-click, long press, or Ctrl-click on Mac) | Opens the menu: Download last take, or Download all takes, which saves every kept take (up to 16), one WAV per pass, so each layer is its own stem. |
| Folder (click) | Opens the folder the Deck saves its takes in, in Finder or Explorer. Terrain makes the folder if it is not there yet. |
| Folder (right-click, long press, or Ctrl-click on Mac) | Choose folder: pick where the Deck saves its takes; Terrain remembers it on this computer. Open folder: shows the folder. |
The files
- Each file is exactly one loop long at the Deck's current speed, so it drops into your DAW on the grid.
- Stereo, 32-bit float WAV at your session's sample rate.
- The default folder is Deck Takes inside Terrain's capture folder, which sits in your Music folder under
Waves Crate/Terrain, next to the stems and captures. - Files are named
Terrain Deck – Session 3 – Take 2 – 120 BPM – 2 bars – 2026-10-17 1432.wav: the session number, the take, the song tempo, the Length (beats and bars, or milliseconds when Length is in milliseconds or Free) and the date and time of the save. - A save never writes over an existing file; a second file with the same name gets a number added.
The capture strip at the bottom of the window confirms each save (for example, Saved Take 2 to Deck Takes). If there is nothing to save yet, it says Record a take first.
Sessions
The Session number groups takes that belong together. A new session starts when you wipe the loop (double-click Stop), add a new Deck, load the Init preset or another preset, or open a saved DAW session. Session numbers count up on your computer, so takes from different days never share one.
Capture#
The strip along the bottom of the Terrain window is Capture. It keeps the last 10 minutes of what Terrain played, all the time, without you pressing anything. When you play something you love, drag the strip into your DAW and it drops in as audio.
What the strip says
| The strip reads | What it means |
|---|---|
| CAPTURE: LISTENING... | Capture is on and waiting for sound. |
| CAPTURE: 2m 14s — DRAG TO DAW | It holds that much of what you played (up to 10 minutes). Drag the strip into your DAW to drop it in. |
| SAVING... | It is writing what you played to a file. In a moment it is ready to drag. |
| DRAG TO DAW ↓ | Ready: drag the strip into your DAW to drop the recording in. A click clears it and starts listening again. |
| CAPTURE - OFF | Nothing is recorded. Click or right-click the strip to turn it on. |
Using it
- Drag the strip onto a track in your DAW to drop in what it holds as a WAV file.
- Right-click the strip for the DAW capture menu: On or Off. Off records nothing and frees the memory it used. The same switch is in Settings › Performance › DAW capture (see Settings).
- Captures are saved in your Music folder under
Waves Crate/Terrain(Terrain FX usesWaves Crate/Terrain FX), named with the date and time, as stereo 16-bit WAV files.
The strip also talks to you
Capture shares the strip with Terrain's messages. Hover over any control and its tooltip appears here, so the strip doubles as a live manual (turn this off in Settings › Interface). Short notices pass through too: the result of a save or an export, and actions you can take back, which show an Undo button for a few seconds. When a new version of Terrain is out, an update notice appears with What's new (opens the updates section of Settings with the full list of changes), Get the update (opens your Waves Crate account in your browser, where your purchase has the download; nothing installs by itself) and a dismiss ×, which hides the notice until the next version. When a notice finishes, the capture words fade back.
The small grip at the right end of the strip is the window's resize corner: drag it to make the whole Terrain window bigger or smaller.
Chapter 15
Voicing
The voice column decides how Terrain answers your hands: one note or a whole chord, a hard cut or a slide, a light touch or a firm one. It sits at the right of the SYN page, and every setting in it changes how a patch feels to play long before it changes how it sounds.
The voice column#
The column is a stack of rows you drag up or down, with two rows of buttons framing it. At the top you pick the voice mode (Mono, Legato or Poly) or swap the whole column for the nine macro knobs with Macros. Below sit the numbers: how many notes may sound, how velocity responds, which key is playing, how notes slide into each other and how loud the instrument leaves. Always and Scaled at the bottom set how the slide behaves.
Every number row works the same way: press anywhere on the row and drag up to raise it, down to lower it. The value updates as you drag, and the processor follows instantly, so you can set a glide time while holding a note and hear it change.
| Control | What it does |
|---|---|
| Mono | One note at a time. A new key cuts the last one and starts the note again, with a short, click-free fade on the old note. Release the newest key while older ones are still held and Terrain returns to the most recent of them. Pair it with Portamento for leads and basses. Off by default. |
| Legato | The smooth form of Mono. With Mono and Legato both lit, overlapping keys glide on to the new pitch without restarting the envelopes, so a phrase plays as one breath. Only the first note of a phrase (or a key pressed after letting go) restarts the sound. Off by default. |
| Poly | Many notes at once, up to the Voices count: the everyday mode for chords and pads. Poly means "not Mono": a click turns Mono and Legato off, and Poly lights whenever Mono is off. A fresh instance starts in Poly. |
| Macros | Shows the nine macro knobs in place of the voice settings. Click again to bring the voice rows back. The macros themselves are covered in Modulation. |
| Voices | How many notes can sound at once in Poly, from 1 to 32 (default 8). When you play more, the oldest note is taken over by the newest. Fewer voices means less computer load, and it never goes past the voice ceiling set in Settings › Performance. |
| Velocity | The velocity curve, 0 to 100 (default 50). Velocity is how hard you hit a key. At 50 the response is even; higher values lift soft hits so a light touch already plays full, lower values make you dig in to reach the top. Right-click the word for Global velocity and Reset to default (back to 50). |
| Key | A readout, not a setting: the key position of the note sounding now. It reads 0 at rest and climbs as you play higher. Drag the word Key onto any knob to make higher notes move that knob further. |
| Portamento | The slide time between notes, shown 0 to 100 (default 0, no slide). The scale is squared so the short end is fine-grained: 18 is about 65 ms, 50 is half a second and 100 is about 2 seconds. Best with Mono or Legato. |
| Glide | The shape of the slide, 0 to 100 (default 50). At 50 the pitch travels evenly; lower values ease in (the slide starts slowly and lands fast), higher values ease out (it leaves fast and settles slowly). Works together with Portamento. |
| Output | The final volume of the whole instrument, in dB (default 0.0 dB), up to +12 dB. Drag up or down; double-click for 0 dB. All the way down reads -inf dB: silence. It is the same master volume as the main volume fader and the Patcher's Out module, so moving one moves them all. |
| Output meter | The left and right level leaving Terrain, on a scale from -60 to +6 dBFS. Keep the bars out of the very top to avoid clipping. |
| Always | On (the default): Portamento glides into every new note. Off: it only glides when you play notes overlapping, so detached notes land clean and only the tied ones slide, the classic acid-line behaviour. |
| Scaled | On: bigger jumps take longer to glide, because the time is set per octave. Off (the default): every glide takes the same time, however far it travels. |
Mono, Legato and Poly in practice#
The three buttons are the first thing to set on any patch you design for playing. Basses and leads usually live in Mono or Legato, because a melody line should never pile up on itself; pads, keys and plucks live in Poly. The dice knows this too: a roll aimed at Bass or Leads comes out Mono (see Dice).
How Mono decides which note plays
Mono uses last-note priority with memory. The newest key always wins. Hold C, press E, release E, and the line falls back to C, because C is still down. In plain Mono the fall-back restarts the note; in Legato it glides back without a restart. Releasing a key that is not sounding (an older key underneath) changes nothing you can hear.
Voices versus unison
Voices counts notes. Each oscillator's own unison Voices (1 to 16, on the oscillator's back) stacks copies inside each note for thickness. A four-note chord on an oscillator with seven unison copies is 28 stacked voices of work, and that total is what the voice ceiling in Settings › Performance watches. The voice ceiling defaults to 96; lower it on a laptop.
Portamento, Glide, Always and Scaled#
Portamento (a slide in pitch from one note into the next) has four controls that work as a team. Portamento sets how long, Glide sets the curve of the journey, Always sets whether every note slides or only tied ones, and Scaled sets whether the time stretches with the distance.
| Portamento value | Slide time (approx.) |
|---|---|
| 0 | No slide |
| 10 | 20 ms: a barely-there scoop |
| 25 | 125 ms: a quick, vocal slide |
| 50 | 0.5 s: an obvious swoop |
| 71 | 1 s |
| 100 | 2 s: a slow siren |
With Scaled on, the time you set applies per octave: a one-octave jump takes the set time, a two-octave jump twice as long, a semitone almost nothing. That makes fast trills stay tight while big leaps still sing. With Scaled off, a semitone and two octaves take the same time, which sounds more mechanical and more electronic.
Per-oscillator Porta and Glide
Each oscillator can also slide on its own. Right-click an oscillator's Coarse pill and pick Porta or Glide: the pill then drags that oscillator's own glide time (Off up to 2 s) or its curve (50 = even). Give one oscillator a long slide and leave the others dry, and every note change smears in one layer only. See Oscillators.
Velocity and Key as modulation sources#
The words Velocity and Key are handles. Press on the word (not the number) and drag it onto any knob in Terrain: the knob gets a modulation route from that source, with a mark on its ring showing how far it moves. Velocity makes harder playing move the knob further; Key makes higher notes move it further (key tracking). The same sources appear in the MOD page's source list under Keys, next to Random and Alt. Routes, amounts and curves are covered in Modulation.
Global velocity
Right-click Velocity to switch Global velocity on or off. Off (the default for a fresh instance and Init), velocity only does what you route it to. On, every oscillator and the noise get louder the harder you play, shaped by the velocity curve above it. Organics oscillators keep their own Velocity knob and are not affected. While Global velocity is on, the word is highlighted.
| Velocity right-click | What it does |
|---|---|
| Global velocity | A tick: every oscillator (except Organics) and the noise follow how hard you play, at their volume. |
| Reset to default | Puts the velocity curve back to 50, an even response. |
The voice settings elsewhere#
On the Patcher canvas
The Patcher's Utility shelf offers Voices: it puts this same column on the canvas as a module, so you can set Mono, Legato and Glide, or drag Velocity and Key onto a module's knobs, without leaving the Patcher. It is the same column, not a copy, so its settings are always the ones the instrument plays. See Patcher.
Settings that shape playing
- Settings › Performance › Voice ceiling — the most notes Terrain sounds at once, stacked copies included (default 96). The Voices row never goes past it.
- Settings › Controllers — the velocity curve of your keyboard itself (Soft, Linear, Hard, Fixed), pitch bend range, MPE and more. See Settings.

Chapter 16
Presets & the Library
A preset is a whole sound in one file: every knob, every route, the effects, the Patcher, and the wavetables and samples it needs. Terrain ships 717 of them in 25 packs: the Waves Crate, Macshooter, and Artist Packs. Audition fast from the header, dig deep in the browser, then save your own, file them into packs and send them to anyone.
The preset strip in the header#
The left side of the header is where presets live while you play. It always shows what is loaded, written as Type - Name (for example “Synth Pad - Aurora Veil”), so you know at a glance that you are on a pad, a bass or a key. A fresh, blank sound reads Init. Hover the name to read the pack it came from. A small dot after the name means you have changed the sound since it was loaded or saved; loading or saving clears it.
How the arrows step
The arrows walk the list the preset came from, in the same order the quick menu shows it: grouped by type, A to Z. Pick a preset from a pack's Bass category and the arrows stay inside that category, Bass after Bass, instead of jumping to a random pad. Pick one from a folder and they stay in that folder. With the browser open, the arrows step through the rows on screen, so a search or a filter becomes your audition list.
The quick menu#
Click the preset name and a two-column menu drops down. On the left are the packs; on the right, the presets of the pack you picked, sorted under headings by type (Bass, Key, Pad, Pluck and so on). It opens on the pack of the preset that is playing, so the next sound is always one click away. A click on a pack shows its presets; a click on a preset plays it at once and closes the menu.
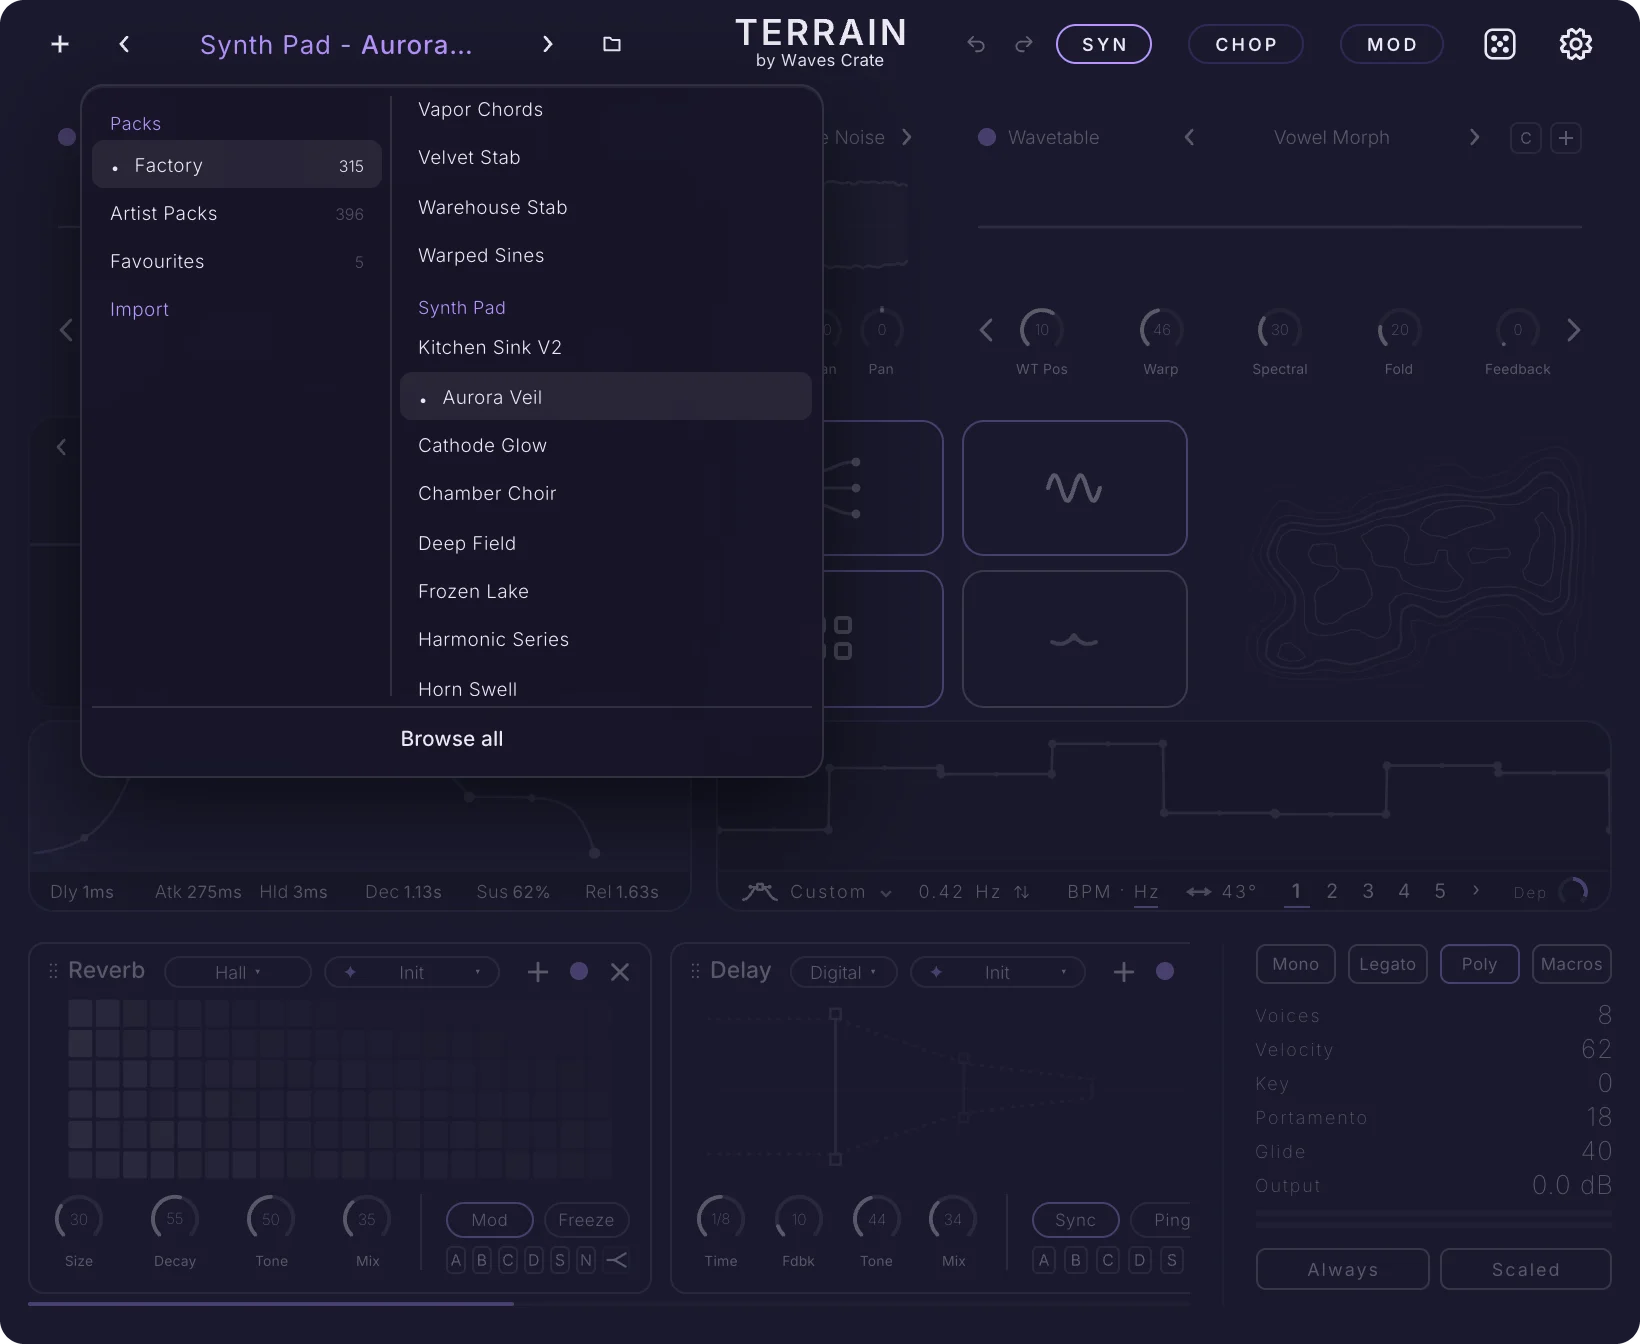
| Row | What it does |
|---|---|
| User | Your own presets, with the packs you made listed under it, A to Z. |
| Factory | The Waves Crate factory library. |
| Artist Packs | One row that unfolds onto every artist pack, A to Z. It opens folded (unless the preset playing comes from one of them), so a long list never pushes the rest out of sight. Click it to fold or unfold; it picks nothing by itself. |
| A pack | Click to list its presets on the right. Double-click to unfold its sub-folders, or its categories (the types its presets use) when it has no folders; double-click again to fold it. |
| Folder / category | Shows only the presets in that folder, or only that pack's presets of that type. The header arrows then step inside it. |
| Favourites | Every preset you hearted, from every pack. Heart presets in the browser or from a preset's right-click menu. |
| Import | Brings a preset file or a whole zipped pack into your library, then shows it here. See Sharing. |
| A preset | Click to play it now. Your own presets show a small ✕ on the right: click it to delete that preset (it goes to Recently deleted). |
| Browse all | The footer of the menu: opens the full preset browser. |
The preset browser#
The Library button (or Browse all in the quick menu) opens the full browser over the instrument page. It is built for big libraries: a rail of packs and authors on the left, a sortable list in the middle, and an inspector on the right that tells you everything about the selected preset before you load it. Clicking a row only selects it, so you can read a preset before you commit; a double-click plays it and closes the browser.
The top bar
| Control | What it does |
|---|---|
| Search | Type any word to find presets by name, style, effect or author: “reverb”, “warm”, “Keyon”. Esc clears the search; a second Esc closes the browser. ↓ jumps from the search field into the list. |
| Preset count | How many presets the list shows right now, after the rail pick, the search and the favourites filter. |
| Random preset (dice) | Picks a random preset from the rows on screen, so you can stumble on something new inside whatever you narrowed down. This is not the main dice in the header, which rolls a brand-new sound (see Dice). |
| Favourites only | Shows only hearted presets. Combine it with a pack or an author in the rail. |
| Close (✕) | Back to the instrument. The preset you loaded stays. |
The rail
The rail is split into Packs and Authors. Click a row to list its presets. Rows with a chevron hold more: click the chevron (or double-click the name) to unfold a pack's folders and categories, or an author's categories. Only one row is unfolded at a time, so the rail stays short.
| Row | What it does |
|---|---|
| All packs | Every preset you have, factory and your own. |
| User | Your own presets. Unfold it to see its folders and the packs you made. It appears as soon as you have saved or imported something. |
| Factory | The Waves Crate factory library. |
| Artist Packs | Every artist pack's presets at once. One click unfolds the list of packs; pick one to narrow it down. |
| Folder / category | Inside an unfolded pack: only the presets in that folder, or only that pack's presets of one type. |
| New pack | Makes an empty pack of your own, with a name (up to 30 letters) and an author, ready to save and sort presets into. |
| Import | Brings in a preset file or a whole zipped pack. You can also drop files onto the browser. |
| Import folder | Windows only, because the Windows file panel picks either a file or a folder. Brings in every preset inside a folder you choose, sub-folders too. On a Mac, Import takes a file or a folder. |
| Export | Writes the pack you picked into one file to share or back up. If the pick is not a pack of yours, it asks which of your packs to export. |
| Authors › Waves Crate | Every preset signed Waves Crate. |
| Authors › Macshooter | Every preset signed Macshooter. |
| Authors › Artists | The presets of every other author, artists and you included. One click opens the list of names; pick one to see only that author's sounds, and unfold a name to split it by type. |
You can drag rows from the list onto one of your packs (or a folder inside it) in the rail to move them there. Factory and artist packs never accept a drop.
Columns and sorting
Each row shows the preset's Name, Author, what it Carries, its Type, its Style words and a heart. Click a column heading to sort by it; click again to reverse. Text cut short with “…” shows in full when you hover it.
| Column | What it does |
|---|---|
| Name | Sorts A to Z; click again for Z to A. |
| Author | Groups presets by who made them. |
| Carries | Sorts by what each preset brings inside its own file. The icons, left to right: wavetables, one-shot samples, impulse responses, flow cards and LFO shapes. A bright icon means the preset carries one or more; a dim one means it does not. |
| Type | Groups bass, keys, pads, leads and the rest. |
| Style | Groups by describing words, like Dark, Warm or Glassy. |
| Heart | Click the heart at the end of any row to make it a favourite, or take the heart off. |
Working the list from the keyboard
| Key | What it does |
|---|---|
| ↑ / ↓ | Select the row above or below. |
| Shift + ↑ / ↓ | Grow the selection up or down. |
| Cmd/Ctrl + A | Select every row on screen. |
| Enter | Load the selected preset and close the browser. |
| Space | Heart the selected preset, or take the heart off. |
| Esc | Drop a multi-selection; pressed again, close the browser. |
The inspector#
The right-hand column describes the selected row. Everything here is read-only on factory and artist presets; on your own presets you can edit it in place, and it saves into the preset file as you type.
| Field | What it does |
|---|---|
| Name and author | The preset's name, and under it who made it. On your own presets, click the author to type a name; it saves into the preset as you go. Factory presets keep their author. |
| Type | The kind of sound (one per preset). |
| Style | Its describing words (as many as fit). |
| Pack | Where the preset lives. On your own presets, click it to move the preset to another pack of yours (or a New pack), everything it carries included. Factory presets stay in their pack; use Save as to make your own copy. |
| Load | How long loading takes: Instant for most presets, A moment when it carries a lot of audio, a few seconds for a preset that also builds a Patcher canvas. |
| Size | The size of the preset file. |
| Nodes | Shown when the preset has a Patcher canvas: how many nodes are on it. |
| Carries | What the preset brings inside its file, counted: wavetables, one-shots, impulse responses, flow cards, LFO shapes, plus the total size embedded. A preset that brings nothing extra reads Parameters only. |
| Notes | What the maker wrote about the sound, often which knob or macro to move. On your own presets, click to write; it saves as you type. Factory notes cannot be changed. |
| Type chips | Every type word in your library as a chip. On your own preset, click a chip to set it, click again to clear it. The + chip adds a new word (up to 20 letters), like Arp or Drone. Right-click a chip to Rename it (every preset of yours using it is re-filed) or Remove it (only when no preset uses it). |
| Style chips | The same for style words, and a preset can have several. The + adds your own word, like Gritty or Airy. |
| Heart | Makes the preset a favourite, or takes the heart off. |
| Load | Plays the preset now and keeps the browser open, so you can keep auditioning. |
What “carries” means
A Terrain preset is self-contained. When you import your own wavetable, drop a sample into an oscillator, load an impulse response into the reverb or draw a custom LFO shape, the preset embeds it in its own file. Send that file to a friend and it sounds exactly the same on their computer, with nothing to hunt down. Factory wavetables are a special case: every copy of Terrain already has them, so a preset only points to them and they cost nothing. The inspector says so, as “1 factory wavetable”.
Saving your sounds#
Everything starts at the + left of the preset name. There is deliberately no save shortcut: Cmd/Ctrl + S belongs to your DAW and saves the project, so a stray key press can never write over a preset.
The + menu
| Item | What it does |
|---|---|
| Save | Writes the sound over the preset that is loaded. It is available only on your own presets; on a factory preset it opens Save as instead. If the browser shows a different preset selected than the one loaded, Save asks where the sound should go rather than guessing. |
| Save as | Opens the Save sheet to store the sound as a new preset, with its name, author, pack, type, style and notes. |
| Import | Brings in a single preset file or a whole zipped pack from anywhere on your computer. |
| Import folder | Windows only: brings in every preset inside a folder, sub-folders too. |
| Export selected | Appears when the browser is open with several presets selected: writes them into one pack file. |
| Move selected to | Appears with several presets selected in the browser: moves them into another pack or folder of yours. |
| Init preset | Starts again from a plain, blank sound to build on. Save first if you want to keep what you have. |
| Recently deleted | Lists the presets and packs you deleted, newest first, with when. Pick one to put it back where it was. If something of that name is there now, it comes back beside it under a new name; nothing is ever written over. |
The Save sheet
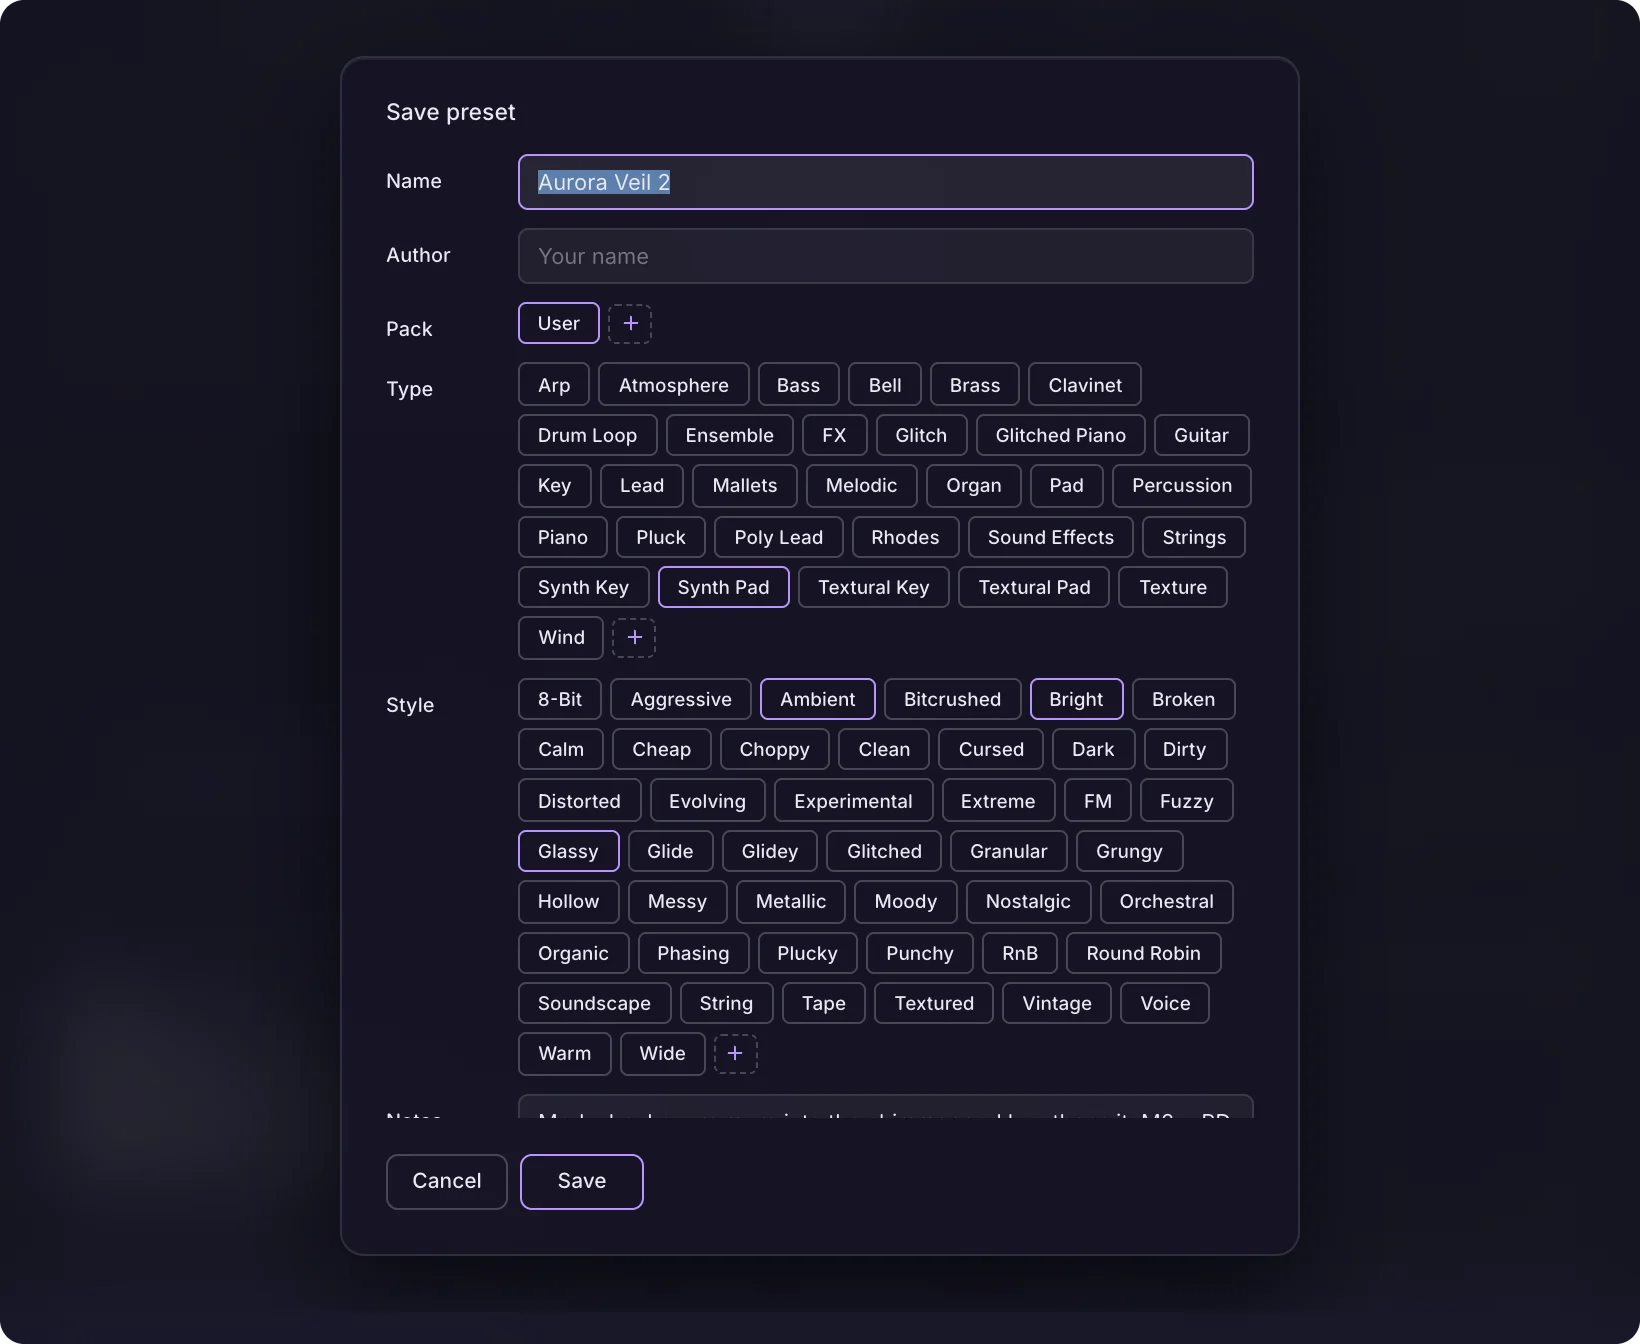
Words are picked as chips, so most saves need no typing beyond the name. Saving a copy of a factory preset suggests its name with a “2” on the end and files it into User.
| Field | What it does |
|---|---|
| Name | What the preset is called in the browser and the header. Up to 40 letters. |
| Author | Who made it. It starts with your name from Settings › Account; type another name for this save only (up to 30 letters). Names you have used before are suggested as you type. |
| Pack | Which pack it goes into, as chips of your own packs. Tick several to save a copy into each. The + chip types a new pack name and saves into a brand-new pack. |
| Type | What kind of sound it is: one per preset; click again to clear. + adds a new type word. |
| Style | Words for how it sounds. Pick as many as fit; search finds them later. + adds your own describing word. |
| Notes | What someone should know about the sound, like which knob to move. Enter starts a new line here. |
| Carries | Read-only: what this sound will embed (wavetables, one-shots, impulse responses, flow cards, LFO shapes), or Parameters only. |
| Cancel / Save | Cancel closes the sheet and changes nothing. Save writes the preset with everything above. |
The types you start with are Arp, Bass, Bell, FX, Glitch, Key, Lead, Pad, Pluck, Synth Key, Synth Pad, Textural Key, Textural Pad and Texture; the styles are Bright, Clean, Dark, Dirty, Evolving, Glassy, Hollow, Metallic, Organic, Punchy, Warm and Wide. Every word a preset in your library already uses joins the list too, which is why the browser shows extra chips like Atmosphere, Brass or Clavinet. In Terrain FX the types describe effects instead (see Terrain FX).
Overwriting, versions and undo
If the name you typed is already in the pack, Terrain asks first, naming both the preset it would replace and the sound replacing it. Choose Overwrite and the old version is kept as a backup before anything is written. After every save, delete or move, a notice with Undo appears in the strip at the bottom of the window, so a mistake is one click away from being taken back.
Every backed-up version of one of your presets is listed under Restore previous version in its right-click menu (the number shows how many there are), each with the date it was saved. Restoring also keeps the current version as a backup, so a restore can be undone too.
Prefer a visible trail of versions? Turn on Keep old versions in Settings › Presets (it is Off by default): saving over a preset then keeps the previous one as “Name v2”, “v3” and so on, right in the list. The same page sets the author name link, what new instances open with (Init, Your default or Last preset used) and Save as default. See Settings.
Organising: right-click menus and selections#
Everything you can do to a preset or a pack is one right-click away, in the browser and its rail. Factory and artist presets can be loaded, hearted and saved as your own copy, but never renamed, overwritten or deleted, so the shipped library stays intact.
Right-click a preset
| Item | What it does |
|---|---|
| Load | Plays the preset now and closes the browser (a double-click on the row does the same). |
| Favourite / Remove favourite | Adds the preset to Favourites, or takes it off. The preset itself stays. |
| Rename | Your own presets: a new name (up to 40 letters). Its heart follows it. |
| Restore previous version | Your own presets that have backups: lists the earlier saves by date; pick one to bring it back. |
| Move to | Your own presets: moves it into another pack or folder of yours, or into a New pack or folder. Everything it carries moves with it. |
| Export | Your own presets: writes the saved preset into one file you can share or keep as a backup. On the preset that is loaded, unsaved changes are not in it; save first. |
| Delete | Your own presets: asks, then removes it. It goes to Recently deleted in the + menu. |
| Download from iCloud | Shown instead when a preset in a synced folder has been offloaded to iCloud: fetches it so Terrain can open it. |
Right-click the rail
| Row | Menu |
|---|---|
| A pack of yours | Rename (every preset in it is re-filed under the new name, hearts included), Export, Remove pack (it goes to Recently deleted; anything in its folder that is not a preset stays where it is). User can be renamed and exported but never removed. |
| Any other row | A folder, a category, an author, All packs, a factory or artist pack: Select all selects every preset that row lists, and Export (when it holds presets of yours) writes them into one pack file. Right-click Synth Key under your own name, choose Export, and every Synth Key you made leaves as one file. |
Selecting several presets
Shift-click a row to select everything between it and the last one you clicked; Cmd-click (Ctrl-click on Windows) adds or removes single rows. The inspector keeps showing one preset, and its buttons change to Export (with the count), Move and Load. Right-click the selection for Export, Move to, Delete (your own presets only, with the count) and Clear selection. A click on empty space under the rows drops the selection.
Move to lists your packs and their folders, plus New pack or folder: type a pack name (an existing one or a new one) and, if you like, a folder inside it. When a preset of the same name is already there, the moved one is renamed beside it rather than written over.
The library: 717 presets in 25 packs#
Terrain ships with 717 presets in 25 packs: the Waves Crate, Macshooter, and Artist Packs. Factory is the Waves Crate library: playable instruments, pads, keys, basses, textures and glitch, built to show what every engine and card can do. Macshooter Pack collects the sounds of Macshooter. The other 23 are artist packs, made by producers who build their records on Terrain. In the browser, Factory sits on its own under Packs; Macshooter Pack and the artist packs are listed under Artist Packs. Under Authors, Waves Crate and Macshooter have their own rows and every other maker is under Artists.
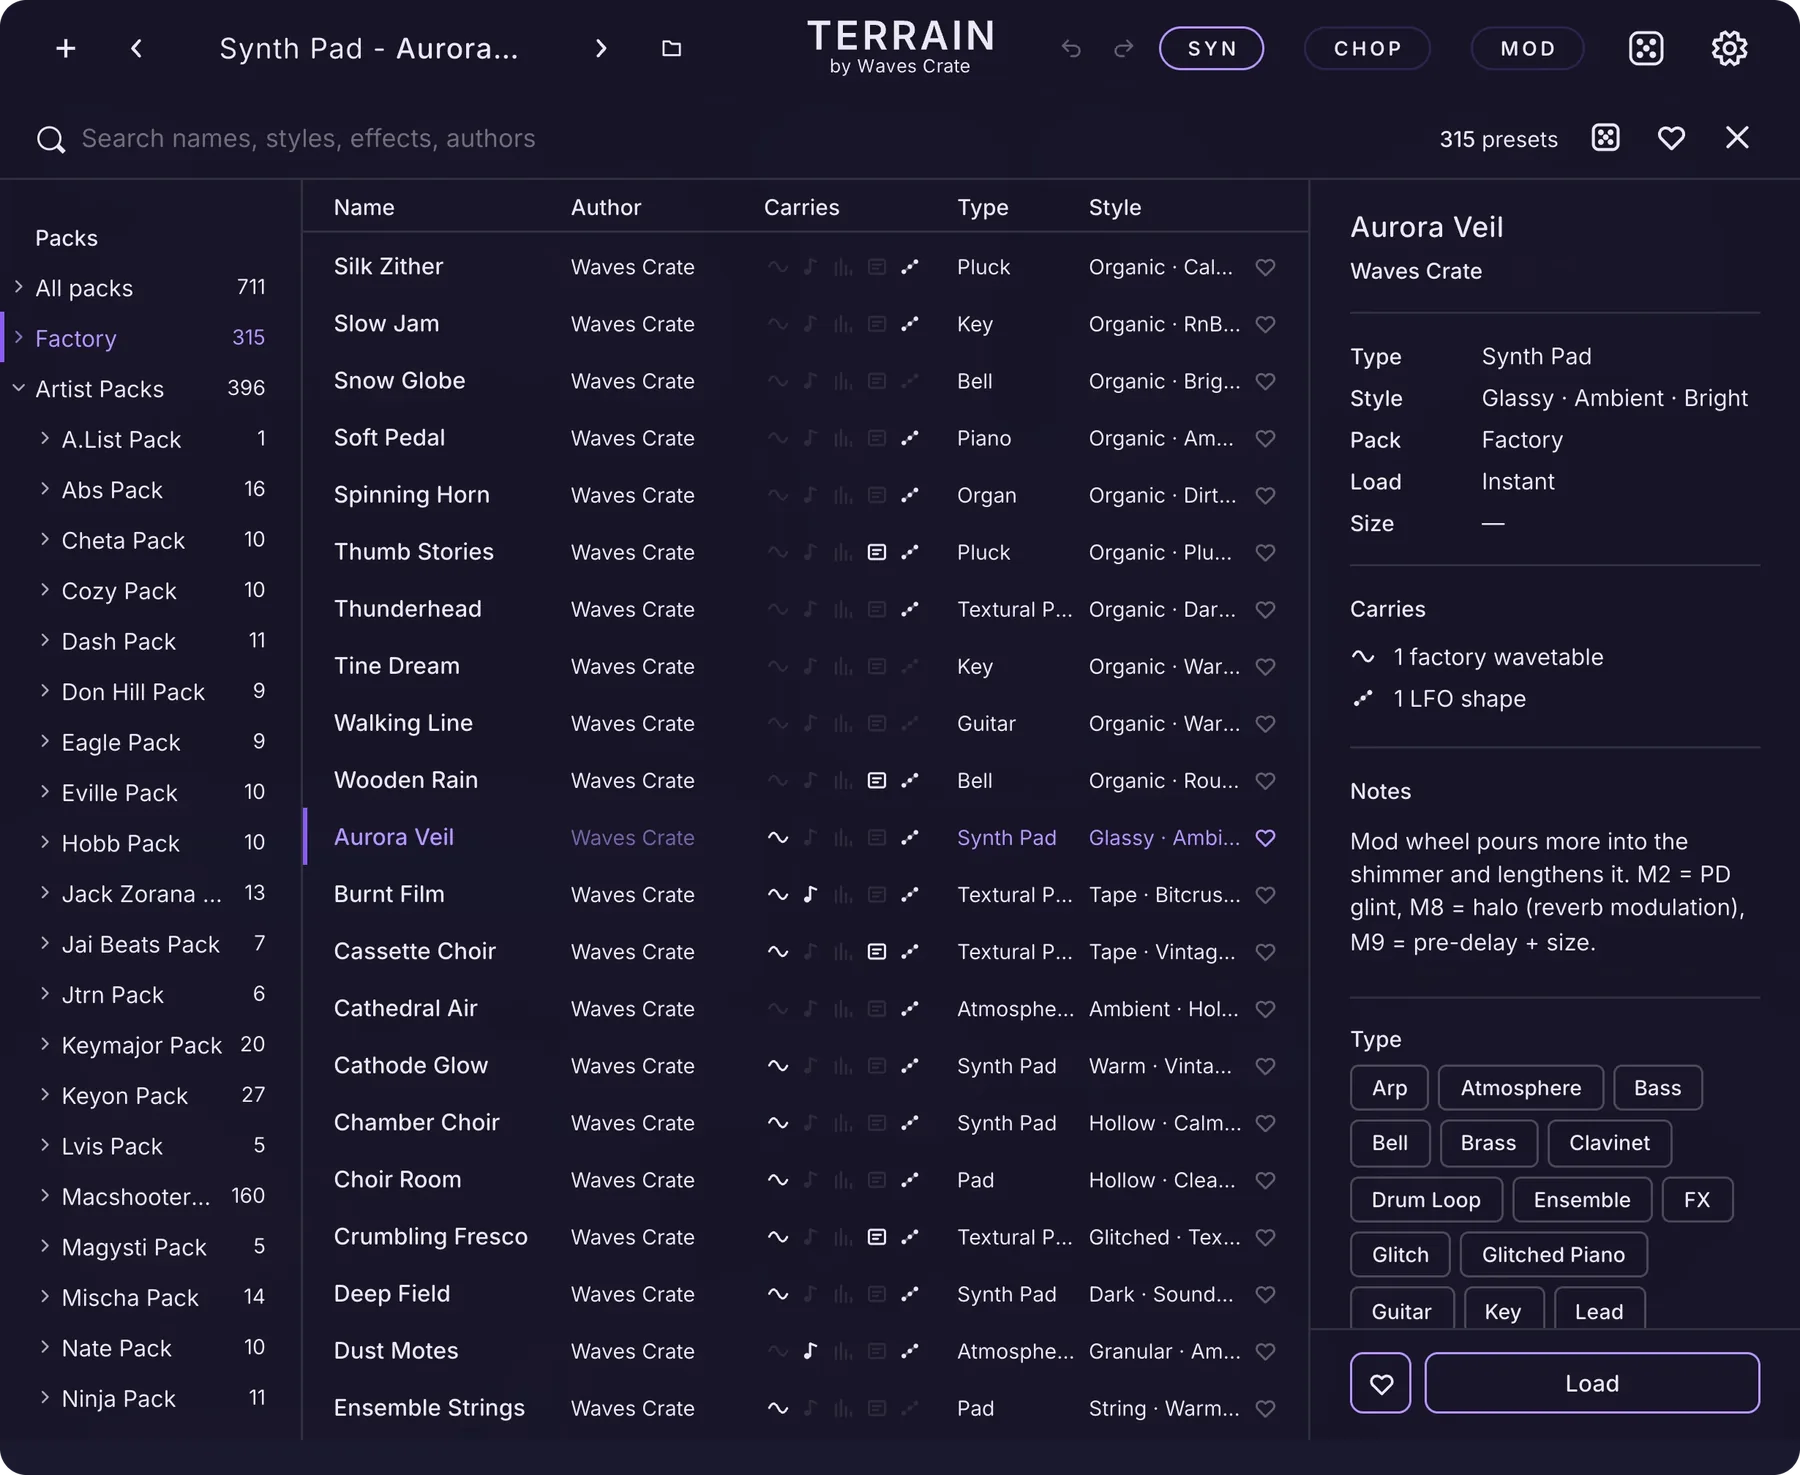
The artist packs
| Pack | Artist |
|---|---|
| A.List Pack | A.List @tha_a.list |
| Abs Pack | Abs Toolbox @abstoolbox |
| Cheta Pack | ChetaMeister @chetameister |
| Cozy Pack | Cozy Coolin @cozycoolin |
| Dash Pack | DashOTB @dashotb |
| Don Hill Pack | Don Hill @33donhill |
| Eagle Pack | Eagle @eagleofc |
| Eville Pack | Eville @prodbyeville |
| Hobb Pack | Hobb The Goat @hobbthegoat |
| Jack Zorana Pack | Jack Zorana @jackzorana_ |
| Jai Beats Pack | Jai Beats @jai_beats |
| Jtrn Pack | Jaytron @jtrn.the.producer |
| Keymajor Pack | Keymajor @keymajorbeatz |
| Keyon Pack | Keyon @prodkeyon |
| Lvis Pack | Lvis @prodlvis |
| Magysti Pack | Magysti @your.magysti |
| Mischa Pack | Mischa Chillak @mischa_chillak |
| Nate Pack | Nate @nategotsmoke |
| Ninja Pack | Ninja Blader @ninja_blader |
| RTC Pack | RTC @r.tc |
| Shiv Pack | Shiv @isthisshiv |
| Tumfy Pack | Tumfy @tumfyy |
| Tywil.wav Pack | Tywil.wav @tywil.wav |
Each artist preset carries its maker's name as its author, and many carry a note from them: open the inspector to read how they meant the sound to be played. Your own presets sit beside all of this under User, signed with your name.
Chapter 17
Dice
One click, one new sound, built to be played. The dice rolls a complete patch in the style you aim it at: oscillators, filters, envelopes, effects and modulation. Use it as a starting point, a happy accident or a way out of a rut, and step back with Undo whenever a roll misses.
The dice button#
The dice sits in the header, between the page buttons and the gear. Click it to roll. Right-click it to open the Randomize sheet, where you choose the style, the parts that change and how far a roll travels. Your choices stick: every later click rolls with them, so you set the sheet once and keep clicking until something grabs you.

A roll writes a new sound into the current patch: which oscillators are on and which engines they run, their wavetables or one-shots, unison, warp and fold, both filters, the envelopes, a chain of effects and a set of LFOs routed to the knobs that matter. Everything the dice leaves on the Patcher canvas is switched on and in the signal path, and the canvas tidies itself afterwards. The preset name stays, with a small dot after it to show the sound has changed: save it under a new name to keep it.
What the dice never does
- It never moves pitch: Octave, Semi, Cent and Coarse stay where they are. The one exception is the Bass aim, which sits its oscillators an octave down.
- It keeps a delay's feedback low, so a roll never runs away into a feedback loop.
- It never picks the Granular effect from the rack; that one deserves deliberate design.
- It does not touch the Flow cards (Arp, Shaper, Glitch, Robin) as part of the header roll; the Randomizer map in the Flow box rolls them on demand (see The Randomizer map).
The Randomize sheet#
Right-click the dice to open the sheet. It has four rows of chips and two buttons. Every tick counts the moment you make it: you can close the sheet with Cancel and the dice button still rolls with what you ticked.
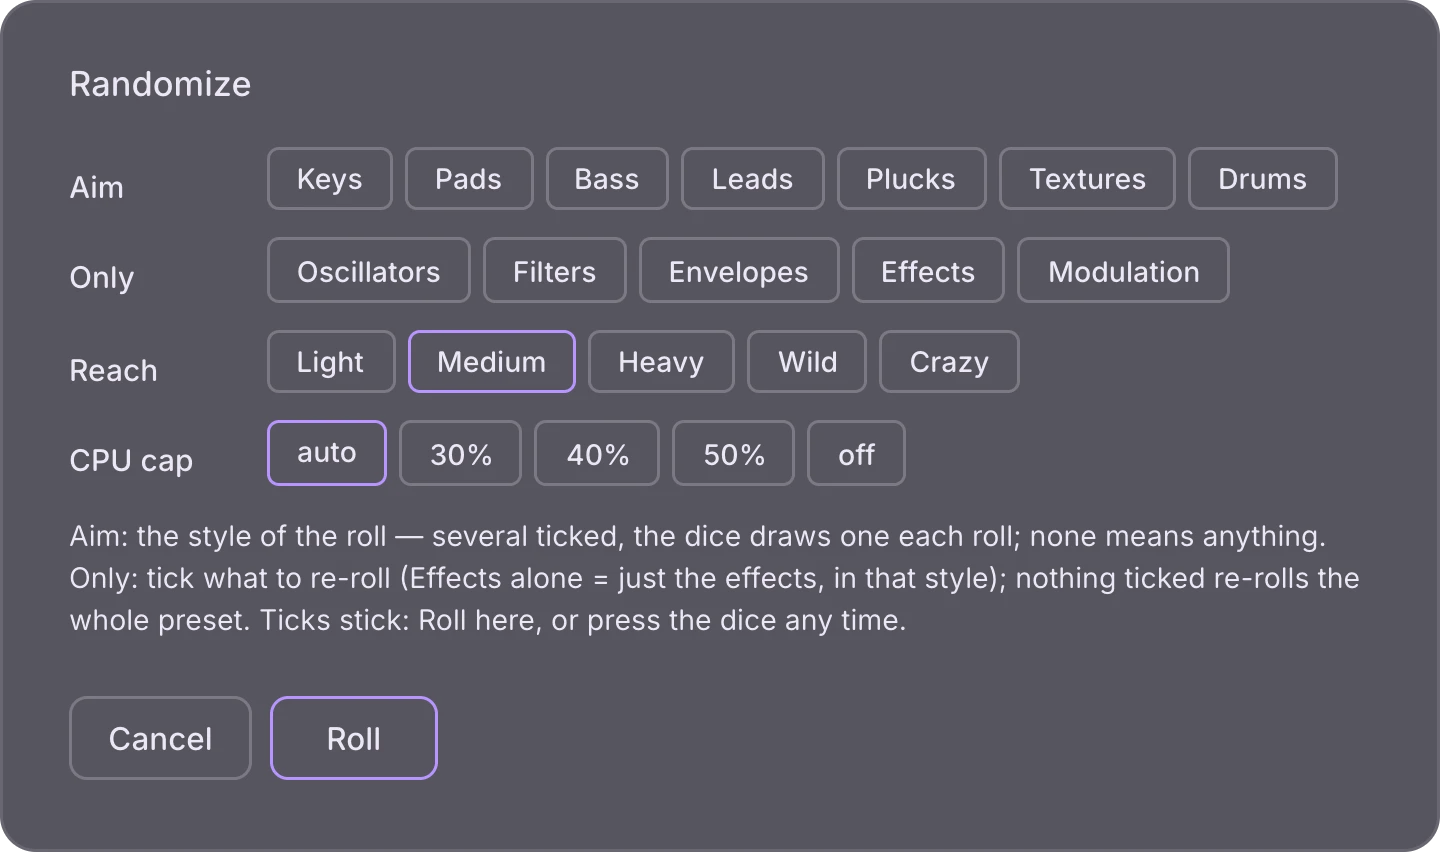
Aim
Aim is the kind of sound you want. Each aim brings its own envelopes, its own pool of effects and its own habits: basses come out Mono and an octave down, leads come out Mono, pads swell and hold. Tick one aim for consistency, or several to let each roll surprise you within a family. With no aim ticked, the dice can roll any style.
| Aim | What the dice rolls |
|---|---|
| Keys | Pianos, electric pianos and bells. |
| Pads | Slow, wide pads that swell and hold. |
| Bass | Low basses, one note at a time (Mono), that sit under a track. Oscillators an octave down, fewer of them, less unison. |
| Leads | Single-note melody sounds (Mono) that cut through a mix. |
| Plucks | Short plucked notes that ring out. |
| Textures | Evolving beds, noise and movement. |
| Drums | Drum hits and deep 808 kicks, layered from the sample library on several oscillators with a percussive envelope. |
Only
Only decides which parts of the patch are re-rolled. Tick one or more; everything unticked keeps exactly what it has. With nothing ticked, the dice rolls the whole preset. When you tick only some parts, the Aim still applies: Effects alone gives you a new effect chain in the aimed style, over the sound you already have.
| Only | What it re-rolls |
|---|---|
| Oscillators | The oscillators, the parts that make the raw sound: which are on, their engines, sources, unison, warp and fold. |
| Filters | Both filters, which shape the tone: their types, cutoff, resonance and drive. |
| Envelopes | The envelopes: how each sound rises and fades. |
| Effects | The effect rack: its effects, types and order. |
| Modulation | The LFOs (wobbles that move knobs) and what they are routed to. |
Reach
Reach sets how far every roll travels from a plain sound. It scales almost everything at once: how many effects and LFOs a roll uses, how deep the modulation goes, how often a card leaves its default type, how often a back panel gets rolled, how much unison and grit. Medium is the starting point.
| Reach | What to expect |
|---|---|
| Light | Small, safe changes that stay close to a plain sound. One or two effects, a couple of LFOs, little unison. |
| Medium | A fresh sound that still plays easily. A good start, and the default. |
| Heavy | Bold changes: thicker stacked voices, more grit, more effects and movement. |
| Wild | Big, surprising sounds with heavy modulation and effects. Every card leaves its default type and every back panel is rolled. |
| Crazy | The far end: everything may move a lot, with both filters, nearly all ten LFOs and the deepest routes. Some rolls get loud and strange. |
CPU cap
A wild roll can stack enough unison voices to make a laptop sweat. The CPU cap prices every roll before it is written and, if it would cost more than the cap, tones it down: fewer stacked unison voices first, then less filter drive. The engines, filters and effects the dice chose (the character of the roll) are never changed by the cap.
| CPU cap | What it does |
|---|---|
| auto | The default. Each reach gets its own limit, and heavier reaches may use more. |
| 30% · 40% · 50% | A roll that would use more than this share of one processor core is toned down. |
| off | Rolls are never toned down. Crazy rolls can be heavy on a laptop. |
Undoing a roll#
Every roll is a single step in Terrain's undo history, however many parameters it changed. Press Cmd+Z (Mac) or Ctrl+Z (Windows), or click the Undo arrow in the header, to get the sound from before the roll back exactly. Redo with Shift+Cmd+Z, Shift+Ctrl+Z or Ctrl+Y. Step back through several rolls to return to one you passed. See Shortcuts.
The Randomizer map#
The Flow box on the SYN page holds the four flow tiles and, beside them, the Randomizer map: a second dice that rolls only what you connect it to. In the Patcher it appears as the Randomizer module. Drag a cable from its output onto any module's top dot (the dice dot) and that module joins the map. A click on the map then re-rolls exactly the modules cabled to it, whichever page is open, and nothing else. With nothing cabled, a click does nothing and a short message tells you why.
Oscillators, the filter, the envelopes, the LFOs, the master tape machine, the flow cards and every effect in the rack can be cabled to the map. That makes the map perfect for performance: cable it to the Glitch card and one effect, and every click gives you a new variation of only that corner of the sound.
| Map gesture | What it does |
|---|---|
| Click | Re-rolls the modules cabled to the map, at the map's reach. |
| Right-click | Opens the map's menu: the reach (Light, Medium, Heavy, Wild, Crazy) and a list of the modules currently cabled to it (or Not connected). |
| Map reach | What it does |
|---|---|
| Light | Nudges its modules a little from where they are. Safe, subtle variations. |
| Medium | Changes its modules noticeably but keeps the sound recognisable. The default. |
| Heavy | Moves its modules far from where they are. Big, surprising changes. |
| Wild | Can set its modules anywhere in their range. |
| Crazy | The furthest reach: every roll lands somewhere new and extreme. For happy accidents. |
The map's cables are saved in the preset, so a patch can ship with its own "variation button" already wired. Cable a dice dot by dragging from the Randomizer's output; right-click a Randomizer cable to cut it. More on the Flow box in Flow and on cabling in Patcher.
The dice in Terrain FX#
Terrain FX has the same dice in its header, tuned for an effect. A click rolls a new effect chain for your audio and then fresh modulation for it. Right-click opens a short menu instead of the sheet:
| Menu item | What it does |
|---|---|
| New effect chain | Rolls a fresh set of effects, their types and order, fed from your audio. The menu stays open, so you can roll again and again. |
| New modulation | Rolls fresh LFOs that move the effect knobs, keeping your effects. The menu stays open too. |
| Light · Medium · Heavy · Wild · Crazy | The reach for every roll; the dice remembers it. |
Everything in Terrain FX rolls into one undo step, exactly like the instrument.
The random preset dice#
The preset browser has a small dice of its own. It does not invent a sound: it loads a random preset from the list on screen. Narrow the list first (a pack, an author, a type, a search, favourites only) and the dice picks within it. It is the quickest way to rediscover what is already in your library. See Presets.
Chapter 18
Settings
Settings is where Terrain learns how you work: your name on every preset, your keyboard's touch, how hard the processor runs, how knobs feel under the mouse and which colours paint the window. Set it once and every Terrain you open follows. Every change is saved the moment you make it.
Finding your way around#
Click the gear at the right end of the header to open Settings over the instrument. It is laid out in three columns: a rail of pages on the left, the rows of the page you picked in the middle, and an inspector on the right that explains whatever row your pointer rests on. Close it with the × at the top right; there is no Apply or OK button, because every change is already saved.
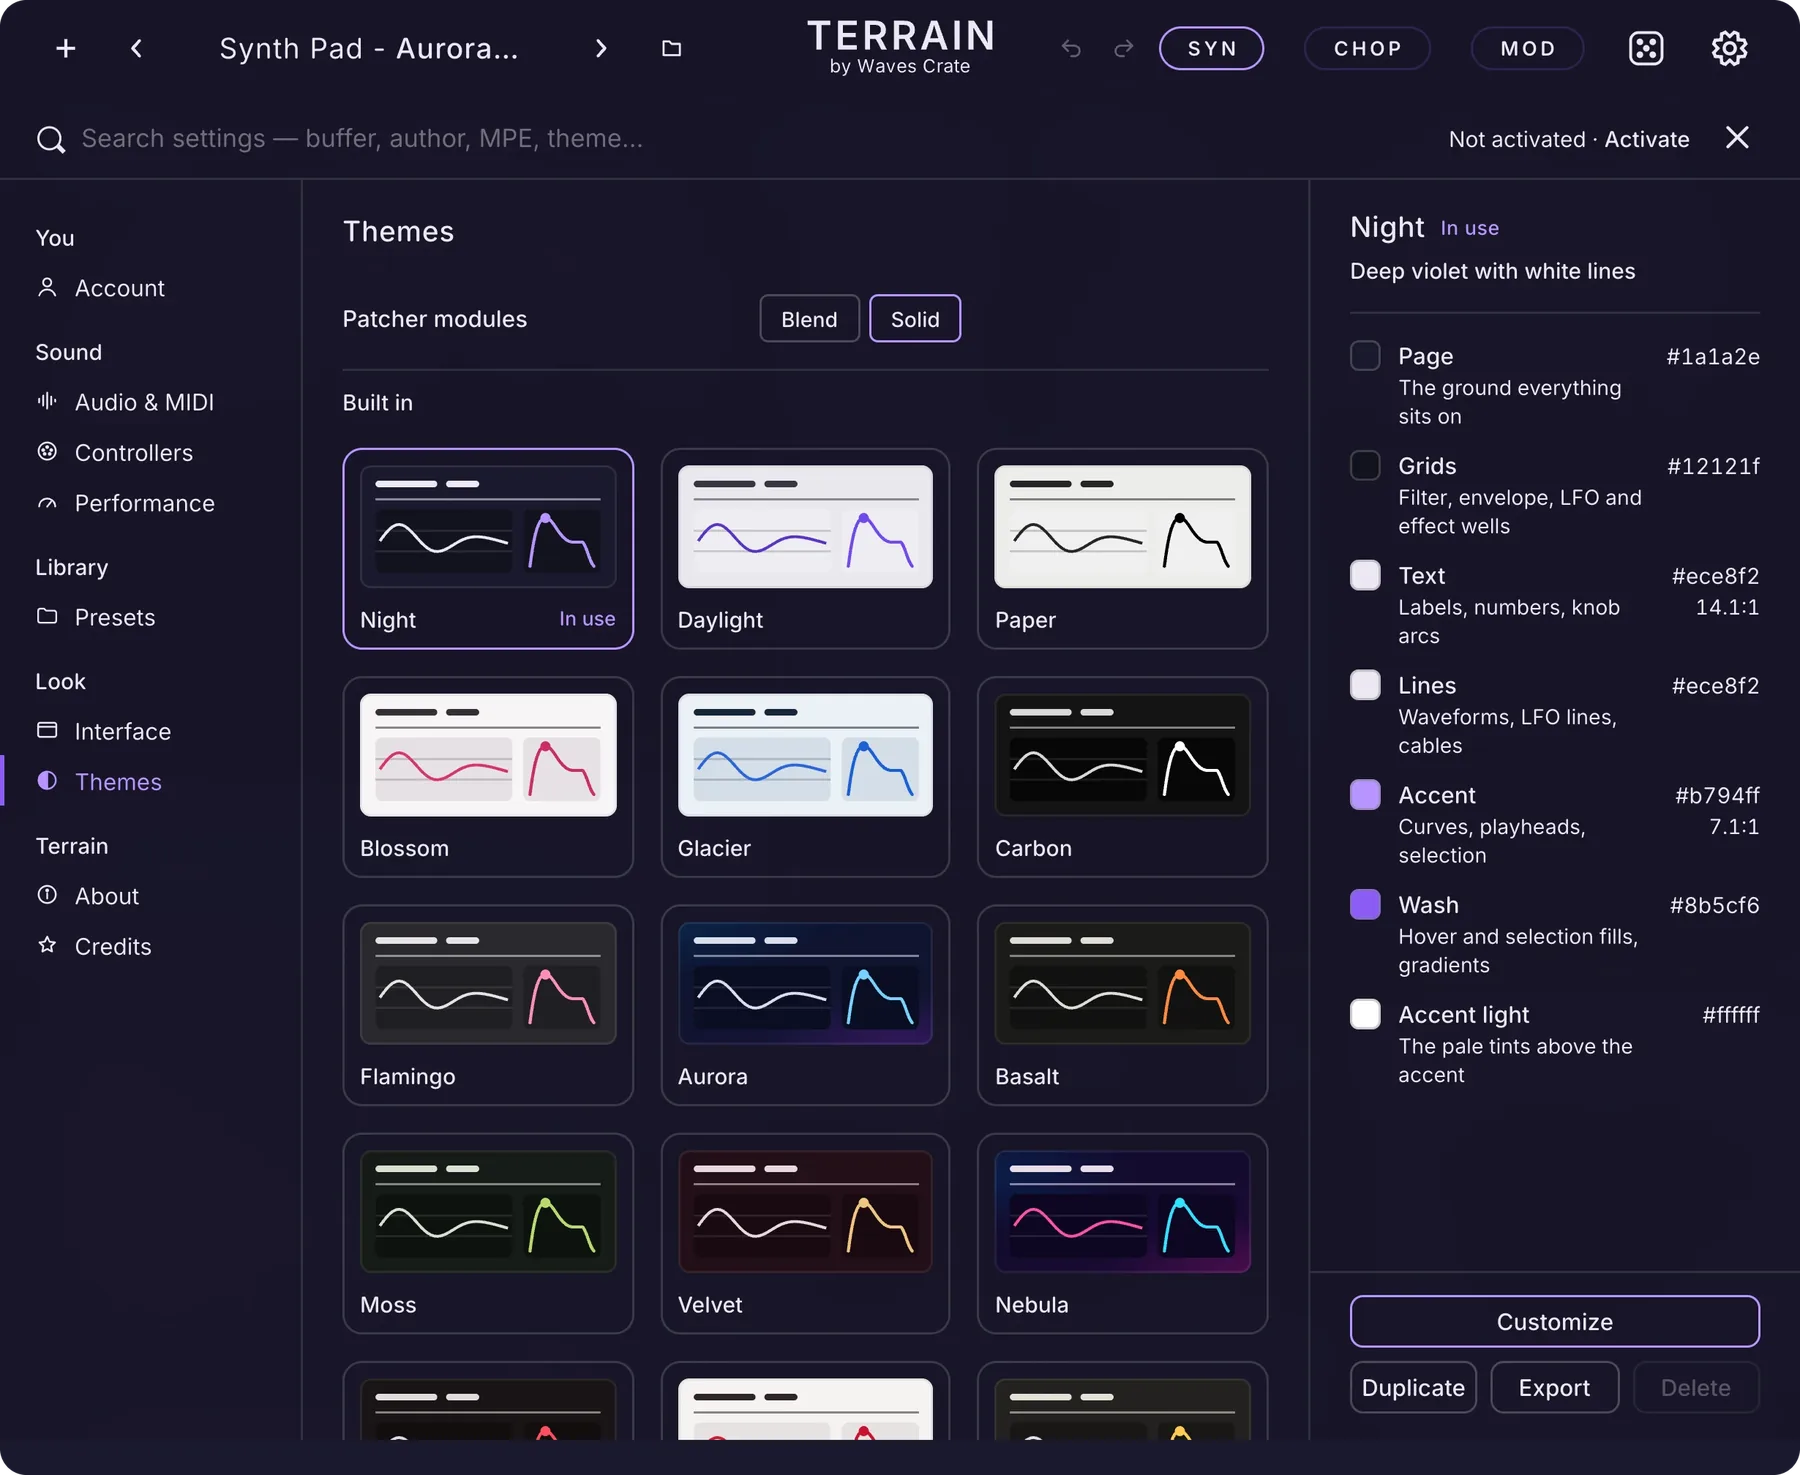
The pages
| Page | What lives there |
|---|---|
| Account | Your licence, the author name that signs your presets, your credit line and the privacy switch. |
| Audio & MIDI | Sound card, MIDI inputs, the computer keyboard and tempo — for the standalone app (Terrain running on its own, outside a DAW). |
| Controllers | How Terrain answers your MIDI keyboard and knobs: channel, touch, pitch bend, tuning, MPE, pressure and knob links. |
| Performance | Sound quality against processor (CPU) load, the voice ceiling, sleep, DAW capture and screen refresh. |
| Presets | Saving, old versions, what new windows open with, importing, exporting and where files live. |
| Interface | Window size, motion, help, values and how knobs turn. |
| Themes | The colours of the whole window. Pick one, customise it, or import a theme someone sent you. |
| About | Version, updates, this manual, licence, support and resetting every setting. |
| Credits | The open sample libraries and software inside Terrain, with their licences (see Credits). |
Search and the inspector
Search settings finds any row on any page: type buffer, author, MPE or theme and the matches line up in the middle column, each tagged with the page it lives on. Rows you can change directly are live in the results; the others carry an Open button that jumps to the row on its own page and flashes it so you spot it.
Rest the pointer on any row and the inspector on the right gives you the long version: what the setting does, in plain words, and where it applies. That second line matters. This computer means the setting belongs to the machine (your licence, your folders). Every instance means every Terrain window and track shares it. Saved with the instance or saved with the patch means it travels inside your DAW project or preset. Standalone app only marks rows that do nothing inside a DAW, because there the DAW owns the sound card.
With nothing under the pointer, the inspector shows a summary of the page: your licence and next save's author on Account, the live device and the last MIDI message on Audio & MIDI, the live input on Controllers, the current load on Performance, your library's preset and sample counts on Presets.
Account#
Account is about you: who Terrain is licensed to on this computer, and who you are as a sound designer. The name you set here is written into every preset you save and shown in the preset browser for everyone who loads your sounds (see Presets).
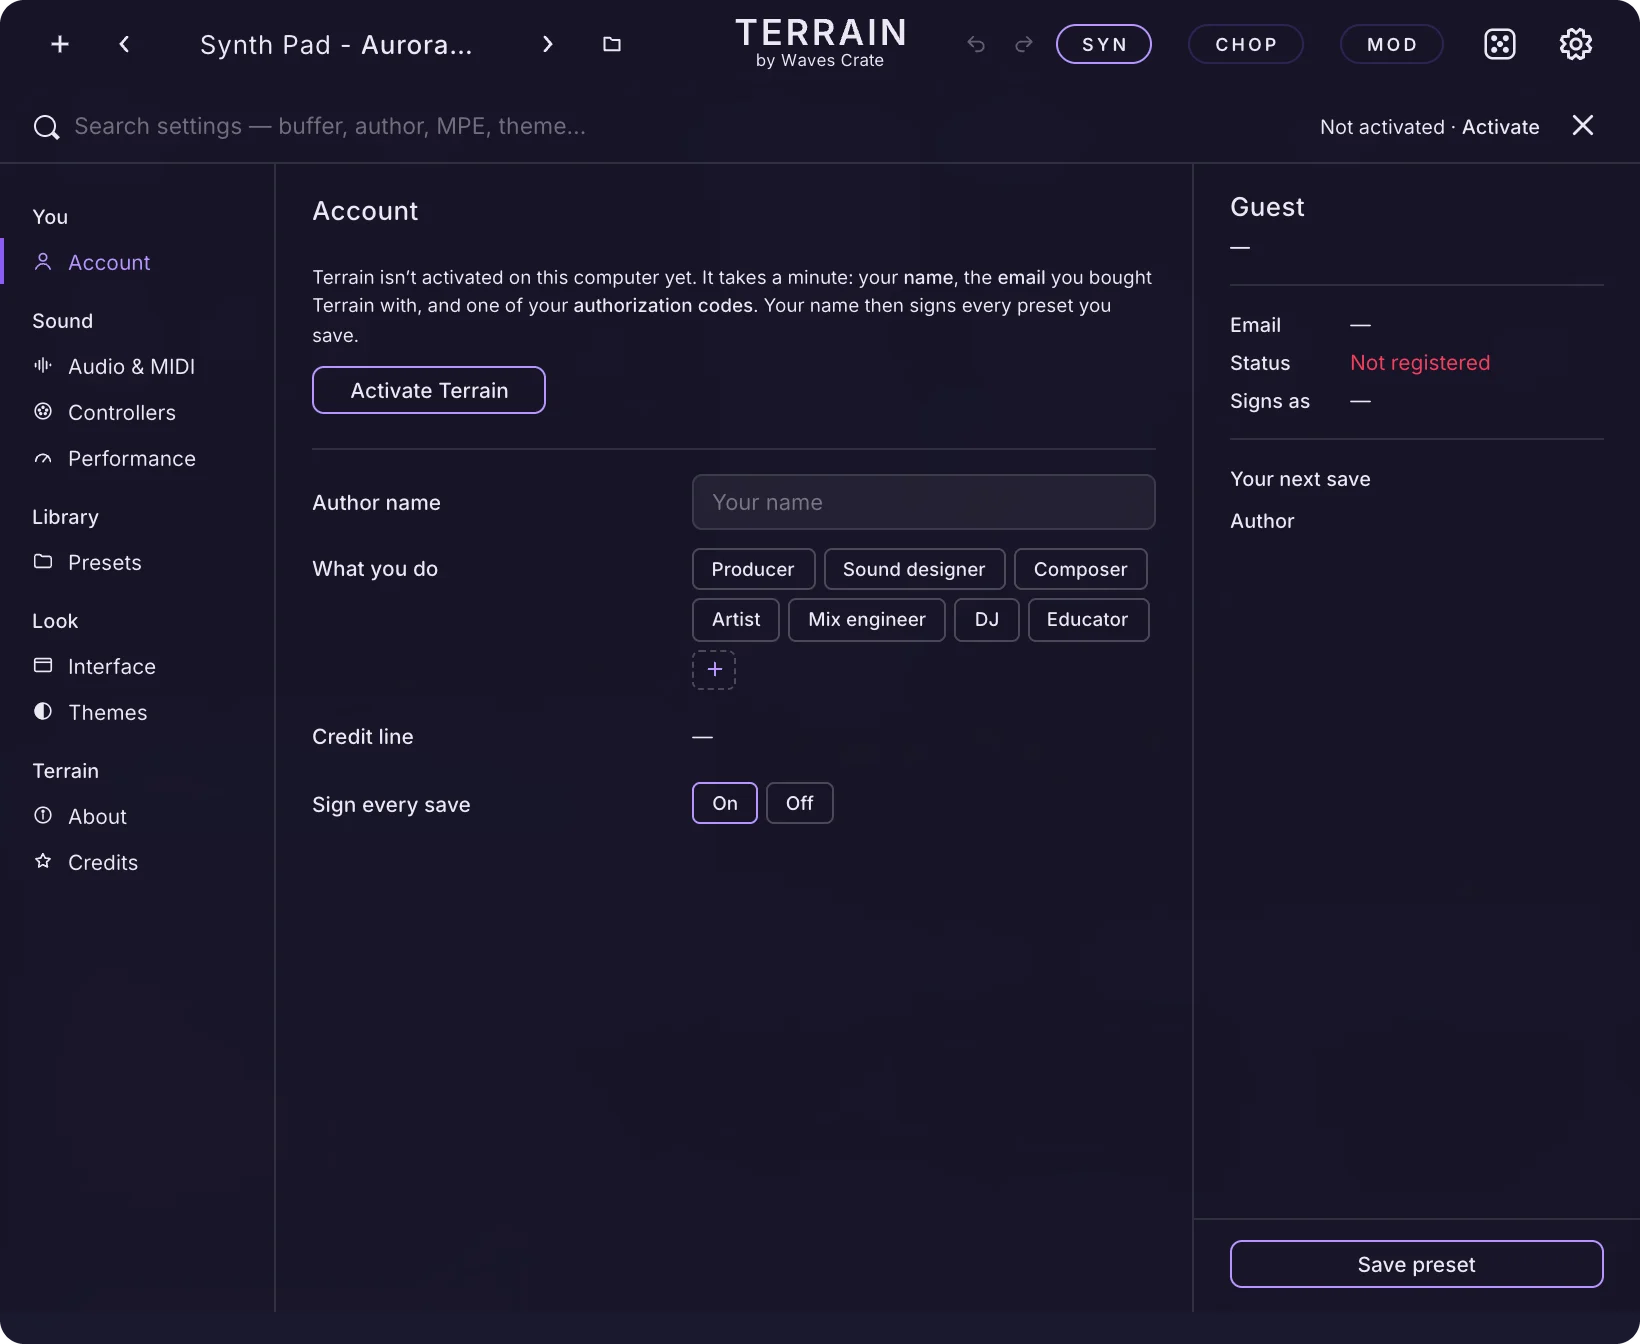
Licence
The top block shows the licence on this computer. When Terrain is activated it lists Licensed to, Email and Status, with a Deactivate this computer button. Before activation it explains what you need and offers Activate Terrain and Buy Terrain.
| Control | What it does |
|---|---|
| Activate Terrain | Opens the Activate sheet. Type the Email you bought Terrain with, your Licence key and your Order no. — all three are in your Waves Crate order email — then press Activate. The key reads TRRN followed by twelve letters and numbers; paste it with or without the dashes and Terrain tidies it for you. A key never contains 0, O, 1 or I, and Terrain catches a mistyped character before it asks Waves Crate. The order number can be typed with or without its #. During the 10-day trial the time left runs under the TERRAIN wordmark; activate whenever you're ready (see Installing and activating). |
| Buy Terrain | Opens the Waves Crate store in your browser. One licence covers both Terrain and Terrain FX. |
| Deactivate this computer | Opens a sheet that removes Terrain (and Terrain FX) from this computer so you can move it to another one. Your presets are not touched, and you can activate again any time with the same licence key. |
| Status | Reads Active or Trial in normal use. Trial ended, Needs to check in, No longer active, Reinstall Terrain or Not activated tell you something needs your attention; the note under the block says what to do. |
The same status sits at the top right of Settings on every page. While Terrain is not activated it reads Not activated · Activate (or Trial · Activate); click Activate there to open the sheet from anywhere.
You as an author
| Row | What it does |
|---|---|
| Author name | Signs every preset you save and fills the Save sheet's Author field. Type your producer name once. When you change it and you already have presets signed with the old name, Terrain offers to rename them: Rename re-signs your own presets (factory packs are never touched), Not now leaves them as they are. |
| What you do | Your roles: Producer, Sound designer, Composer, Artist, Mix engineer, DJ, Educator. Tick every one that fits; click a chip again to take it off. + adds a word of your own — type it and press Enter, Esc cancels. |
| Credit line | A live preview of how your name reads in the preset browser: your author name, then your roles separated by slashes. |
| Sign every save | On (default): the Save sheet opens with your author name filled in; you can still type another name for a one-off. Off: the Author field opens empty and you type a name on each save. |
Privacy
| Row | What it does |
|---|---|
| Anonymous usage data | Off unless you turn it on. On: Terrain sends Waves Crate a few counts a day so the team can see what to improve — how many people use it, which pages, engines, flow cards and effects get used, how often the dice is pressed, how many presets are saved, loaded, imported and exported, which theme is picked, how many errors happen and how long sessions last, with your Terrain version, system and build. Each computer gets a random number that is not linked to you. Never your audio, files, preset names, licence, email or anything personal. Turning it Off stops it at once and deletes anything waiting to be sent. |
With nothing under the pointer, the inspector shows your name, roles, email, status and Signs as, plus what the Author field of Your next save will read. Its Save preset button opens the Save sheet directly.
Audio & MIDI#
This page sets up the standalone app: your sound card, your MIDI gear, the computer keyboard and the tempo. Inside a DAW these rows do nothing — Ableton, FL Studio, Logic and friends own the audio device, and Terrain reads their sample rate, buffer and tempo. The Controllers page applies in both.
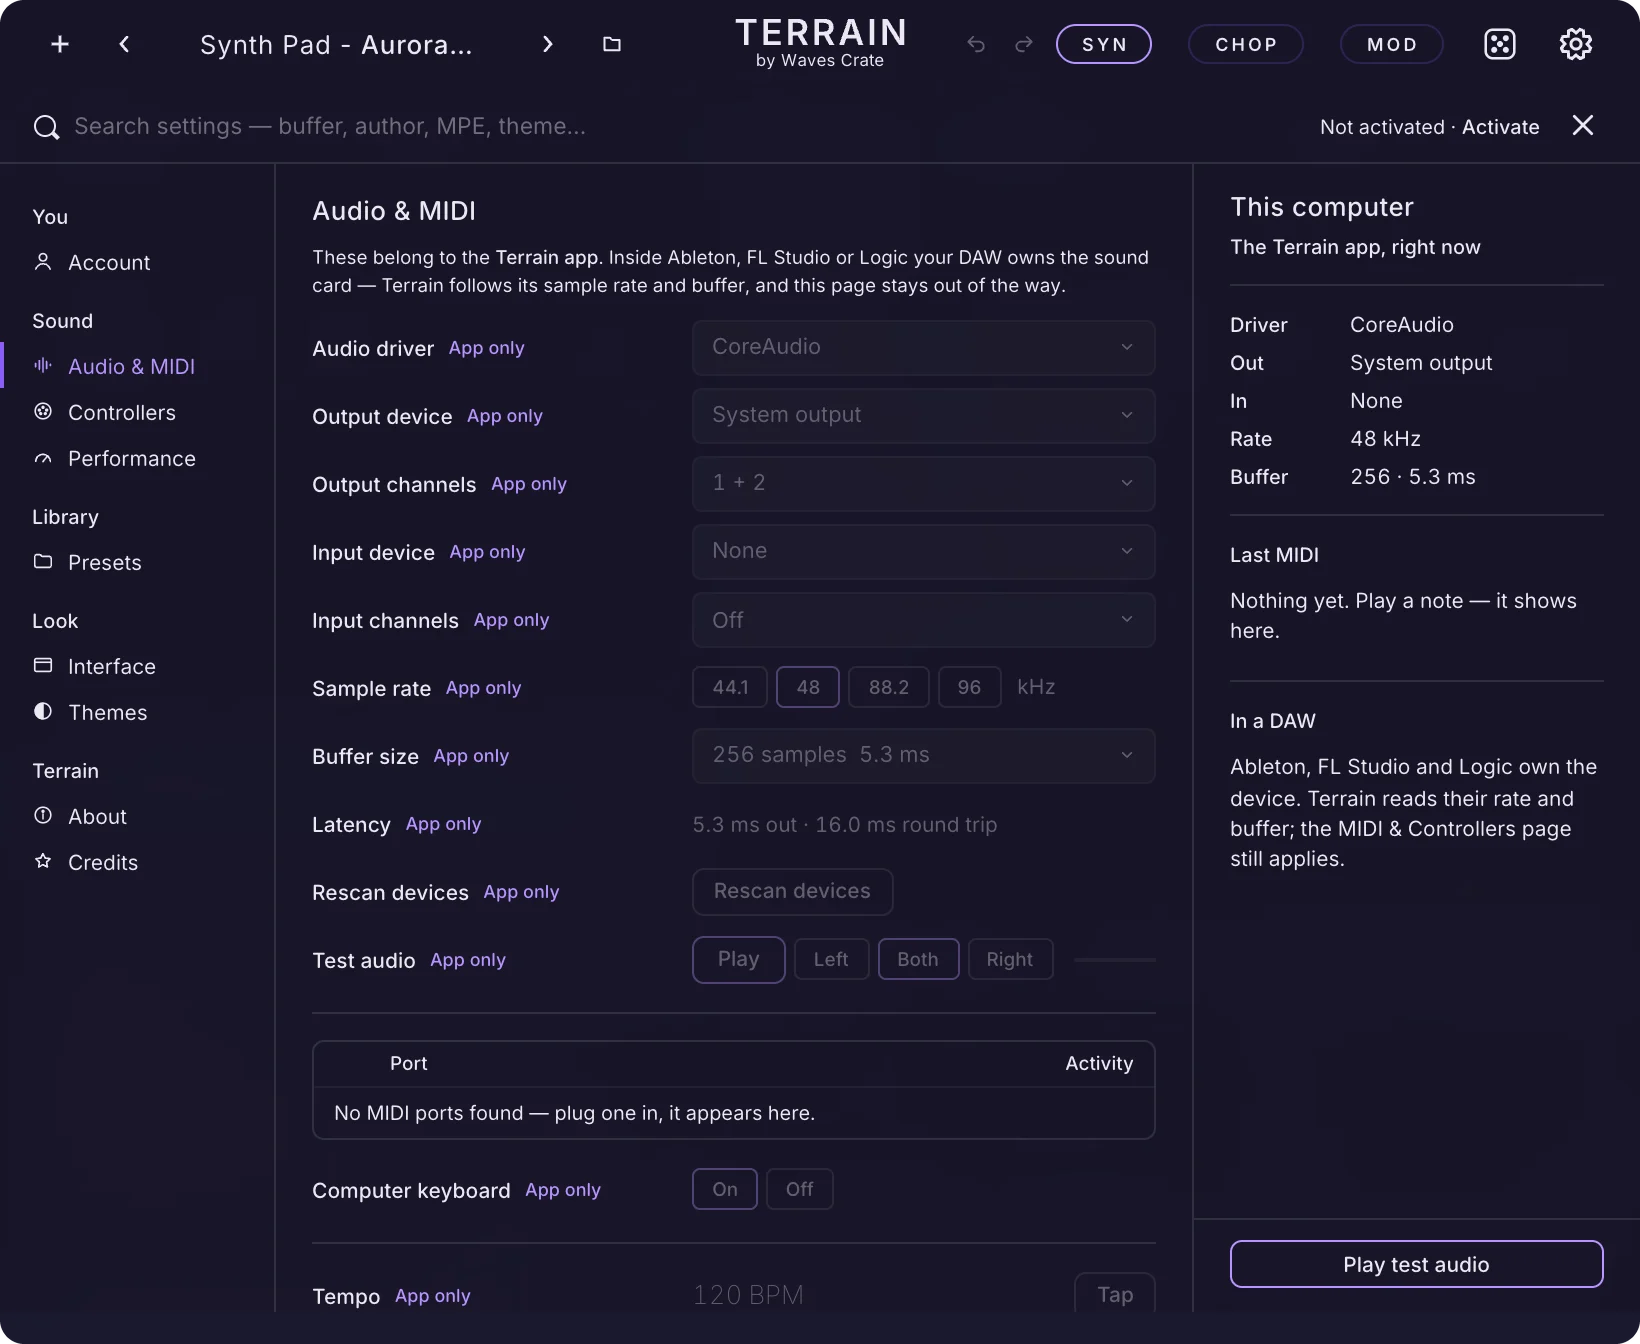
Audio device
| Row | What it does |
|---|---|
| Audio driver | The audio system Terrain talks to. On a Mac it is Core Audio. On Windows: Windows Audio (WASAPI, in its shared, exclusive and low-latency forms) and DirectSound. |
| Output device | Where Terrain plays: your speakers or audio interface (an external sound card). If you unplug it, Terrain falls back to the computer's own output and tells you. |
| Output channels | Which pair of outputs carries Terrain's left and right. 1 + 2 suits most speakers and headphones. |
| Input device | Lets Terrain hear a microphone or instrument — the granular engine and DAW capture can listen to it. None (default) keeps the input closed. |
| Input channels | Which inputs feed Terrain. A single (mono) input is copied to both sides. Reads Off while the input device is None. |
| Sample rate | How many thousand times a second the sound is measured, in kHz — the chips show the rates your device offers (typically 44.1, 48, 88.2, 96). 44.1 or 48 suit almost everything. |
| Buffer size | The chunk of sound worked on at once, from 32 to 2048 samples; the menu shows each size's delay in milliseconds. Smaller answers the keys sooner but works the computer harder. 256 (default) is a safe start; go to 64 or 128 to play live, 1024 when a big patch crackles. |
| Latency | A readout of what you feel between key and sound: the output delay and the full round trip, in milliseconds. |
| Rescan devices | Asks every driver for its devices again — use it after plugging an interface in or out. The lists also refresh by themselves every few seconds while this page is open. |
| Test audio | Play sends a short chime through the device and channels above, so you hear that sound really comes out. Pick Left or Right to check each side on its own. The inspector's Play test audio button does the same. |
MIDI inputs
| Row | What it does |
|---|---|
| MIDI inputs | Every MIDI port Terrain can see, each with a tick box and an activity lamp. Tick every keyboard or controller Terrain should listen to; the lamp flashes when a port sends anything. With nothing plugged in it says so — plug a device in and it appears. |
| Computer keyboard | On (default): the letter keys A W S E D F T G Y H U J K play an octave from C, all at velocity 100. Off: the letter keys never play notes, so typing elsewhere is safe. |
Transport
| Row | What it does |
|---|---|
| Tempo | The standalone has no DAW to follow, so this is the clock for synced LFOs, the arpeggiator, delays and Chop. 40–240 BPM; drag the number, double-click for 120. Tap: click in time with the beat, two taps or more, and the tempo follows you. |
Controllers#
Controllers decides how Terrain answers your hardware in every host: which MIDI channel it hears, how your touch becomes loudness and brightness, how far the wheel bends, what pitch the whole instrument is tuned to, MPE and pressure, and which hardware knob moves which Terrain knob. While you play, the inspector shows the live input — the note, its velocity before and after your curve, bend and controllers.
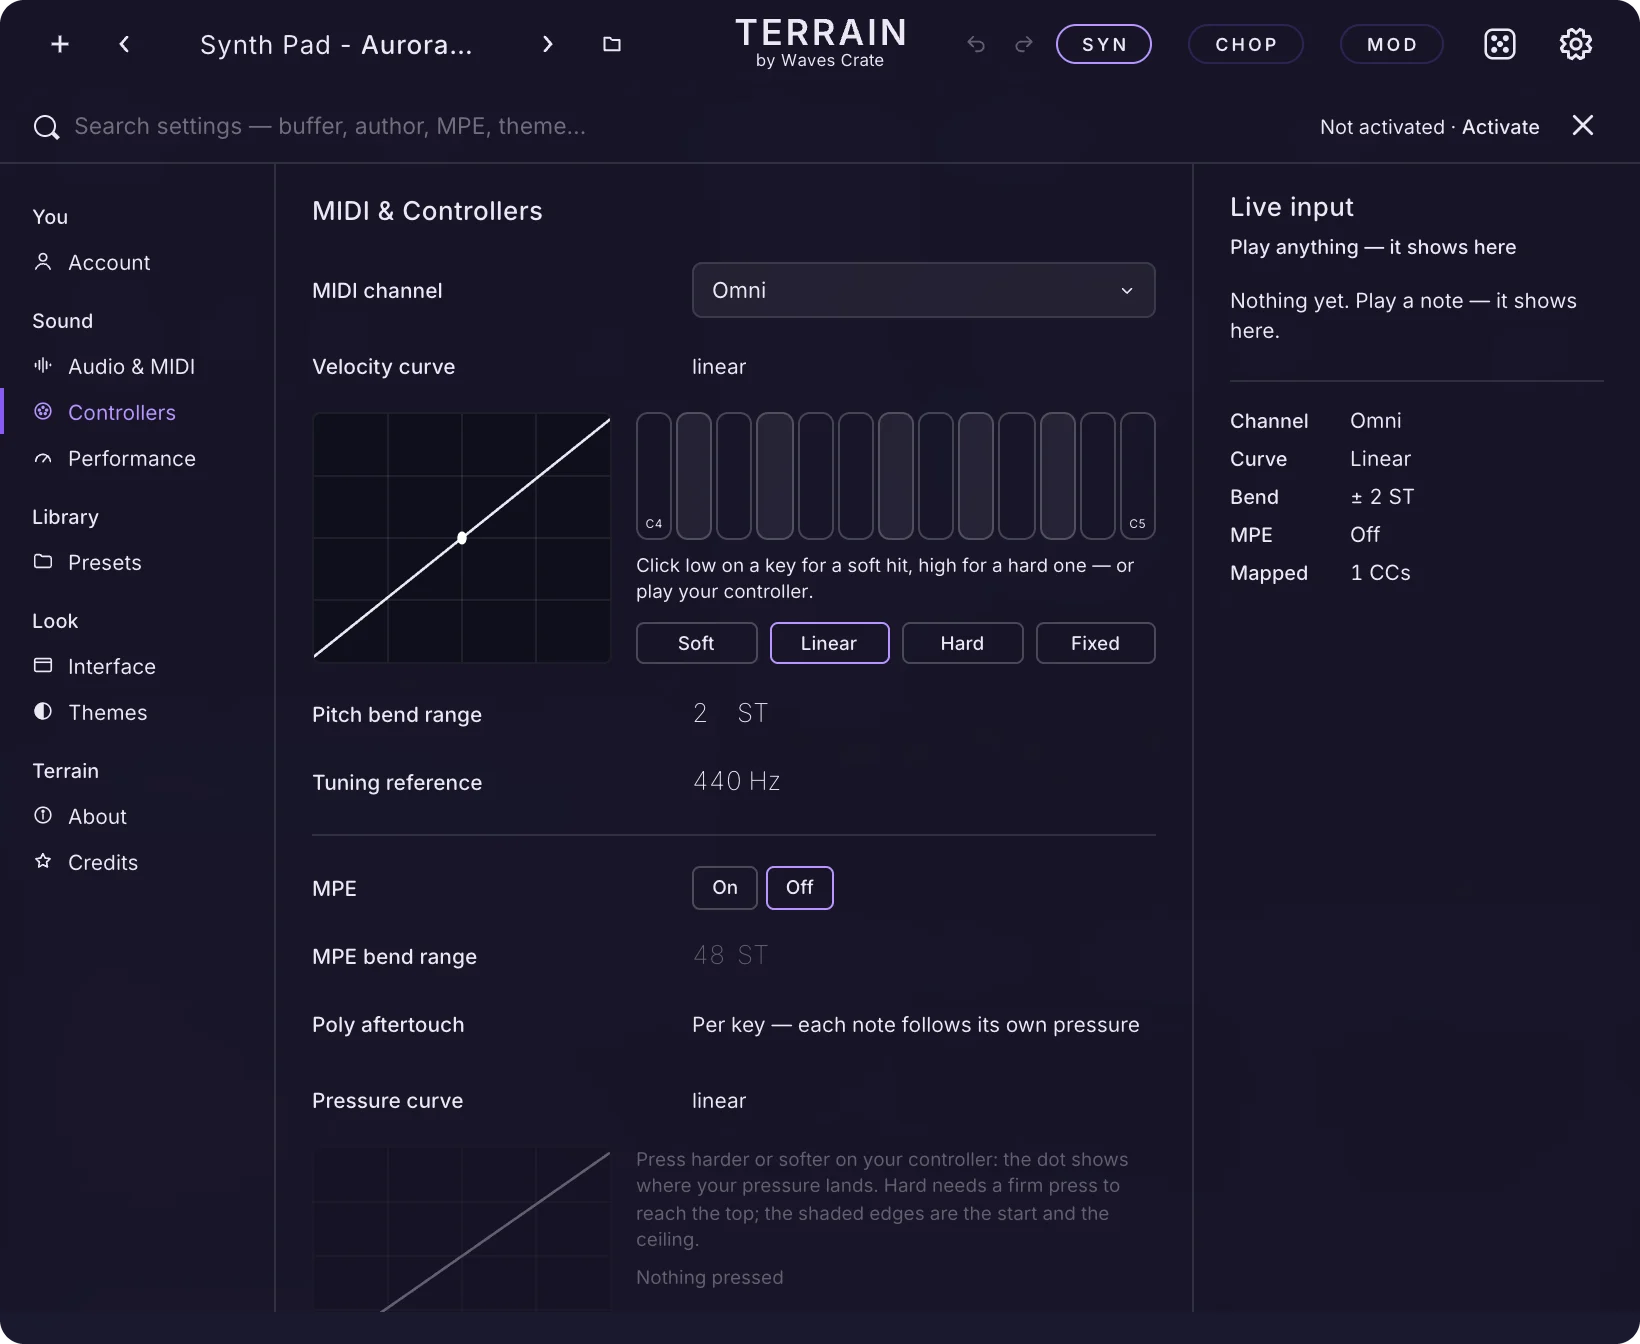
Receiving
| Row | What it does |
|---|---|
| MIDI channel | MIDI has 16 channels, like lanes. Omni (default) plays notes from every channel. Pick Channel 1–Channel 16 to share a controller with other instruments: every other channel is ignored (notes, bend, pressure, controllers). While MPE is on this is set aside, because MPE uses every channel. The computer keyboard always plays. Saved with the instance. |
| Velocity curve | How hard you play becomes how loud and bright Terrain answers. Drag the curve up for a softer touch (quiet playing sounds fuller), down for a harder one; double-click makes it straight again. Presets: Soft (a light touch already plays loud and bright — for stiff keys), Linear (your keyboard's velocity passed through exactly), Hard (play firmly to reach full volume — for light keys), Fixed (every note at the same strength). Beside the curve sit test keys from C4 to C5: click low on a key for a soft hit, high for a hard one, or play your controller — you hear the curve and a dot shows where each hit lands. |
| Pitch bend range | How far the bend wheel moves the pitch, in semitones: 0–24, default 2. Drag the number; double-click for 2. Saved with the patch. |
| Tuning reference | The pitch of A4 (the A above middle C) in Hz: 415–466, default 440. Every oscillator, the sub, the resonator and a pitched chop pad follow it, and a dropped sample's note name is read on this grid. 432 sits 31.8 cents below 440. Double-click for 440. |
Expression
| Row | What it does |
|---|---|
| MPE | MIDI Polyphonic Expression. On: each note gets its own bend, pressure and slide (CC 74) on its own channel, with channel 1 as the master (wheel, pedal) — for controllers like a Seaboard. Pressure and Slide become modulation sources; bend moves the note's pitch. A controller or host that sends the MPE setup message turns it on by itself. Off (default): a normal keyboard setup, where the wheel and pressure move every note together. In Ableton Live, use the AU version for MPE: Live's VST3 path drops per-note expression. |
| MPE bend range | How far sliding a finger sideways bends one note, in semitones: 1–96, default 48 (the MPE standard). Match your controller so a slide of one key lands exactly on the next note; a mismatch overshoots or falls short. A controller that sends its range over MIDI sets it for you. Dimmed while MPE is off. |
| Poly aftertouch | Always on. Key pressure (poly aftertouch) moves only the note you press; channel (mono) pressure moves every note. Route Aftertouch in the mod matrix to hear it (see Modulation). |
| Pressure curve | How hard you have to press to reach the top, for MPE pressure, poly aftertouch and channel aftertouch alike. Drag the curve down for a firmer push, up for a lighter one; double-click resets. Presets: Soft (a light press reaches the top), Linear (untouched), Hard (a normal press stays low; you reach the top only when you lean in), Harder (only a really firm press reaches the top — for very light controllers). Press your controller and a dot shows where you land; the shaded edges mark the start and the ceiling. It shapes pressure before any modulation route, so every Aftertouch route follows. If your controller has its own aftertouch curve, that acts first. |
| Pressure start | Ignores the first part of the key's travel so fingers resting on keys change nothing: 0–50 %, default 0 %. Below it pressure reads 0; above it the curve starts from 0. Double-click for 0 %. |
| Pressure ceiling | Where pressure reaches 100 %, before the end of the travel: 50–100 %, default 100 %. Lower it if your controller's top is hard to reach. Double-click for 100 %. |
Controllers
| Row | What it does |
|---|---|
| MIDI learn | The list of hardware-to-knob links, with columns CC, Controls and Range. To add one, right-click any Terrain knob, pick MIDI Learn, then move the hardware control. The × on a row unmaps it. The mod wheel is always on CC 1 and cannot be removed. Save as default map: every new Terrain starts with the links listed here. Clear: removes every learned link (the mod wheel stays). Saved with the instance. |
| Knob pickup | What happens when a hardware knob and Terrain's knob disagree. Jump: Terrain's knob snaps straight to the hardware — fast, but the sound can jump. Hook (default): nothing moves until you turn past Terrain's value. Scale: Terrain's knob glides over as you turn until they meet. |
| Presets carry their MIDI map | On: loading a preset also loads the hardware-knob links it was saved with. Off (default): your links stay as they are, whatever preset you load. |
| Program change loads presets | On: a controller or a DAW clip can step through the current pack by sending program change messages. Off (default): those messages are ignored; presets change only when you pick them. |
Performance#
Performance balances sound quality against processor load. The defaults are tuned to sound clean on a modern computer; this is where you lean a heavy session towards lighter, or a final bounce towards cleaner. The inspector shows what Terrain costs right now: DSP load, the voice ceiling, the memory capture holds, the quality in use, whether the engine is asleep and the screen refresh.
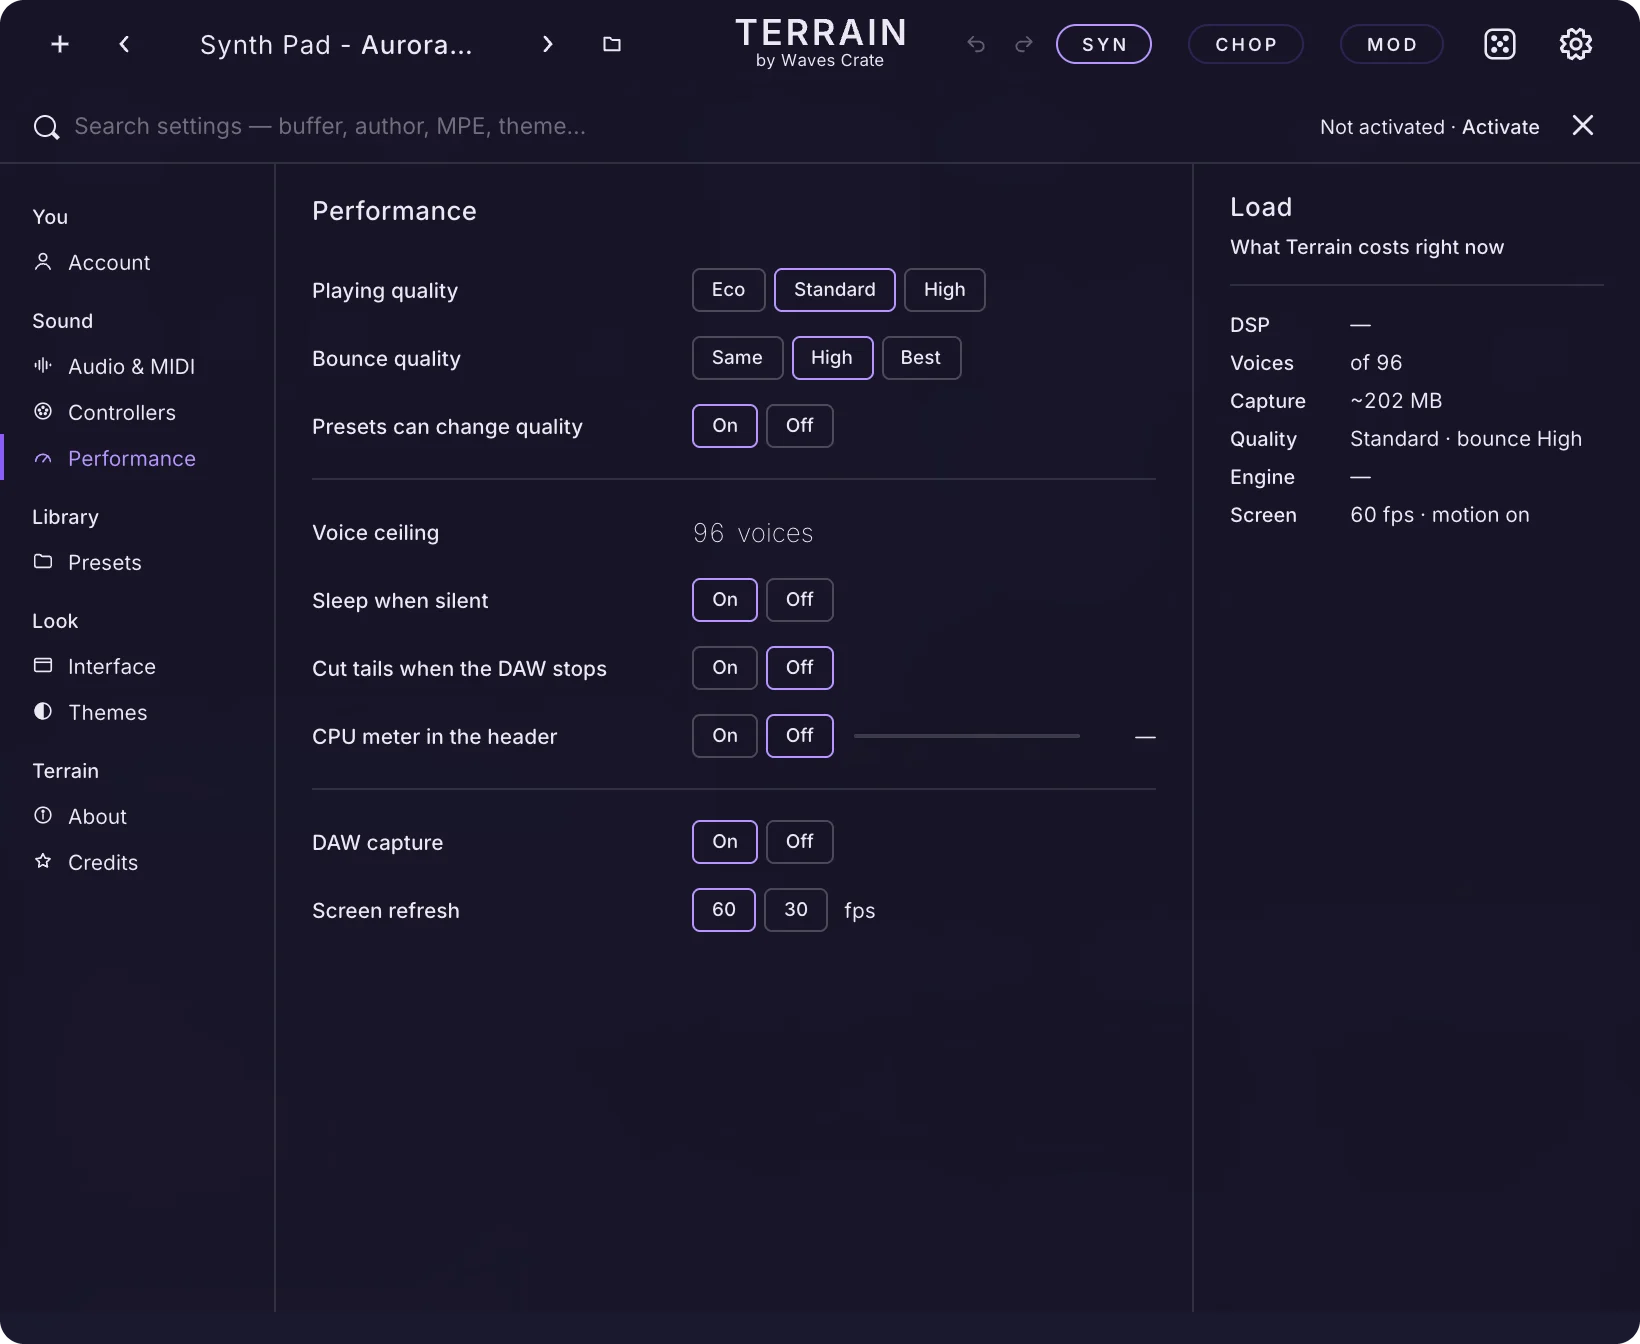
Quality
| Row | What it does |
|---|---|
| Playing quality | Sets the 2× oversampling (running at double speed to keep harsh fold-back out of the high end) of each voice's filter. Eco: never — the lightest load, and a driven Ladder or Diode filter sounds a little harsher. Standard (default): only while a filter is driven hard or near self-oscillation. High: always, on every drive-able filter type — the cleanest, the most CPU. With Presets can change quality off, it also sets the Distortion's quality tier. |
| Bounce quality | Used only while your DAW exports the song to a file (a bounce, rendered offline). Same: your playing quality. High (default): every drive-able voice filter oversampled and the Distortion at High or better. Best: the same with the Distortion at Ultra — the slowest export, the cleanest result. |
| Presets can change quality | On (default): each preset's own Distortion quality is used as saved. Off: your playing quality sets the Distortion quality for every preset. |
CPU
| Row | What it does |
|---|---|
| Voice ceiling | The most voices Terrain ever sounds at once, counting unison: 8 notes of 4-voice unison are 32. 8–96, default 96; double-click for 96. Past it the oldest note is released first, with a short fade. The Voices control on the voice column still caps a patch below this (see Voicing). Lower it on a laptop. |
| Sleep when silent | On (default): when no note sounds and the output has stayed below −100 dB for a second (longer if a delay could still echo), Terrain stops computing and sends silence. Any MIDI, the transport starting, a preview or live input wakes it on the same block. It never sleeps during an offline bounce. Off: Terrain keeps computing in silence. |
| Cut tails when the DAW stops | On: when the DAW's transport stops, everything still ringing — note releases, reverb, delay and every effect tail — fades out over 10 ms and is emptied, so the next play starts clean. Off (default): tails ring out naturally. |
| CPU meter in the header | On: a small number left of the TERRAIN wordmark shows how hard Terrain works the processor. Off (default) hides it. The bar beside the switch shows the load live while this page is open. |
Memory & screen
| Row | What it does |
|---|---|
| DAW capture | On (default): Terrain keeps up to 10 minutes of what it played, ready to drag from the strip at the bottom of the window into your DAW (see Tape Deck & Capture). Off: records nothing and frees the memory it used. You can also right-click the strip to switch it. |
| Draw without the graphics card | Windows only. On: the processor draws the window instead of the graphics card — use it when the window stays empty or flickers on an older graphics chip; it costs a little more CPU. Terrain turns it on by itself when its window cannot draw. Off (default): the graphics card draws, the fastest way on most computers. Changing it redraws the window. |
| Screen refresh | 60 fps (default): the window redraws 60 times a second, the smoothest look. 30: halves the drawing cost on slower computers. The sound is never affected. |
Presets#
The Presets page covers saving, what a new Terrain loads, getting sounds in and out, and where your files live on disk. The inspector sums up your library — author, what new windows open with, when Terrain scans, and how many presets, packs and samples it found — and its Open the browser button takes you straight to the preset browser (see Presets).
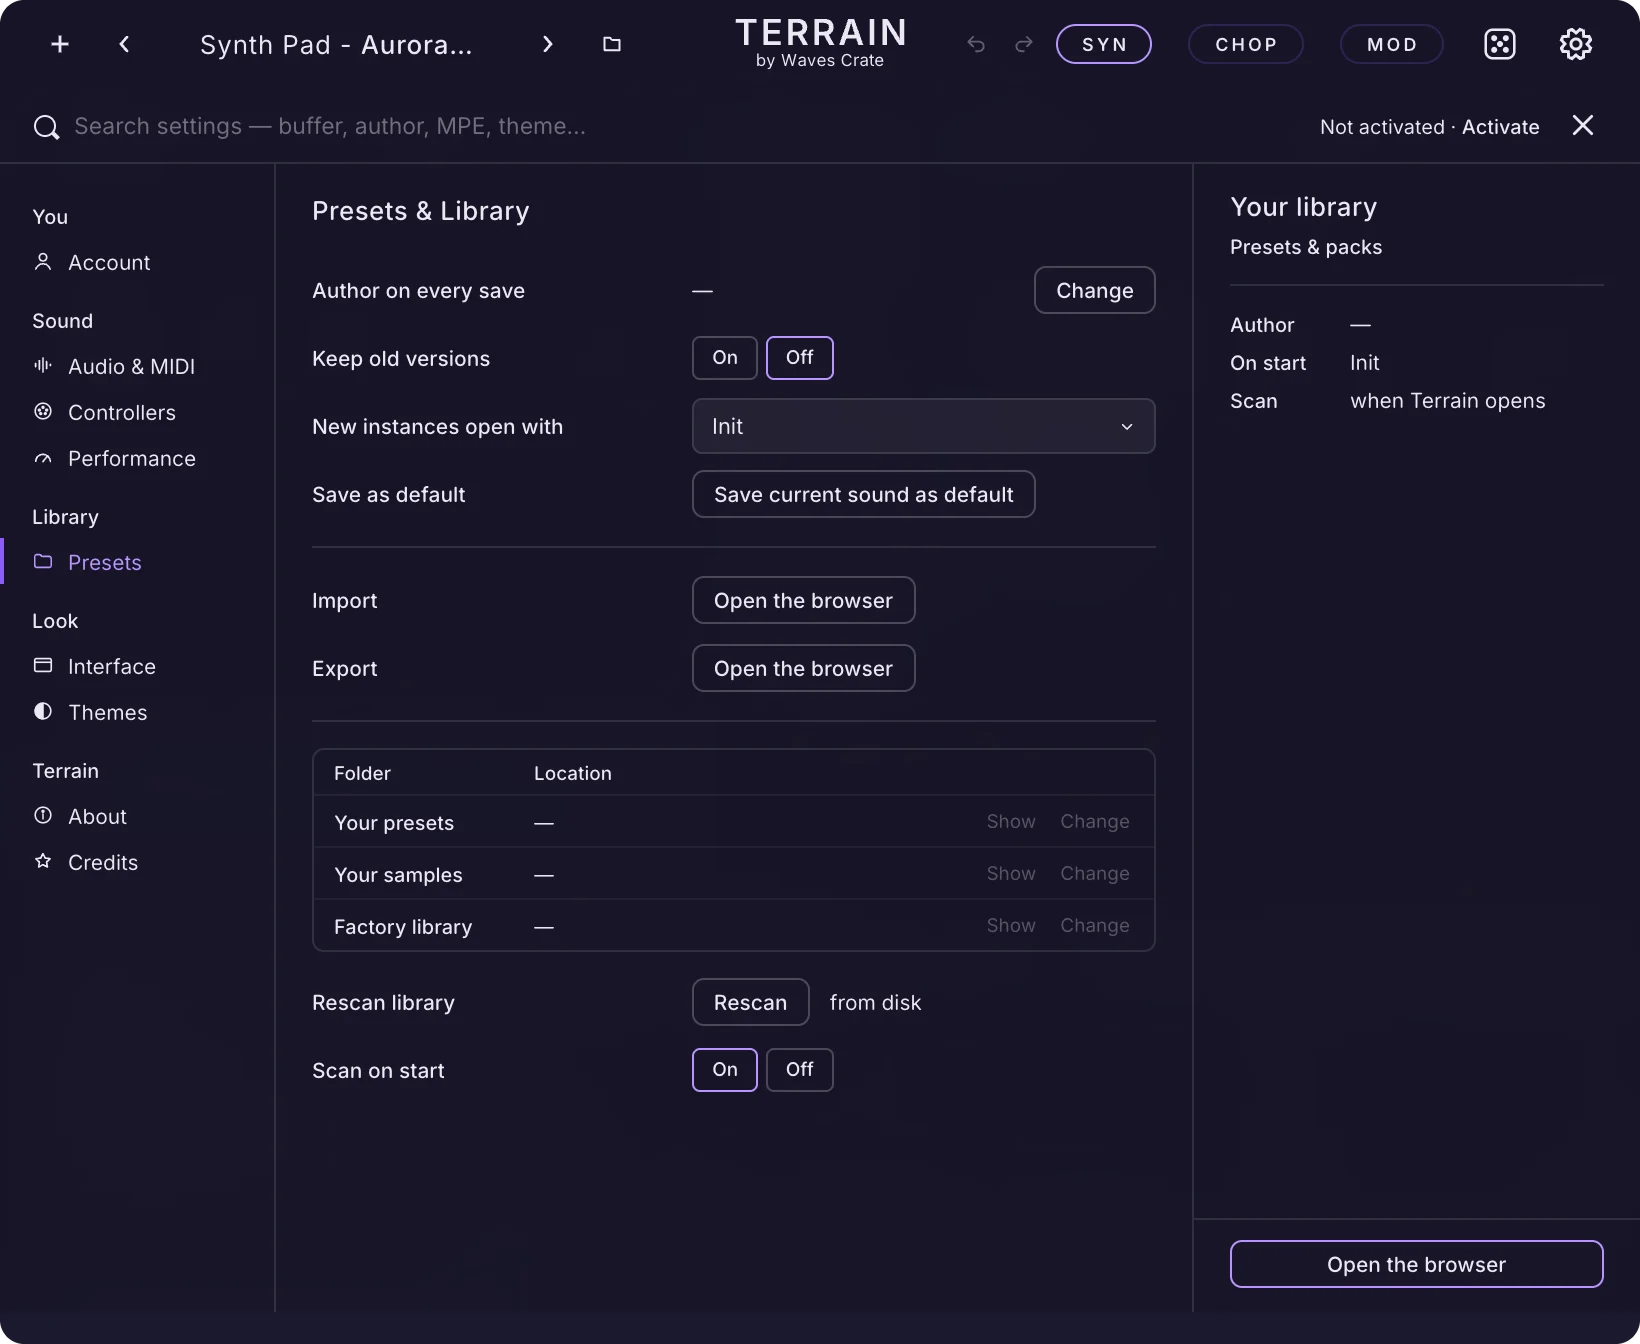
Saving
| Row | What it does |
|---|---|
| Author on every save | Shows the author name set on the Account page. Change jumps there. |
| Keep old versions | On: saving over a preset keeps the previous one as "Name v2", "v3" and so on. Off (default): saving over a preset replaces it. |
| New instances open with | What each newly opened Terrain loads. Init (default): a plain default sound. Your default: the sound you saved with Save as default. Last preset used: the preset you played last. |
| Save as default | Save current sound as default makes the sound you hear now the one every new Terrain starts with, and sets the row above to Your default. |
Bring sounds in
| Row | What it does |
|---|---|
| Import | Open the browser: the preset browser, where you bring in presets, a zipped pack (.zip) or a folder. |
| Export | Open the browser: the preset browser, where you write your presets into one pack to share or back up. |
Where things live
| Row | What it does |
|---|---|
| Folders | Three lines — Your presets, Your samples, Factory library — each with its location. Show opens the folder in Finder or Explorer. Change picks another folder (an external drive, a synced folder) and Terrain rescans. A folder you picked is tagged Yours and gains Default, which moves it back to the standard folder and rescans. Presets already in an old folder stay there — move them across to keep them in the list. If a chosen folder goes missing, the line says so; for your presets, saving is off until it is back. |
| Rescan library | Rescan re-reads every preset pack and sample folder from disk — use it after copying presets or samples in by hand. The result appears beside the button. |
| Scan on start | On (default): a new Terrain window reads your whole library as it opens. Off: it waits until you open the preset browser or press Rescan — faster with a very big library. |
Interface#
Interface is about feel: how big the window is, whether things animate, how much help you get, and how knobs answer your hand. The page has a practice knob so you feel each change before you go back to work.
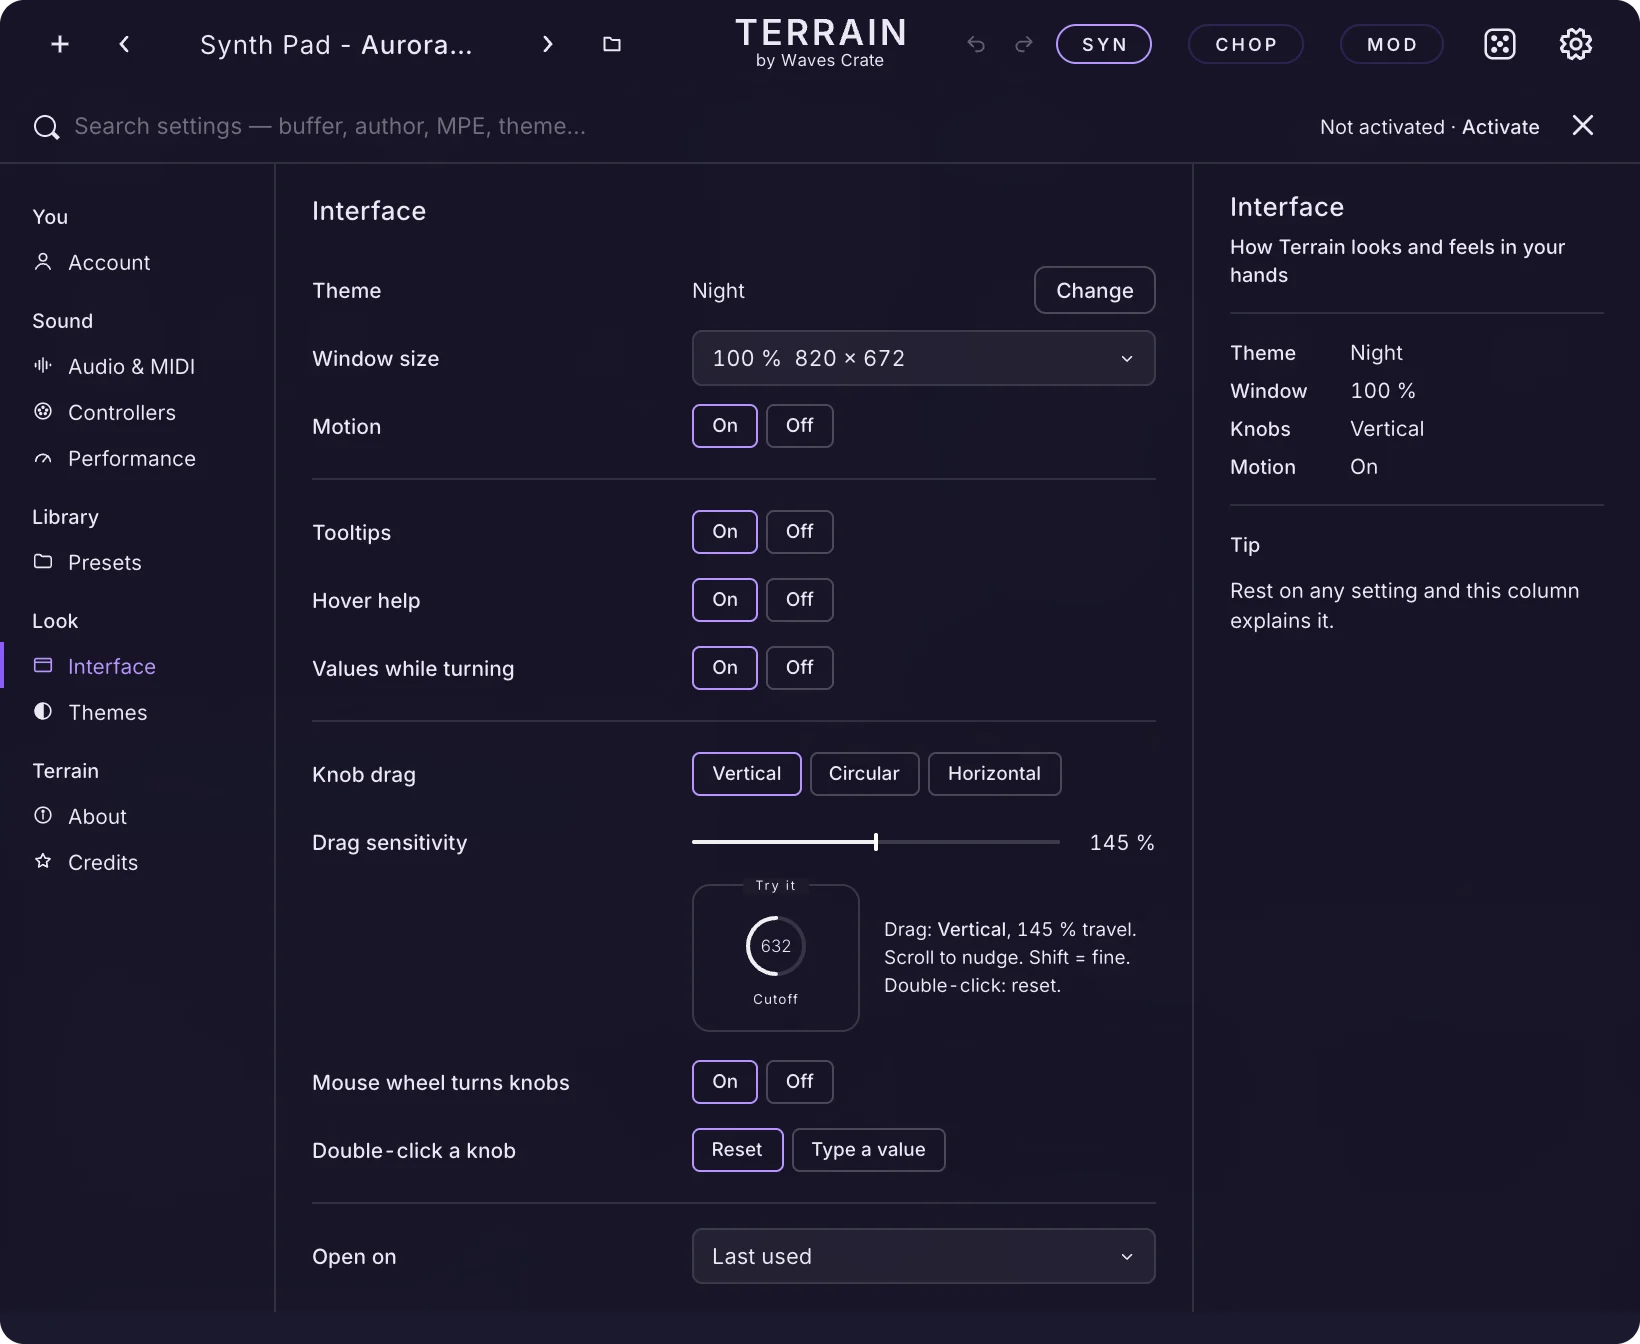
Look
| Row | What it does |
|---|---|
| Theme | Shows the theme in use. Change jumps to the Themes page. |
| Window size | 65 %, 80 %, 100 % (default, 820 × 672 pixels), 125 %, 150 %, 175 % or 190 %; the menu shows each size in pixels. Resizes this window now, and every new Terrain window opens at it. Dragging the window's corner still works, and a window or project you have sized yourself keeps its own size. |
| Motion | On (default): wavetables, meters and visuals animate on their own. Off: nothing animates by itself and the window costs less CPU; knobs still redraw, and LFOs, envelopes, filters and trackers still move. |
Help
| Row | What it does |
|---|---|
| Tooltips | On (default): rest the pointer on any control and the strip at the bottom of the window says what it does. Off: the strip shows the capture only. |
| Hover help | On (default): a card at the bottom right of the 3D terrain picture explains the control under the pointer. Off hides that card. |
| Values while turning | On (default): shows the number under a knob while you drag it. Off: knobs turn without showing their number. |
Knobs
| Row | What it does |
|---|---|
| Knob drag | Vertical (default): drag up to turn a knob up, down to turn it down. Circular: turn around the knob like a real one. Horizontal: drag right to turn up, left to turn down. |
| Drag sensitivity | How far you move the mouse for a full turn of a knob, from 40 % to 250 % (default 145 %). Double-click the slider to reset. Hold Shift while dragging any knob for fine moves. |
| Try it | A practice Cutoff knob that uses your drag, sensitivity, wheel and double-click settings, with a line underneath spelling them out. Turn it to feel them. |
| Mouse wheel turns knobs | On (default): scroll over a knob to nudge it. Off: scrolling never moves a knob — useful if you scroll long pages with a trackpad. |
| Double-click a knob | Reset (default): puts the knob back to its default value. Type a value: opens a box to type an exact number. |
Pages
| Row | What it does |
|---|---|
| Open on | Which page a new Terrain window shows first: Last used (default), SYN, CHOP or MOD. |
Themes#
Terrain ships with 30 themes — dark and light, flat and gradient — and you can make your own and send it to anyone. Click a theme and the whole window repaints at once; there is nothing to confirm. The page is shown in the picture at the top of this chapter.
The built-in themes are Night (the default), Daylight, Paper, Blossom, Glacier, Carbon, Flamingo, Aurora, Basalt, Moss, Velvet, Nebula, Ember, Porcelain, Citrine, Mint, Lagoon, Cobalt, Sand, Sunset, Phosphor, Volt, Blueprint, Royal, Reef, Espresso, Riso, Matcha, Mist and Butter. Under them, Yours lists the themes you made or imported, followed by a New theme tile that starts a theme from the one in use.
The page
| Control | What it does |
|---|---|
| Patcher modules | Solid (default): every module on the Patcher is a card in its own colour, the page's opposite, so it stands out, with its displays in the theme's accent. Blend: the modules wear the page's own colour, for a calmer look. The SYN page is the same either way (see Patcher). |
| Theme tiles | Click to paint the whole window in that theme. The theme in use is outlined and marked In use; its colours show on the right. |
| New theme | Starts your own theme from the one in use, ready to recolour and name. |
| Import theme | Opens a theme file someone sent you and adds it to Yours. |
| Open themes folder | Shows where your own themes are kept, in Finder or Explorer. |
The inspector
The right column names the picked theme with a one-line description and lists its palette: Page (the ground everything sits on), Grids (filter, envelope, LFO and effect wells), Text (labels, numbers, knob arcs), Lines (waveforms, LFO lines, cables), Accent (curves, playheads, selection), Wash (hover and selection fills, gradients) and Accent light (the pale tints above the accent). Each colour shows its hex code; Text and Accent also show their contrast against the page, so you can see at a glance that a theme stays readable.
| Button | What it does |
|---|---|
| Customize | Opens this theme in the editor. A built-in theme is copied first, so the original stays. |
| Duplicate | Makes a copy of this theme under Yours, to change without touching the original. |
| Export | Saves this theme as a file you can send to anyone. They import it on their Themes page. |
| Delete | Removes a theme of yours. Built-in themes cannot be deleted, so the button is dimmed for them. |
The theme editor
Customize turns the middle column into the editor. Every change paints the window live, so you judge it on the real instrument.
| Row | What it does |
|---|---|
| Name | What your theme is called in the grid and in a file you export, up to 40 characters. |
| Colours | One row per palette colour (Page, Grids, Text, Lines, Accent, Wash, Accent light). Click the swatch to open the colour picker, or type a hex code (# and six letters or numbers, like #1b1b2e). Text and Accent show their live contrast. |
| Gradient | On: paints the page as a gradient between the colours below. Off: one flat colour. |
| Gradient colours | The start, middle and end of the page gradient. Click a swatch to pick its colour; the + swatch adds another stop. |
| Angle | Which way the gradient runs, in degrees. Drag the number; double-click for 160. |
| More | Opens the finer controls below. |
| Flip markers on coloured waves | On: playheads and marks turn to stay readable on coloured waves. Off: they keep their own colour. |
| Markers | The colour of playheads and marks on waves. Leave the hex box empty to follow the text colour. |
| Envelope dots | The colour of the handles on every envelope. Empty follows the text colour. |
| Grid depth | How far the grids sit from the page. Drag the slider; double-click resets. |
| Text strength | How strongly quiet text reads. |
| Glow | The light around lit controls. |
| Shadow | Shadows under cards and menus. |
| Glass tint | How much the Wash colour tints the glass panels. |
| Hold to peek | Hides Settings while you hold the button, so you see the whole window in your draft colours. |
| Save | Keeps your edited theme under Yours and paints the window in it. |
| Cancel | Closes the editor and puts the window back the way it was. Unsaved changes are dropped. |
The colour picker
Clicking a swatch opens the picker. Drag in the colour field left and right for how strong the colour is, up and down for how bright. Drag along the hue bar to pick the colour itself, from red through green and blue back to red. Type into the hex box and it applies as you type. The row of chips holds this theme's other colours: click one to reuse it, so two parts of the theme match exactly. The current colour swatch shows what that part is painted with now.
About#
About tells you exactly what you are running, keeps Terrain up to date, opens this manual, and gets you help when something goes wrong. The top shows the Terrain wordmark, who it is licensed to, and the version and build.
| Row | What it does |
|---|---|
| Version | Version, Build, Running as (the plug-in format or the standalone app), Formats (AU · VST3 · Standalone on a Mac, VST3 · Standalone on Windows) and Engine. Quote it in any bug report. |
| Check for updates | Check now asks Waves Crate whether a newer Terrain is out; the line beside it reads Up to date with when it last checked, or that Waves Crate can't be reached. When there is one, it reads Terrain x.y is available with a short list of what's new and a Get the update button. Nothing downloads or installs by itself. |
| Get the update | Opens your Waves Crate account in your browser, where your purchase has the download. |
| Manual | Open opens this manual, the Terrain user manual at wavescrate.com/manual, in your browser: every page, engine, card and effect, with pictures. |
| Check automatically | On (default): once a day Terrain quietly looks for a newer version and tells you in the strip at the bottom of the window — never a pop-up. Off: Terrain only looks when you press Check now. Terrain and Terrain FX share this setting. |
| Licence | The licence status and who Terrain is licensed to. Account jumps to Settings › Account; before activation the button reads Activate and opens the Activate sheet. |
| Support | Report a bug opens your mail app with a message to Waves Crate already written — your version, your system and this session filled in; you add what happened. Report a crash does the same and shows you the crash log to attach. No mail app? The report is copied for you to paste into any email. Copy system info copies your Terrain version and system details, ready to paste. |
| About Waves Crate | Who makes Terrain and why, with a link to Credits & Licences. |
| Reset all settings | Reset settings opens a sheet; Reset puts every setting back to how Terrain shipped. Your presets, packs and licence are not touched, and your author name, roles and theme are kept. |
Credits
The Credits page lists the open sample libraries Terrain's Organics engine plays and the software inside Terrain and Terrain FX, each under its own licence, plus the trademark notices. Show the full texts opens every licence in full; click again to hide them. See Credits for the full list.
Chapter 19
Terrain FX
Build your own effect rack. Terrain FX is Terrain's effects, flow cards, modulation and Patcher as an audio effect you put on any track: vocals, drums, a bus, a whole mix. It comes with Terrain, and everything you know from the instrument works the same way.
What Terrain FX is#
Terrain FX is a second plug-in installed alongside Terrain. Where Terrain makes sound from notes, Terrain FX takes the sound already on a track, runs it through a chain you patch yourself, and hands it back. Under the hood it is the same Patcher and the same sixteen effects as the instrument, so a reverb you dialled in on a Terrain patch sounds identical here.
It loads in your DAW as an audio effect (VST3 on Mac and Windows, AU on Mac) and also runs as a standalone app, where it processes your audio interface's input. It runs on Terrain's licence: activate Terrain and Terrain FX is activated too. See Installation.
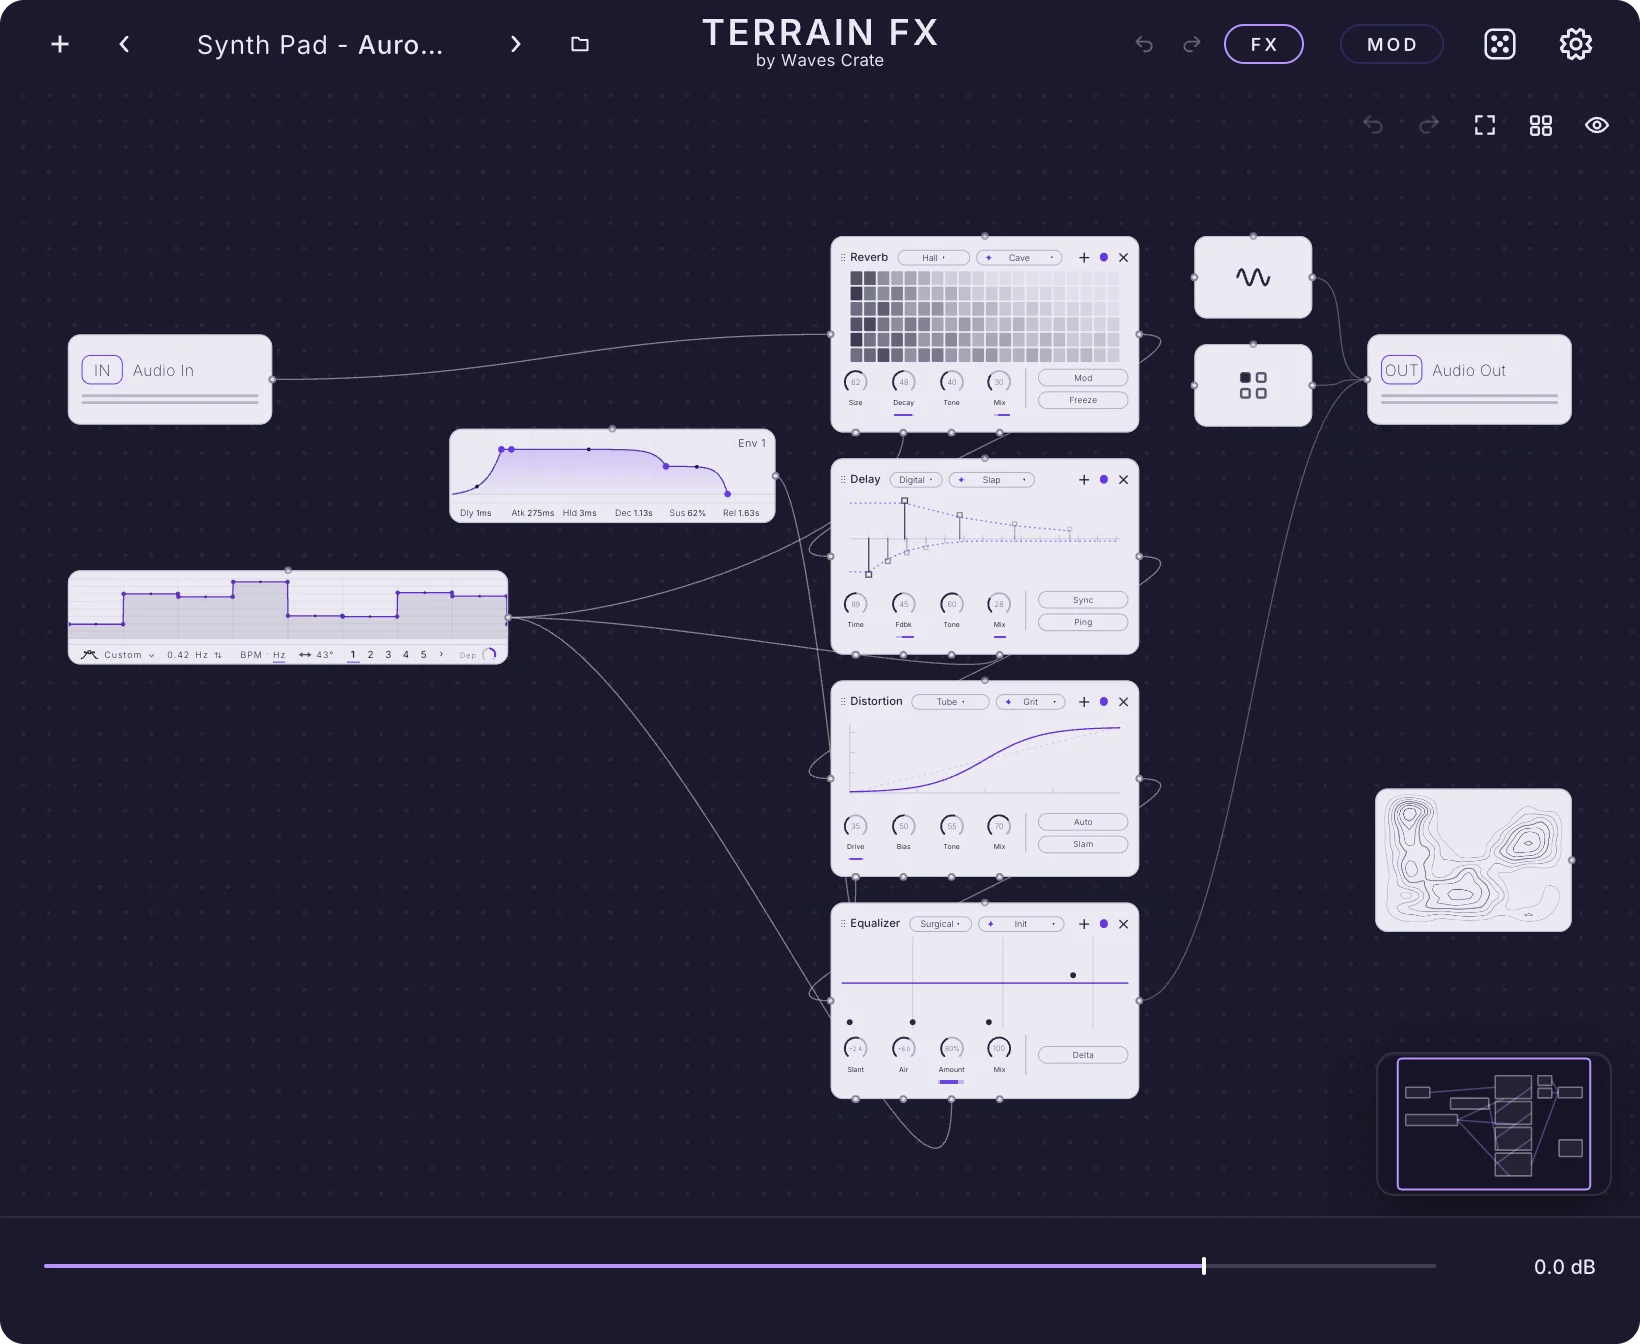
What is the same, what is different
| Area | In Terrain FX |
|---|---|
| Pages | Two: FX (the Patcher) and MOD. There is no SYN page and no CHOP page: nothing in Terrain FX makes a sound of its own. |
| Effects | All sixteen: Reverb, Delay, Distortion, Granular, Filter, Chorus, Flanger, Phaser, Tape, Equalizer, Widen, Compress, Multiband, Bode, Splitter and Utility, up to six of each, with every type, front and back panel. See Effects. |
| Flow cards | Shaper and Glitch, up to four of each, the two flow cards that process audio. Arp and Robin play notes, so they are not here. |
| Tape Deck | The Deck looper is on the Utility shelf, exactly as in the instrument. See Tape Deck & Capture. |
| Modulation | Envelopes, the ten LFOs, Random, Alt and the rest of the MOD page's sources. With no notes to play, a Trigger setting decides what fires them (see The MOD page). |
| Dice | Rolls a new effect chain and new modulation for your audio (see The dice). |
| Presets | Terrain FX keeps its own presets, with effect types such as Reverb, Delay, Distortion, Granular, Glitch, Filter, Modulation, Tape, Lo-fi, Rhythmic and Ambient. |
| Settings | Only what matters to an effect: no Controllers page, no voice settings, no sound library folders. |
The FX page#
Terrain FX opens on the FX page, which is the Patcher canvas with two fixed modules: Audio In on the left and Audio Out on the right. Audio In is the sound arriving from your track; Audio Out is what leaves Terrain FX. Both carry an IN or OUT chip and live left and right meters, so you can see the level entering and leaving at a glance. Everything you hear runs along the cables between them.
Right-click empty canvas to open the module browser and add a module. In Terrain FX it has four shelves:
| Shelf | What it offers |
|---|---|
| All | Every module you can add here. |
| Flow | Shaper and Glitch cards (the next free one of each; up to four). |
| Effects | The sixteen rack effects, from Reverb to Utility. |
| Utility | The Deck, a looper that records what is cabled in and plays it back into the chain. |
Cable Audio In into the first effect, each effect into the next, and the last one into Audio Out. Only what reaches Audio Out is heard: an effect left dangling is silent. Right-click a port to unplug it, right-click a cable to cut it, and right-click a module for Bypass (off, cables kept) or Remove. A Splitter cuts the sound into bands (lows, mids, highs, or mid and side) so each band can get its own effects. Modulators live on the canvas too: an envelope or LFO module drags its output onto any knob's dot, and the Randomizer module re-rolls whatever you cable it to (see The Randomizer map). Everything else about the canvas (moving, zooming, the toolbar's Undo, Redo, Fit, Tidy and Eye, the overview map) is described in Patcher.
| Control | What it does |
|---|---|
| Audio In | The sound coming from your track. Cable it into an effect. Its meters show the incoming level. |
| Audio Out | The end of the chain. Cable the last effect here or nothing is heard. Its meters show the outgoing level. |
| Output | The final volume of Terrain FX, the fader along the bottom of the window with its dB readout. Drag left or right; double-click for 0 dB. |
| FX | The header button for this page. In Terrain FX it always shows the Patcher. |
| MOD | The header button for the modulation page. |
The MOD page#
The MOD page works as it does in Terrain: drag an LFO, an envelope or a macro onto any effect knob, set the amount, and the knob moves. In Terrain FX the LFOs start out synced to your DAW's tempo, which is what you want on an effect nine times out of ten. Routes, curves and the Pro view are covered in Modulation.
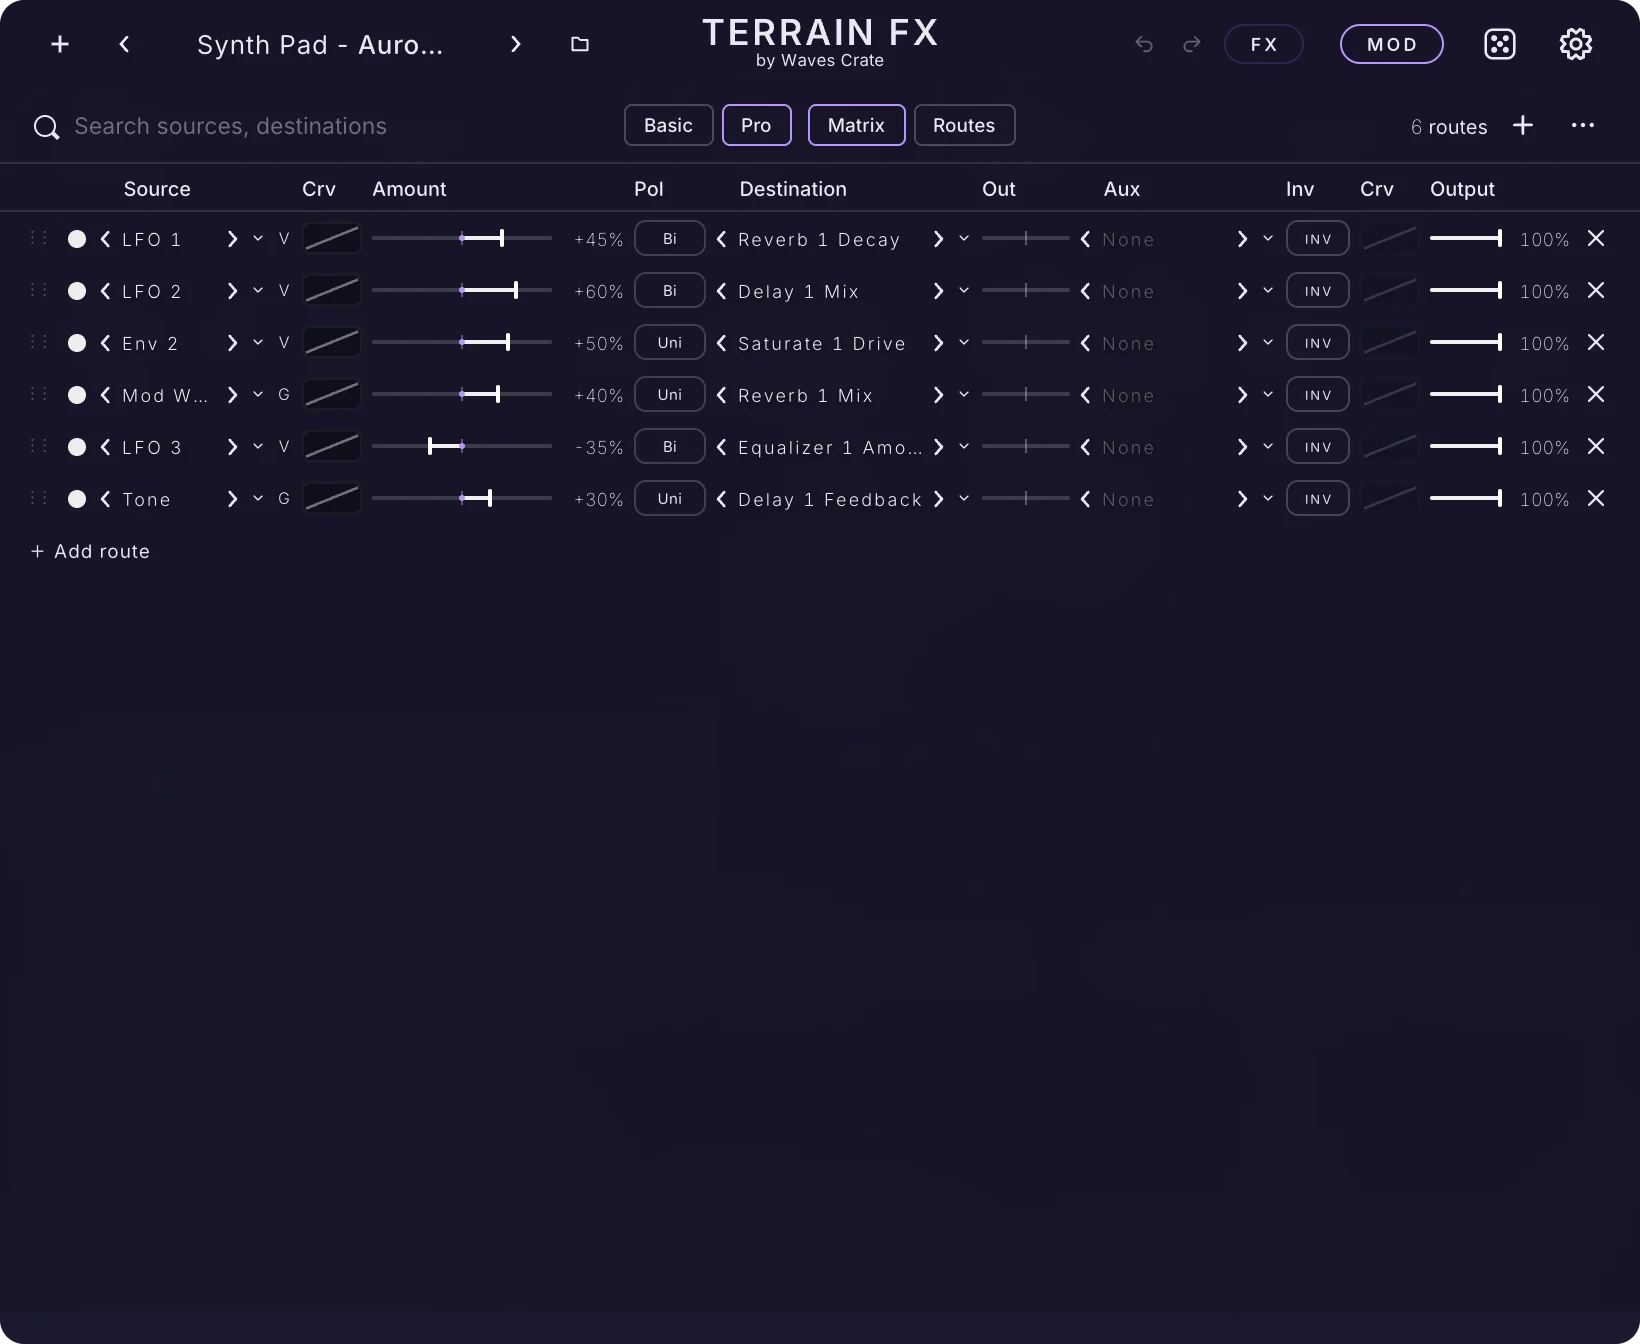
An effect has no notes, so something else has to start its envelopes, restart its retriggered LFOs and draw a new Random value or flip Alt. That is the Trigger: right-click any envelope and pick one under Trigger. It applies to every modulator at once and is saved with the preset.
| Trigger | What fires the modulators |
|---|---|
| Transient | The default. A hit in the incoming audio (or a MIDI note, if your DAW sends one) starts every envelope. The "note" is held while the input keeps sounding and released when it goes quiet. A kick or a snare can now pump, open a filter or fire a stutter on its own. |
| MIDI | Only MIDI notes your DAW sends to Terrain FX fire the modulators; held while any note is down. Route a MIDI track to the effect to play your effects like an instrument. |
| Beat | Every beat of your DAW's grid while the transport plays, and on the press of play so a pass always starts from the top. Each trigger is held for the first half of the beat. |
| Bar | The same on every bar line: one envelope per bar, perfect for long swells and builds. |
The dice#
The dice in the Terrain FX header rolls for your audio. A click rolls a new effect chain (effects, their types and order, cabled from Audio In to Audio Out) and then fresh modulation for it. A right-click opens a short menu: New effect chain, New modulation and the reach (Light, Medium, Heavy, Wild, Crazy). The two roll items keep the menu open, so you can roll again and again until it clicks. Every roll is one undo step. See Dice.
Presets, settings and output#
Presets
Terrain FX has its own preset library, separate from Terrain's, with the same browser, packs, favourites, Save, Save as, Import and Export (see Presets). The Save sheet offers effect types instead of instrument types. If you import a pack that mixes Terrain and Terrain FX presets, each plug-in installs its own and tells you how many belong to the other, so you can open them there.
Settings
The gear opens the same Settings as Terrain, trimmed for an effect: Account, Audio (in the standalone, the input device matters here: it is what Terrain FX processes), Performance, Presets, Interface, Themes and About. The Controllers page, the MIDI input list and computer keyboard, the voice ceiling, and the sound library folders are not part of Terrain FX. See Settings.
Output
The Output fader sets the final volume of Terrain FX. Drag left or right; double-click for 0 dB. Use it to match the level going out to the level coming in, so you judge the effect and not the loudness.
Chapter 20
Undo, Shortcuts and Tips
Experiment without fear. Terrain remembers every move you make, keeps your keyboard where you expect it, and explains every control the moment you point at it.
Undo and redo#
Terrain has one history for everything you do: turning a knob, drawing a shape, cabling the Patcher, rolling the dice, loading a preset, editing a chop. A whole gesture is one step (a knob drag from press to release, a roll of the dice, a preset load), so one undo takes back exactly what you did.
| Action | Mac | Windows |
|---|---|---|
| Undo | Cmd + Z | Ctrl + Z |
| Redo | Shift + Cmd + Z | Ctrl + Y (or Shift + Ctrl + Z) |
- The ↶ and ↷ arrows right of the TERRAIN wordmark do the same. Point at them and the strip names the step they would undo or redo; after an undo the strip says what was taken back.
- The history holds up to 200 steps and lasts as long as this Terrain is open in your project. Closing and reopening the window keeps it.
- Undo stays inside Terrain: while Terrain has the keyboard, Cmd/Ctrl + Z never reaches your DAW's own undo. In a text field it undoes your typing.
- When a message with its own Undo is on screen (after deleting a preset, for example), the first undo takes that one.
- Undo works in popped-out cards and in Terrain FX as well.
Keyboard and mouse shortcuts#
Everywhere
| Shortcut | What it does |
|---|---|
| Cmd/Ctrl + Z | Undo. |
| Shift + Cmd + Z / Ctrl + Y | Redo. |
| Shift + drag | Fine adjustment on knobs, sliders and values. |
| Double-click a knob | Reset to default, or type a value (Settings › Interface › Double-click a knob). |
| Right-click a knob | Modulate, copy and paste modulators, remove modulators, reset, MIDI Learn, the knob's modes. |
| Mouse wheel over a knob | Nudges it (when Settings › Interface › Mouse wheel turns knobs is on). |
| Esc | Closes the preset browser and its search, and most menus and sheets. |
Preset browser
| Shortcut | What it does |
|---|---|
| ↑ ↓ | Move through the presets in the list. |
| Enter | Load the selected preset and close the browser. |
| Space | Heart the selected preset (add to or remove from Favourites). |
| Shift + ↑ ↓ | Grow the selection, for exporting or moving several presets. |
| Shift-click, Cmd/Ctrl-click | Select several presets. |
| Cmd/Ctrl + A | Select every preset on screen. |
| Esc | Clears a multiple selection first; pressed again, it closes the browser. In the search field it clears the search. |
Letter keys in the preset list go back to your DAW (so you can keep playing your computer keyboard there); click the search field to type a search.
Patcher
| Shortcut | What it does |
|---|---|
| Delete / Backspace | Removes the selected cable or modules. |
| Right-click the canvas | The add menu: browse or search every module. |
| Drop a cable on empty canvas | The same menu, filtered to what fits that cable; pick a module and it arrives already cabled. |
| Right-click a cable or port | Cut or unplug it. |
Standalone app
With Settings › Audio & MIDI › Computer keyboard on, the letter keys A W S E D F T G Y H U J K play an octave from C.
Tips from the people who made it#
- Read the strip. Every control in Terrain has its own line of help at the bottom of the window, including menu rows, Patcher ports and settings. It is the fastest manual there is.
- Capture is always on your side. Played something great while noodling? It is in the strip for the next 10 minutes. Drag it into your DAW before you touch anything else.
- Flip everything over. Oscillators, the filter and every effect have a back panel. Half of Terrain's character lives on the backs.
- Drag, don't dig. Modulation is a drag away: an LFO number, an envelope chip, a macro name, Velocity or Key onto any knob.
- Pop the cards out. On two screens, put the Shaper or the Arp on the second one and play.
- Roll, then undo. The dice are an idea machine. Roll until something sparks, keep it, undo what didn't work.
- Save with words. Give your presets a type, a few style words and a note about which knob to grab. Future you will search for them.
Chapter 21
Troubleshooting and Support
Most problems have a one-minute fix. Here are the ones people ask about, and how to reach us when you need a hand.
Installing and loading#
- My DAW doesn't show Terrain.
- Rescan your plug-ins. Make sure you are looking for the right format: on a Mac, Logic Pro and GarageBand use the AU; most other DAWs use the VST3. Terrain is an instrument, Terrain FX is an audio effect, so they appear in different lists. Check that the plug-in files are where the installer puts them (Installing Terrain).
- The window is empty or flickers.
- Turn on Settings › Performance › Draw without the graphics card. The processor then draws the window instead of the graphics card.
- Terrain says its factory sounds are unavailable.
- Some of Terrain's files have changed or gone missing. Reinstall Terrain from your Waves Crate account; your presets are safe.
- The window is too big or too small.
- Drag the corner at the right end of the strip at the bottom, or pick a size in Settings › Interface › Window size.
Trial and licence#
- The trial won't start.
- Terrain needs the internet once to start the trial. Connect, then press Start again. The trial runs once per computer.
- Activation says something is wrong.
- Use the email you bought with, the licence key and the order number, all from your order email. Licence keys never contain 0, O, 1 or I: if Terrain finds a typo, compare those characters first. The order number can be typed with or without the #.
- I am moving to a new computer.
- On the old one, open Settings › Account and choose Deactivate. Then activate on the new computer with the same details.
- Terrain asks me to connect to the internet.
- A licence checks in with Waves Crate now and then. If a computer stays offline for 60 days, connect once and Terrain unlocks by itself. Nothing about your sounds changes.
- Terrain makes no sound and shows a card about the licence.
- The trial has ended, or the licence was deactivated on this computer. Activate with your licence key. Your presets are safe, and the card lets you export the packs you made. If you think it is a mistake, write to us.
Sound and performance#
- There is no sound.
- Check the Output in the voice column and the main volume on the Patcher. On the Patcher, only what is cabled into Out reaches your speakers; an oscillator needs its notes cabled from MIDI In (or the Arp or Robin). Check that oscillators are powered on and not muted in their quick menu. In the standalone app, check Settings › Audio & MIDI and press Play test audio.
- Crackles and dropouts.
- Raise the buffer size (in your DAW, or Settings › Audio & MIDI in the standalone app). Lower Settings › Performance › Playing quality to Eco, lower the voice ceiling, reduce oscillator Unison voices, and keep Sleep when silent on. The CPU meter (Settings › Performance) shows what a sound costs.
- The exported song sounds slightly different from playback.
- Bounce quality in Settings › Performance can render your mixdown at a higher quality than you play at. Set it to Same to match playback exactly.
- Synced LFOs, arps or delays drift from the beat.
- Check the clock setting of the part in question: BPM follows the song tempo, Hz runs free. Global BPM and Global Hz put every LFO on one clock. On the flow cards, set the clock to Sync rather than Free.
- A reverb or delay keeps ringing after I stop the DAW.
- That is the tail ringing out. Turn on Cut tails in Settings › Performance and tails stop the moment the transport stops.
- My MIDI keyboard does nothing.
- In a DAW, arm the track and check the DAW's MIDI setup. In the standalone app, tick your keyboard under Settings › Audio & MIDI › MIDI input; its lamp flashes when notes arrive. Check the MIDI channel in Settings › Controllers (Omni listens to all).
Presets, samples and files#
- I deleted a preset by mistake.
- Press undo right away, or open the save menu (+) › Recently deleted and put it back.
- I saved over a preset.
- Right-click it in the browser and choose Restore previous version. With Settings › Presets › Keep old versions on, every save keeps the earlier one as a numbered version.
- A preset from a friend sounds different.
- Presets carry their own wavetables and samples inside the file, so they sound the same on any computer. Check that Terrain is up to date on both computers.
- Where do Capture, stems and Deck takes go?
- Into Terrain's folder in your Music folder (the Deck keeps its takes in Deck Takes there unless you choose another folder). The strip tells you where each file went, and the folder buttons open it.
- I copied presets into the folder by hand and they don't show.
- Press Rescan library in Settings › Presets, or use Import in the browser instead.
Getting help#
Write to contact@wavescrate.com. The fastest way is from inside Terrain:
- Settings › About › Report a bug opens your mail app with a message to Waves Crate, your Terrain version and system already filled in. Tell us what happened and what you expected.
- Report a crash does the same and shows you the crash log to attach.
- Copy system info copies your Terrain version and system details, ready to paste into any message.
Include your DAW and its version, what you did just before the problem, and, if you can, the preset or a short Capture of the sound. For licence questions, include your order number and the email you bought with.
Your account, downloads and receipts live at wavescrate.com/profile.
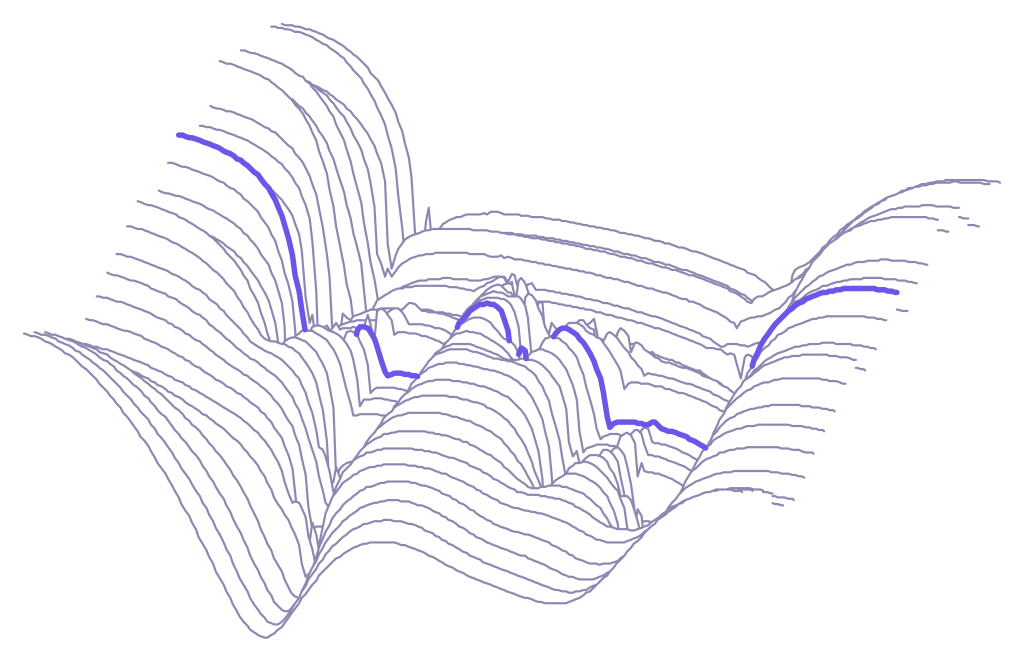
Chapter 22
Credits
Terrain is made by Waves Crate, with sounds from a crew of producers and sound designers, and built on open libraries we are proud to credit.
Preset artists#
The 717 presets come in 25 packs: the Waves Crate, Macshooter, and Artist Packs. The 23 Artist Packs are made by:
| Artist | |
|---|---|
| A.List | @tha_a.list |
| Abs Toolbox | @abstoolbox |
| ChetaMeister | @chetameister |
| Cozy Coolin | @cozycoolin |
| DashOTB | @dashotb |
| Don Hill | @33donhill |
| Eagle | @eagleofc |
| Eville | @prodbyeville |
| Hobb The Goat | @hobbthegoat |
| Jack Zorana | @jackzorana_ |
| Jai Beats | @jai_beats |
| Jaytron | @jtrn.the.producer |
| Keymajor | @keymajorbeatz |
| Keyon | @prodkeyon |
| Lvis | @prodlvis |
| Magysti | @your.magysti |
| Mischa Chillak | @mischa_chillak |
| Nate | @nategotsmoke |
| Ninja Blader | @ninja_blader |
| RTC | @r.tc |
| Shiv | @isthisshiv |
| Tumfy | @tumfyy |
| Tywil.wav | @tywil.wav |
Thank you to every producer who played Terrain early, broke it, and told us how to make it better.
Sampled instruments#
The Organics engine plays sampled instruments from open libraries, credited as their licences ask:
- Salamander Grand Piano v3 by Alexander Holm (SFZ mapping by kinwie), CC BY 3.0, modified by Waves Crate.
- Etherealwinds Harp II: CE by Versilian Studios LLC, CC BY 4.0, modified by Waves Crate.
- Saxophone samples recorded by the Music Technology Group, Universitat Pompeu Fabra, CC BY 3.0; SFZ edit by kinwie, CC BY 4.0; modified by Waves Crate.
- With thanks (CC0, public domain or Unlicense): Versilian Community Sample Library, VSCO 2 Community Edition, Karoryfer Samples, FreePats, itsclipping, Jeff Learman (jSteelDrum), and Freesound.org contributors.
Software and fonts#
Terrain and Terrain FX are built with these libraries, each under its own licence. The full licence texts are in Settings › Credits & Licences › Show the full texts.
| Library | Copyright and licence |
|---|---|
| JUCE | Raw Material Software Limited · JUCE 8 licence |
| Steinberg VST3 SDK | © 2025 Steinberg Media Technologies GmbH · MIT |
| Apple AudioUnitSDK | © 2000–2021 Apple Inc. · Apache-2.0 |
| Signalsmith Stretch | © 2022 Geraint Luff / Signalsmith Audio Ltd. · MIT |
| Signalsmith Linear | © 2025 Signalsmith Audio · MIT |
| FLAC | © 2000–2009 Josh Coalson, © 2011–2023 Xiph.Org Foundation · BSD-3-Clause |
| Ogg Vorbis | © 2002–2020 Xiph.Org Foundation · BSD-3-Clause |
| libjpeg | Based in part on the work of the Independent JPEG Group · IJG |
| libpng | © 1995–2019 The PNG Reference Library Authors · PNG Reference Library License |
| zlib | © 1995–2004 Jean-loup Gailly and Mark Adler · zlib |
| HarfBuzz | © Google, Behdad Esfahbod, Red Hat and the HarfBuzz authors · Old MIT |
| SheenBidi | © 2014–2025 Muhammad Tayyab Akram · Apache-2.0 |
| Microsoft WebView2 | © Microsoft Corporation (Windows only) · BSD-style |
| Audio Plugin Coder | © 2026 Noizefield · MIT |
| Freeverb | Jezar at Dreampoint · Public domain |
| Inter | © 2020 The Inter Project Authors · SIL Open Font License 1.1 |
Terrain Rounded and Terrain Wordmark, the typefaces of Terrain and of this manual, are Modified Versions of Inter, © 2020 The Inter Project Authors, licensed under the SIL Open Font License 1.1. The licence text ships with this manual in fonts/OFL.txt.
Trademarks#
VST is a registered trademark of Steinberg Media Technologies GmbH. Audio Unit and macOS are trademarks of Apple Inc. Windows is a trademark of Microsoft Corporation. All other product and company names are trademarks of their respective owners and are used only to describe compatibility.
© 2026 Waves Crate. All rights reserved. This manual describes Terrain version 1.0.